 FREE 1 to 3-Day Delivery on Orders $149+ Details
How to Install a Black Boss Style Roof Decal on Your 2005-2013 Mustang
Installation Time
3 hours
Tools Required
- Spray bottle with soap & water mixture
- Plastic Squeegee
- E-Z reach squeegee
- Surface cleaner-Mequiars Deep Crystal System paint cleaner
- An assistant or two
- Large table to work from (2 folding tables works well)
Installation
Prep:
Clean car well to ensure good adhesion of the decal. Remove any wax from the car using a surface cleaner. Rewash the car to remove anything missed and to rinse any chemicals left behind. Fill a spray bottle with a mixture of water and soap (we use baby shampoo), about 4 large drops per 32 oz. spray bottle of water. Be sure to install decal out of direct sunlight. Also have s omeone to assist you in handling the vinyl.
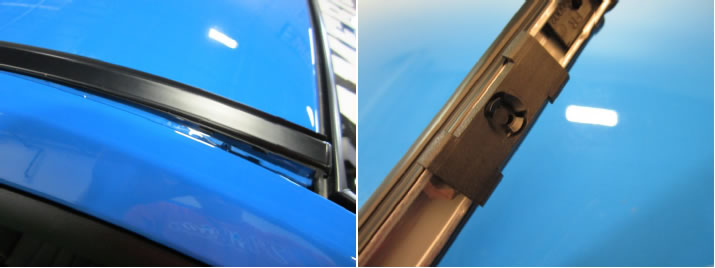
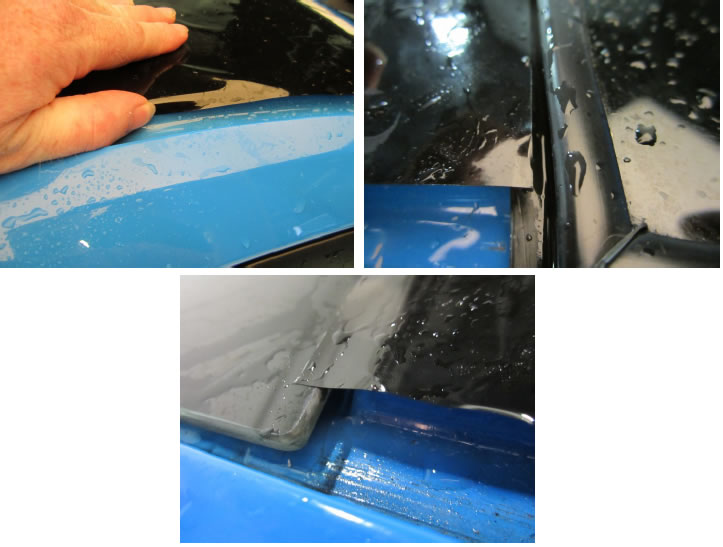
Step 1: Remove roof molding. Do this by gently pry up underneath the end. There is several clips that snap onto rivet like snaps built into the roof
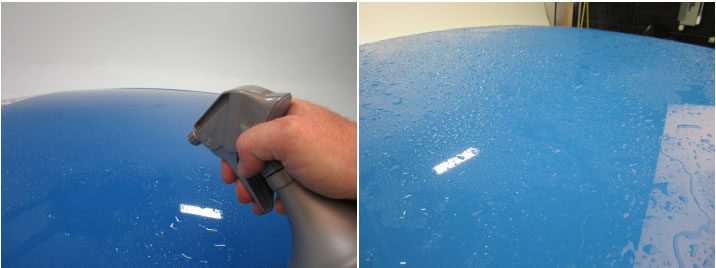
Step 2: Spay roof with water solution generously .
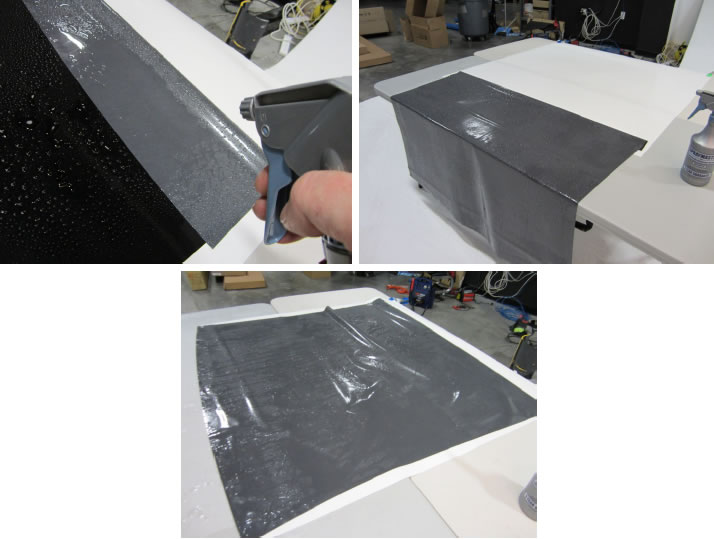
Step3: Lay out the vinyl on a large table or tables. Peel back vinyl being careful not to crease it. Spraying the water solution to completely cover the back. Clamping the backing to the table will help in this stage. It also helps to put the table at the front or back of the car.
Note: In this install be very generous with the shampoo/water solution on the car and the vinyl.
Step 4: With the help of an assistant pick the vinyl up and lay it on the roof being careful not to wrinkle the vinyl. This is were being in front or back of the car makes it easier to just grab the vinyl by the corners and basically flip it onto the roof.
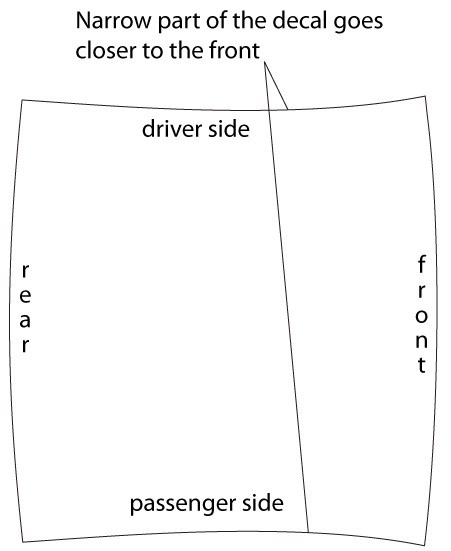
Step 5: Center the vinyl on the roof with equal amount on the sides of the car. There should be about 1/4” to be rolled over the edge to be covered by the roof trim that was removed. The front should be lined up so that vinyl goes past the windshield gasket by enough to tuck it under the gas-ket later. This will leave enough in the back to roll over the back edge and go between the rear windshield and roof .
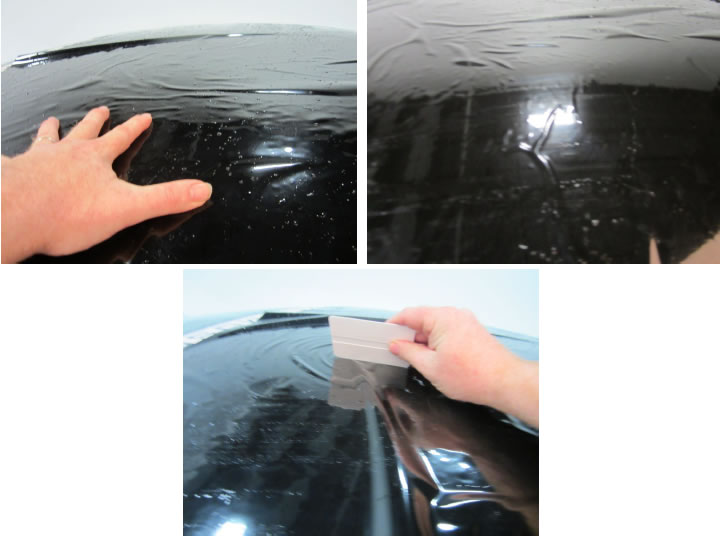
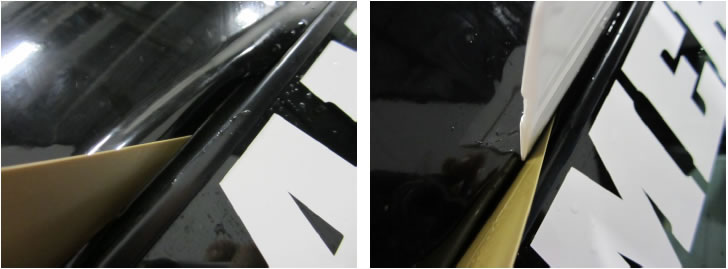
Step 6: Keeping the orientation of the vinyl start from the center and smooth out the vinyl. It may be better if you use your hand to smooth the vinyl. When you have the vinyl relatively flat without large tunnels you can switch to a squeegee again working from the center out(covered in a cloth that will not scratch the vinyl and keep the vinyl wet) . The top two pictures is how when you can switch to a squeegee, the bottom pic-ture is what not to do that is a large tunnel the vinyl will be wrinkled. Keep in mind this vinyl is a “wrapping cast vinyl” it can be lifted and repositioned. What this does for the installer is if there is not enough “slip” in the vinyl as you smooth and squeegee it out you can lift the corner up spray more solution. Only lift por-tions of the vinyl up to keep the orientation of the panel. You may use a hair dryer cautiously to help conform the decal Do not over heat it will shrivel or wrinkle.
Step 7: On the back tuck the vinyl over the back edge using a squeegee to push it down and against the roof. Use of a hair dryer here to dry out this part of the vinyl is helpful just follow the same precautions as before.
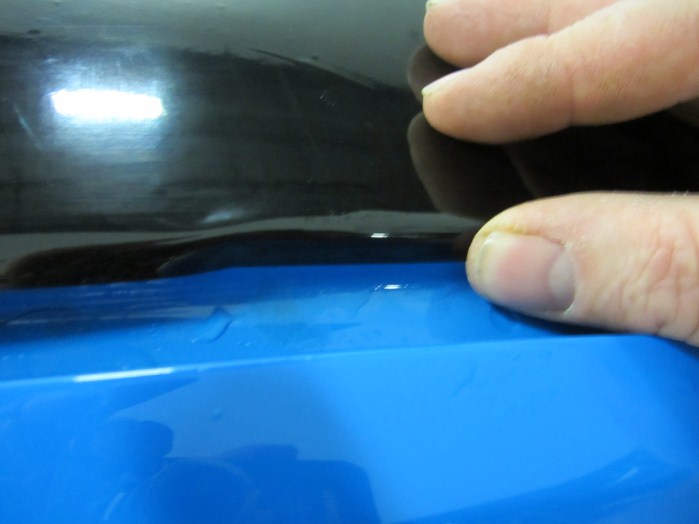
Step 8: Simply roll the vinyl over the side edges. Again drying with the hairdryer can help here.
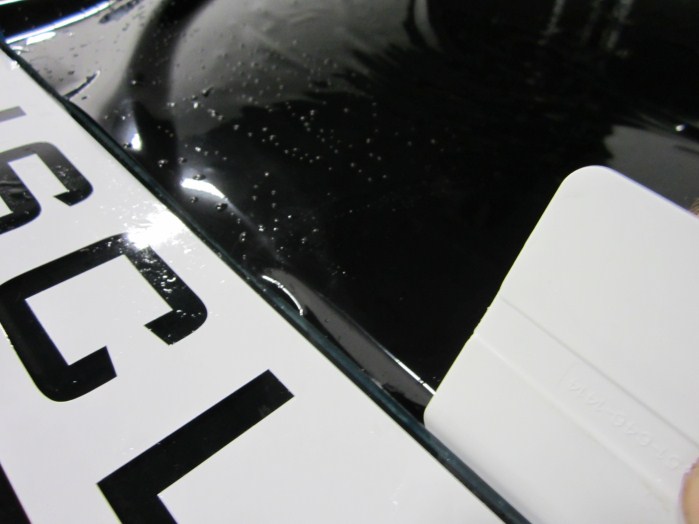
Step 9: Insert the ez reach squeegee into the win-dow gasket and use the white squeegee to carefully tuck the vinyl underneath. You will want this to be wet underneath so you may check by peeling back and respraying the vinyl. It is only necessary for a inch or so of the vinyl to be wet so you wont have to peel the vinyl back far at all if you need to respray. After tucking the front re cover the squeegee and squeegee toward the windshield to remove the water.
Step 10: Once the panel is installed let it dry a while for the last step will be the corners. After the vinyl has dried simple push the corners down wi your fingers. Sinse this is a wrapping cast vinyl it will con-form to the contour. Reinstall the roof trim.
Leave several hours, depending on climate, of dry time before cleaning car. Use a quick detailer in a spray bottle for the initial clean-ing then hand wash car waiting at least several days for the first time after drying. Do not power wash vinyl or wax vinyl.


