 FREE 1 to 3-Day Delivery on Orders $149+ Details
How to Install a Classic Design Concepts Convertible Lightbar on your 2005-2013 Mustang
Installation Time
4 hours
Tools Required
- 3/8" Drive Ratchet
- 3/8" Drive 10mm socket 3/8" Drive 13mm socket
- 3/8" Drive Ratchet Extension
- T-50 Torx Bit (For Ratchet)
- 1/4" Allen Wrench
- 3/16" Allen Wrench
- 1/2" Wrench
- 1/8" Drill Bit (metal bit works best)
- 5/16" Drill Bit (metal bit works best)
- 2" Hole Saw
- Body Trim Removal Tool (Optional)
- Electrical Tape (Optional)
- Center Punch and Hammer (Optional)
Installation
Before Light Bar Installed
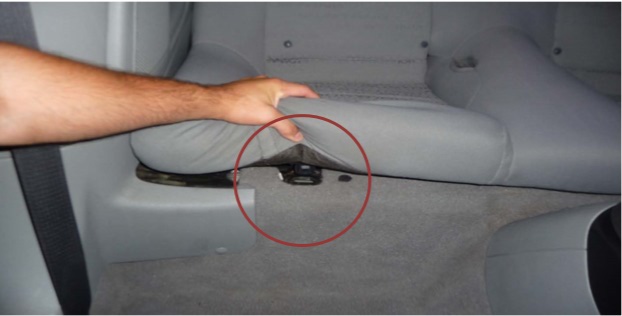
1. Removing Back Seat
Remove the rear seat bottoms by pushing in both retaining clips (one on each side of the vehicle) and lifting upwards
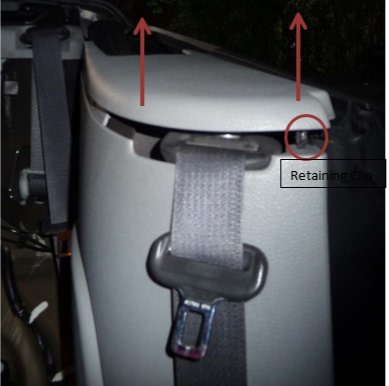
Next, remove the top of the rear seats buy removing the two 13mm bolts holding the seats to the body, then lifting up from the top center of the seats.
NOTE: It is possible to install the light bar without completely removing the seat top, however, installation is much easier by doing so. To remove the seat completely, either slide the seats to either side of the vehicle or physically disengage the flange between the seat back and the convertible top fabric.
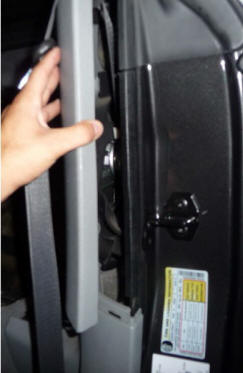
2. Remove Quarter Trim Top Panels
Pull the trim panels straight up starting from the hole facing forward where the seatbelt comes through. Simple retaining clips hold the panel on and will come dislodged easily.
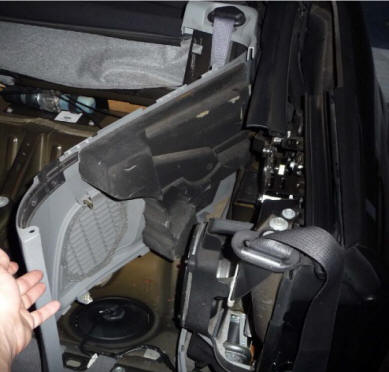
3. Remove Top Inside Quarter Trim Panel
The top panel inside the vehicle removes easily by pulling from the door jamb and sliding your fingers between the bottom and top pieces, disconnecting them from each other
NOTE: You can completely remove the inside top panel by disconnecting a plastic pushpin between the OUTSIDE of the panel and the sheet metal located towards the back of the vehicle (See last figure on this page)
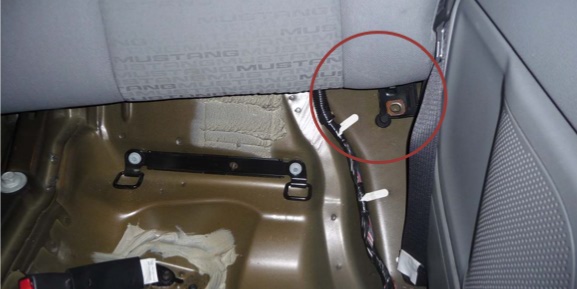
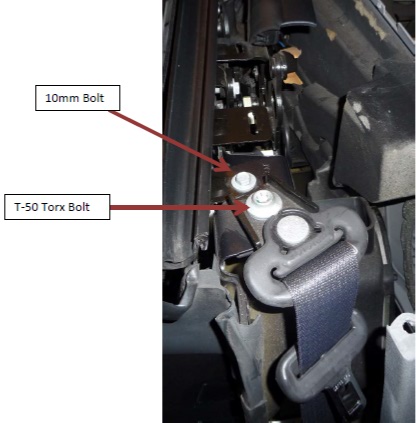
4. Installing the Light Bar Brackets
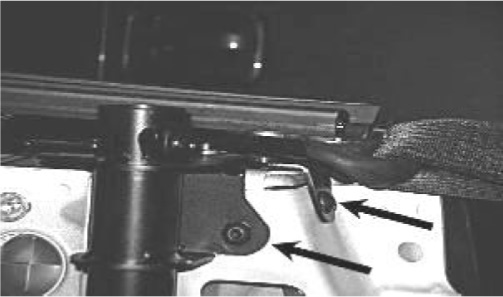
First, the bolts holding the seatbelt guide to the vehicle and the bolt behind it need to be removed.
Using a T-50 Torx Bit, remove the seatbelt guide bolt (Be careful not to lose the lock washer on the bolt). Also, remove the 10mm bolt located directly behind the seatbelt guide.
Place the bracket labeled RH on the passenger side and LH on the driver side over the holes left by removing the bolts. The large “guide” hole goes over the seatbelt guide bolt hole.
• Reinstall and tighten the 10mm bolt and the T-50 Torx bolt. IT IS RECCOMMENDED TO TORQUE THE T-50 TORX BOLT TO 30 LB-FT
• After bolts are reinstalled, drill 1/8” pilot holes using a metal drill bit into the sheet metal through the guide holes provided on the light bar bracket. Enlarge these to 5/16”. Install the 4 button-head screws and flange nuts. The nuts go behind the body metal. Tighten bolts with 3/16” allen wrench.
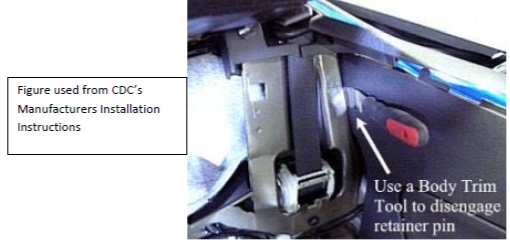
• The next picture shows an installed light bar bracket from the CDC Manufacturer’s Installation Instructions
5. Light Bar Wiring
This step cannot be any simpler. Even if you have never worked on your vehicle’s wiring, you will have no problem wiring this up.
- Take the wiring harness included with the light bar (one red and one black wire ending together in a plastic connector) and slide wires through the passenger side bracket tube.
- The black plastic connector should be on top and hanging out of the bracket tube with a few inches of slack (so it does not slip back down)
Black Grounding Wire
- Behind the speaker on the passenger side there is a wiring harness with a plastic connector that is attached to the body of the vehicle with a plastic push pin clip. Remove this retaining clip so the connector is free.
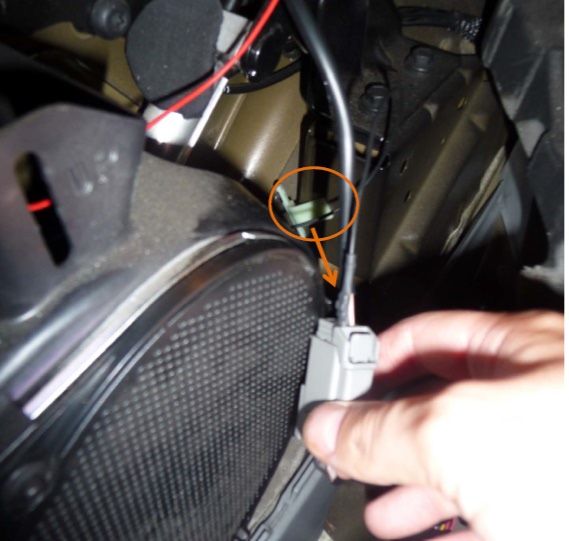
- Within this connector on the side that runs away from the front of the vehicle (or facing up, whichever direction instruction you prefer) there is a White Wire with a Purple Stripe.
- Take the black wire from the light bar wiring harness and push it’s free end (ending with a metal plate) into the same connector opening as this white and purple wire.
- Secure to the other wires using one of the zip ties behind the shrink wrap. Lightly tug on the wire to ensure its security.
Red “Hot” Wire
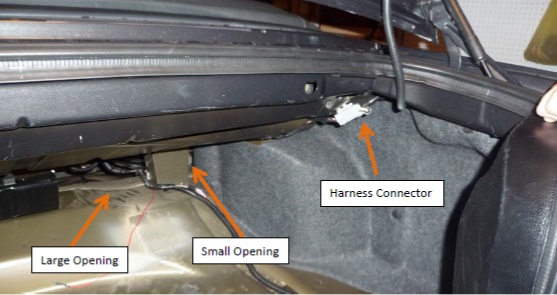
• Take the free end of the red wire and route through the opening between the seats and the trunk area (large opening that spans entire seat length) containing the convertible lid motor, or the smaller opening closest to the quarter panels.
• Locate wire harness and connector that is positioned on the top of the passenger side of the trunk running towards the trunk lid.
• Following it up, there is another connector. This time, find the Tan Wire with Blue Stripe.
• In the same manner as before, slide the Red wire free end into the open end of the same connector as the tan and blue wire.
• Secure to the other wires using one of the zip ties behind the shrink wrap. Lightly tug on the wire to ensure its security.
At this point, you should test the light bar to ensure all connections were made properly. Bring the bar to the car and rest on the center console (or have a friend hold it). Depress the brake and the LEDs should illuminate. If not, check your connections and re-secure as necessary.
NOTE: Once light is determined to work correctly, wrap electrical tape around the zip tie and surrounding wires to give extra support if desired.
• Reinstall the inside top quarter trim panels by reversing step 3.
6. Cut Holes in the Quarter Trim Top Panels
I have provided the template at the end of this document that is given in the manufacturer’s installation instructions. You may use this template, or download the vendor’s guide from American Muscle of classicdesignconcepts.com.
- Cut out the template and position it on the passenger side quarter trim top panel. It is helpful to tape the edges down so the page does not slip.
- Here, you may either center-punch a hole or create a 1/8” hole. Either way, create a pilot hole in the center of the crosshairs.
- REMOVE THE PAPER. Follow through with a 2” hole saw to cut out entire circle.
- Take the template, flip over, place on the driver side quarter trim top panel and repeat the above process.
- Test fit the panels and ensure that the light bar bracket tubes sit nicely inside the newly drilled holes. If there is any obstruction to the inside of the bracket tubes, enlarge the holes until there are no obstructions.
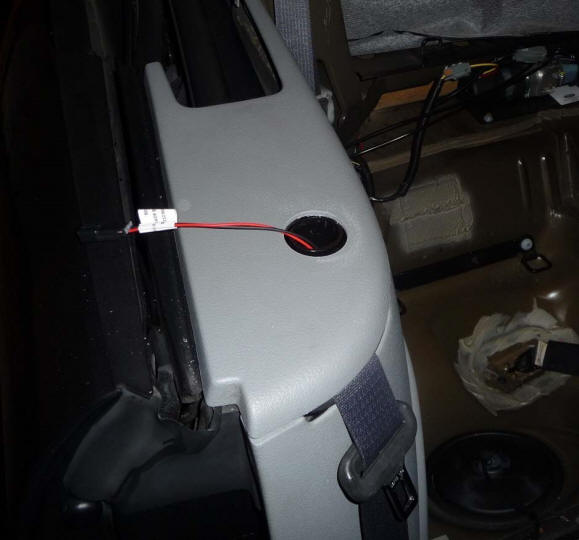
7. Reinstall Quarter Trim Top Panels
• Snap the panels back into their proper positions. On the passenger side, ensure the light bar wiring harness is pulled through the tube still and rests outside of the trim panel
8. Install the Light Bar into Vehicle
- Bring the light bar over and connect the two wiring harnesses together. Slide the bar into the bracket tubes until flush with the top trim panel guiding the wires into the tube as you lower.
NOTE: It is easiest to have two people lower the bar into the tubes to ensure bar is going in level. If not, it becomes difficult to push both sides down.
- Again, press the brake to make sure the lights still work properly. If not, check and re-secure the connections.
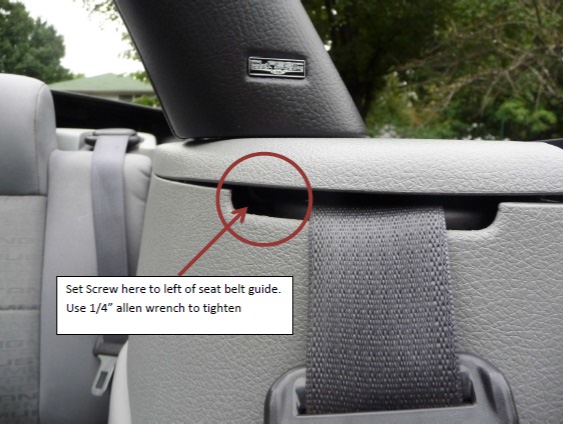
- Slide a 1/4” allen wrench into the hole below the quarter trim top panel where the seatbelt comes through to the left of the seatbelt guide. There is a set screw in the bracket tube here that needs to be tightened.
It is easiest if a second person shines a light into the opening while slightly pulling up on the panel.
9. Convertible Top Clearance Issue
This step is included because the fabric on the convertible top will rest on the bar if not secured closer to the top.
This step is optional, however, if not completed, there is a chance the top fabric will cause rub marks or ruin the finish on the light bar after repeated use of the convertible top.
- Raise the convertible top to approximately the halfway point
- Locate the elastic band towards the bottom of the convertible top by two support bars
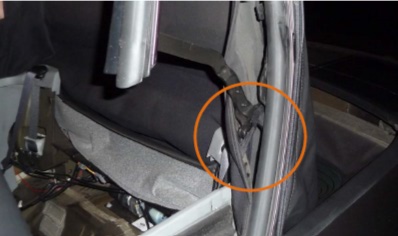
- Using the included Velcro straps, tie the elastic band closer one of the support bars
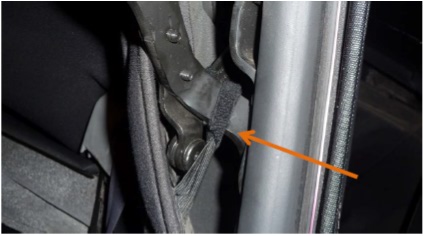
- Close the top and verify the fabric is far enough away from the bar for your liking. If not, redo until it is.
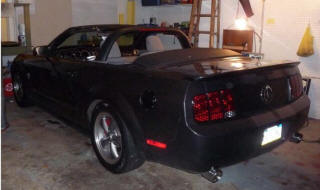
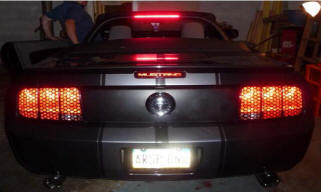
10. Enjoy Your New Light Bar!
This is a great time to clean up the back seat area before reinstalling the seats, then put them back in.
Step back, look at your handiwork and enjoy!
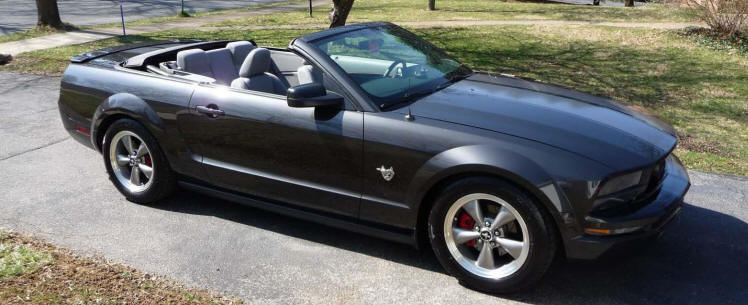
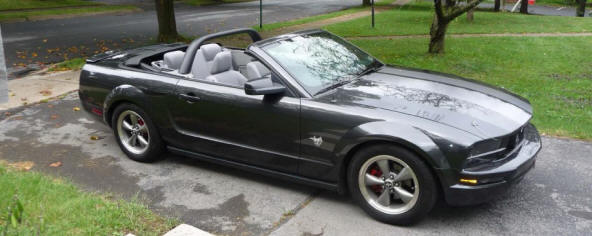
Here are a few pictures of the bar on my car. Alloy Metallic, light gray interior with the Charcoal light bar.
Installation Instructions written by AmericanMuscle customer Michael Wozniak 9/12/2012

