 FREE 1 to 3-Day Delivery on Orders $149+ Details
How to Install a CDC Grille Delete on Your 1987-1993 Mustang LX
Installation Time
30 minutes
Tools Required
- Plastic Cutting Saw
- ¼"
- Masking Tape
- Drill Motor
- Eye Protection
Installation
About the Product:
This product is designed and manufactured exclusively by Classic Design Concepts. We recommend the part be painted by a professional automotive paint facility to ensure the quality of the part. We also recommend the bake cycle not exceed 115° F. Please read instructions before installation and test fit part before painting.
Kit Component:
- Grille Bar Delete Panel
- Instruction Guide
- 2 Push Pin Fasteners
- Isopropyl Alcohol Pack
- 3M Adhesive Promoter Pack
Attention:
Failure to follow instructions may result in loss of this product. Classic Design Concepts is not responsible for improperly installed product. Part must be installed at a temperature of 70ºF or above. If necessary, warm the vehicle and Trim Panel areas with a heat gun or hair dryer.
Installation Procedure:
- Apply masking tape to front fascia near the grille opening to protect paint.
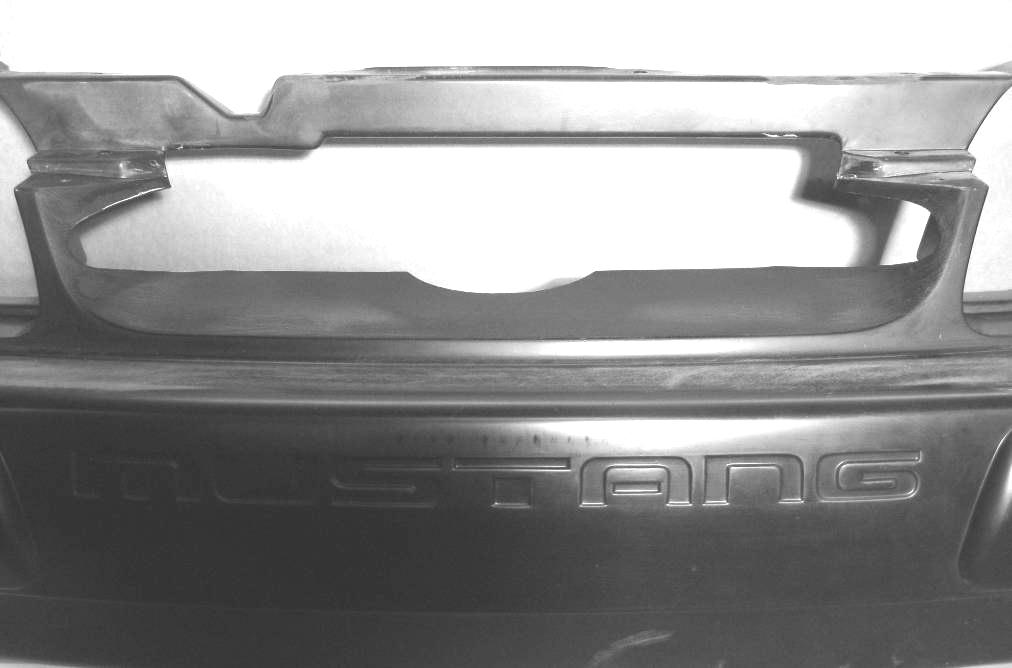
- Remove the Grille Bar by cutting with a saw suitable for cutting plastic. Should look like the picture below when finished.
3. Remove composite structure behind the Grille opening with saw, or notch the new part to fit around the structure if you do not wish to remove.
4. Trial fit the Part to the Fascia. Make sure part fits well, relieve additional fascia plastic if necessary.
5. Once proper fitment has been achieved hold part firmly in position, and drill ¼” holes through top side of fascia using the part as a drill guide.
6. It is now time for paint. If you intend to color match, we suggest taking to a professional body shop. However, Trim Black is an inexpensive alternative and can be found at most automotive retailers in an aerosol can. Sand part as needed and paint.
7. Install Grille Bar Delete Panel. On the back side of the part you will notice that there is a preinstalled 14” strip of 3M Acrylic Foam Tape. Clean the font fascia with the supplied Alcohol pack and allow time to dry. Apply the supplied 3M Adhesive Promoter to fascia where tape will land and allow time to dry. Remove the red backing from the tape and install. Align the part to the holes drilled in step 5, using the supplied push pins as a guide. Press part firmly to activate the pressure sensitive 3M tape. Fully engage the push pins by firmly pressing the center.
8. Remove masking tape from fascia.
9. Congratulations, your installation is complete.
