 FREE 1 to 3-Day Delivery on Orders $149+ Details
How to Install a CDC Shaker System for a 1999-2004 Mustang GT
Tools Required
- Tape
- Center punch
- 1" hole saw
- Jig saw
- Drill
- Drill bits
- Scissors
- Phillips screw driver
- Socket set
- Removable loctite
- Box cutter
- Hammer
- Pry bar
- Zip ties
- Tape measure
- Safety glasses

Shop Parts in this Guide
Installation
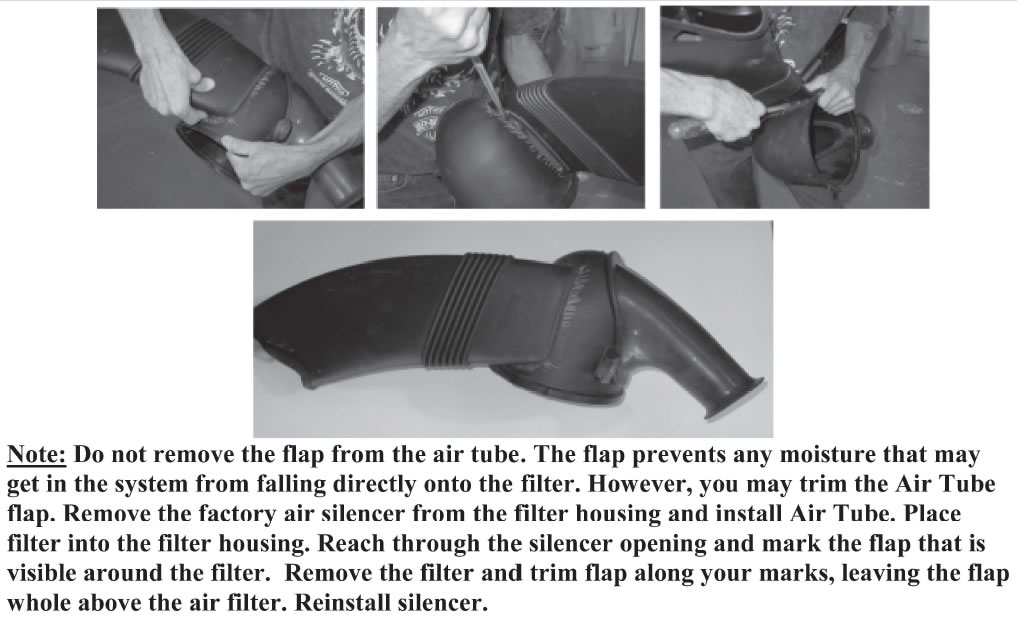
Air tube:
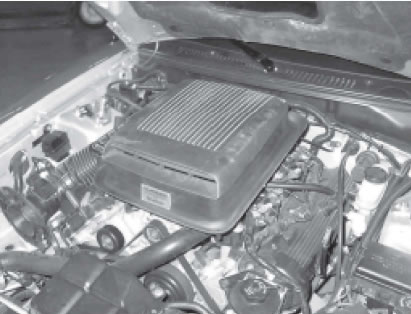
1. Open hood and remove stock air filter housing.
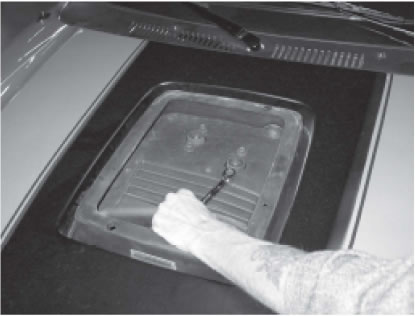
2. Cut out appropriate areas of the air filter template and tape it to the housing as shown below.
3. Mark the hole location with a marker and cut out with jig saw.
4. Drill a 5/16” hole in the lowest point of housing for drainage.
5. Attach the air tube to housing by working it into the cutout. This takes a little brute force.
6. Set completed air tube aside until later.
Hood appliqué
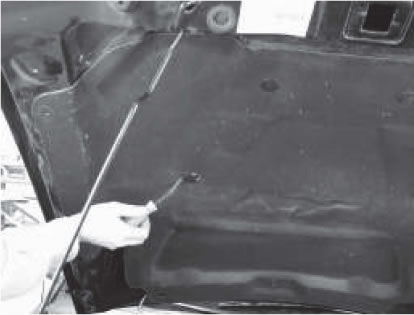
1. Remove push pins from hood blanket with pry bar. Hood blanket can be left on hood to prevent shavings from getting into engine bay. I also put a piece of card board on the blanket to make sure I wouldn’t cut too deeply.
2. If factory hood scoop installed, remove that too.
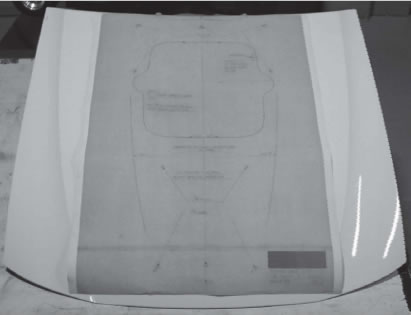
3. Lay hood down, but do not close all the way. Lay template on hood using feature lines. Tape template to hood once centered and aligned properly.
Note:This is the hardest, most time consuming part of the install due to the curves of the hood, so make sure to double and triple check measurements so template is in proper position before making any cuts.
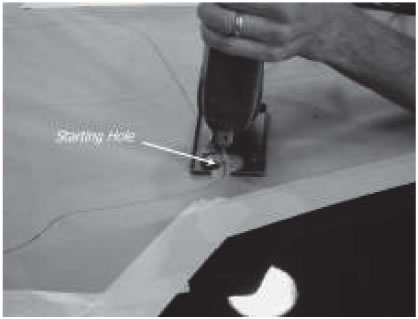
4. Use a 1” hole saw to drill a starter hole where specified. Use jig saw to cut out shaker hole.
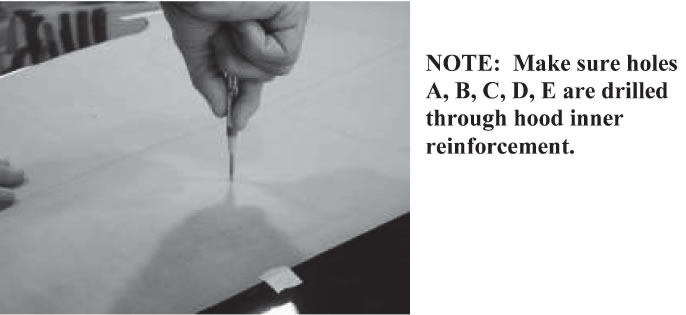
5. Use a center punch on the hole locations specified on the template. Drill locations with a 1/8” pilot hole. The front two holes need to be drilled perpendicular to the ground, not the hood.
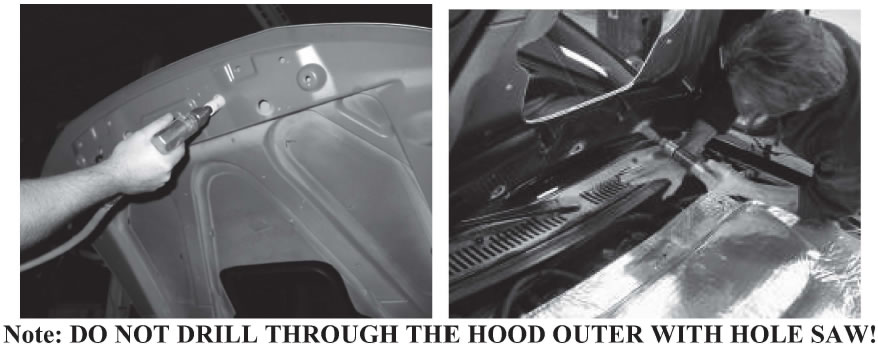
6. Lift the hood and use 1” hole saw on holes that go through inner reinforcement.Don’t go all the way back through to outer hood with the hole saw
7. Lay hood back down and drill out pilot holes with size indicated on template.
8. Put appliqué on hood to make sure it fits. Some holes may need adjustment.
9. Remove template and all tape from hood.
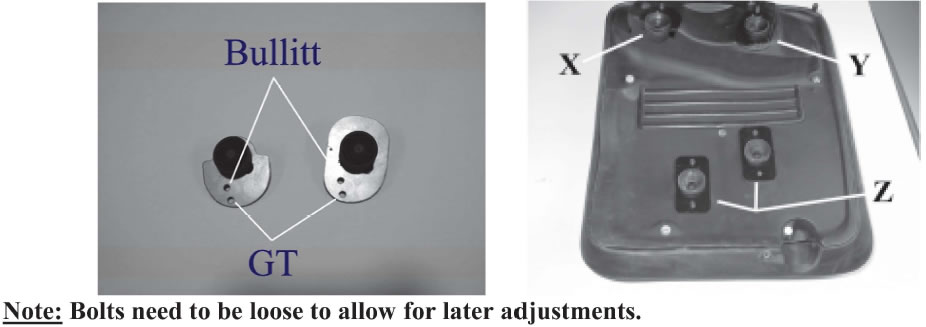
10. Attach appliqué with the supplied hardware..
11. Attach hood blanket back to hood and use box cutter to cut out the shaker hole.
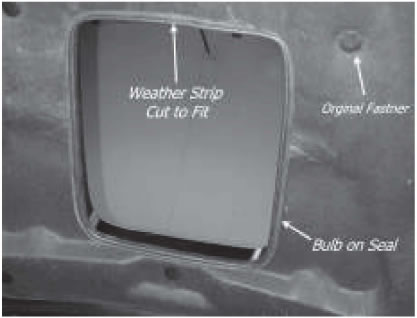
12. Install weather strip on appliqué as shown below.
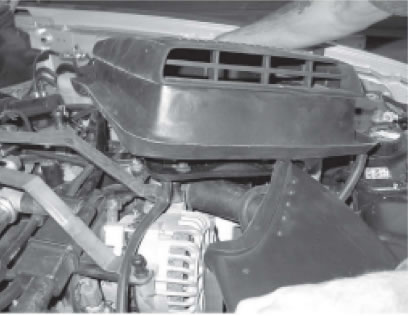
Shaker scoop
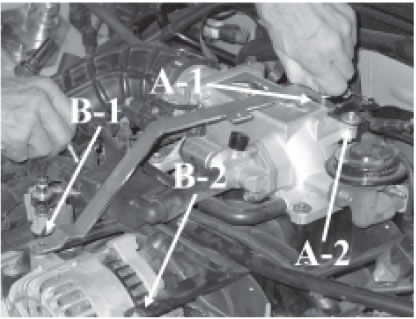
1. Attach the first mounting bracket as shown below. The alternator bolt is replaced with the ball stud and the bolt on the throttle body is reused. Be sure to use loctite on the threads.
Note: Do not over tighten ball studs! I accidentally sheared one off. Torque to 40 inch pounds.
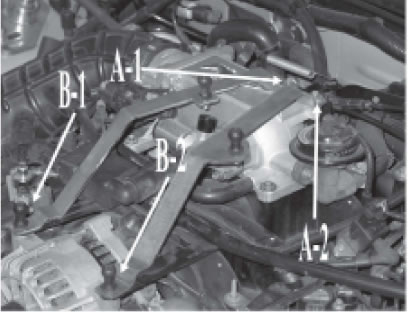
2. Attach the second bracket next to the first, again replacing the alternator bolt with the ball stud and reusing the throttle body bolt.
3. Install the ball stud brackets to lower air box by hand tightening for now.
Note the mounting location for the front brackets.
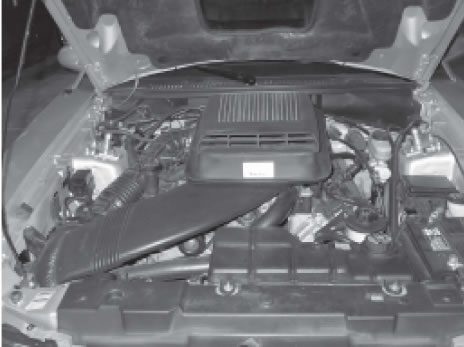
4. Press lower air box onto ball studs. Set upper air box and shaker scoop loosely on top of lower air box and close hood.
5. Center the scoop in hood. Once centered, remove just the shaker scoop and tighten the mounting brackets.
6. Open hood and remove entire shaker assembly.
7. Attach shaker scoop to upper air box first. Use loctite.
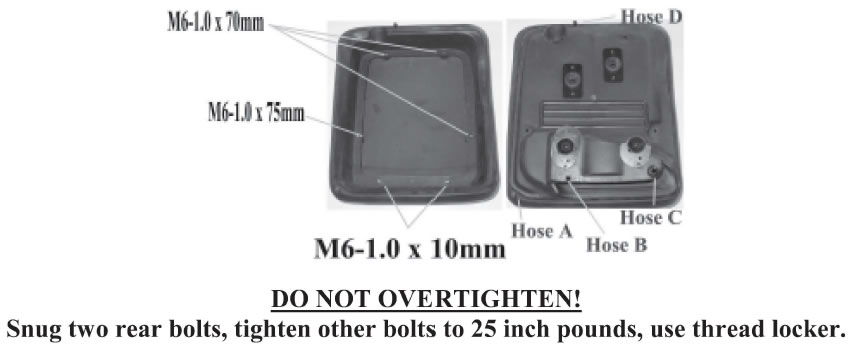
8. Then attach lower air box, again using loctite.
9. Install air filter housing back in place.
10. Slide shaker assembly over air tube before snapping it onto ball studs.
11. Attach drain tubes with zip ties. Make sure to route them away from engine.
12. Close the hood and you’re ready to go.
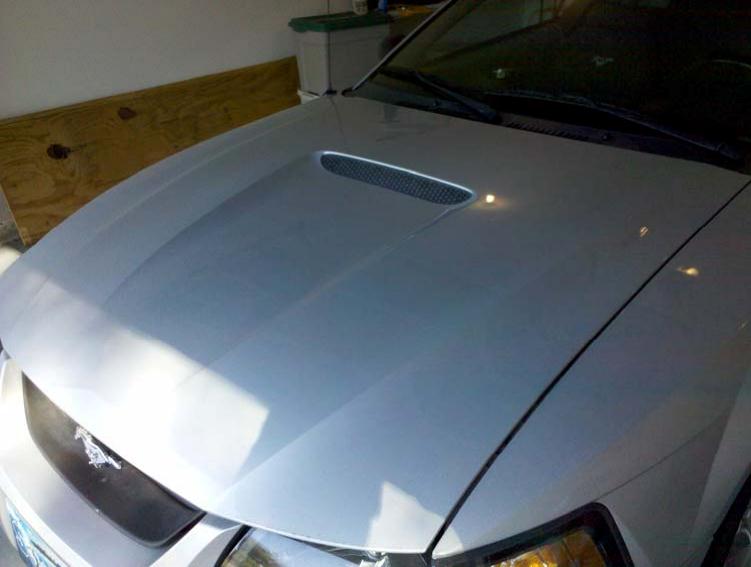
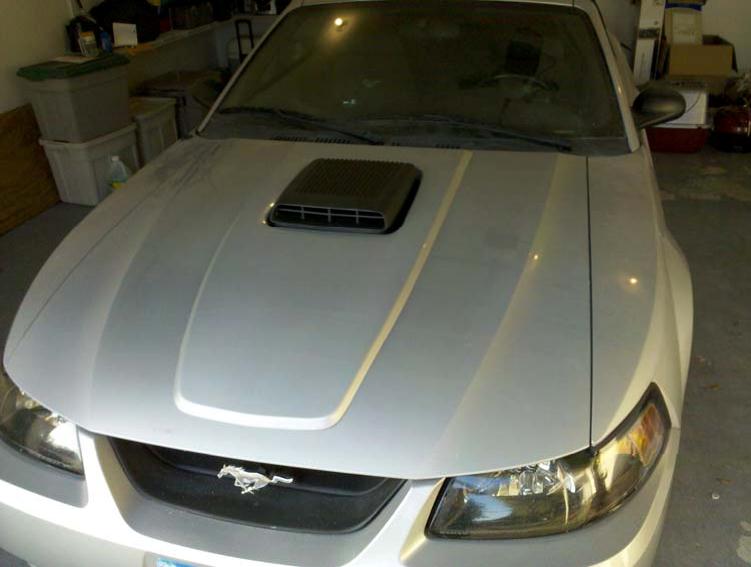
Before
After
Related Guides
-
Installation
-
Installation
-
