 FREE 1 to 3-Day Delivery on Orders $149+ Details
How to Install Retro USA Chrome Rocker Molding Trim on Your 2005-2009 Mustang

Shop Parts in this Guide
Installation
Pre-Installation
1. Inspect product for damages that might have been caused by shipping before installing on vehicle. Retro USA Inc. will not accept damaged returns that have been installed on the vehicle.
2. Do not remove any tape linings before installation. These will be removed during the installation process.
3. Prepare vehicle for installation by cleaning all adhesion surfaces. Vehicle surface must be clean and dry for proper adhesion. Use isopropyl alcohol and a cloth to remove existing wax and dirt residue.
Installation Tip
- To make the red lining tabs easily accessible during installation, fold the tabs back 45° in the direction that they will be pulled. It may be necessary to slightly lift the part during installation so that the linings pull off easily and do not tear.
Product Care Tips
- Care for Chrome-Tech™ products as you would care for an automotive paint finish. Waxes and scratch removers may be used to protect and restore finish.
- Avoid the use of oil based lubricants around Chrome-Tech™ products.
- Do not use chrome cleaning products on chrome film. Use of chrome cleaning products will void product warranty.
Rocker Molding Installation
1. Begin with the passenger side of the vehicle. Both Rocker Moldings will work on either side of the vehicle.
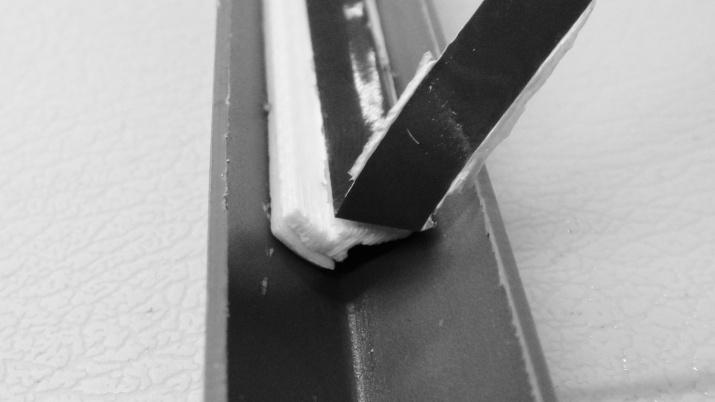
2. Start by locating the top side of the rocker molding using the picture below. The top side is determined by which side of the Rocker Molding the tab is on. The top side is on the right in the picture below.
3. Place the Rocker Molding on the rocker panel. Be sure that all 3 of the tabs are exposed.
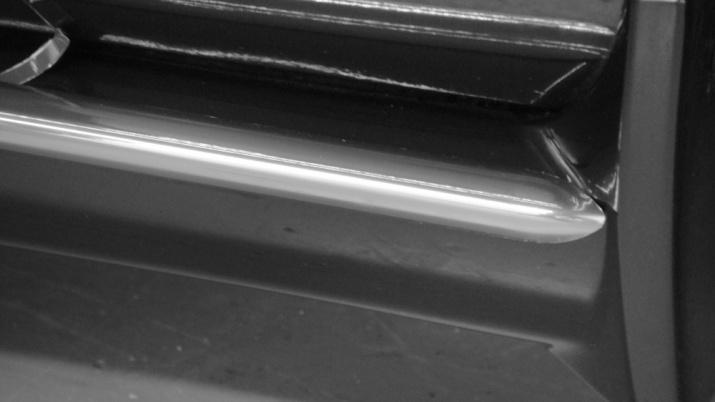
4. Align the front end of the Rocker Molding with the vehicle as shown below.
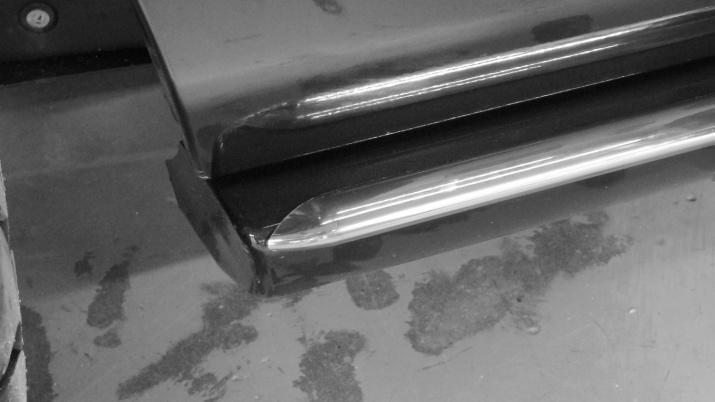
5. Align the rear end of the rocker molding with the vehicle as shown below.
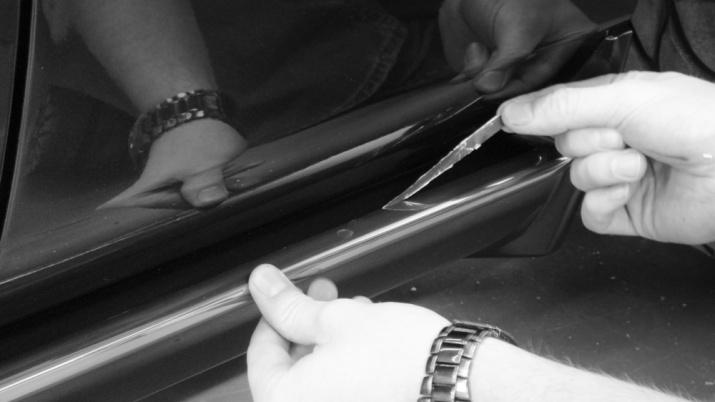
6. Hold the rocker molding still and pull all 3 tabs beginning with the front of the vehicle as shown below. All tabs should pull in the same direction. Apply light pressure to the insert where the lining has been removed.
7. Once all tabs are removed, press down firmly on rocker molding to secure it on the vehicle.
8. Repeat steps 2-7 with other side of the vehicle.
9. Congratulations! You have installed the Chrome-Tech™ Rocker Moldings.
Related Guides
-
Installation
-
Installation
-
Installation

