 FREE 1 to 3-Day Delivery on Orders $149+ Details
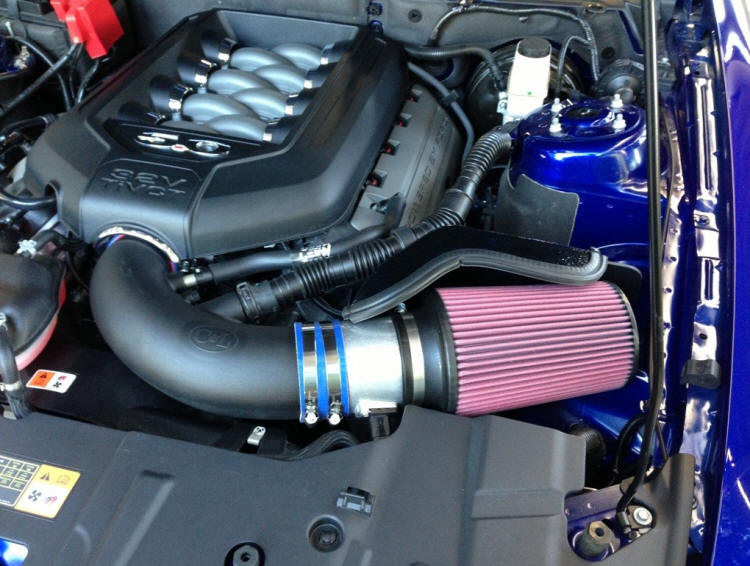
How to Install a C&L Cold Air Intake on your 2013 Mustang GT
Installation Time
1 hours
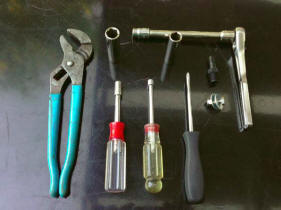
Tools Required
- Ratchet Wrench
- Extension, 8" minimum
- Socket, 8 mm (clamps)
- Socket, 10 mm (airbox mounting bolt)
- Socket, 13 mm (strut tower brace)
- Socket, 15 mm (hose fitting, auto cars)
- Socket Driver or Ratchet with extension
- Bit driver (for T20 Torx bit, included w/kit)
- Phillips Screw Driver (MAF screws)
- Channel Lock Pliers (sound tube clamp)
Installation
Special Notes:
Be aware that this is an extremely simple install and only requires a few hand tools. Installation difficulty is about 3 out of 10 and can be accomplished in between 30 and 60 minutes. However, remember that this kit has a larger MAF housing and will require a custom tune to be downloaded to your factory computer from a Mustang specific tuner.
Caution: You NEED A CUSTOM TUNE!
You cannot drive your car without a custom tune if you install this kit!
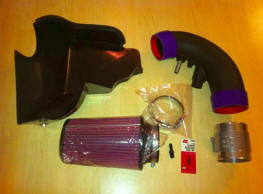
Contents:
- Plastic Air Filter Shroud Assembly
- Plastic Air Inlet Tube (w/silicone hose)
- Aluminum MAF Body
- Air Filter Element (band clamp attached)
- Small Worm (hose) Clamps
- Large Worm (hose) Clamps
- Barbed Hose Adaptor (for automatic cars)
- T-20 Torx Bit
Safety Precautions:
1. Wait until the engine has cooled down.
2. Put the car in "park" or set the hand brake.
3. Load the custom tune before you start your Mustang!
Tools required:
Tool Note: You can use just about any size ratchet or socket driver, as long as you have the right size sockets on the right size bolts. Use reasonable hand force to tighten the bolts, most of the parts are plastic and could be cracked if you use large amounts of force. Hose clamps can be damaged if you tighten them too much.
1. Begin by removing the plastic intake "vanity" cover from the engine (it's blocking access to the bolts). If you have a strut tower brace, remove the four 13 mm nuts holding it to the strut towers with a 13 mm deep socket. Now, grasp the cover and pull straight up, it is held on by four posts that sit in rubber grommets. (I didn't have the strut brace)

2. Remove the PCV hose attached to the inlet tube, pull back on the gray tab and pull the hose off the fitting.
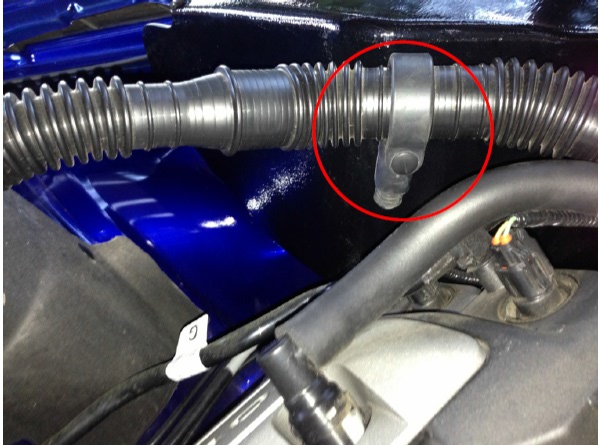
3. Remove the sound transmission tube by using channel lock pliers to squeeze the two tabs together, then pull the large tube off the end by pulling back on it. Pull on the soft rubber clamp to open and release it.
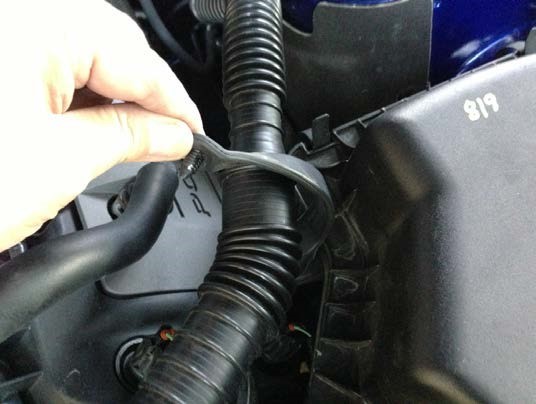
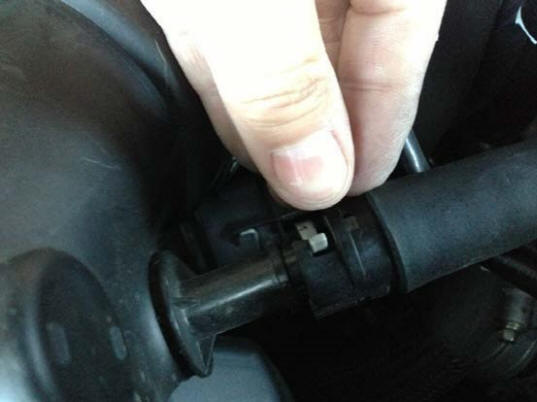
Optional: On automatic cars, you will have a third smaller tube in middle, disconnect this by pushing down on the yellow tab with your thumb while pulling back on the tube.
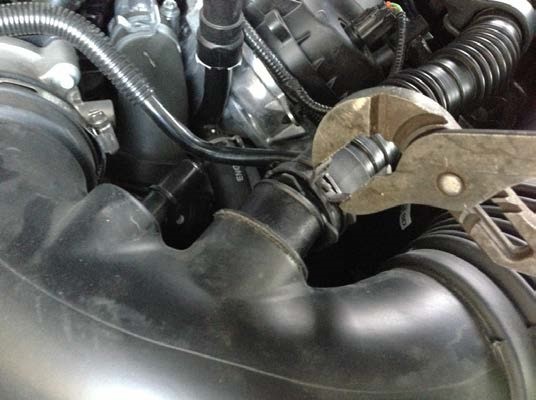
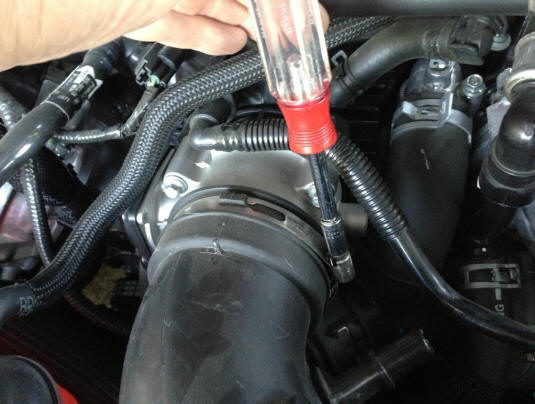
4. Loosen the 8 mm bolt holding the inlet tube to the throttle body (TB).
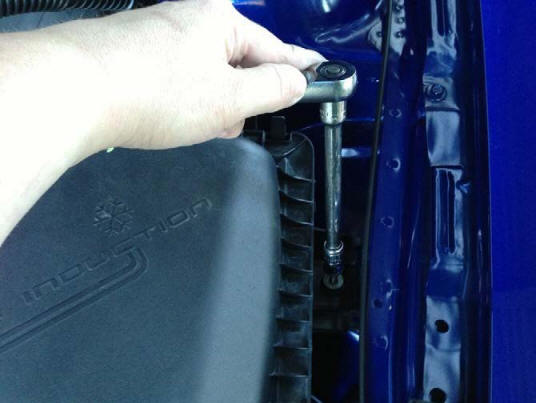
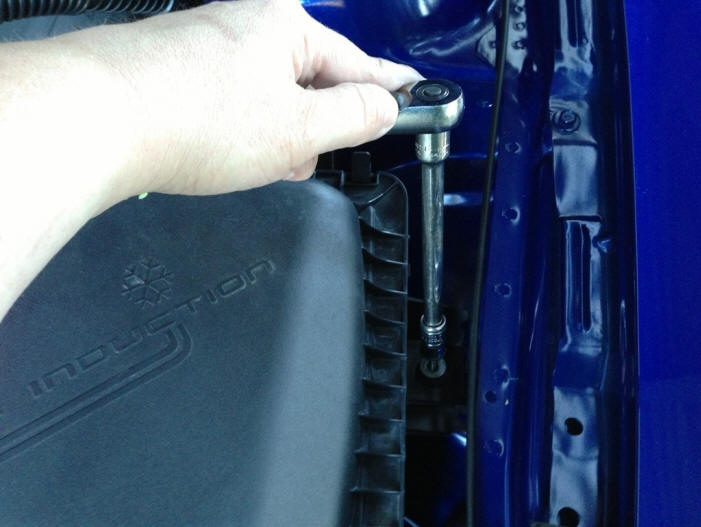
5. Remove the 10 mm bolt holding the stock airbox into the fender, use an extension at least 8" to keep from hitting your fender with the wrench, set this bolt aside for later. (note, you do not need to remove the air cleaner lid, but you can if you want, there are no bolts inside).
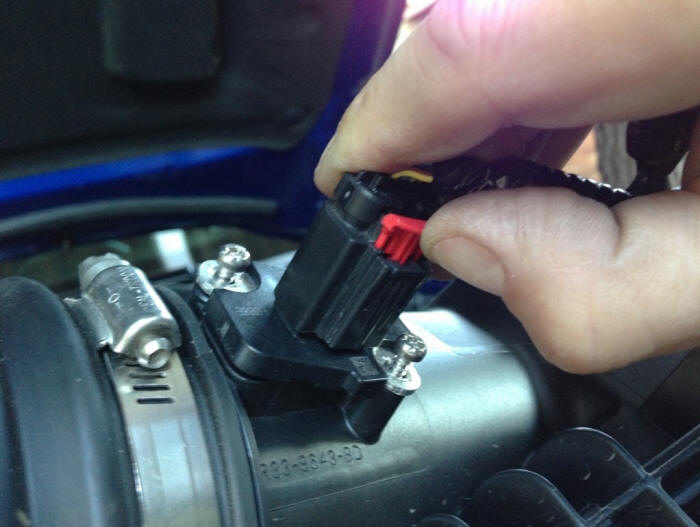
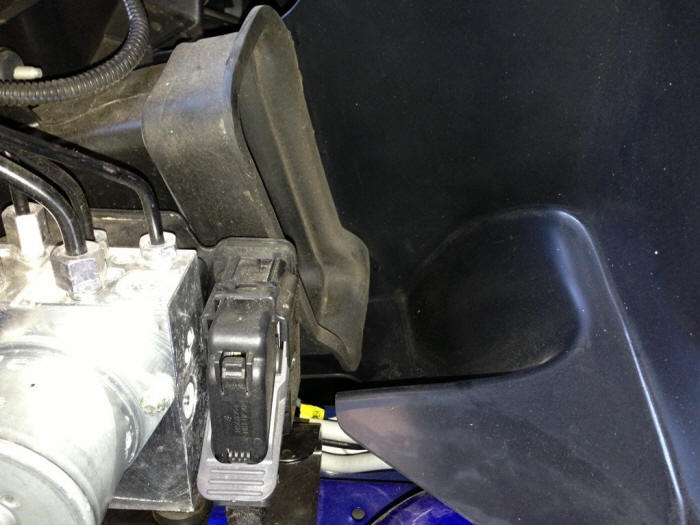
6. Remove the MAF wire connector, pull the red tab out toward the end of the connector about a 1/4 inch, then pull the connector off entirely, this is done while the airbox assembly is still installed. (the pictures below show it removed for clarity, because this red tab is on the bottom and you cannot see it)
You can now pull up the air box to dislodge the rubber feet, and then pull up on the whole assembly by twisting it slightly toward the rear. Remove from the vehicle.
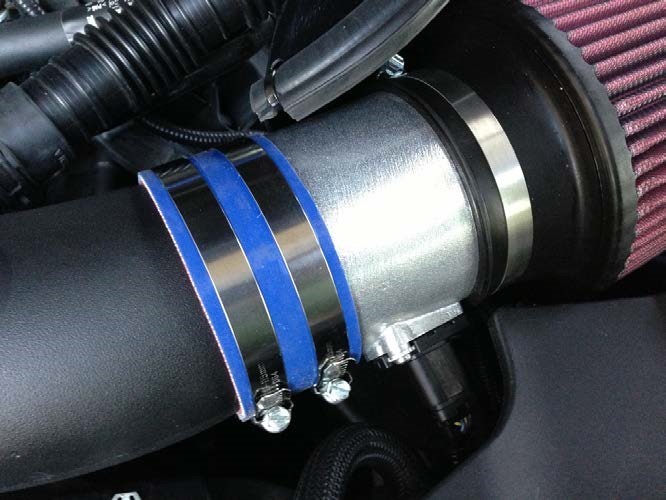
7. Pre-assemble the new C&L Cold Air Intake. The kit comes with the blue silicon hoses slipped on to the plastic intake tube, install and tighten the clamps to the intake tube.
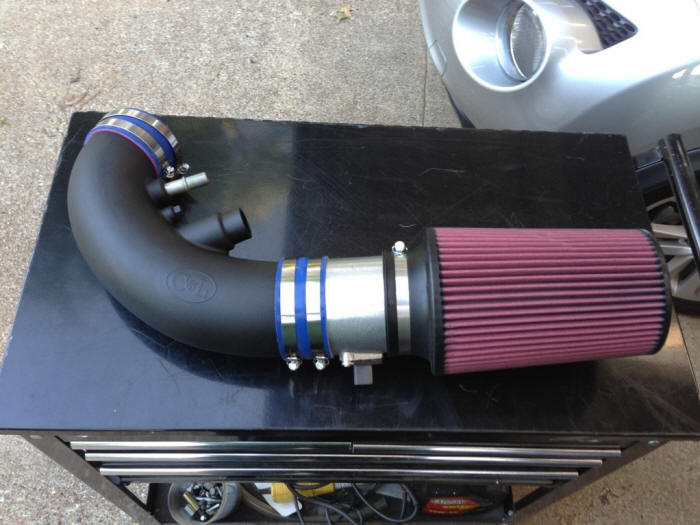
Remove the MAF sensor from the factory air box with the supplied T-20 torx bit and a bit driver, transfer it to the C&L Aluminum housing.
Don't worry about installing the MAF backwards, the screws only line up one way. Also, you should be able to read the writing on the MAF sensor from the front of the car, and the tab should be on the bottom.
Do not re-use the torx screws, the C&L housing has its own screws, you will damage the housing if you use the factory screws.

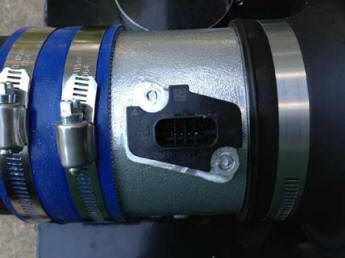
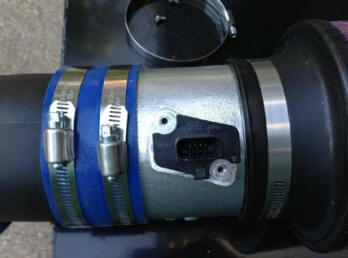
8. Insert the MAF sensor into the MAF housing and tighten the supplied Phillips screws with a screwdriver, don't over-tighten, aluminum can easily strip if you use a lot of force. Installed correctly, the C&L logo is in the bottom and not visible, use the seam on the intake tube and align it with the top screw, this puts the sensor at the perfect angle when installed in the car, then tighten the clamps with an 8 mm socket. Install the air filter and tighten the clamp on it too.
9. Install the filter shroud assembly by sliding it under the rubber gasket from the factory fresh air feed
10. Line up the hole in the shroud with the nut in the fender, reinstall the factory 10 mm bolt and tighten.
(C&L includes an optional bolt to attach the shroud to the bottom of the air feed, you will have to drill a 5/16 hole, but I did not add it to mine, so that I can return it to factory stock without any evidence)
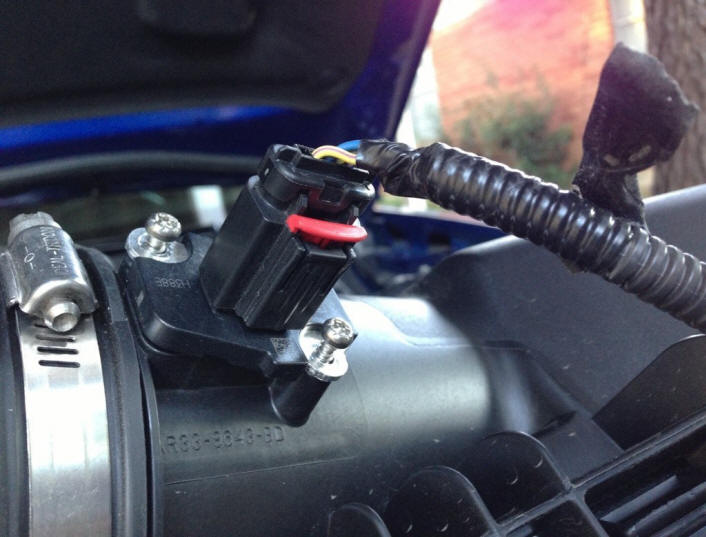
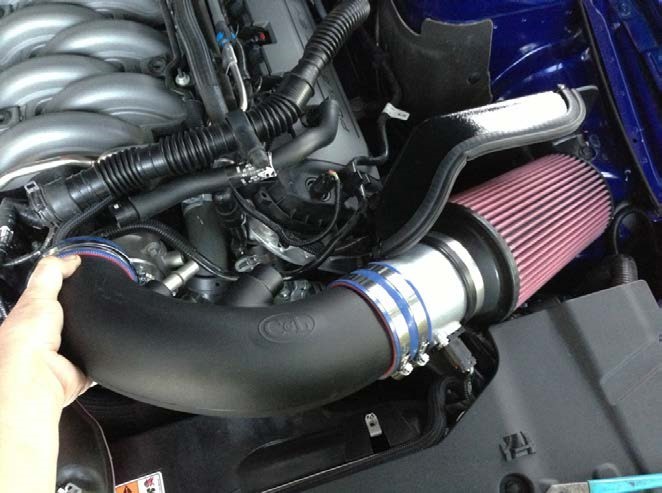
11. Set the CAI assembly into the car, filter end first, reconnect the MAF sensor connector, slide the red tab in to lock it in place. Then slip the blue silicone hose over the end of the throttle body while holding the loose clamp in place with your hand. Tighten the 8mm bolt on the clamp.
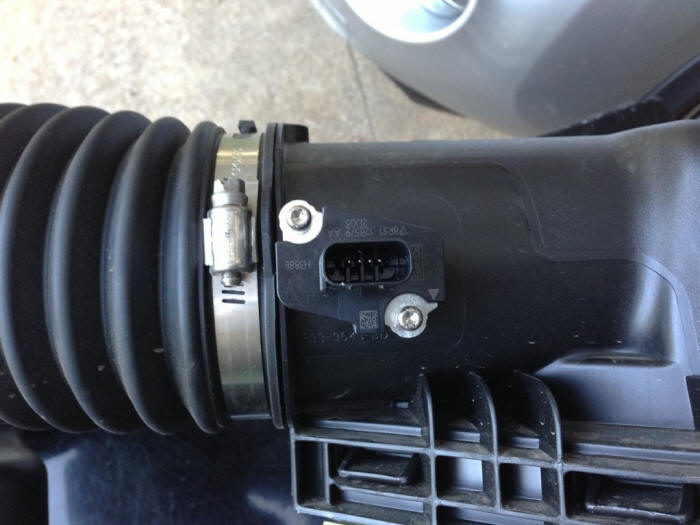
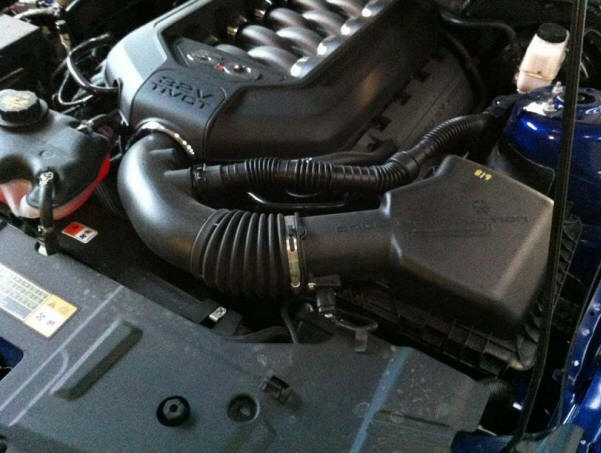
The MAF housing should look like this when installed, sensor at a slight down angle facing forward so that it clears the plastic radiator shroud. Reinstall the Sound tube and PCV hose in reverse of how you removed it.
12. Now, double check to make sure all the clamps are tight.
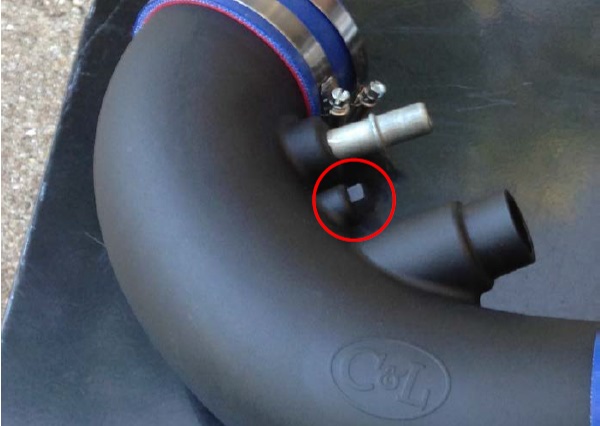
Automatic equipped cars: You will need to remove the center plug (circle) from the intake tube and install the included barbed hose fitting, so that you can connect the vacuum hose from the intake.
TIP: You can use the soft rubber mount from the factory airbox to keep the plastic sound tube from rattling against the filter shroud, just reinstall it so that it rests on the shroud and let the long end hang down.
13. Reinstall the factory intake cover and load your CAI performance tune!
Installation Instructions Provided by American Muscle customer Mark Kuzia 11/12/2012

