 FREE 1 to 3-Day Delivery on Orders $149+ Details
How to Install a Mechanical Boost/Vac Gauge on your 1979-2014 Mustang
Installation Time
2 hours
Tools Required
- Ratchet
- T-15 Torx driver
- Wire strippers
- Solder (or crimp connectors)
- Razor knife
- 7mm socket
- 8mm socket
- ½" wrench
- 3/8" wrench
- 7/64" dill bit

Shop Parts in this Guide
- Auto Meter Cobalt Series 2-1/16-Inch Boost/Vacuum Gauge; 30 inHG / 20 PSI; Mechanical (Universal; Some Adaptation May Be Required)
- Auto Meter Sport-Comp II Series 2-1/16-Inch Boost/Vacuum Gauge; 30 inHG / 20 PSI; Mechanical (Universal; Some Adaptation May Be Required)
- Auto Meter Sport-Comp II Series 2-1/16-Inch Boost/Vacuum Gauge; 30 inHG / 30 PSI; Mechanical (Universal; Some Adaptation May Be Required)
- Auto Meter Cobalt Series 2-1/16-Inch Boost/Vacuum Gauge; 30 inHG / 30 PSI; Mechanical (Universal; Some Adaptation May Be Required)
- Auto Meter Phantom II Series 2-1/16-Inch Boost/Vacuum Gauge; 30 inHG / 30 PSI; Mechanical (Universal; Some Adaptation May Be Required)
- Auto Meter Phantom II Series 2-1/16-Inch Boost/Vacuum Gauge; 30 inHG / 20 PSI; Mechanical (Universal; Some Adaptation May Be Required)
Installation
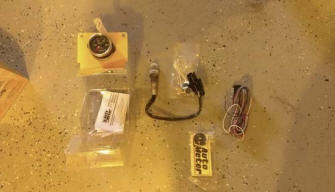
In the box:
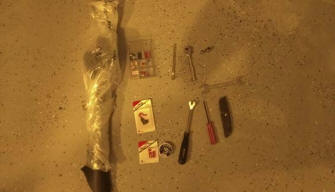
Tools and extra pieces needed:
Removal of stock trim pieces
1. As when working with any project involving electronics, it is always a good idea to first disconnect the battery to protect both yourself and your car. Loosen the negative battery terminal with an 8mm socket, and hang it safely aside.
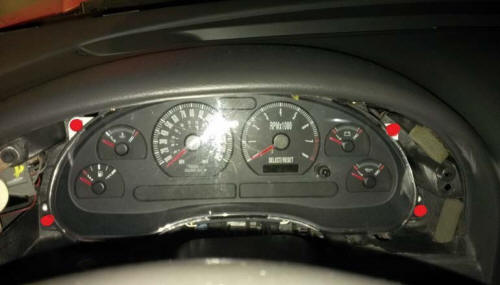
2. First locate and remove the (2) T-15 Torx screws on the top of the gauge bezel.
3. Now remove the headlight knob. There is a small clip in a grove on the back of the switch. Using the small flat-head screw driver, carefully disengage this clip and slide the switch off.
4. Remove the gauge bezel. Using the trim tool, or a large screw driver wrapped in fabric, carefully pry around the edges of the bezel until you can wiggle it free.
5. Remove the (4) T-15 Torx screws holding the instrument cluster in place.
6. Carefully rotate the instrument cluster forward, and unplug the two connections in the back.
7. Remove the (2) 7mm screws holding the headlight switch in place, and unplug and remove the switch.
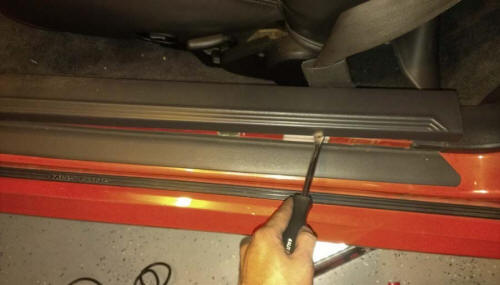
8. Turn your attention to the door sill plate. The trim tool, or screw driver comes in very handy here. Carefully go down the length of the piece prying upward on the clips that hold it to the body.
9. Next, remove the driver’s side kick panel. Using the trim tool, or a screw driver, first remove the plastic push pin holding the kick panel in place.
10. With the push pin removed, the kick panel can easily be removed by pulling outward, and towards the back of the car.
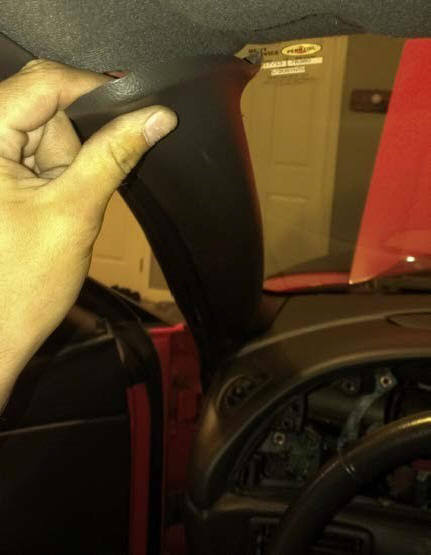
11. Remove the driver’s side A pillar. Using the trim tool, or screw driver, very carefully pry along the length of the trim piece, until the clips begin to release. I found it easiest to then use my finger tips to gently wiggle the piece out.
Installation:
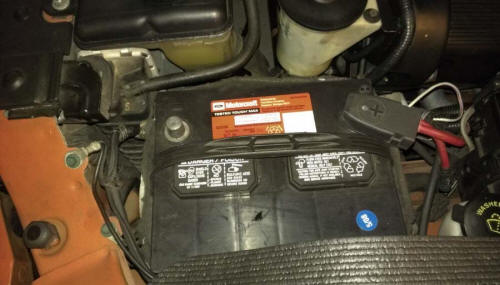
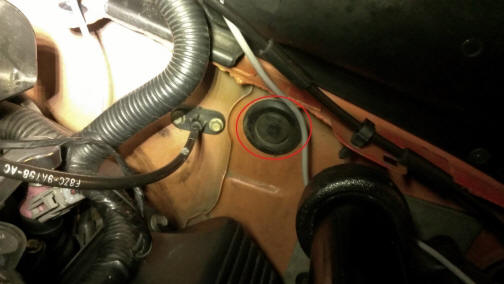
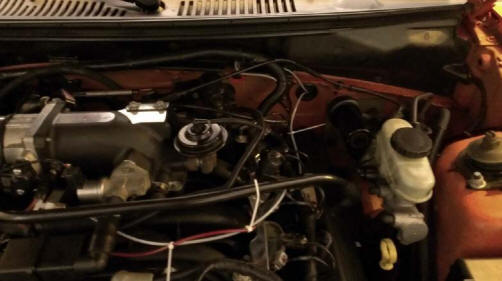
1. First pop the hood, and look on the driver’s side near the firewall.
2. Find and remove the grommet in the firewall shown below.
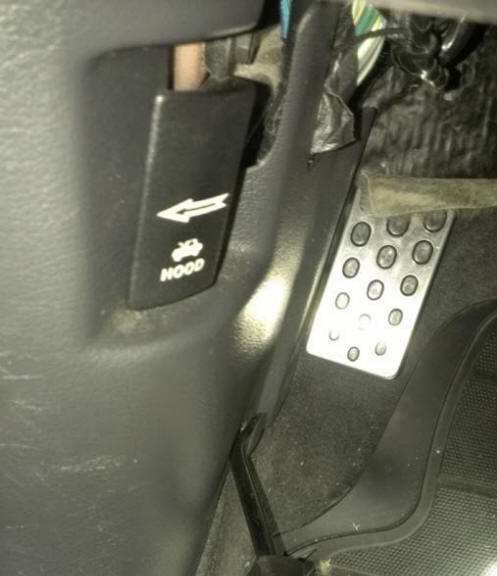
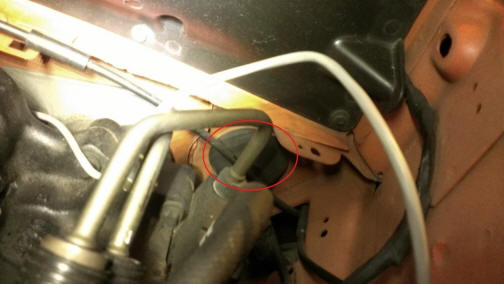
3. NOTE: on some Mustangs, the clutch cable may not allow room for the vacuum tube to pass through the grommet. Alternatively, you can use the grommet for the hood cable, shown below.
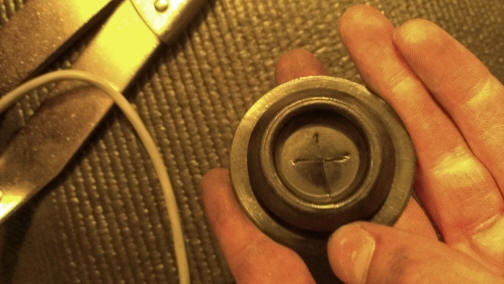
4. With the grommet removed, carefully cut an ‘X’ in the center of the grommet using the razor knife.
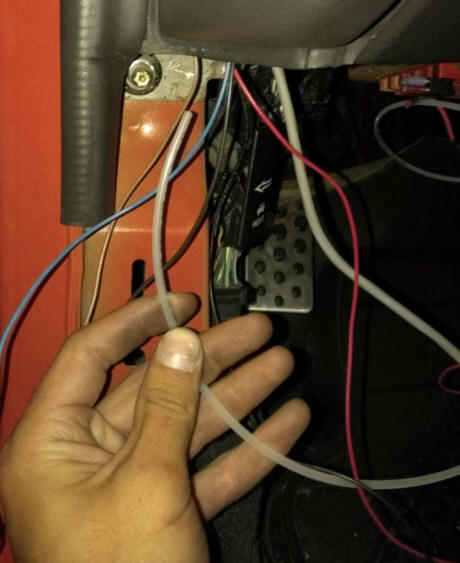
5. Route the vacuum tube for the boost gauge through the grommet, into the firewall, as shown.

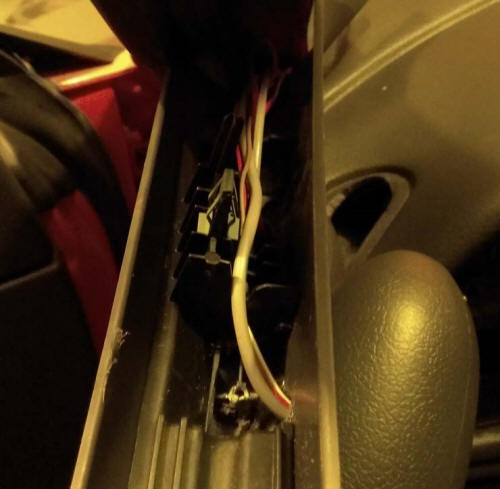
6. Moving back inside the car, pull the vacuum tube through the firewall, and pull it to the bottom of the kick panel.
7. Begin to route the vacuum tube from the kick panel, up to the A pillar, as shown. Be careful not to kink the vacuum tubing.
8. Once you have the vacuum tubing above the dash, install the brass fittings supplied with the boost gauge, as shown.
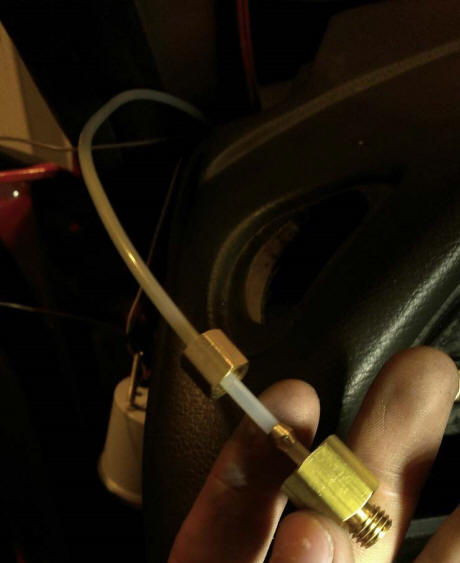
9. Tighten the brass fittings using a ½” and 3/8 wrench. Make sure the fittings are snug, to avoid vacuum leaks.
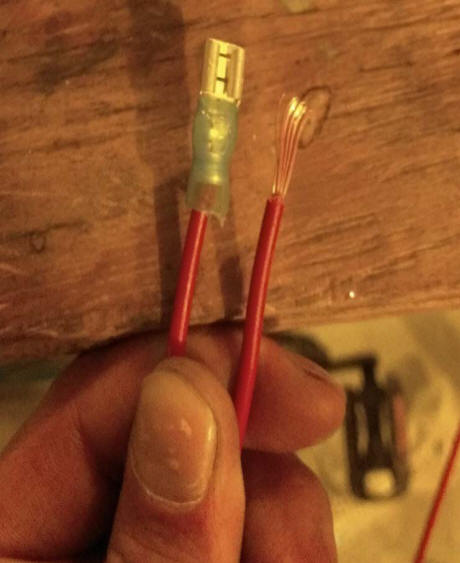
10. Take the 1 of the 3 foot lengths of wire, and crimp the ¼” spade connector on one end, as shown.
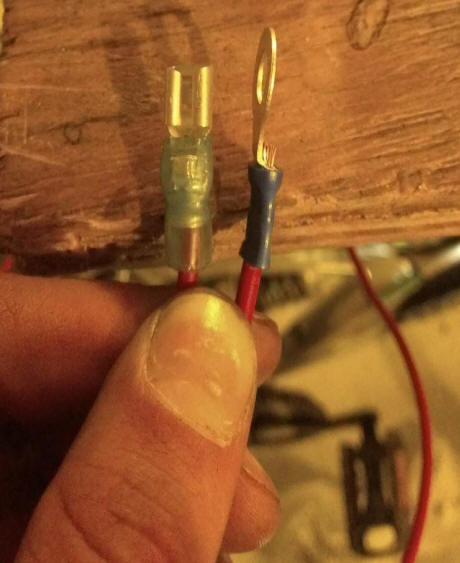
11. Take the length of wire, and crimp the ¼” spade connector to one end, and the 14 gauge ring terminal to the other, as shown.
12. Carefully feed the two lengths of wire down through the dash, into the instrument cluster cavity, making sure to leave both of the ¼” spade connectors above the dash to connect to the boost gauge, as shown.
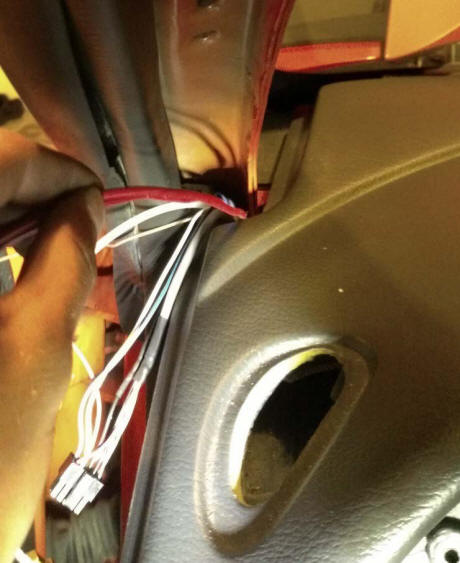
NOTE: if you are installing more than one gauge in the A pillar location, you may find it necessary to use a Dremel tool, or file, to slightly elongate the hole between the dash and the body of the car. This will be totally invisible with the A pillar installed.
13. Looking through the instrument cluster cavity, locate the red wires going down through the dash, and pull them into the cavity.
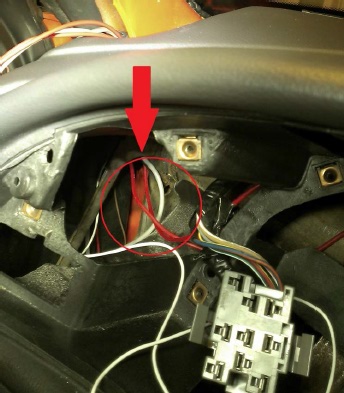
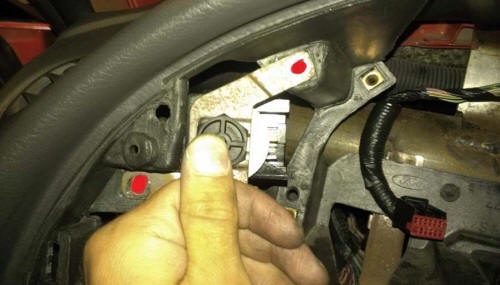
14. Take your 7/64th , or other small drill bit and make a small pilot hole in the dash frame in the location shown.
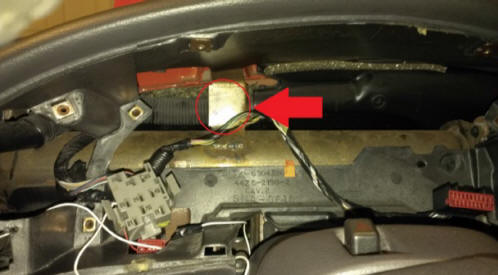
15. Sand the area thoroughly to remove any rust or debris.
16. Route the length of red wire with the ring terminal to the hole, and secure it with the self-tapping screw, as shown.
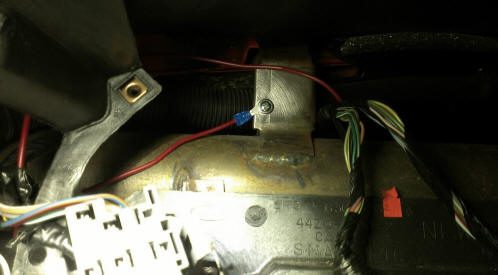
17. Locate the blue/white stripped dimmer wire coming from the back of the headlight switch.
18. Splice the end of the remaining length of wire into the blue/white wire, as shown.
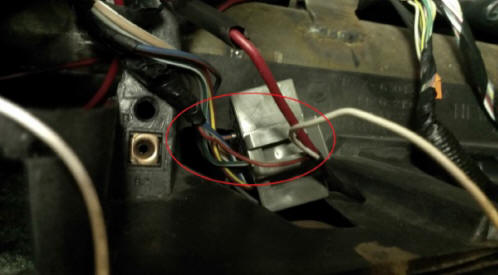
19. NOTE: I first spliced in a small piece of red wire to my blue/white dimmer wire, in order to make it easier to install other accessories in the future. I then attached the white wire. This step is completely optional.
20. With the wires spliced together, secure the connection with shrink wrap or electrical tape, and tuck the excess wire away.
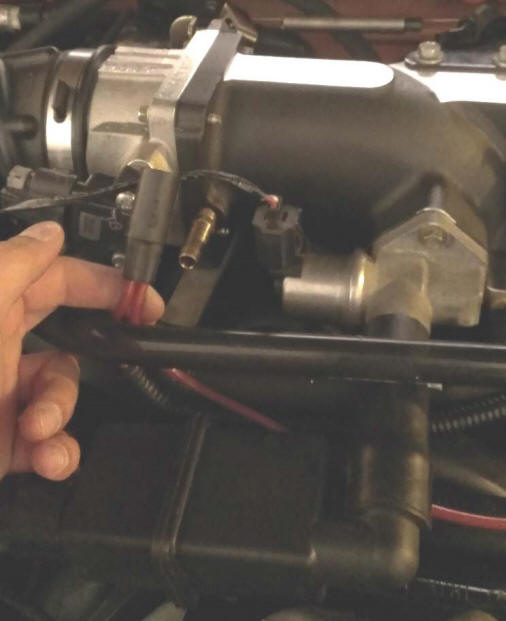
21. Moving back under the hood, locate the barb coming off of the plenum with two red vacuum hoses going into it, and remove the black rubber fitting from the plenum, as shown.
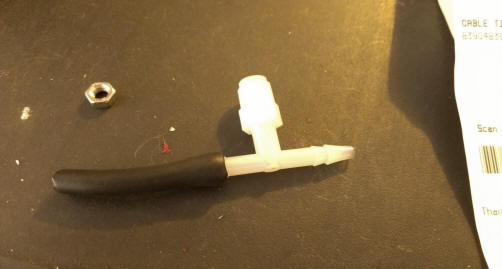
22. Taking the plastic ‘T’ fitting included with the Boost gauge, install a small length of the 7/64th vacuum tubing, as shown.
23. NOTE: Any vacuum connection will work for the boost gauge. However, the closer the connection is to the plenum, the faster and more accurate your boost readings will be. That is why I chose to use this location.
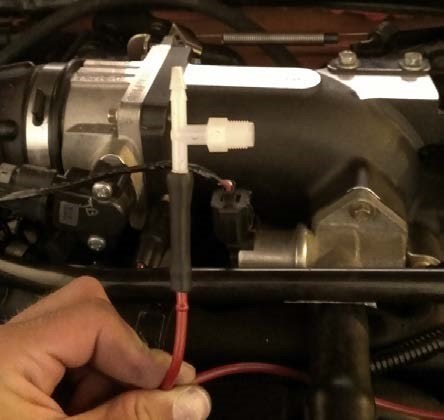
24. Remove one of the red vacuum tubes from the black rubbing fitting, and replace it with the ‘T’ fitting, as shown.
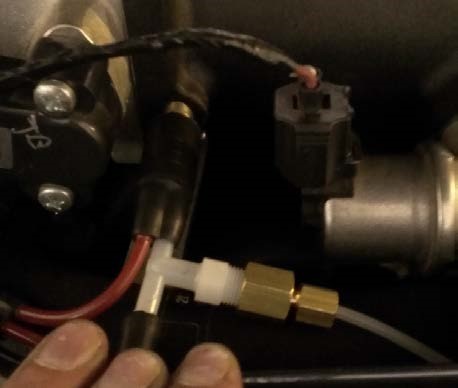
25. Install the ‘T’ fitting into the black rubber fitting, and install the brass fittings onto the white vacuum hose going to the boost gauge, as shown.
26. Zip tie the vacuum line out of the way, and coil any excess under the dash.
27. Back on top of the dash, line your aftermarket gauge pillar up to the A pillar location, and pull the boost gauge tubing and wires through the back as shown.
28. Carefully install your Auto Meter Boost gauge into the front of your gauge pillar, and plug the wiring harness into the back.
29. Reinstall the gauge pillar, carefully tucking any excess wire as you go.
30. Plug the headlight switch back in, and reinstall it, along with the instrument cluster.
31. Replace all trim pieces, and tuck any excess tubing under the dash away with zip ties.
32. Replace battery connection, and start your car.
33. NOTE: The vacuum at idle should read between 17, and 22 in/hg. For cammed Mustang’s, this reading may be slightly lower. If your vacuum does not match this, double check all connections are snug, and trace the length of the white vacuum tubing for kinks.
34. Stand back, and admire your work!
Installation Instructions Written By AmericanMuscle Customer Jake Anderson 8.21.2013

