 FREE 1 to 3-Day Delivery on Orders $149+ Details
How to Install a Exedy Mach 500 Stage 3 Clutch on your '99-'04 GT, Cobra and Mach 1 Mustang
Installation Time
4 hours
Tools Required
- 8mm Socket (Deep/Standard)
- 10mm Socket (Deep/Standard)
- 12mm, 12-point Socket (Deep/Standard)
- 13mm Socket (Deep/Standard)
- 15mm Socket (Deep/Standard)
- 17mm Socket (Deep/Standard)
- 18mm Socket (Deep/Standard)
- A Helping Hand/Friend (*Optional but Highly Recommended)
- Breaker Bar
- Cheater Bar (*Optional)
- Clutch Alignment Tool (*Included in the clutch kit)
- Drain Pan
- Extension (Various Sizes. 2-24 in.)
- Jack (2)
- Jack Stands (4)
- Pry Bar
- Ratchet (3/8 and 1/2 in.)
- Screwdriver (Various Sizes. 6-24 in.)
- Swivel (3/8 and 1/2 in.)
- Torque Wrench
- Transmission Jack (*Optional)
- Transmission Oil (Manufacturer Recommended)
- Wood Blocks

Shop Parts in this Guide
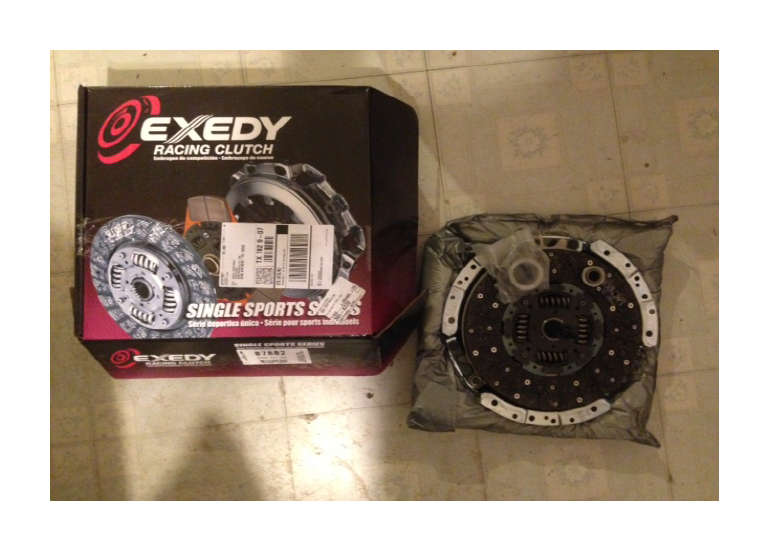
*NOTE: When replacing a clutch assembly it is suggested to also replace the pilot bearing, throw-out bearing, and sometime the vehicle’s flywheel. This is why the new pilot bearing and throw-out bearing are included in this kit.
Prepping Procedure:
1. Open the hood and disconnect your battery. (*NOTE: If you have your vehicle tuned by a handheld tuner make sure the vehicle is set to stock before disconnecting the battery.)
2. Locate the vehicle’s lift points and using 1 of your 2 jacks, raise the front of the vehicle about 3 ½ -feet or until comfortable.
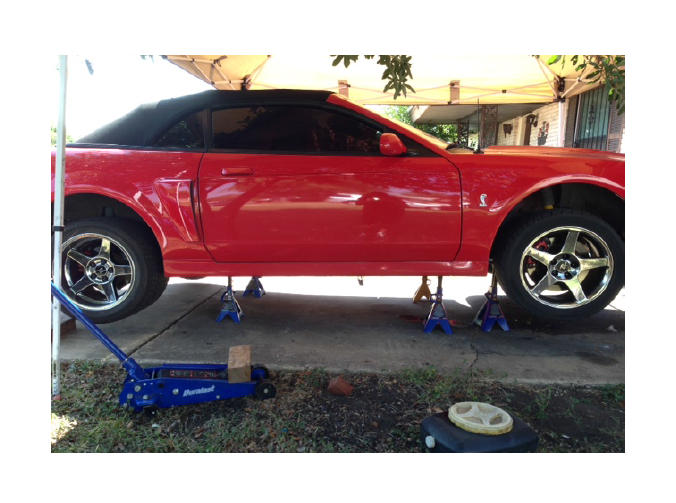
3. Now set 2 of your jack stands parallel to each other at the left and right side of the vehicle then slowly lower the vehicle until it is seated properly and secure on your jack stands.
4. Repeat steps 1 and 2, to raise and secure the rear of the vehicle.
Removal Procedure:
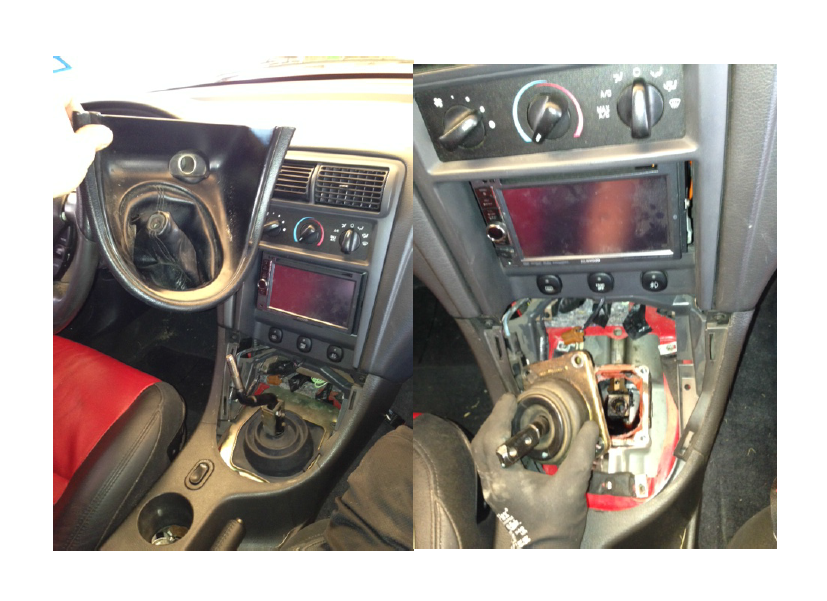
1. Start by removing the shifter assembly from inside the vehicle.
- Twist the shifter knob counter clockwise to remove the knob.
- Remove the shifter bezel, which will expose a series of bolts (8mm/10mm/13mm), these must be removed.
2. Begin draining the transmission oil. The transmission drain plug is located on the right side of the transmission and is removed by using a 3/8 in. ratchet drive.
3. Now remove the driveshaft from the vehicle. There are (4) 12-point, 12mm bolts holding the driveshaft. Using a cheater or a breaker bar will help here. (*NOTE: You will need to hand turn the driveshaft to gain access to each bolt, and engaging the parking brake will help keep the driveshaft from turning.)
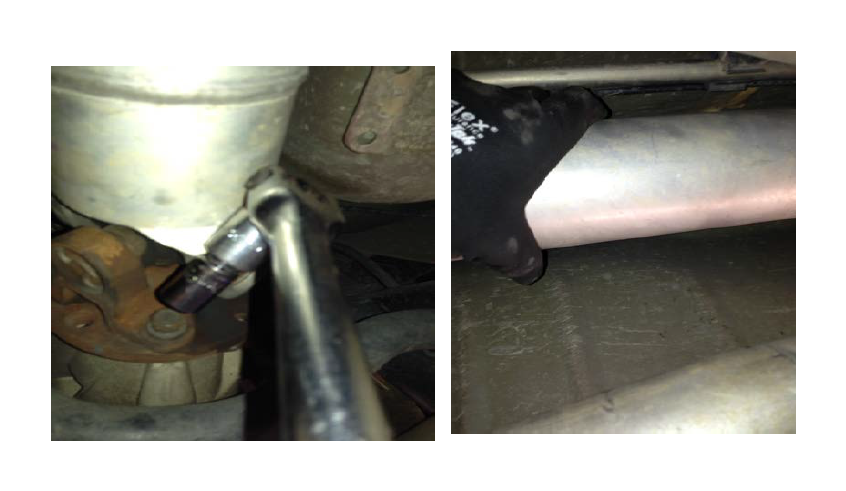
4. Begin removing the exhaust system, which uses a series of 12-15mm bolts/nuts. The oxygen sensors must also be disconnected at this point.
5. At this point the transmission and bell housing should be exposed. The 2-3 sensors located on the transmission must now be disconnected.
6. The starter can now be removed, which is held by a series of 10-13mm nuts and bolts.
7. Next remove the clutch cable.
- Remove the dust shield. This will expose clutch cable/fork.
- Using a pry-bar, push on the clutch fork to release tension on the cable so that you may pull it off.
- Use a screwdriver to remove the small C-Clip holding the clutch cable to the transmission.
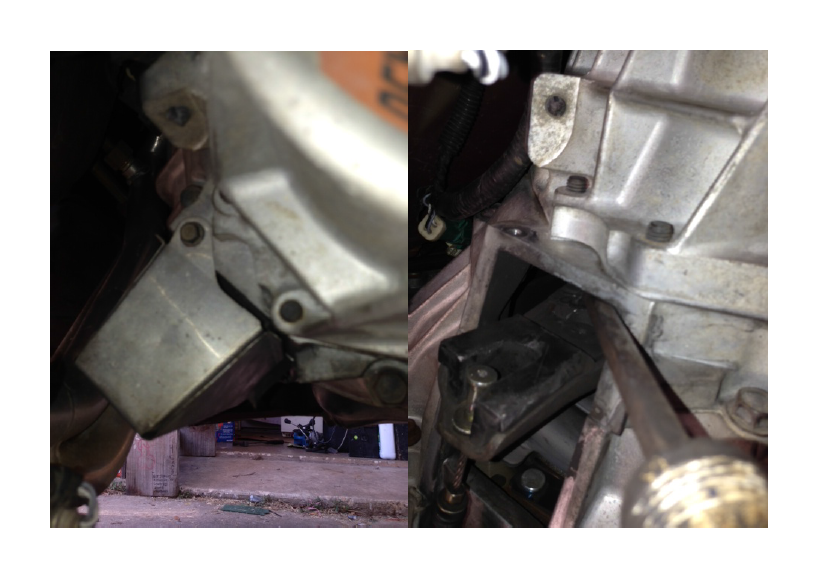
8. Next, by using a wooden block with excessive surface area and 1 of the twoJacks or transmission jack, apply slight pressure on the base of the transmission away from the transmission mount.
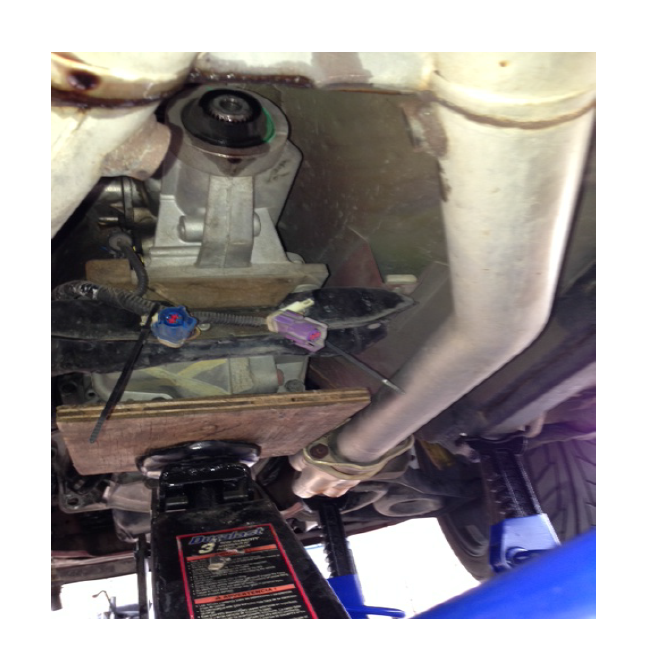
9. Remove the transmission mount which is held by (6) 15mm bolts.
10. The jack should now be supporting the transmission, this will be your adjuster.
11. Work your way around the bell housing to remove all (7) 13mm bolts. Using a series of extensions and swivels will help here.
12. Use the jack to adjust the height of the transmission from time to time to reach the harder bolts.
13. Once all the bell housing bolts are removed, you and a friend must level the transmission height with the jack and wiggle the transmission out from the engine.
14. The transmission should be removed and the clutch assembly should be exposed at this point.
15. Begin removing the clutch assembly which is held on by (8) 13mm bolts. Wiggle the assembly out, but be careful because it is heavy.
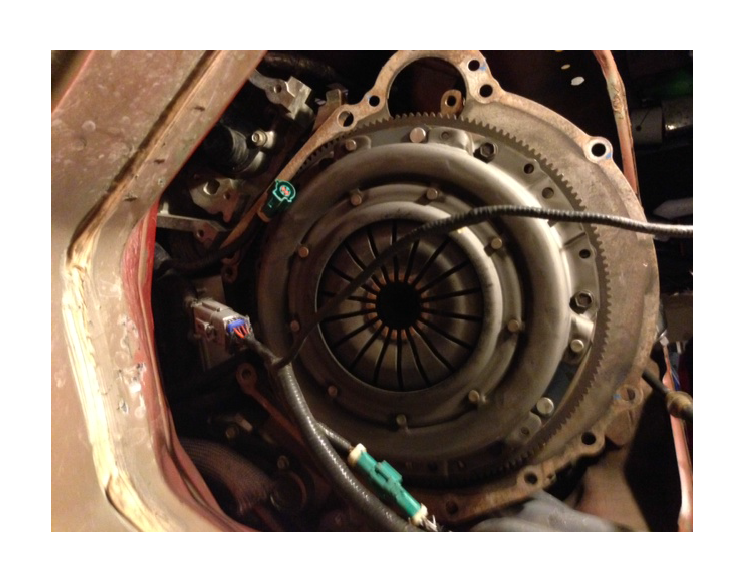
16. The flywheel should now be exposed. Remove the flywheel which is held on by (8) 17mm bolts.
17. Next the pilot bearing must be removed by renting a special tool from your auto parts store or by using the hydraulic method. (*Research “How To’s” for the hydraulic method.)
18. Remove/replace the throw-out bearing located on the clutch fork.
Installation Procedure:
1. Start by installing all components in the reverse order from which they were removed.
2. Begin with the pilot bearing.
- Tap into place with rubber mallet
3. Install the flywheel. (Should line up one way)
4. Using the clutch allignment tool install the clutch assembly (Should line up one way)
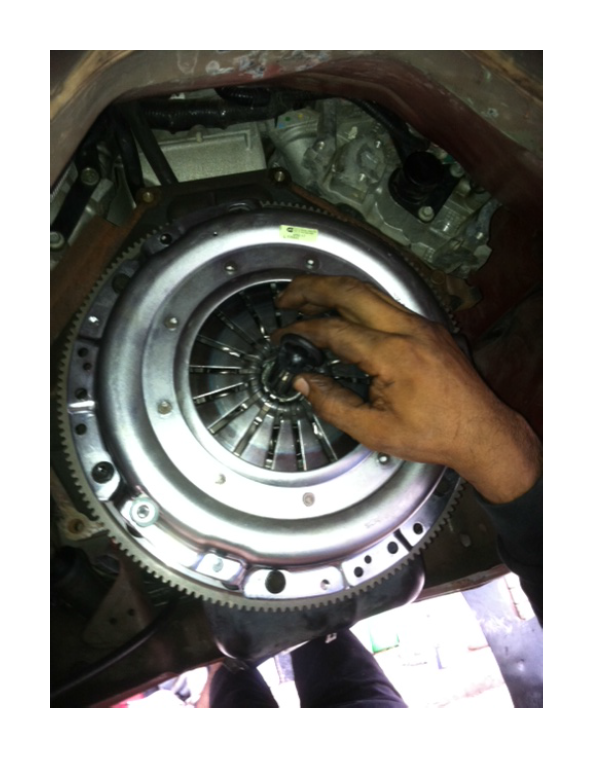
5. Install the throwout bearing, which is included in this clutch kit
6. Install the transmission
- Grab your “Helper” and place the transmission on your preffered jack
- Line up the input shaft to the opening of the clutch
- Wiggle in the transmission until the bell housing is flush with the engine
- Begin installing the (7) 13mm transmission bolts
7. Once all bolts are torqued down begin re-installing the transmission mount.
8. Next install the clutch cable back into the clutch fork
9. Install the drive shaft.
10. Intall the exhaust system next
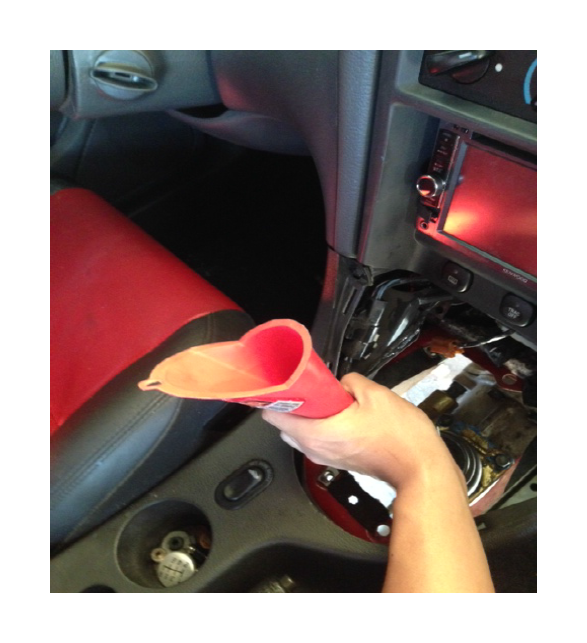
11. Fill the transmission with new oil, through the inside of the vehicle. (*NOTE: Make sure the transmission drain plug is tightened before filling new oil.)
12. Install the shifter assembly.
13. Next re-connect the vehicle’s battery
14. Last, double check that all components are nice and torqued then the installation is complete.
Torque Specs/Capacities:
• Clutch = 45-47lbs. ft. 60deg. turn
• Drain Plug = 20-22lbs. ft.
• Drive Shaft = 83-85lbs. ft.
• Flywheel = 63-65lbs. ft.
• Transmission Bellhousing = 26-28lbs. ft
• Transmission Oil = 3.9L (4.1qts.)
(NOTE* It is recommend to use the torque specs but it doesn’t hurt to make sure everything is nice and tight.)
