 FREE 1 to 3-Day Delivery on Orders $149+ Details
How to Install OPR Replacement Foxbody Floor Pan - Left Side (79-93 All) on your Ford Mustang
Installation Time
4 hours
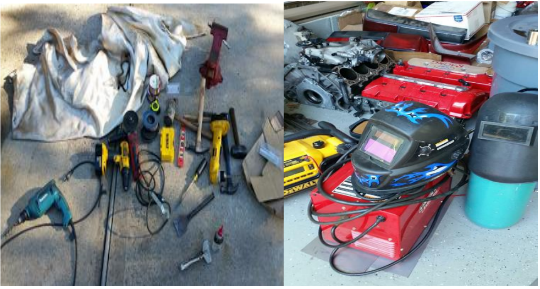
Tools Required
- Grinder with cutting and grinding wheels/Plasma Cutter
- Sawzall with metal blades, Drill with assorted bits (I recommend getting titanium bits there are lot of spot welds this will save you time in the long run)
- Hammers
- Chisels
- Wire Wheels
- Mig Welder with .25-.35 steel wire and tips
- Welding Mask
- Welding Blanket
- Leather Gloves
- C02 Argon Mix
- Soapstone
- Magnets
- Level
- Tape Measure
- Jack Stands
- Jack/4 Post Lift

Shop Parts in this Guide
Note: This guide is for both the Left and Right Floor Pans.
Difficulty level: advanced
Step 1: First you must start by completely removing the interior of the car. This includes the carpet, dashboard, seats, console etc.
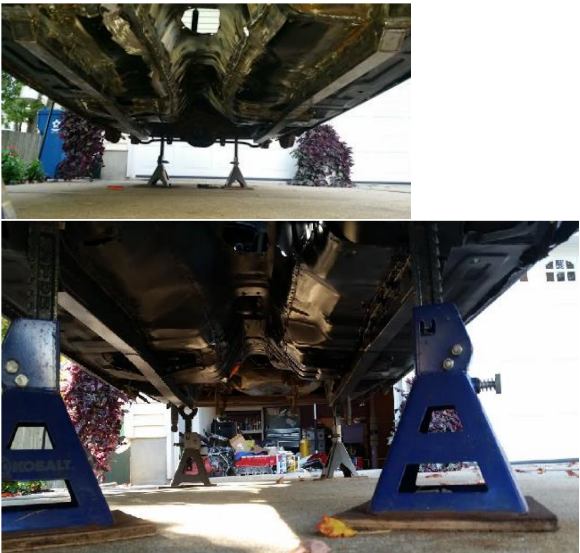
Step 2: Then place the car on 4 jack stands or a 4 post lift make sure the car is 100% level from front to back and left to right. Place the stands on the rear and on the k member to ensure that it does not get in the way while working. You do not want to be removing structural parts of the body on uneven ground.
Step 3: Next you must remove the cross member support going across the top of the Trans tunnel and floor pans. To do this use your titanium drill bits to locate the recessed spot welds and drill out the welds along the sides of the brace and the 6 spot welds on each side of the brace which is holding it to the door frame of the car. **When drilling out the welds on the side of the brace that connects it to frame rails if possible drill them out just enough to break them loose without drilling through both pieces of
metal because it will save you time in the long run with welding the holes shut before reinstalling the new pans. Once all the spot welds are drilled out on the cross brace use your hammer and chisel to finish breaking loose any welds that are still attached, *having a sharp chisel, Sawzall, or grinder really helps to cut through any welds still hanging on.*
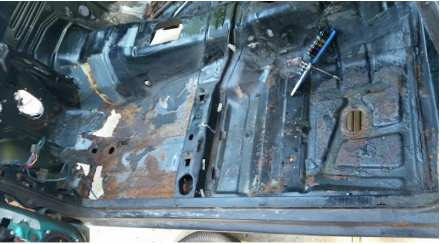
Step 4: Once removed next you must drill out the spot welds along each side of the floor pans which connect the floors to the door frame rail.**Once again remember there are a lot of welds so do your best to not drill all the way through to the frame rail because you will have to weld, fill, and grind down the welds before installing the pans in order to insure it's air tight so no moisture can get in between the rail and pan after install or it will rust out again over time because you will not be able to paint the bare metal between where the side of the pan and frame rail meet.
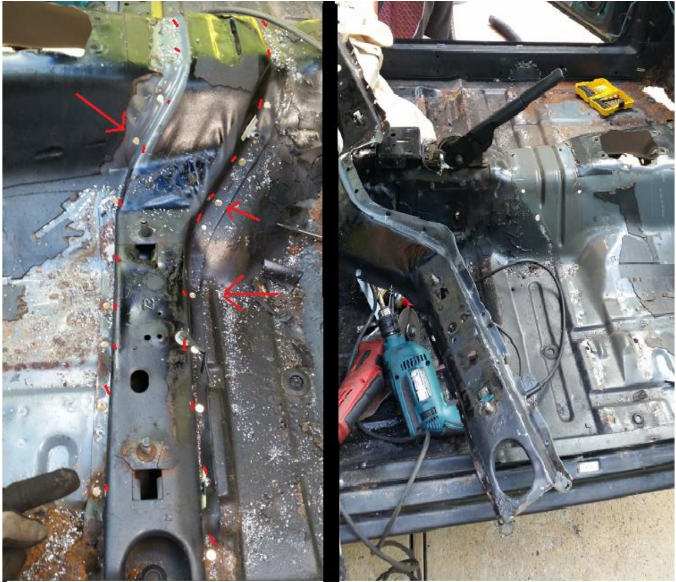
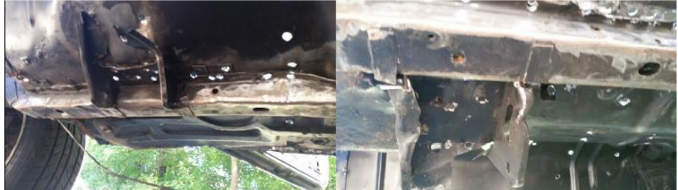
Step 5: The last section you must drill spot welds out are the frame rails running down the front to the center of each floor pan and the transmission mounts. **If you are nervous about the frame rails moving once the floors are out weld a brace underneath the car across from one frame to the other before drilling to ensure no movement. I don't think it is necessary though as they are very sturdy. Drill them out from the top (inside of the car) if possible, this may not be possible as my floors were so rusted I wasn't able to locate all of the spots so I had to drill from under the car through the frame rail then through the floor pans. Once again after you drill through the welds most likely you will not have drilled all the welds perfectly so it will still be connected. Use your Sawzall, chisel, and hammer to finish bending down them edges of the frame rail and cut through whatever spot welds are still holding on.
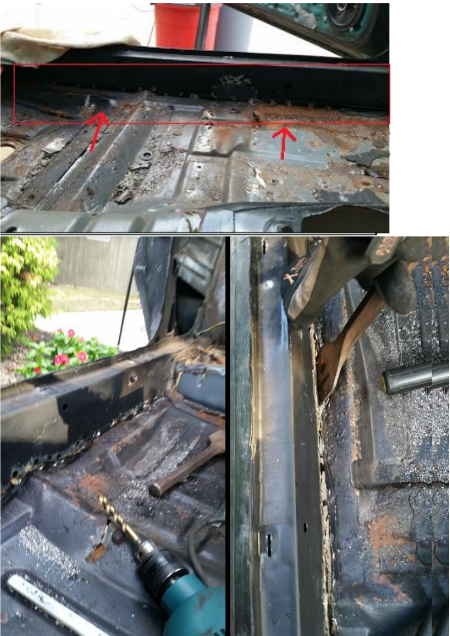
Step 6: Once the frame rails are completely free from the pans now you must use a grinder, plasma cutter, or Sawzall to cut out the backs of the floor pans where it meets the bottom of rear seats and the inside where the floor meets the Trans tunnel. *Before cutting place your new floor pans on top of the existing floor and trace the inside line of the pan leaving yourself some room for error.
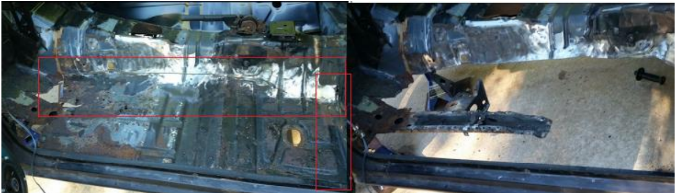
Step 7: Once the floor pans are completely removed retest fit the pans and make cuts and trim as necessary. I left about 1 inch over hang on each inner side to weld both top and bottom to completely seal the inside and not risk cutting off to much in any particular section.** Once the pans are out you also will need to drill out the front seat rear bolt brackets which are spot welded to the floor pans. Remove these and reweld them to your new pans before install, making sure the bolt holes are center and plates are straight.
Step 8: Now it's time to weld your new floor pans in. Weld all the holes from when you drilled out the spot welds in the door frame rail closed and grind down the excess welds. Grind down all edges on top and bottom of the floors pans and all the area inside the car that they are going to be welded to down to bare metal. (Trans tunnel, inner frame rails, door frame rails, and front and rear where pan meets the body) Place the pans in and outline the frame rail from underneath the car with the soapstone on the bottom of the pan then grind down that entire area to bare metal as well. **Before welding clean all surfaces with alcohol to insure the cleanest welds. Use your level to make sure the pans are as straight as possible front to back and left to right. This goes back to making sure your car is level on your jack stands or lift. Tack weld the pans in and recheck your work before completely welding them in. You will need to weld the pans in along all sides from top and bottom to fully seal it. Then reweld the cross brace
in making sure it is aligned with the rear holes for the seats. Use a wire wheel to go over all your welds once they are done and paint and undercoat them to protect them from rust. In these 8 simple steps you can fully restore your fox body mustang floors. Take your time and always measure twice and anyone can take this project on.
Installation Instructions Written by AmericanMuscle Customer S. Astone on 3/30/18

