 FREE 1 to 3-Day Delivery on Orders $149+ Details
How To Install Flowmaster American Thunder Catback Exhaust for 1999-2004 Mustang GT, Mach 1, Bullit
Installation Time
2 hours
Tools Required
- 14mm wrench
- 15 mm wrench
- Hacksaw or Reciprocating Saw(sawzaw)
- 1 ½ Ton or Larger Jack
- 2 Jack Stands
- Wheel Chocks
- Anti Seize Lubricant

Shop Parts in this Guide
Fitment:
1999-2004 Mustang GT, Mach 1, Bullit. Will not fit 2001, 2003 Cobra.
Optional Tools Needed:
• Hammer (sometimes exhaust parts stick together)
• Roller (For Your Comfort)
What’s in the Box:
• Right muffler assembly
• Left muffler assembly
• Right tailpipe assembly
• Left tailpipe assembly
• 2 Muffler Clamps
• 4 Exhaust Hanger Keeps
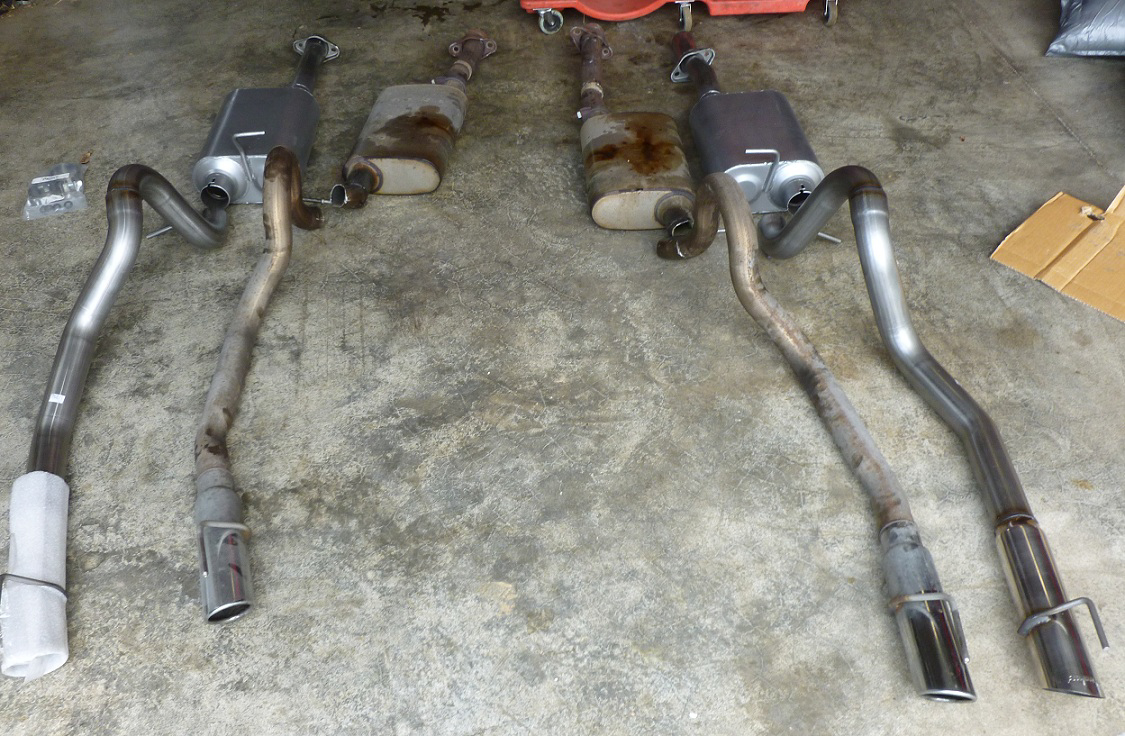
Removal of old Cat Back System:
1. First begin by chocking the front wheels, and then jack the car up under the pumpkin on the axle. Place jack stands in a location where they are out of the way but allow the suspension to flex all the way out. This is needed to install the new tail pipe assemblies.
2. Now place the jack under the H pipe in the center jack it up until it is snug but is not supporting any weight.
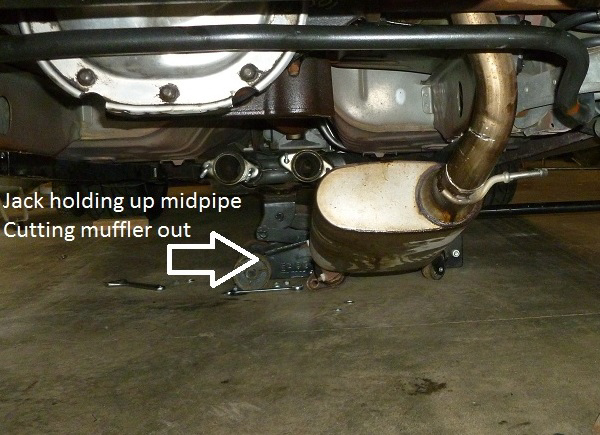
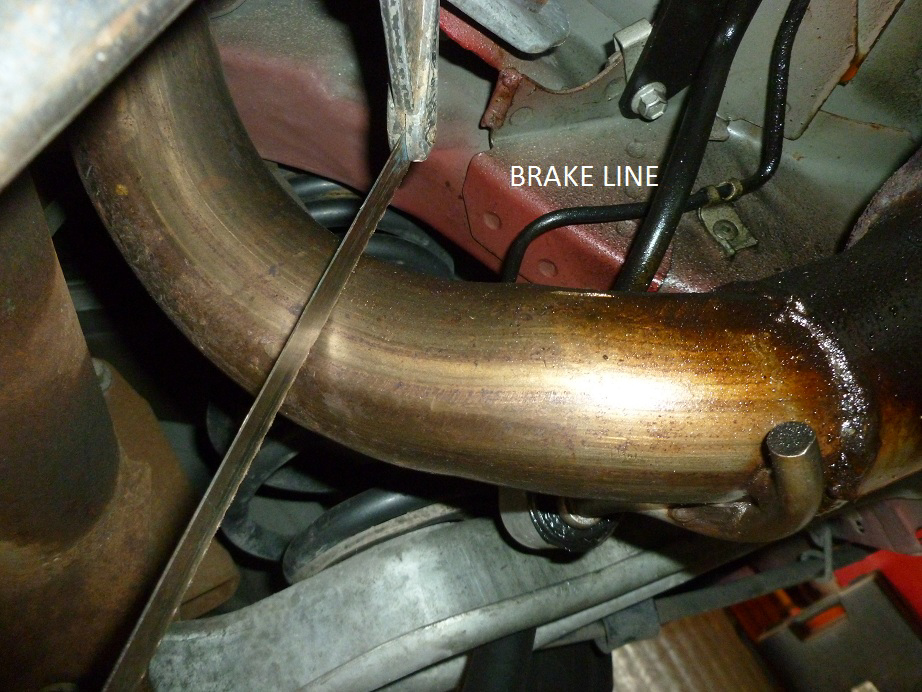
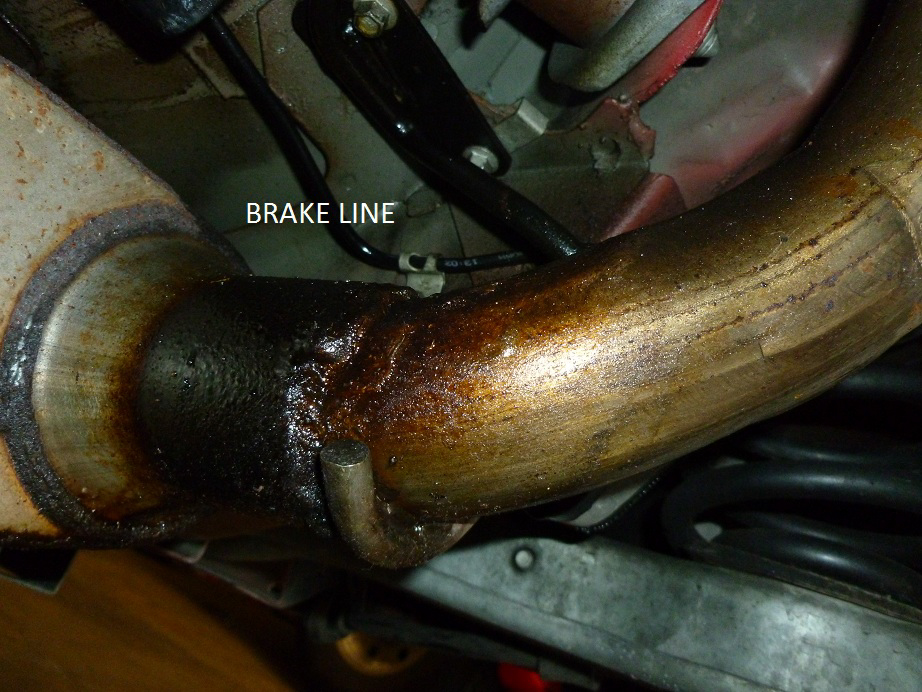
3. At this point you have two options undo the bolts holding the mid pipe to the catback or cutting the catback just behind the mufflers. After trial and error I found dropping the catback from the mid pipe made cutting easier. ( I used a hacksaw) BE EXTREMELY CAREFUL WHEN CUTTING WITH A POWER TOOL OR EVEN THE HACKSAW THE BRAKE LINES ARE JUST ABOVE THE EXHAUST.
4. To unbolt the mid pipes use the 14mm wrench or socket if you like, be careful not to let them fall on your head leg etc.
5. Using the hacksaw or reciprocating saw cut the catback system about 2 to 4 inches behind the muffler casing.
6. Pull the exhaust off of its hangers, this can take some effort but they will come out it is just a matter of muscling them out. Again be careful not to drop the exhaust on your body it is not too heavy but still hurts if it lands on your fingers or head.
7. Pull the system out from under the car. On the rear pipes you will have to slide the pipes forward to release the hanger at the exhaust tip. Again be careful not to drop it on yourself. If you have the suspension all the way released downward this should be simple, if the suspension is flexed up this will be much harder.
Installing the new Catback system:
8. Lay the new system out next to the old system and make sure you have the new parts in the correct order.
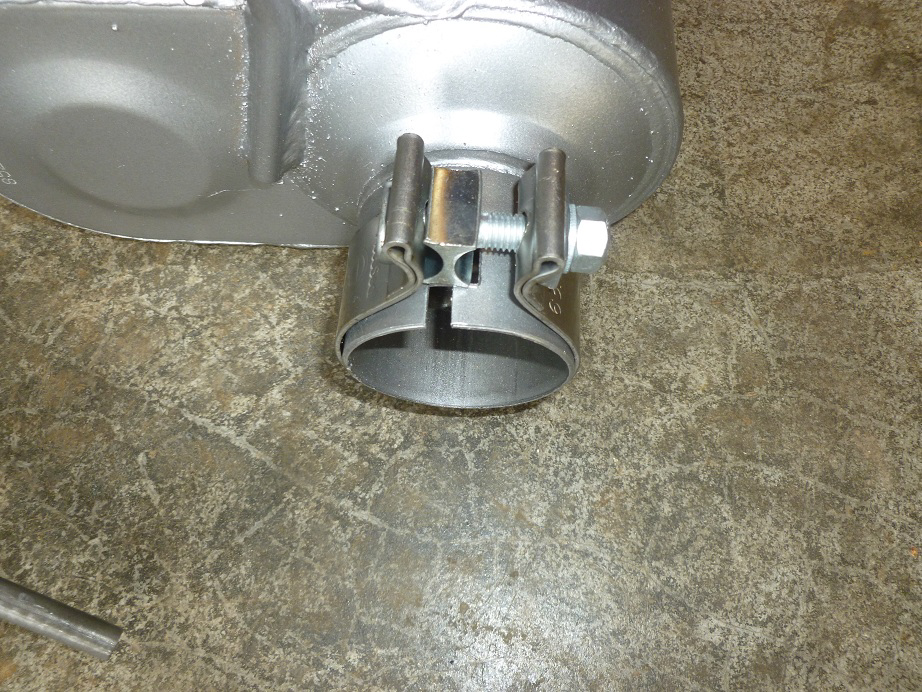
9. Apply anti seize to the threads on the clamps you are installing. Slide the clamps over the stubby exhaust ends at the back of the muffler cases.
10. Slide the tailpipe assembly for the left (or right) side up into the car. Slide the exhaust tip hanger into its slot and attach the hanger to the front portion of the pipe. Do this for each side.
11. Take the left (or right) muffler assembly and slide the exhaust hanger over the steel tip. Slide the tailpipe section into the stubby end of the muffler assembly.
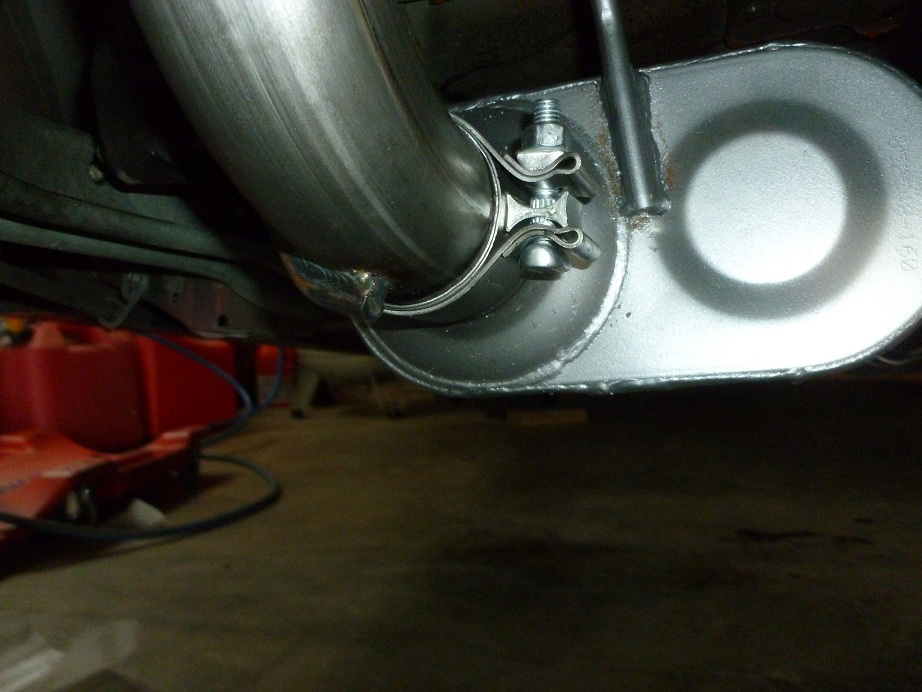
12. Attach the two studs through the flange where the mid pipe and muffler assembly meet. Leave these a little loose so that adjustments can be made.
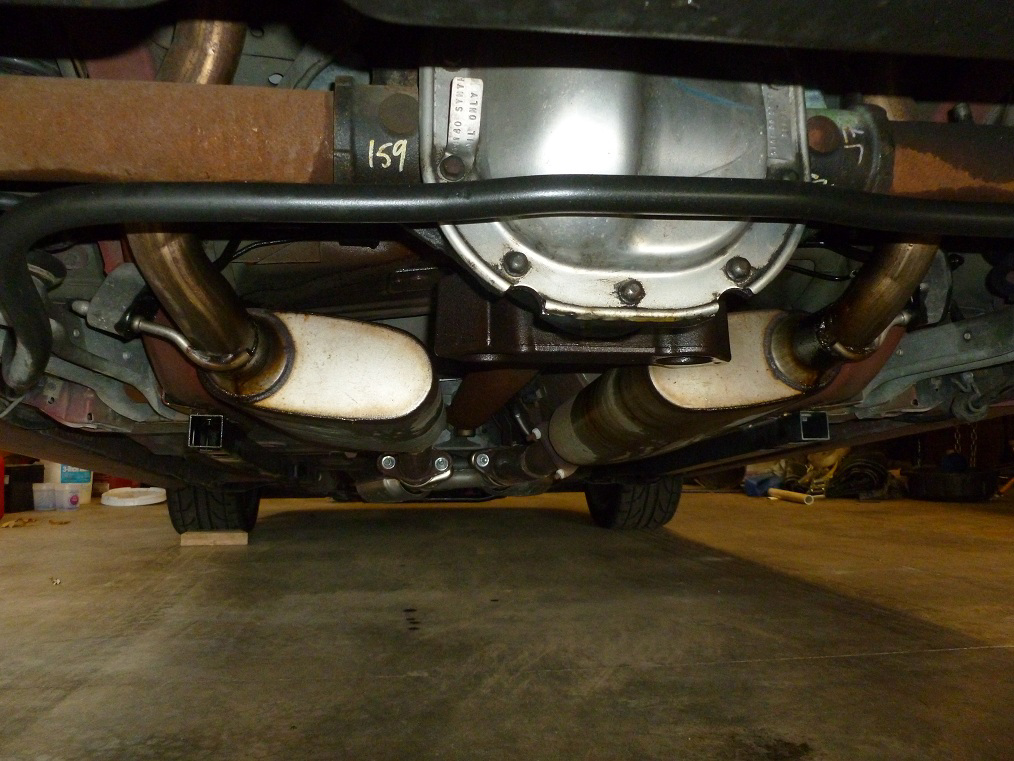
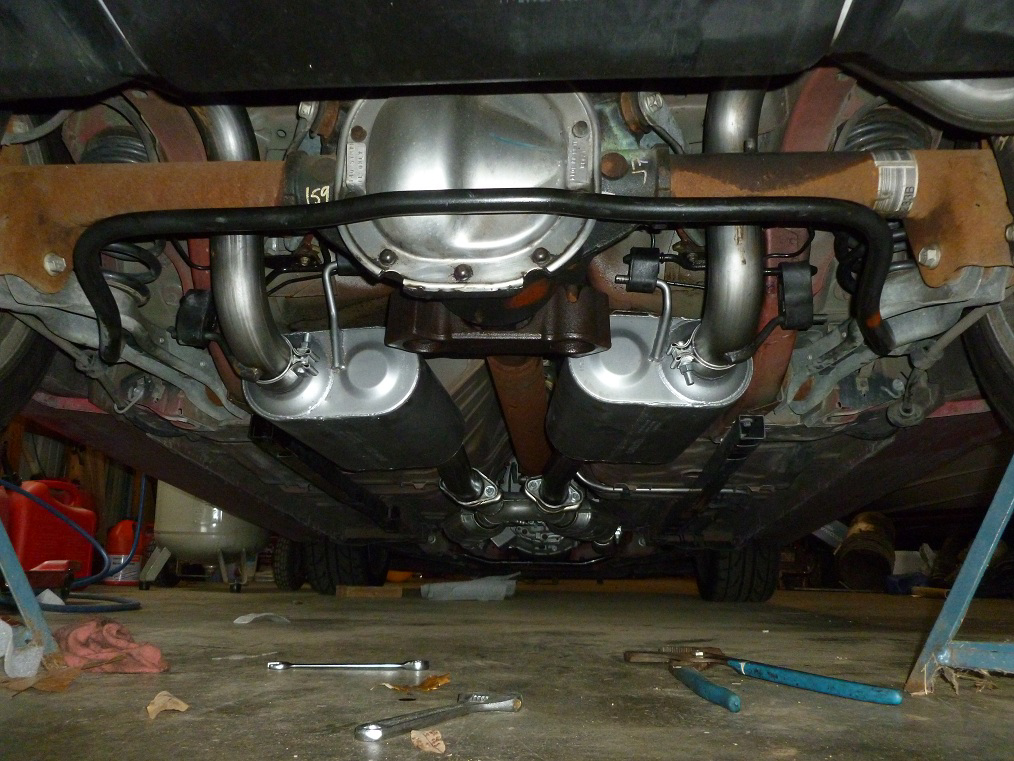
13. Begin to adjust the system so that the mufflers and pipes do not touch the car anywhere and so there is a good amount of clearance between the axle and upper control arms. At this point, to be sure of clearances I jacked the suspension up and placed jack stands under the axle. You may have to tighten the clamps at the back of the mufflers so that your adjustments stay where you want them. Also remember pushing the hangers left of right can make a difference on rotation angle for the whole system.
Side note: For whatever reason the passenger side on my car was much harder to adjust. It took much more effort and the hangers were more stressed.
14. After the system is where you want it tighten all the bolts starting at the mid pipe and work your way back. 14mm for the mid pipe. 15mm for the exhaust clamps behind mufflers. Use the hanger keepers to keep the system from falling off. They are the little round washer looking things they slide on with a good tap.
15. Start the car and check for leaks.
16. Lower the car back down and check clearances again.
Trouble Spots:
Exhaust hangs too low. You need to jack up the mid pipe higher before tightening it all up.
Mufflers tilted out of whack / exhaust tips hitting bumper. You didn’t make sure they were on properly aligned before tightening, slowly loosen the nuts at the union until you can move the mufflers, align properly, and tighten everything back up.
Hear a banging noise when you are driving over bumps. Most likely not enough clearance between the axle and the exhaust pipes. Could also be that the mufflers are too close to sub frame and are hitting. Readjust and make sure everything is tight.
Installation Instructions provided by AmericanMuscle Customer Jacob Meuth 11.9.2012

