 FREE 1 to 3-Day Delivery on Orders $149+ Details
How to Install Ford Performance Boss 302 Torsen Differential - 31 Spline 8.8 in. on your Mustang
Installation Time
4 hours
Tools Required
- Jack
- Two Jack Stands
- Conventional Socket Set
- Liquid Collection pan
- Rear axle lubricant and friction modifier
- Rags for wiping up spills
1. Jack car up
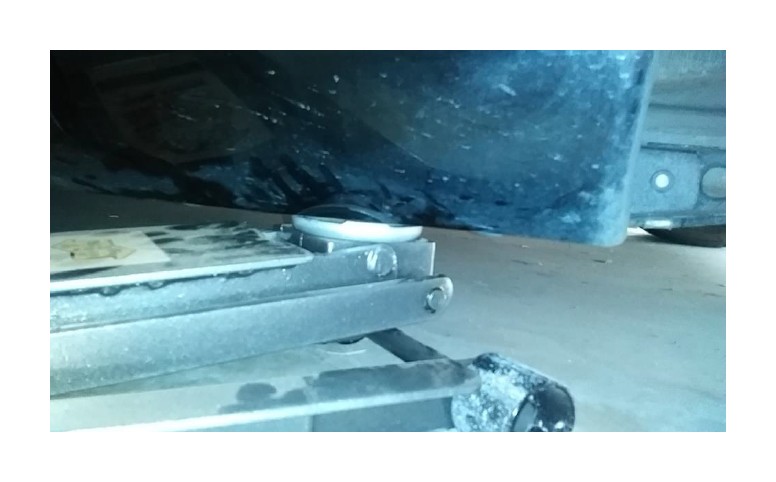
Loosen wheel lugs first. Don’t take them completely off, just loosen. I do this before jacking the car up because it’s hard to generate enough torque to remove the lugs if the wheel can rotate freely. Jacking point for the rear of the car is located just forward of the rear wheels. It is a recess within the panel just below the door. Be sure the front wheels are braced with something to prevent the vehicle from rolling forward once you start jacking. It’s a good idea to start jacking slowly so you ensure that you have the jack contact patch situated correctly in the jacking point recess. If you accidently put the jack contact patch in slightly wrong, you can deform a portion of your body panel.
2. Emplace jack stands
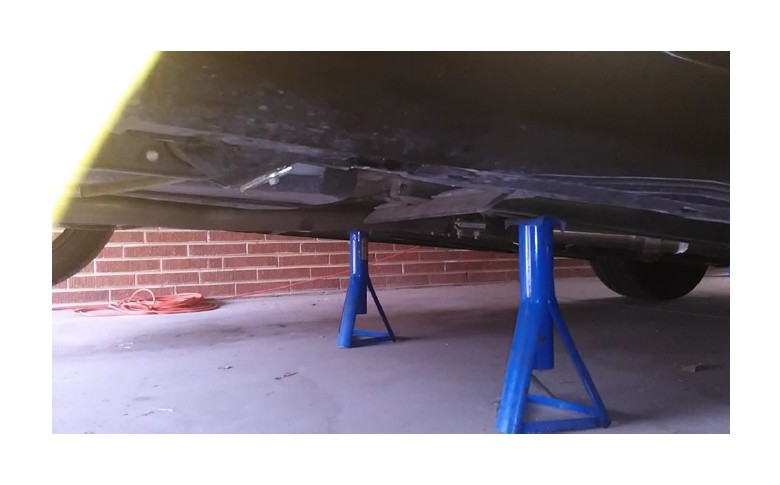
Emplace jack stands on a portion of the frame. I emplaced mine a couple feet forward of the jacking point. Once the vehicle is on the jack stands, remove the wheel lugs and both rear wheels.
3. Remove rear rotors
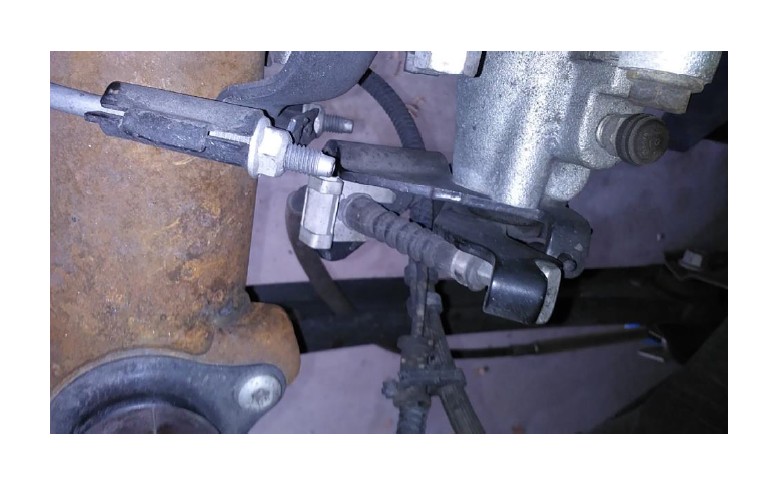
Prior to removing the rear brakes, please disconnect the emergency brake (pictured above) and ABS sensor. The e-brake is attached to a lever connected to the caliber. The ABS sensor is connected into the wheel hub. It simply pulls out. After disconnecting these items, remove the bolts the hold the calibers in place. You’ll want to suspend the calibers with something like a wire coat hanger from the wheel well. This will prevent the brake lines from damaging. (Note: Following the principle of “since I’m here anyway,” I replaced my rear brakes with larger rotors when I replaced the differential. This is a good idea because larger rotors usually require a replacement of the wheel hubs, which require you to open the differential housing to remove the axle half shafts. So, unless you want to do the same things twice or don’t care about improved braking, I’d do a rear rotor upgrade at the same time as a rear differential swap. If you replacing the rotors and calipers, you don’t need to suspend the calipers, just take them off. Be sure to wipe any brake fluid off the car that is comes into contact with. Brake fluid is really caustic and can take off your paint.) Once the caliber is out of the way, you can remove the rotor. The rotor is secured with the caliber and wheel lugs, so once their off, the rotor just pulls right off. Below is a picture of the caliber/rotors prior to removal.
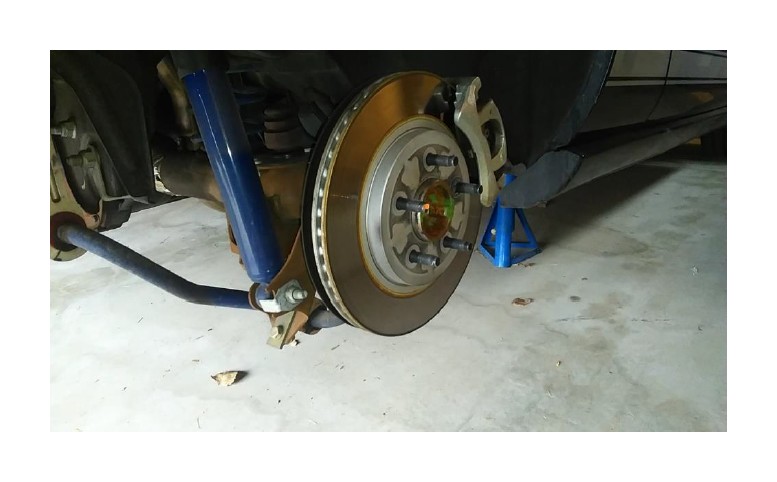
4. Remove the differential housing cover
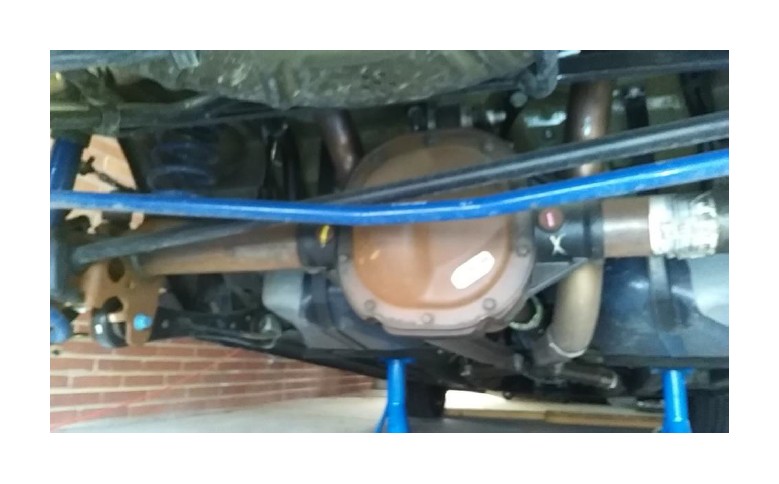
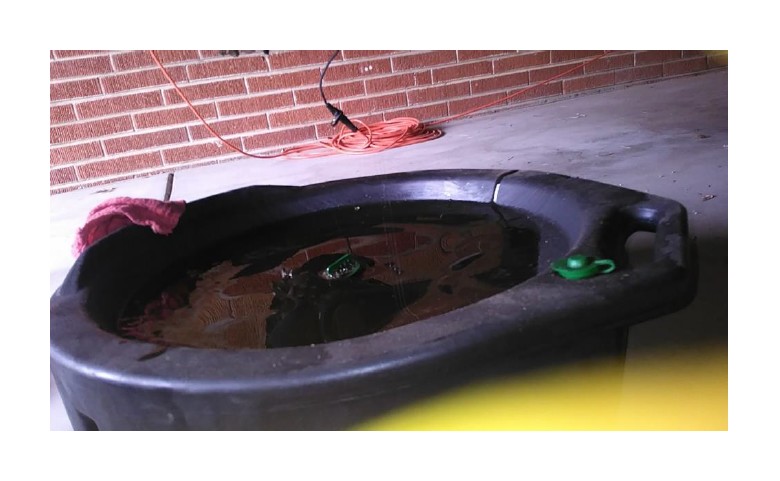
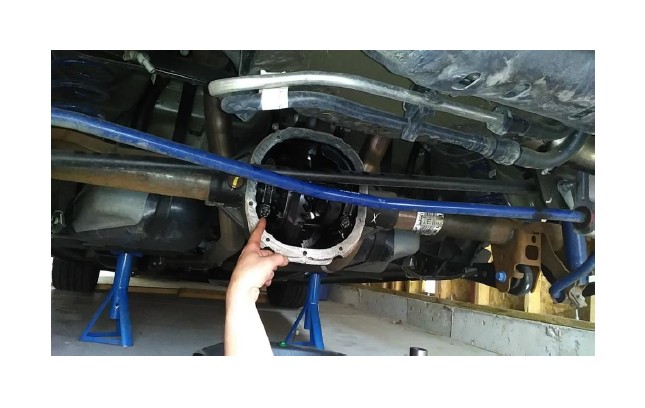
You’ll notice from the picture above that the panhard bar (black bar) is in the way. You’ll want to either remove it or take the bolts out of one side so you can move it out of the way when you want to remove the old diff. The bolts are located at the ends of each side. Once the panhard bar is out of the way, you can remove the differential housing bolts. You can see them in the above picture. Be sure to have your oil collecting device situated below the differential housing prior to removing the bolts because the differential oil will start to gush out of the housing once you remove the cover. The container I used is pictured below.
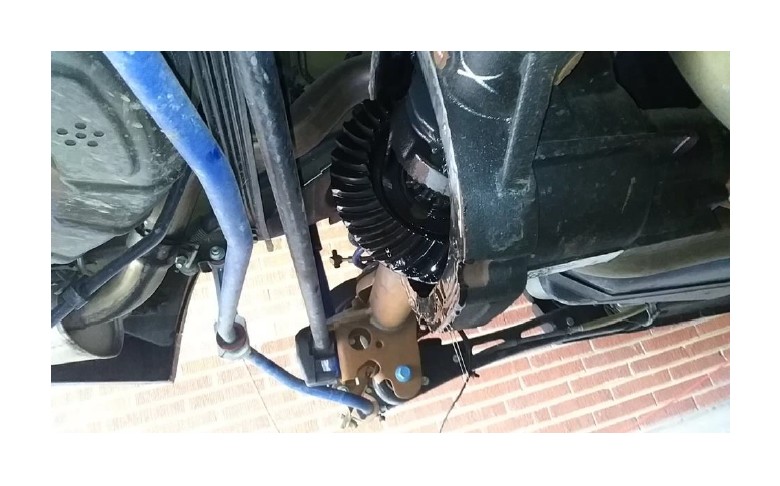
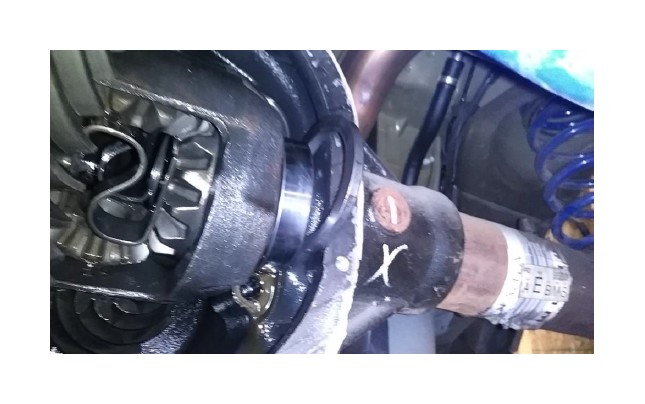
Once the bolts are removed, you can take the housing cover off with a flathead screwdriver. You’ll need to use a screwdriver because the housing cover has a sealant that traces around the circumference of its contact edge with the housing. Below is a picture of the diff with its cover removed.
5. Remove the axle half shafts
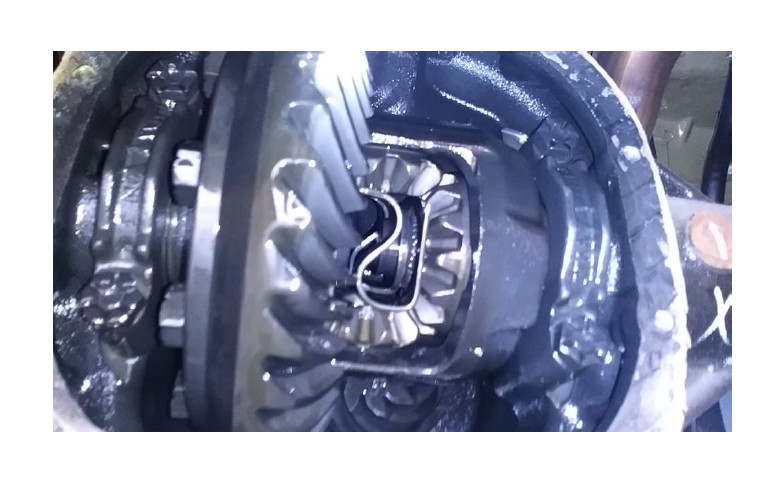
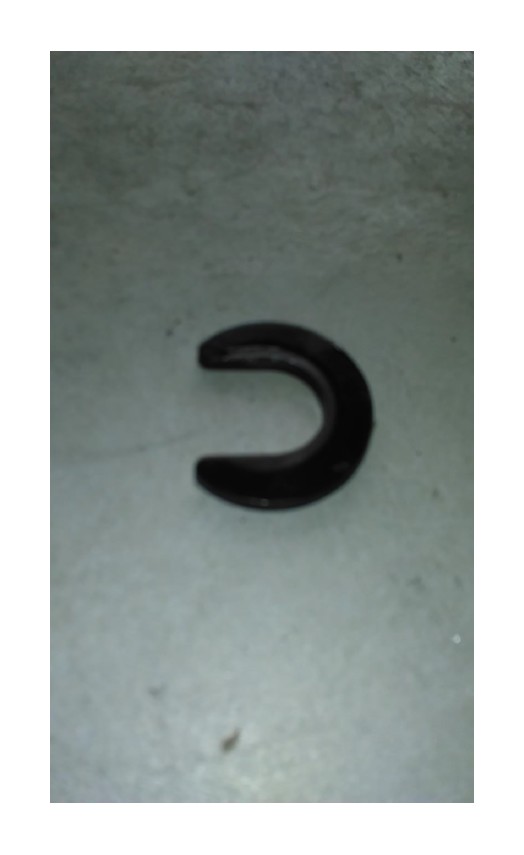
The half shafts are held in place with C clips, which are emplaced inside the differential itself. To get at them, you’ll need to remove the S clips that are on each side of the stock differential. See picture of S clip below
I used needle nose pliers to pull out the S clips. Once they are away, you’ll have to push in each half shaft from the hub toward the diff to access the C clips. The C clips are tucked within a tiny recess before you push the half shafts in. Remove the C clips with needle nose pliers. You’ll need to save them because you’ll use them to reinstall the new diff. On the stock diff, the C clips, like the S clips, are on opposite sides. You’ll have to rotate the axle by hand to access both sides. Once the C clips are removed, pull out each half shaft. C clip is pictured below
6. Remove the old stock differential
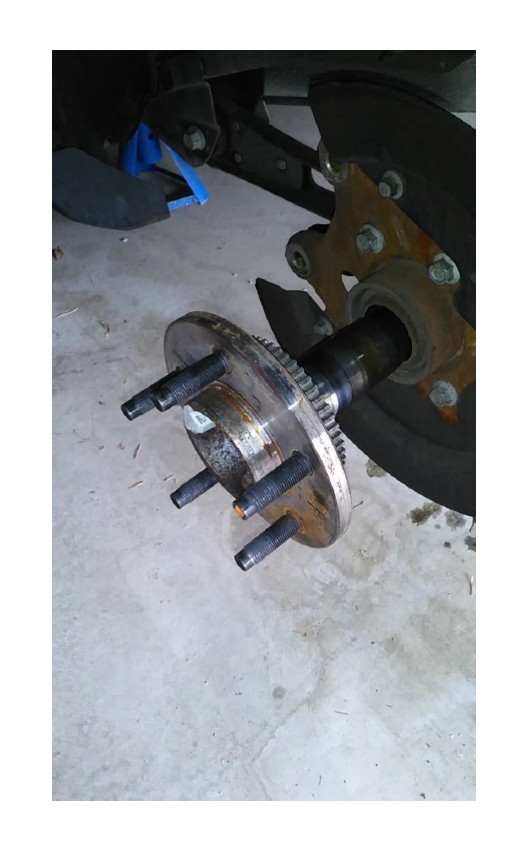
The differential is held in place with two braces located at opposite ends of the diff. Each brace is held in place with two bolts. Remove these 4 bolts and the braces. I’m pointing at one of the bolts
Once you remove the diff braces you can pull the differential out. Be careful. The diff is heavy, slippery, awkward, and the ring around the diff is sharp. There are two shims on each end of the diff. They come off, when you take the diff out. You’ll want to reuse those during install. There are also two rings around the ball bearings on the diff. These will come off as well and you’ll want to reuse them. I believe these are call, “bearing race rings.” You’ll want to take a mental note of how the bearing cups and shims are situated when the differential is installed. Forgetting to install the bearing cups or shims will be bad. Picture of displaced shim is below:
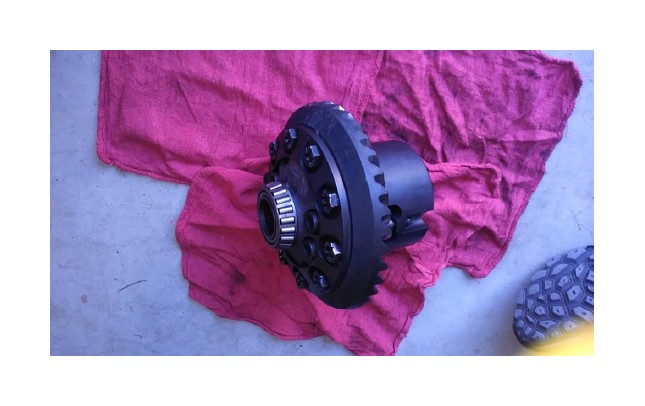
Note the ring gear that surrounds the diff and the ball bearings on each end. I took the diff as shown to an auto machine shop to transfer both these items to the new diff. Be careful not to damage the bearing during transport. A picture of the differential after ring gear and bearing transplant is below.
7. Install new differential.
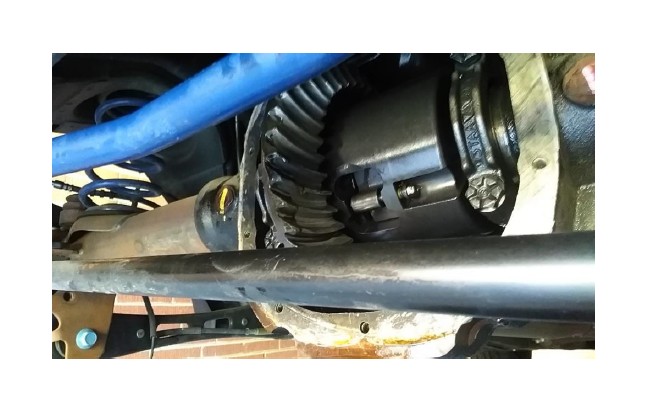
Install new differential ensuring that ring gear meshes with drive train pinion and that differential shims are also emplaced on each end of differential. Also be sure that you’ve placed the Differential Bearing Cup on top of the ball bearings. Once this is completed, reinstall the two differential braces. Each of the differential brace bolts should be torqued to 83 lb-ft (note: the service manual calls these braces: Differential Bearing Caps.) Installed Torsen Diff if pictured below:
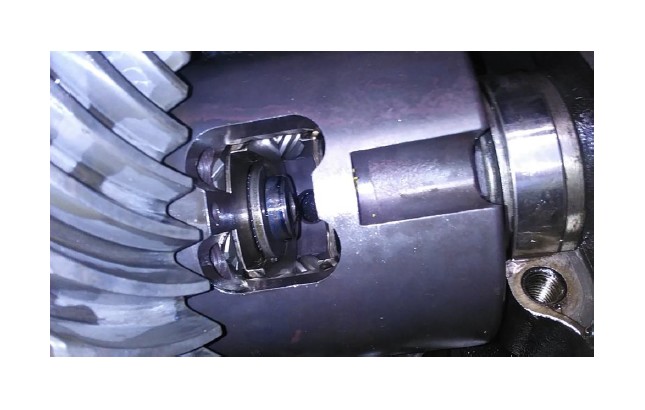
Once new diff is emplaced, remove Differential Thrust Plate by unscrewing Thrust Plate screw. Differential Thrust Plate should pull out easily, once screw is removed. If Thrust Plate is inaccessible, you may have to rotate diff in housing using half shafts until the Thrust Plate is accessible. Note: the Thrust Plate is the C clip looking thing that gives access to the interior of the differential. Once the Thrust Plate is removed, push half shafts all the way in so you can emplace half shaft C clip. Once C clip is in place, pull outward on each half shaft so C clip can nestle into its recess. Pictured below is emplaced C clip prior to moving into its recess:
Once the C clips are in their recess, reinstall the diff Thrust Plate along with its bolt. The Thrust Plate bolt should be torqued to 26 lb-ft.
8. Install differential housing cover.
Ensure that the contact portions of the housing cover and the housing differential themselves are free of debris or anything that will interfere with the silicone differential sealant’s bonding. I used an engine cleaner solvent to assist in cleaning the contact portions. Once it’s clean, apply a bead around the entire circumference of the differential housing cover. The bead thickness should be specified on the differential housing sealant package. Once the silicone is applied, you have 15 minutes to install the cover. Install the cover, with the following torque: steel housing: 34 lb ft/aluminum: 24 lb ft. Typical curing period for the silicone sealant is 1 hour. I waited overnight.
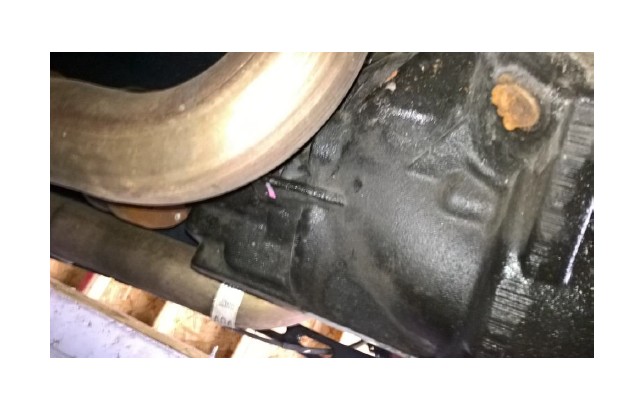
Once differential housing cover is installed, remove the axle plug. The axle plug is on the forward side of the differential housing. On my car, it was tucked inconveniently close to the left exhaust. You’re supposed to use a ratchet without the lug installed. The plug doesn’t have a conventional nut head, but the ratchet actually inserts into the plug. A picture of me ratcheting the plug is below:
Once the plug is removed, install the appropriate weigh axle lubricant and friction modifier. I used 75W axle oil with the friction modifier already pre-mixed. The actual oil you’ll use will vary by climate. I used 4 pts. Once you’ve replaced the lubricant, tighten the plug to 22 lb ft. If you removed the panhard bar, reinstall it. The bolts should be tightened to 129 lb ft.
9. Reinstall rear rotors and calibers.
Reinstall ABS sensors and emergency brake. The ABS sensor bolt should be torqued to 133 lb in. The e-brake just clips onto its lever attached to the caliber (see picture from step: 3). It would be a good idea to use anti seize on the contact portions between the rotor and the wheel hub. Place the rotor on the wheel hub and install the caliber on the rotor and secure in place with the 2 caliber anchor bolts. The bolts should be torqued to 76 lb ft. You can now reinstall the wheels and lower the car. Once the car is lowered on it wheels, torque the wheels to 100 lb ft.
