FREE 1 to 3-Day Delivery on Orders $149+ Details
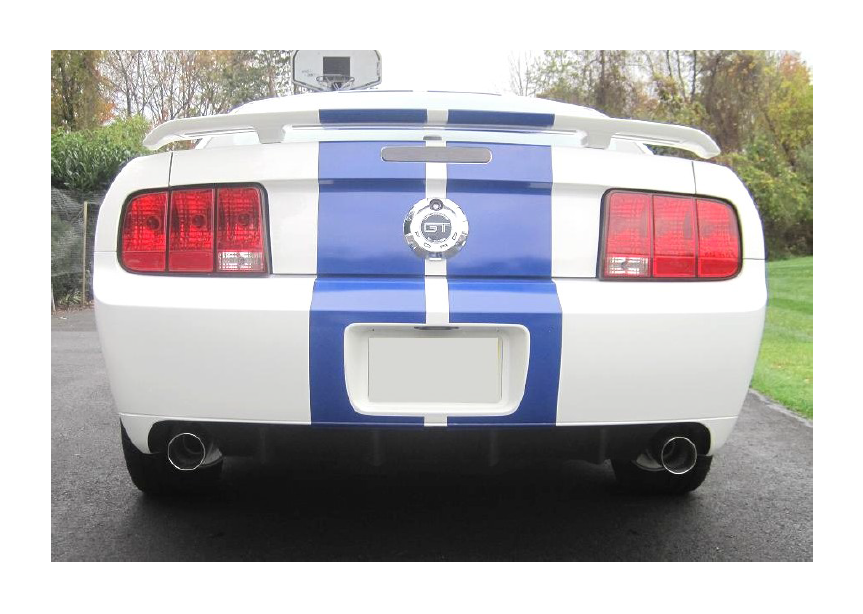
How to Install a Ford Racing FR500S Axle-Back Exhaust on Your 2005-2009 Mustang GT and GT500
Installation Time
2 hours
Tools Required
- 13mm deep and regular sockets
- 15mm deep socket
- 1/4” or 3/8” Drive Ratchet
- Ratchet - 2” extension
- Rubber mallet
- 13mm open end/ratcheting wrench
- (2) car ramps or jacks stands
- Jack
- (2) wheel chocks
- Flashlight
Please read through the instructions carefully before starting on this project. Take the time to get all materials together as well as the safety equipment. Installation was performed on a 2009 Mustang GT/CS in this guide.
Installation:
1. Raise the car to gain access to the hanger bolts to swap out the axle-back exhaust. I preferred to use a set of ramps, but you could also use a jack and jack stands to gain access as well. Once up on the ramp or jack stands, put the car in gear, apply the emergency brake and place wheel chocks in front of the front tires.

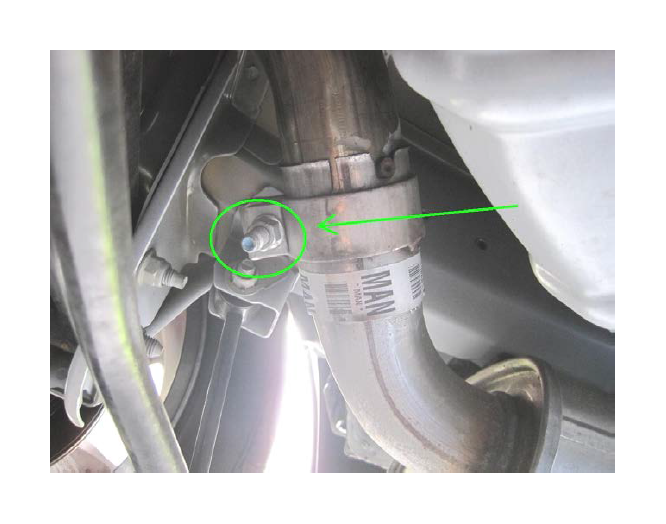
2. Loosen the nut on the clamp between the muffler and the mid-exhaust pipe using the ratchet and 15mm deep socket. Depending on the condition of your exhaust, you may need to use a breaker bar (instead of the ratchet) and some penetrating oil on the nut to loosen it up. Make sure that you have loosened the clamp enough to allow for the separation/removal of the muffler pipe from the mid-pipe.
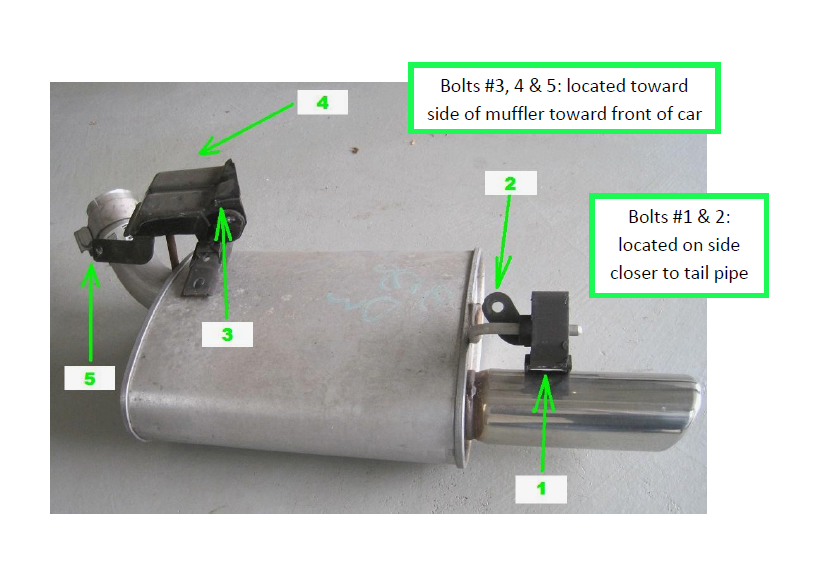
3. Next, you need to remove the bolts that are currently holding the (2) muffler hangers to the under body of the car. NOTE: Work back to front when dissembling and front to back when reassembling. This will make it easier to remove the muffler and get the new axle-back installed centered in the exhaust cutout on the bumper.
Driver side replacement: There are (5) bolts total: (2) toward the side of the muffler near the tail pipe and (3) bolts on the side of the muffler toward the front of the car. The ratchet, extension and 13mm sockets will help to remove the bolts near the tail pipe and the 13mm open ended/ratcheting wrench will help to remove the bolts toward the front of the car. Start with bolts #1 and #2 and then move on to bolts #3, #4 and #5. Before removing the last bolt, support the muffler so that it does not accidently drop to the ground or bend the exhaust pipe.
4. Now, you need to separate the muffler from the mid-pipe. You may be able to twist the muffler slightly to break it free from the mid-pipe and then remove it. Depending on the condition of your exhaust, you may need to use a rubber mallet to lightly tap the pipes to break them free from one another. Remove the muffler from under the car and set aside, being careful not to let the (2) rubber hangers slide off.
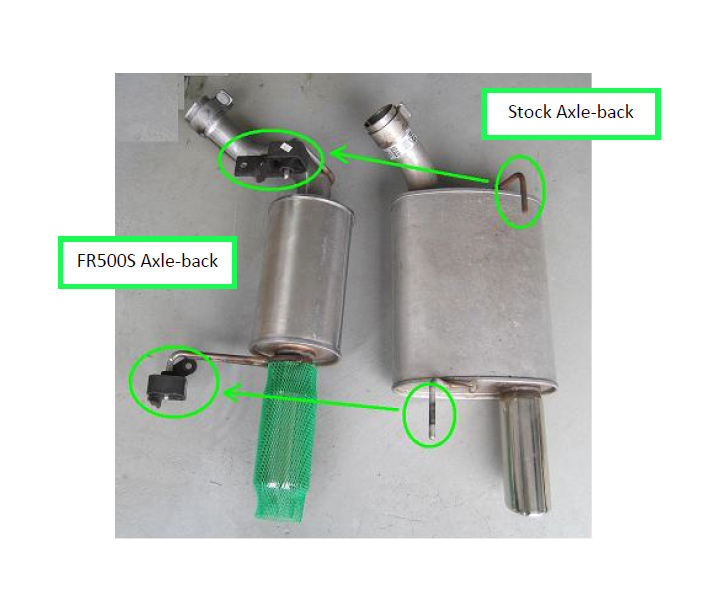
5. Set the old muffler next to the new FR500S axle-back. Line them up in the same position and transfer the (2) rubber hangers from the old muffler to the same locations on the new axle-back. Ensure that the clamp on the axle-back that connects to the mid-pipe is loose. Do not remove the protective netting from the exhaust tips on the new exhaust to help to prevent scratching prior to completing the install.
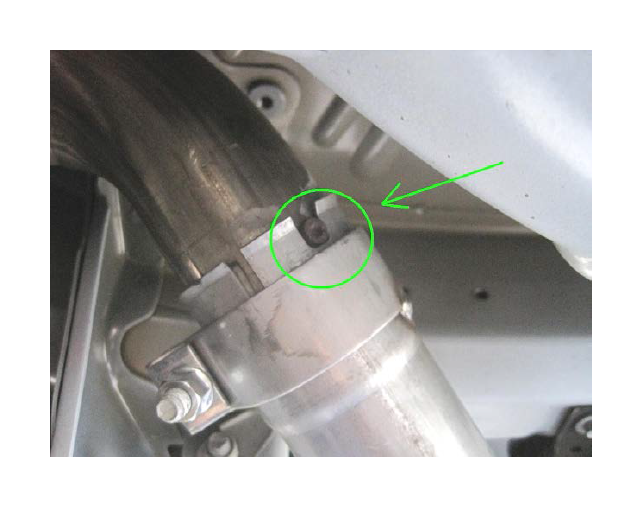
6. Next, insert the exhaust pipe end of your new exhaust into the mid-pipe. You may need a friend or a well-placed knee to keep the axle-back up in position until you have the chance to bolt it in. It may take a little elbow grease to get it fully into the mid-pipe. There is a set screw that you can use as a reference point to ensure proper positioning.
7. While holding the axle-back in the right position, adjust the rubber hangers. Do so by sliding them back and forth on the hanger support until the bracket lines up correctly with the holes. Insert the (3) bolts into the muffler hanger toward the front of the car (#3, #4 and #5) and tighten until they are almost snug. Do not fully tighten at this time. Next, insert bolts #1 and #2 near the tail pipe, also to an almost snug position.
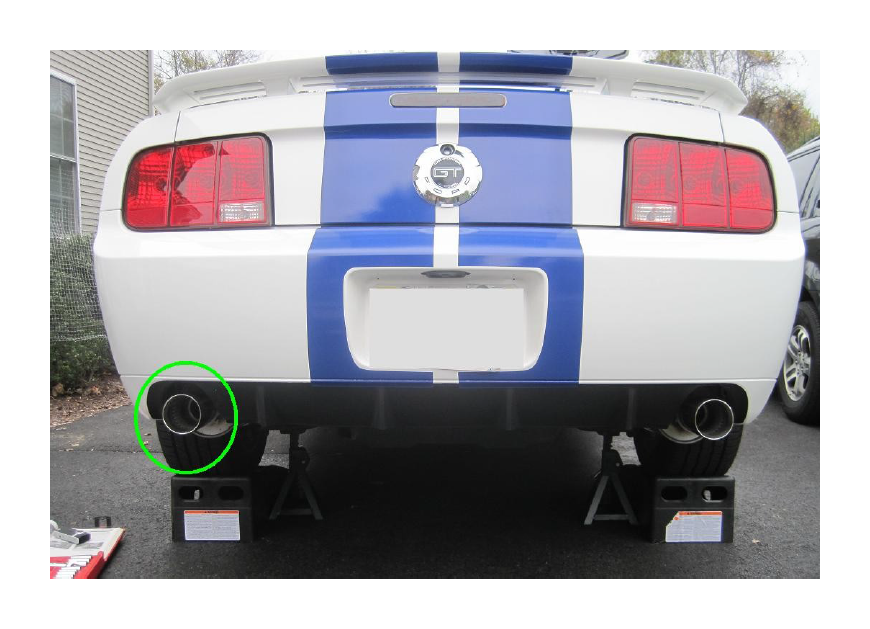
8. Now check that the tail pipe tips are centered in the cutout on the rear bumper. You may need to do some fine adjustment of the rubber hangers and loosening/tightening of the hanger bolts to get everything lined up nicely. Once satisfied, make sure to tighten all (5) of the hanger bolts and don’t forget to tighten the bolt for the clamp connecting the axle-back muffler to the mid-pipe exhaust.
9. Passenger side replacement: The disassembly and assembly is almost the same as it was for the driver side, except there are only (4) bolts to remove: (2) toward the side of the muffler near the tail pipe and (2) bolts on the side of the muffler toward the front of the car. Follow the driver side instructions for removal and installation of the new passenger side FR500S axle-back:
- Loosen the mid-pipe exhaust clamp
- Remove the muffler hanger bolts, back to front
- Remove existing muffler
- Swap the (2) rubber hangers
- Insert the exhaust pipe end into the mid-pipe
- Replace the bolts, front to back
- Check that the tail pipe tips are centered
- Tighten up all hanger bolts and mid-pipe exhaust clamp
10. Remove the protective netting from the exhaust pipe tips.
11. Raise the car and remove the jack stands (if applicable) or drive slowly down the ramps. Remove the wheel chocks and you are now ready to go for a drive and enjoy the growl of your new axle-back exhaust system.