 FREE 1 to 3-Day Delivery on Orders $149+ Details
How to Install a Ford Racing Ford Racing 289/302 Head Bolt Kit in Your 1979-1995 5.0L Mustang
Installation Time
1 hours
Tools Required
- Torque Wrench (foot pounds)
- 1/2" Socket for Torque Wrench
- Extension bar if installing while engine is inside vehicle is handy
Approximate Installation Time: Less than one hour.
Parts required to accompany the installation of head bolts:
ARP thread sealant (Item # 18221 from American Muscle)
Assembly lube (Item # 18222 from American Muscle) comes with the Head bolt kit #50146. .
Tools Needed:
Torque wrench (foot pounds)
½ “ socket for torque wrench
Extension bar if installing while engine is inside vehicle is handy
Special Notes:
1) This guide is intended to show instructions on how to install the cylinder head bolts only. Please refer to American Muscle’s technical articles, a repair manual for your year vehicle, and installation guides for cylinder head and head gasket replacement if unsure. This guide was written while working on a 1995 Mustang GT 5.0, other year 289/302 engines have identical instructions for installation.
2) The Ford Racing 289/302 Head bolt kit is intended only for use on 289/302 displacement engines due to the fact that they have smaller 7/16” head bolts. Many aftermarket aluminum heads (Such as Ford Racing GT40X, Airflow Research etc.) Have larger ½” holes in the cylinder heads to accommodate being installed on 351 other engines that utilize ½” head bolts. The special step washers in this head bolt kit secure the cylinder head properly, failure to use them can and likely will result in gasket failure or engine damage.
What comes in the box:
10) Long cylinder head bolts
10) Short cylinder head bolts
20) Step washers
1) Package of ARP assembly lube
1) ARP decal
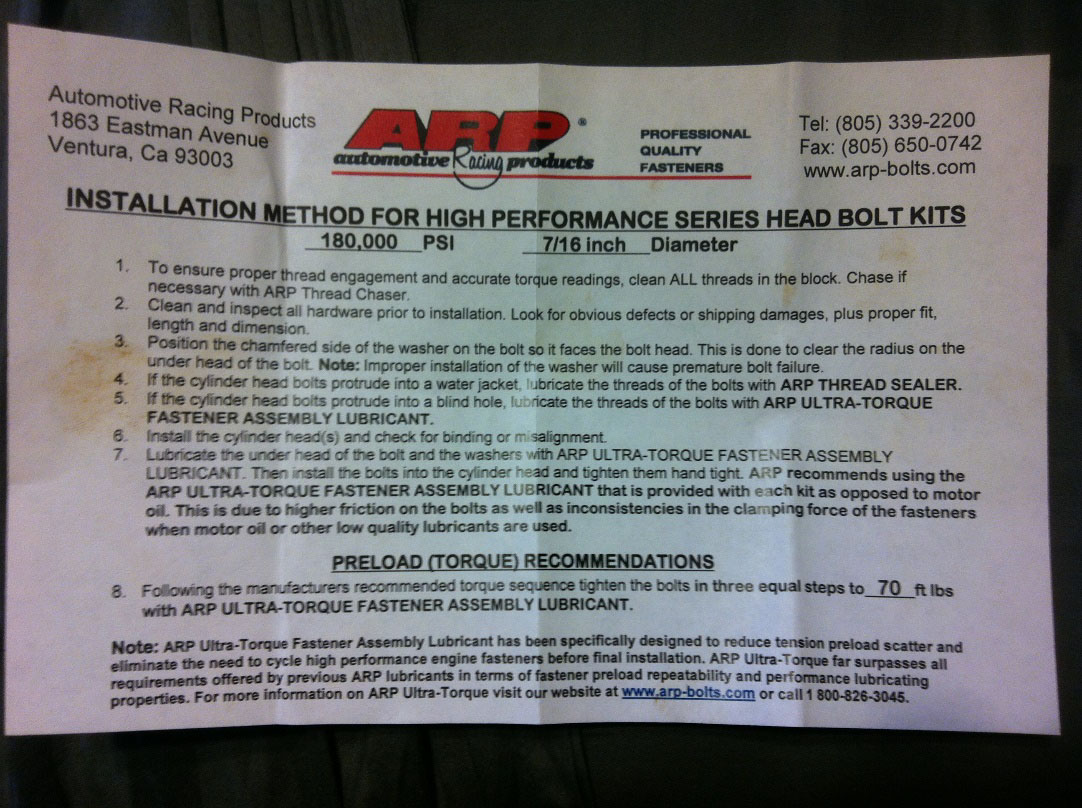
1) Manufacturer warranty and installation instructions

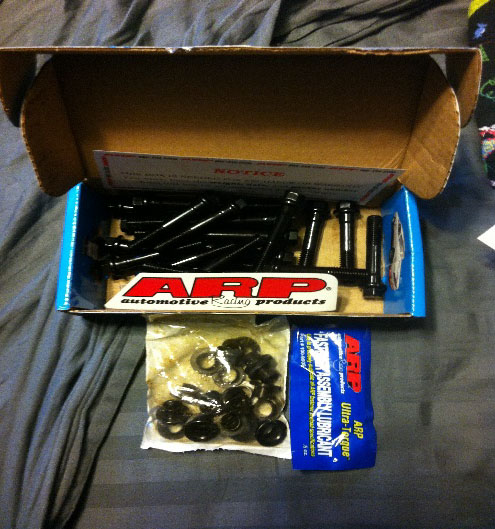
Ford Racing 289/302 Head Bolt Kit contents and instructions
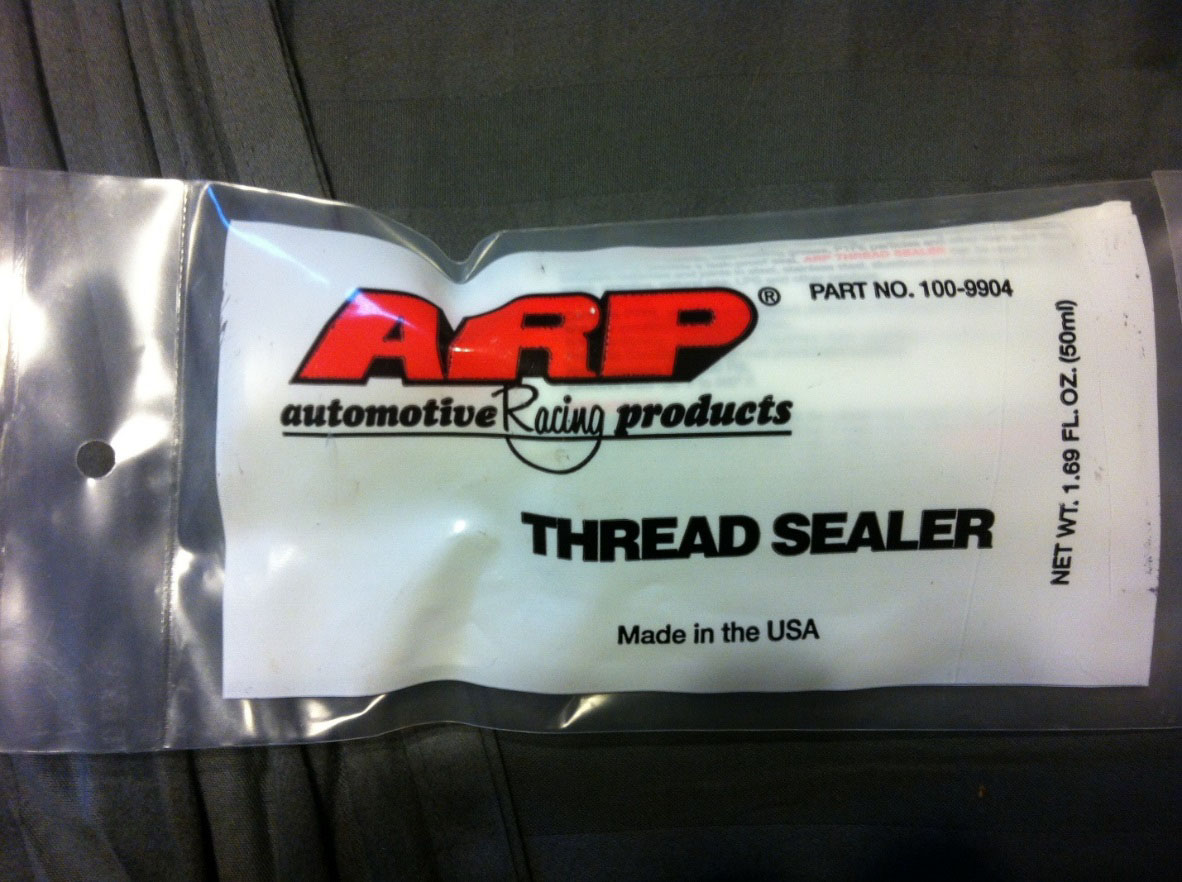
Don’t forget to pick up thread sealant to use on head bolts in water jackets. ARP thread sealant (Item # 18221)
1. Assuming your cylinder heads and head gaskets are in place, get your new head bolts and step washers, assembly lube, thread sealer and torque wrench and have them ready. Cylinder heads will be torqued in three stages, beginning with 35 foot lbs so put the torque wrench on that reading (if click style) in advance. (Photo 1a, 1b)
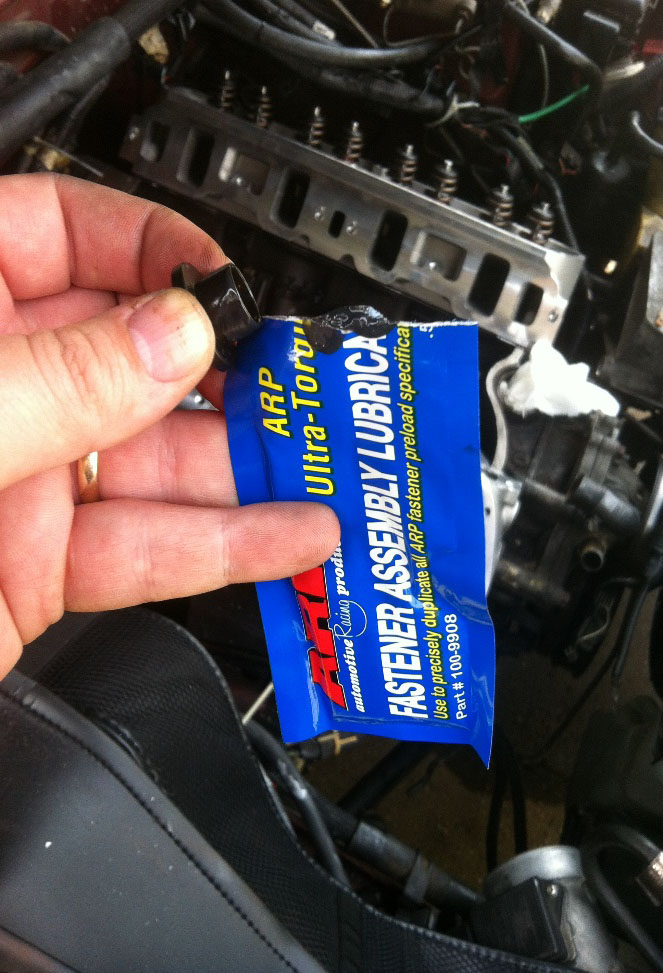
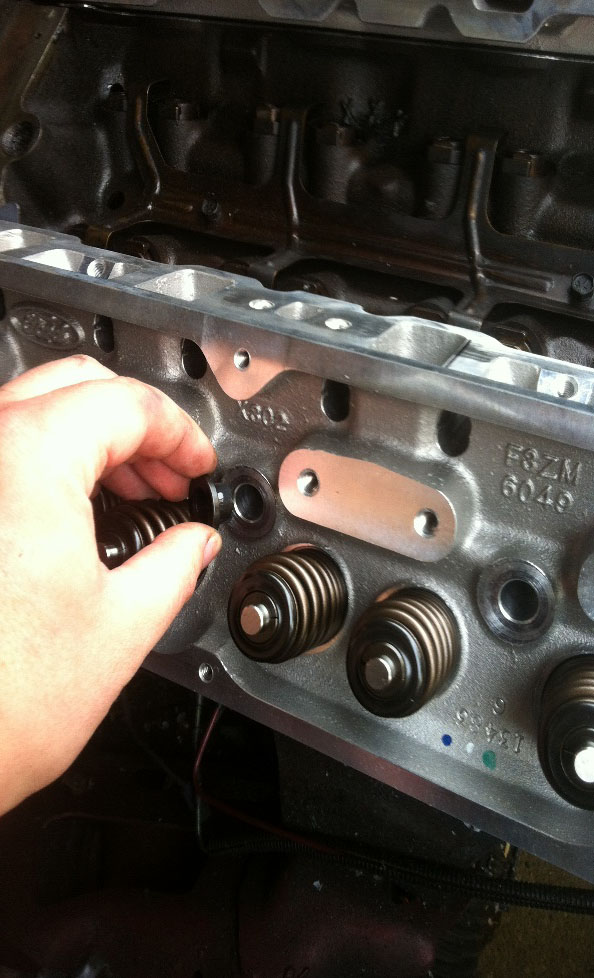
Step 1. Photo 1a: Applying assembly lube to step washer and mounting on cylinder heads.
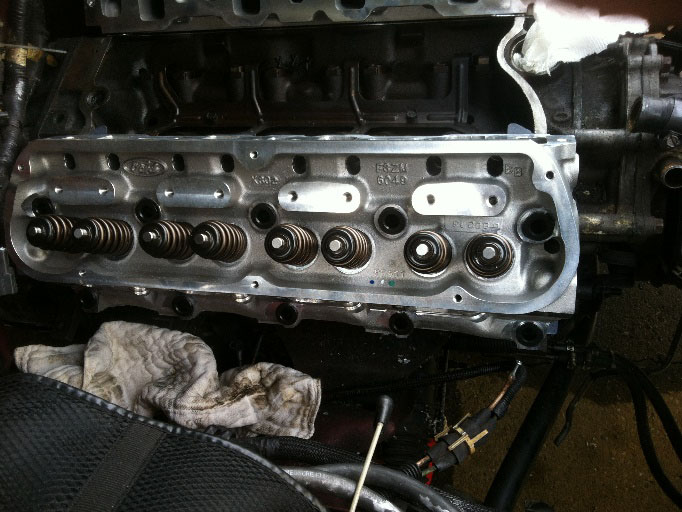
Photo 1b. View of all step washers in place on cylinder head.
2. Take each step washer and apply small dab of assembly lube to each and place in the cylinder head bolt holes flat and fully seated. Take your long head bolts and apply tiny dab of assembly lube to threads and underneath each bolt head and thread them by hand, no wrench. (Photo 2)
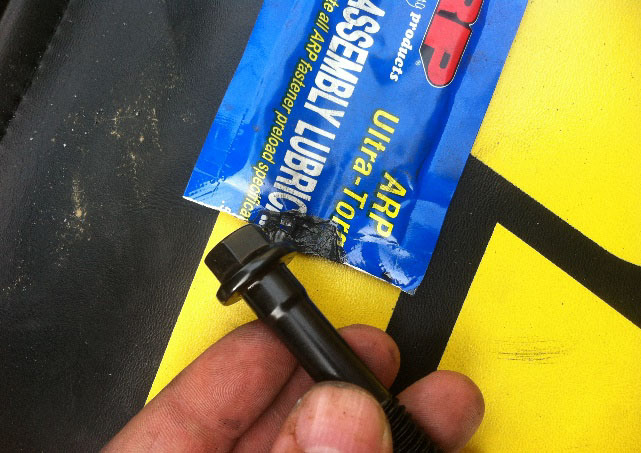
Photo 2: Preparing head bolts with assembly lube
3. For short bolts that enter water jackets, place dab of thread sealer onto each thread, approximately .25” up from end of bolt and only on threaded part. Apply assembly lube under head of each bolt and thread in by hand, no wrench. (Photo 3)
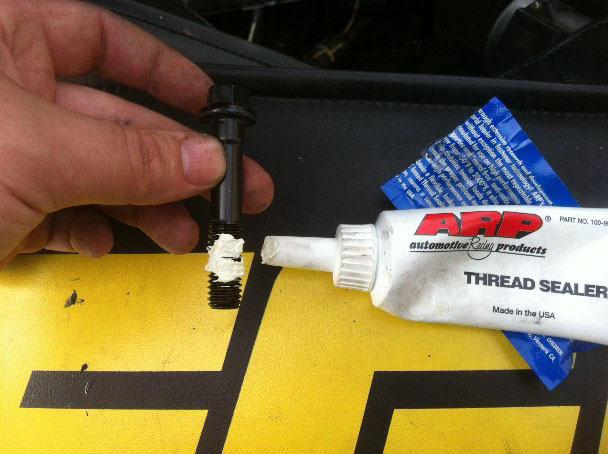
Photo 3. Applying thread sealer for the short bolts that will be in the water jackets.
4. Taking your torque wrench, torque all bolts in proper sequence shown below at 35 in foot lbs. Make sure every bolt has reached the first reading for each bolt before moving to next step. (Photo 4)
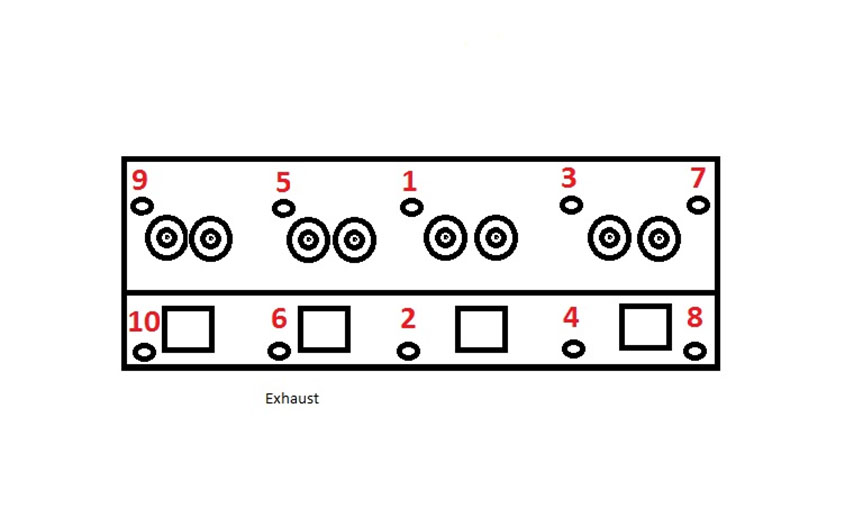
Photo 4: Proper cylinder head torque sequence. Three equal steps of 35 foot lbs, 50 foot lbs, then final 70 foot lbs.
5. Repeat step 4 for second torque sequence (50 Foot lbs) and the third torque sequence (70 Foot Lbs) sequence until you have reached the final torque reading for all bolts. Go back over again to ensure all 10 bolts achieve 70 foot lbs, if any one bolt does not reach proper torque reading, keep repeating the torque sequence until all 10 are exactly to specs.
6. Move on to next cylinder head and repeat bolt preparation steps 4-6. (Photo 4)
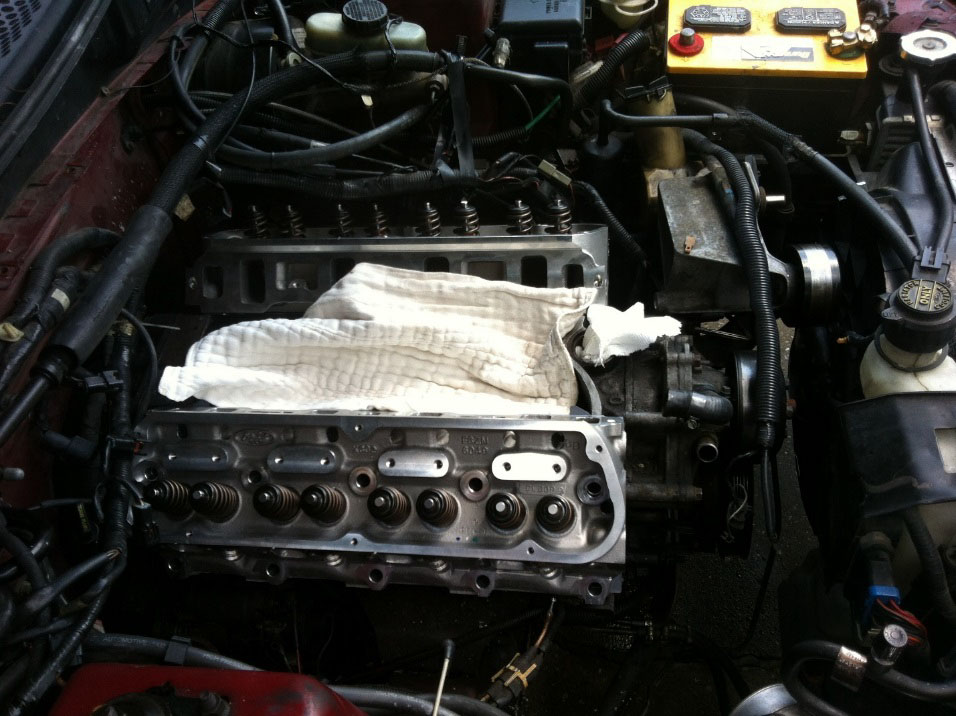
BEFORE
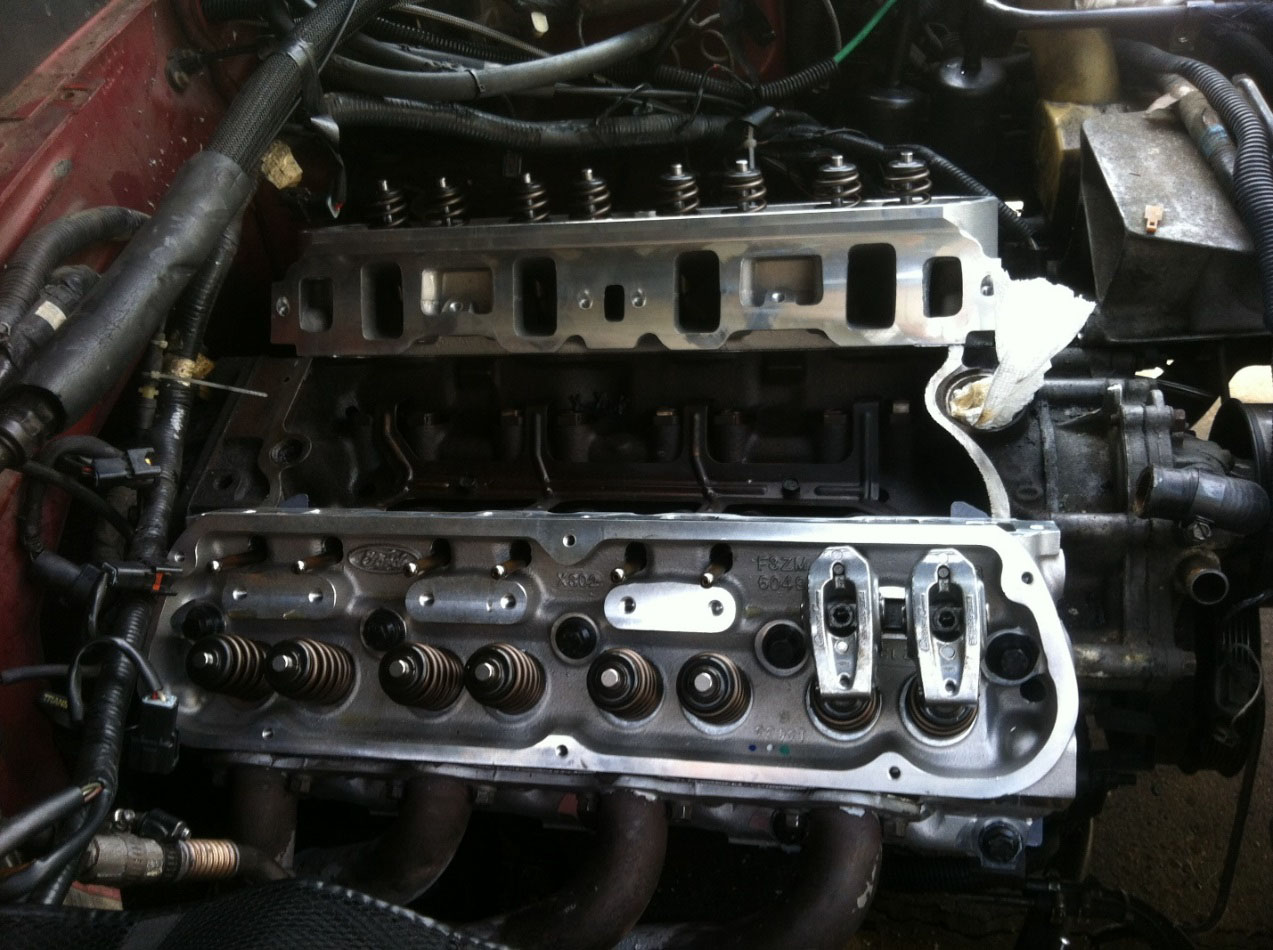
AFTER
Installation Instructions written by AmericanMuscle Customer Edward McSwain 9.15.2014

