 FREE 1 to 3-Day Delivery on Orders $149+ Details
How to Install Splash Guards w/ Pony Logo on Your 1994-2009 Mustang
Installation Time
30 minutes
Tools Required
- Automotive Jack
- Lug Nut Socket and Wrench/Ratchet
- Torque/Tension Wrench (For Replacing Lug Nuts as Recommended by Your Owner’s Manual)
- Screw Driver or Cordless Drill with Phillips Head
- 3mm Drill Bit
- 1 Clamp (2 if doing both sides at the same time)
- Masking Tape and a Pen or Marker

Shop Parts in this Guide
Installation
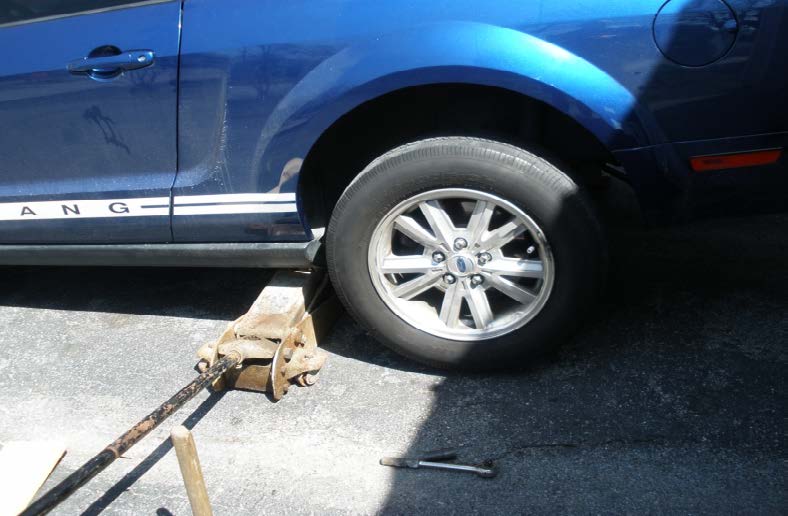
1. You are going to have to remove the rear tires in order to install these splash guards. Make sure the car is in park and break the lug nuts loose on your tires with your lug nut wrench/ratchet prior to jacking the car up.
2. Prior to jacking your car you should place some sort of objects or wedges in front and behind both of the front tires to prevent any rocking of the vehicle while it is jacked up.
3. Once you have broken the lug nuts loose slide your jack under the car at the appropriate place (varying on models). Raise the vehicle high enough so that the back tire is not touching the ground so you can slide it off after fully removing the lug nuts.
*If you do not want to leave the vehicle on the jack you can place jacks stands.
*Make sure to put the lug nuts somewhere that they will not get lost or kicked around.
4. Once the lug nuts are off remove the tire and set it aside. Removing the tire allows you to have room to maneuver in the wheel well.
5. Make the mud flap appropriate for the side of the vehicle that you are working on and place masking tape around the curved or “C” shaped part of the mud flap on the pony side of the mud flap. You will need to do this in order to easily mark the drill spots on the mud flaps.
6. Take a mud flap for the side of the car that you are working on and clamp it into place. There is enough space to get the clamp in behind the lip of the fender well. This will give you an idea of the position and look of the mud flap.
*Pop the tire back on and lightly tighten the lug nuts so you can accurately see how the mud flap will look with respect to the tire.
*Also note that you will be using the two screws in the rear fender well for this installation so adjust the height of your mud flap in regards to the top screw.
7. Once you are satisfied with the positioning of the mud flap carefully fold back top of the splash guard as to not push it out of alignment and mark where the screw well is on the masking tape so you know where to drill.
8. Once you have marked your drill point remove the clamp and the splash guard.
9. Using a cordless drill and a 3mm drill bit, drill through your splash guard at your marked spot.
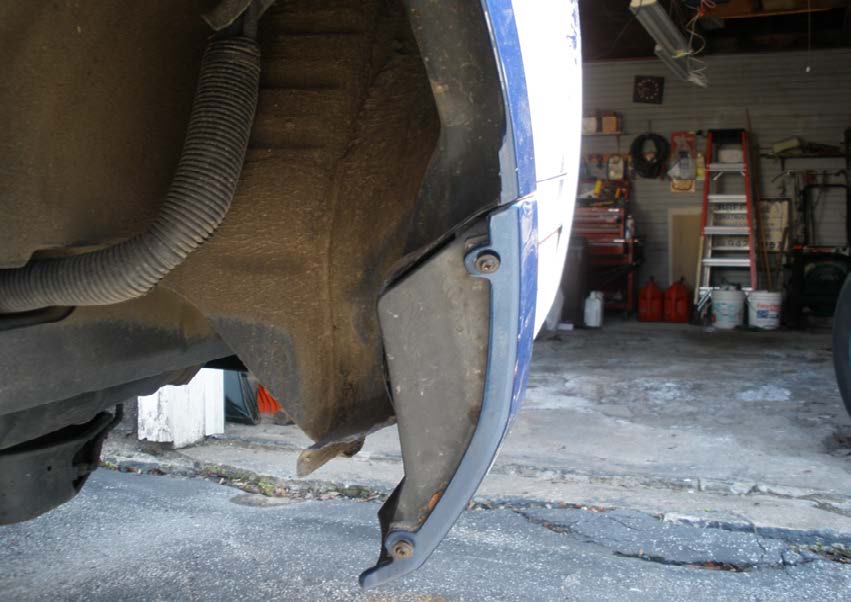
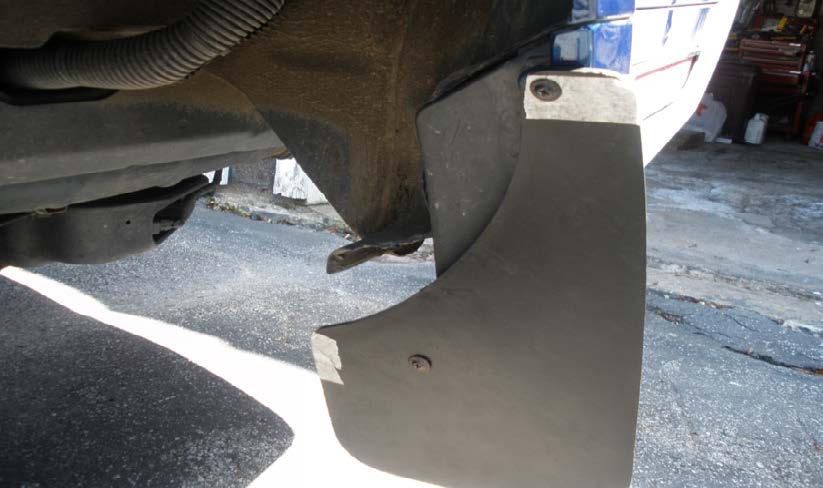
10. Now take a screw driver or your cordless drill with a Phillips head bit and remove the two screws in the wheel well as indicated in the above photograph.
*The bumper will become somewhat loose but will stay in place. I suggest you take a minute to clean out any dirt or debris that may have worked its way in this area.
11. Using the same top screw that you removed, screw the splash guard into the wheel well (only the top screw). Remember to keep it somewhat loose because you will need to maneuver the splash guard into place to find your second drilling point.
NOTE: If you are confident in your abilities you can mark both points at once. I have written these instructions for novice installers. The point being that if you are off on your first drill you can get a second chance at marking and drilling the second hole so that your mud flap will be straight and level.
12. If you want you can tighten the top screw so that the splash guard will not easily move and put the rear tire back on to get a better feel of how the tire and splash guard will relate to each other. Once you have gotten your mud flap where you want it mark your second drill spot.
13. Remove the top screw and go drill your second hole. Once this is done remove the masking tape and you can attach your splash guard at both points with the original screws. Once you have confirmed that you did this properly and the holes align with the factory screw wells you can remove this splash guard to aid in your installation of the other splash guard.
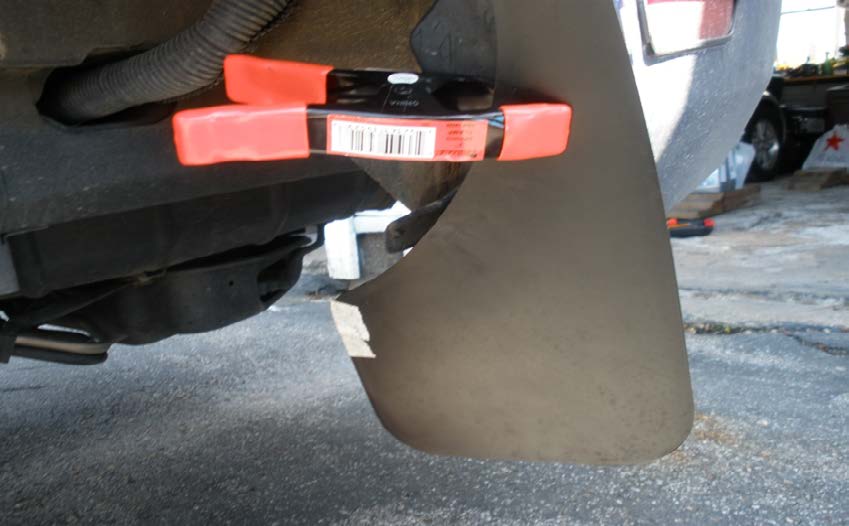
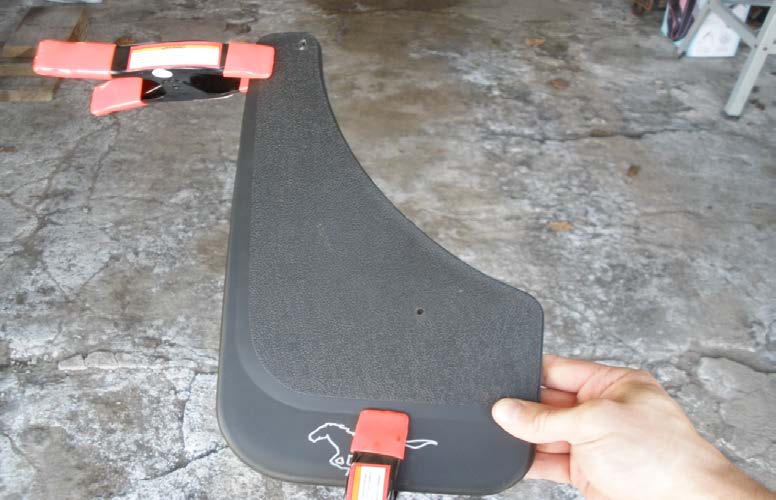
14. Only do this if your drill holes are properly aligned with the screw wells. Take the splash guard with the drilled out holes and hold it against the other splash so that they are aligned together. Then clamp them at two points as shown in the picture below.
15. Using your cordless drill and the 3mm drill bit simply drill through your established holes through the other splash guard as these holes will line up with the screws on the other side of the vehicle.
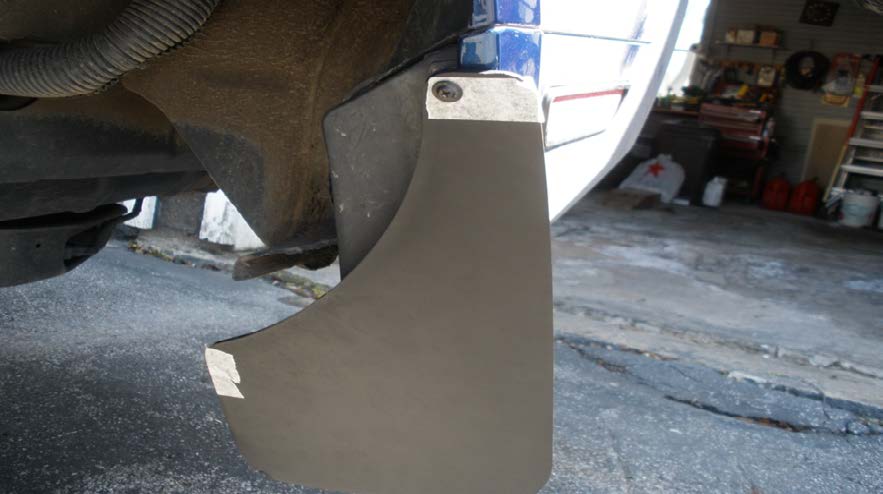
16. Once this is done you can go ahead and permanently affix your splash guard to the side you are working on using your cordless drill and Phillips head bit. Then replace your tire and lug nuts.
*Prior to letting the car down you should tighten the lug nuts so that they are snug. I personally tighten them to about 80lbs and then lower the car.
17. Once the vehicle is back on the ground use your torque/tension wrench to tighten the lug nuts to the appropriate level. The 2008 Owner’s Manual recommends 100lbs.
18 . ince you have predrilled your holes the installation of the splash guards on the other side will be much quicker. Simply follow this sequence:
- Safely jack your car.
- Remove the rear tire.
- Remove the fender screws.
- Place the splash guards in place and screw them securely into place.
- Replace the rear tire and lug nuts to recommended levels.
- Enjoy!
IMPORTANT:
Whenever you remove your lug nuts it is always a good idea to drive a few miles to make sure that your ties are on straight and that the lug nuts are secure. After your test drive check the torque on the lug nuts using you torque/tension wrench.
Installation Instructions written by AmericanMuscle customer Mike Breen 5.2.12
