FREE 1 to 3-Day Delivery on Orders $149+ Details
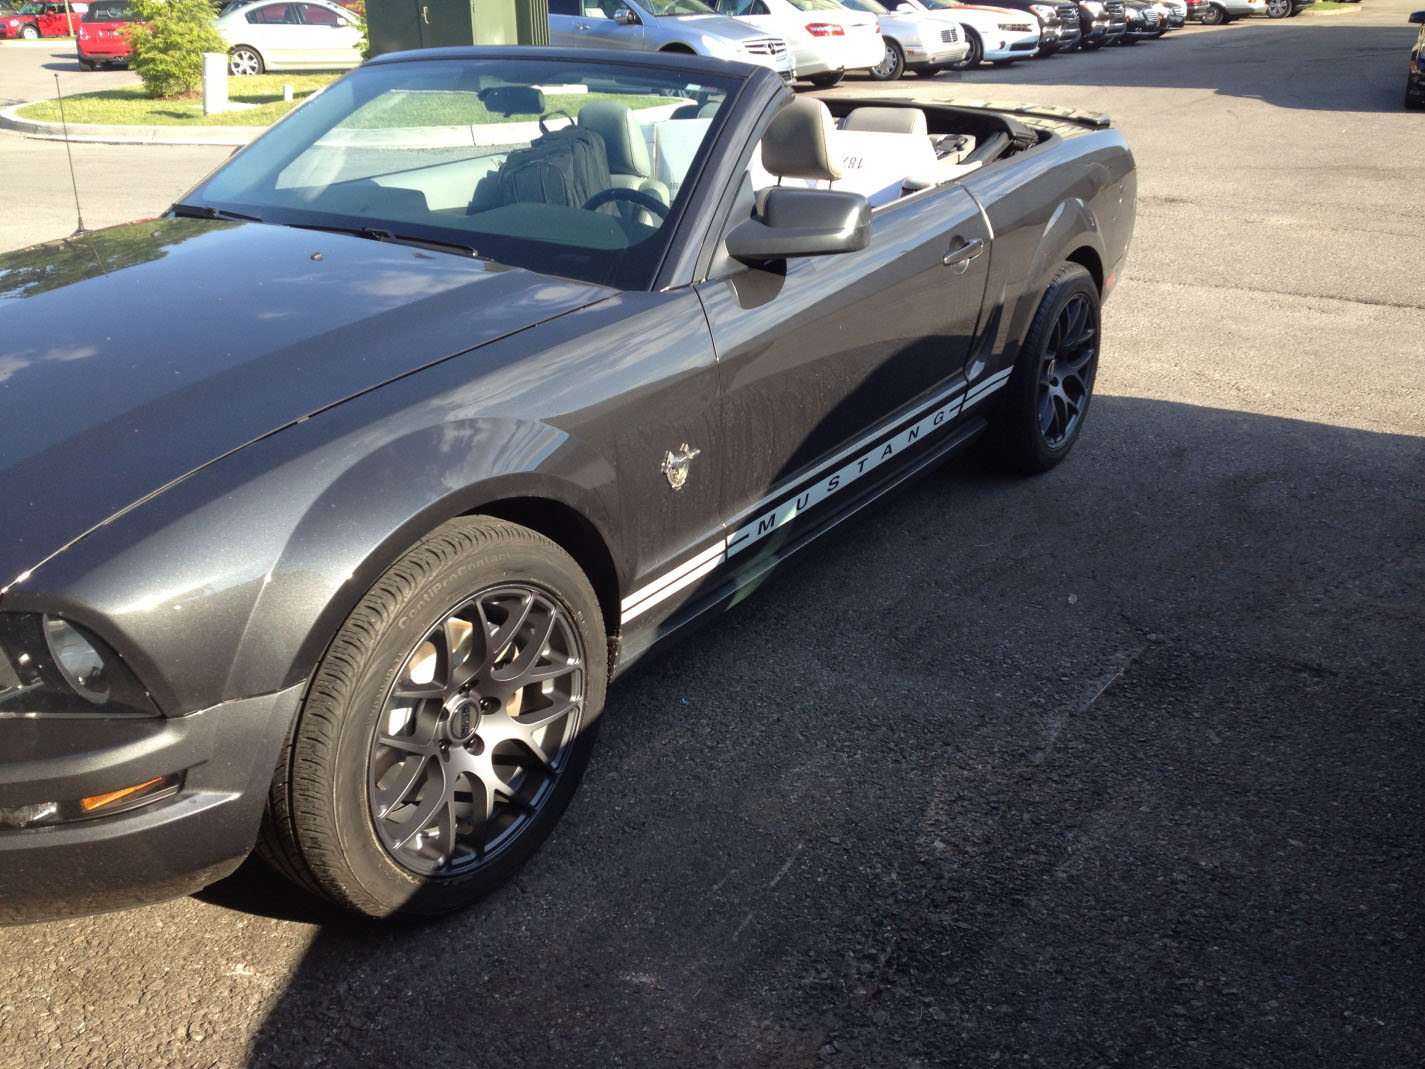
How to Install Ford Racing Front Rotor Upgrade Kit on your 2005-2010 Mustang V6
Installation Time
2 hours
Tools Required
- 15mm Socket
- Ratchet
- Pry Bar
- Floor Lift OR Floor Jack, (2) Jack Stands,, 4 Bricks or Chocks
Time Necessary: Approximately 1.5 hours
Tools Required:
• 15 MM Socket
• Ratchet
• PryBar
• Floor Lift or:
o Floor Jack
o (2) Jack Stands
o 4 bricks or wheel chocks
Parts Required:
• (2) 12.4" Rotors
• (2) Caliper Brackets
• Brake Pad Set (4 pads)
• Brake Pad Grease (usually comes with pads)
Accessing Front Brakes:
1. Remove Front Wheels
a. Place Car in park (or in 1st for Manual Tranny)
b. Lift Car either with Floor Lift (helps if you have a mechanic or car dealer buddy) or a jack and Jack Stands (Chock rear wheels if using jack stands).
c. Remove the 5 lug nuts from each wheel and set aside.
d. Remove Wheel
e. Remove brackets and rotors
2. Place keys in ignition and turn to accessory spot. This will allow you to turn your front wheels to gain easier access to the brakes. Best not to start the car here!!!
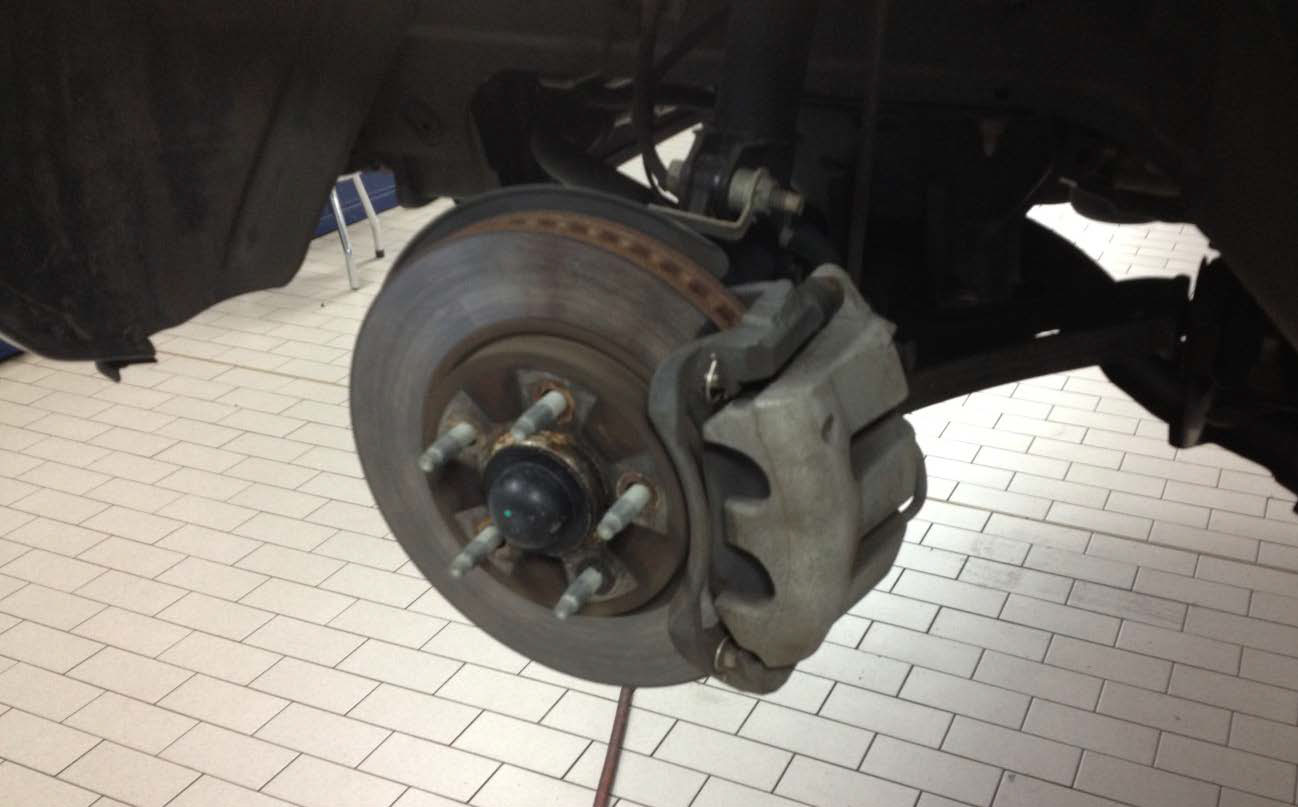
3. Turn steering wheel or manipulate old rotor to get caliper sticking out. Caution! Your old brake hardware will likely be hot.
Removing Brake Hardware:
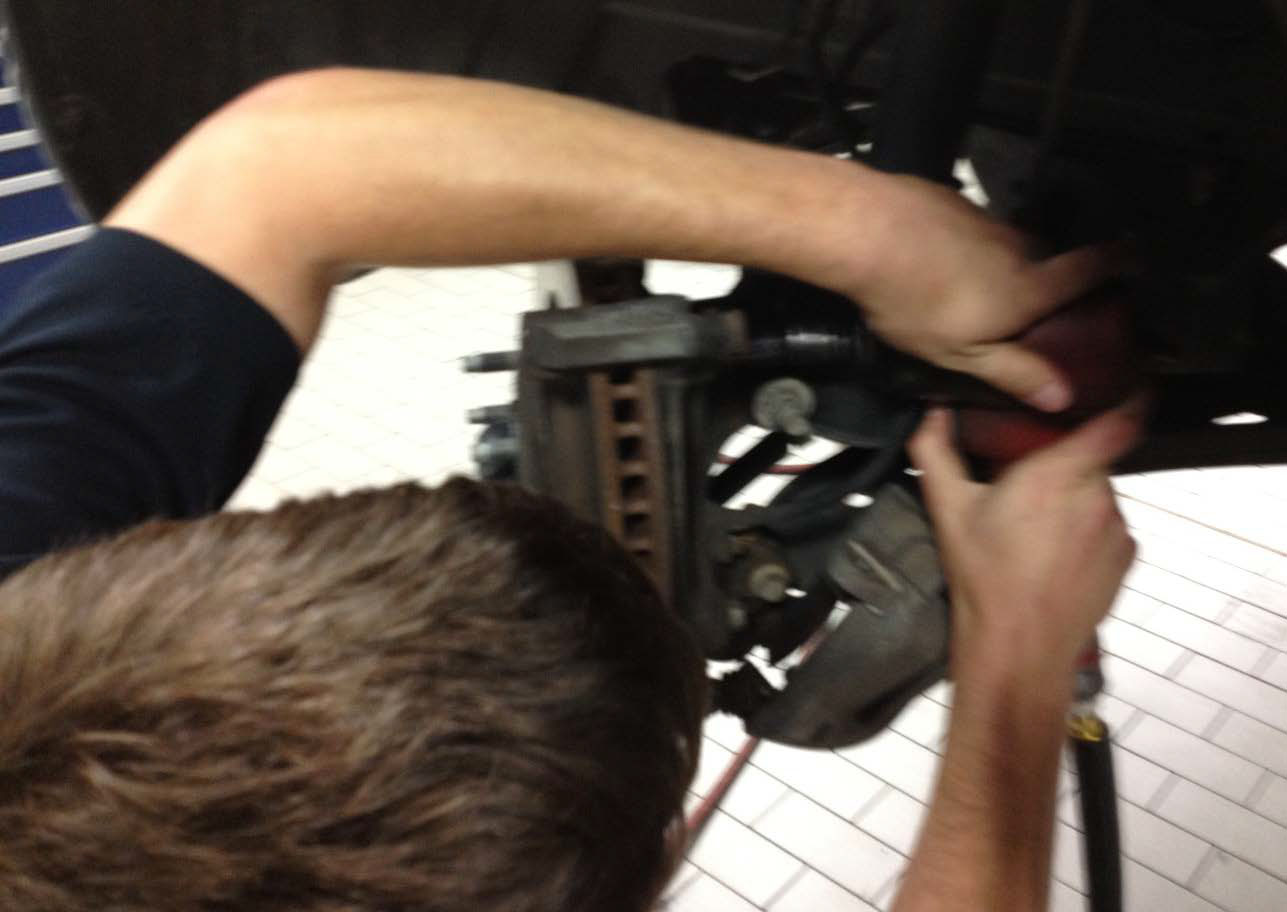
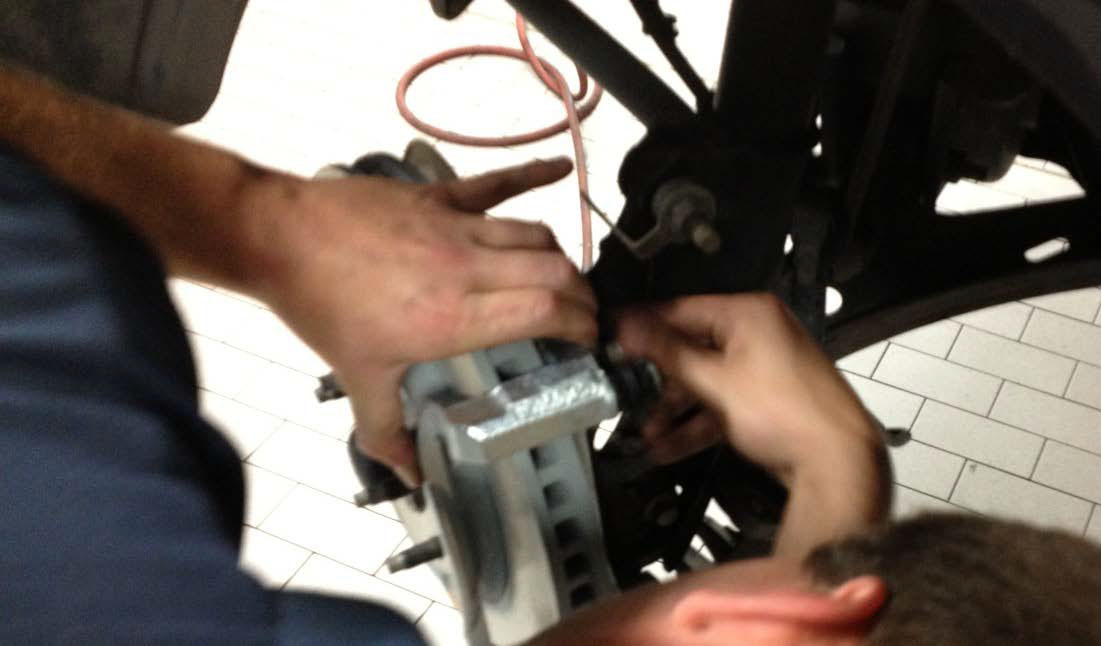
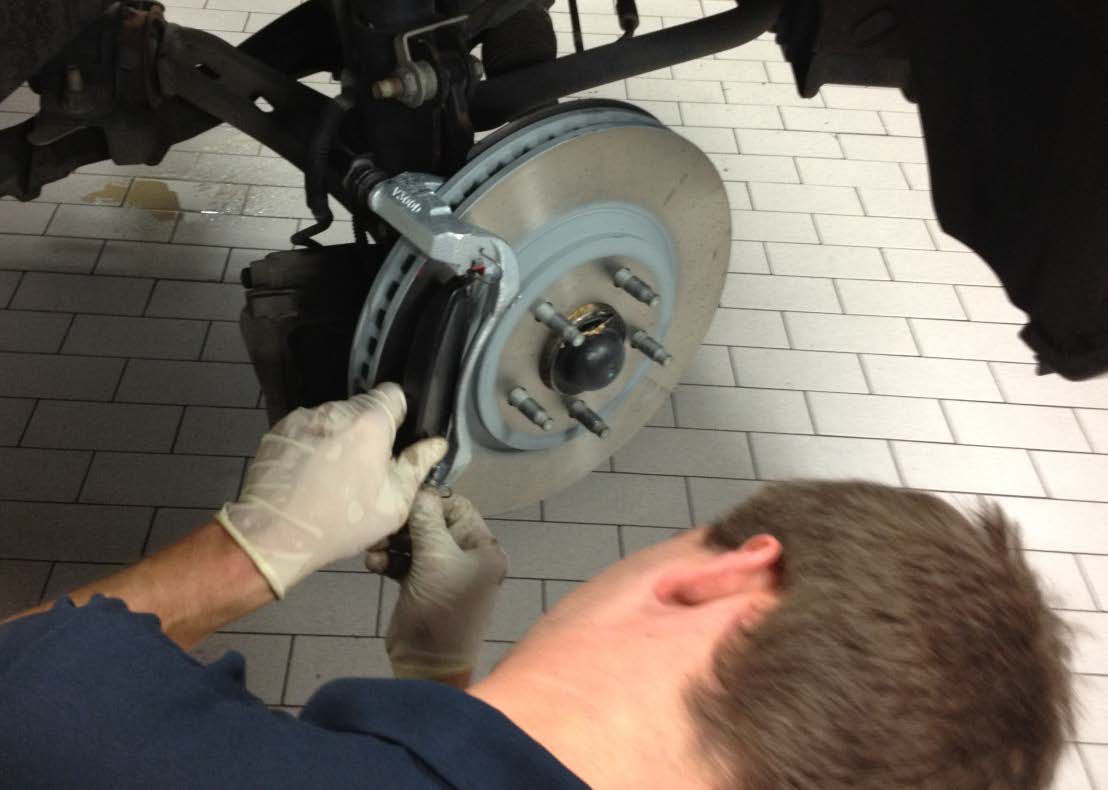
4. Now you can use a small pry bar to reseat your brake caliper piston. It is much easier to do at this stage and requires no special tools. Insert the pry bar between the caliper and rotor and slowly work the caliper jaws apart as seen in the pictures below
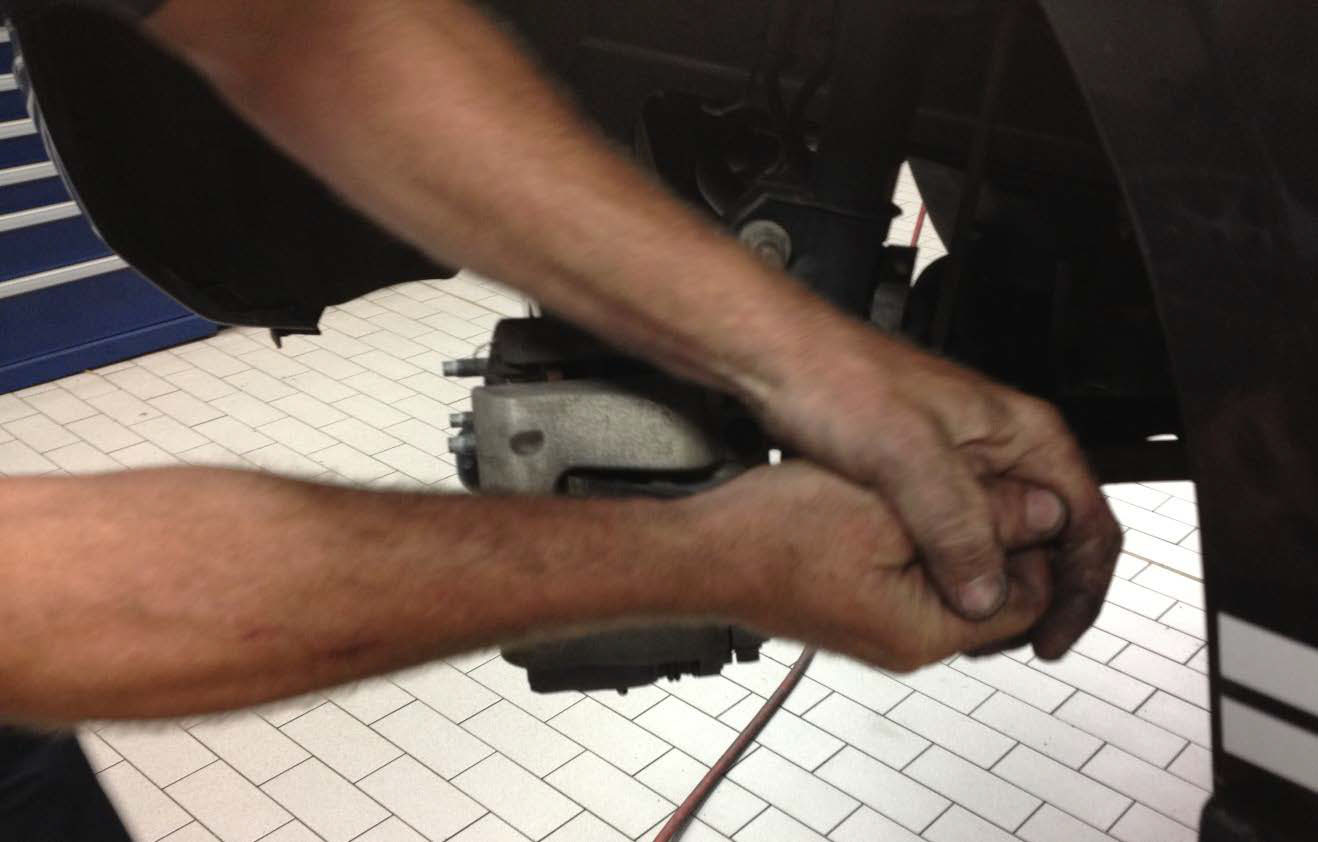
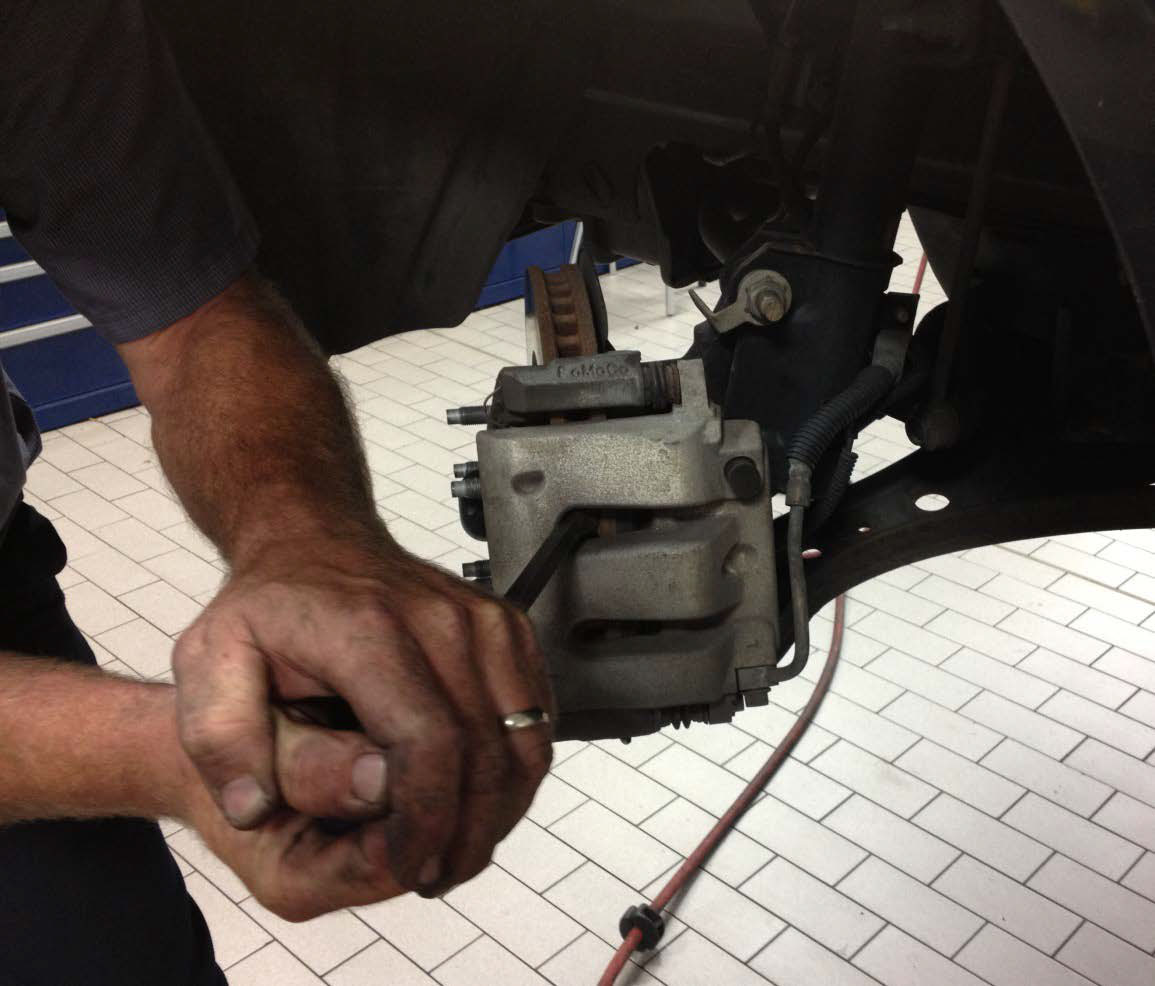
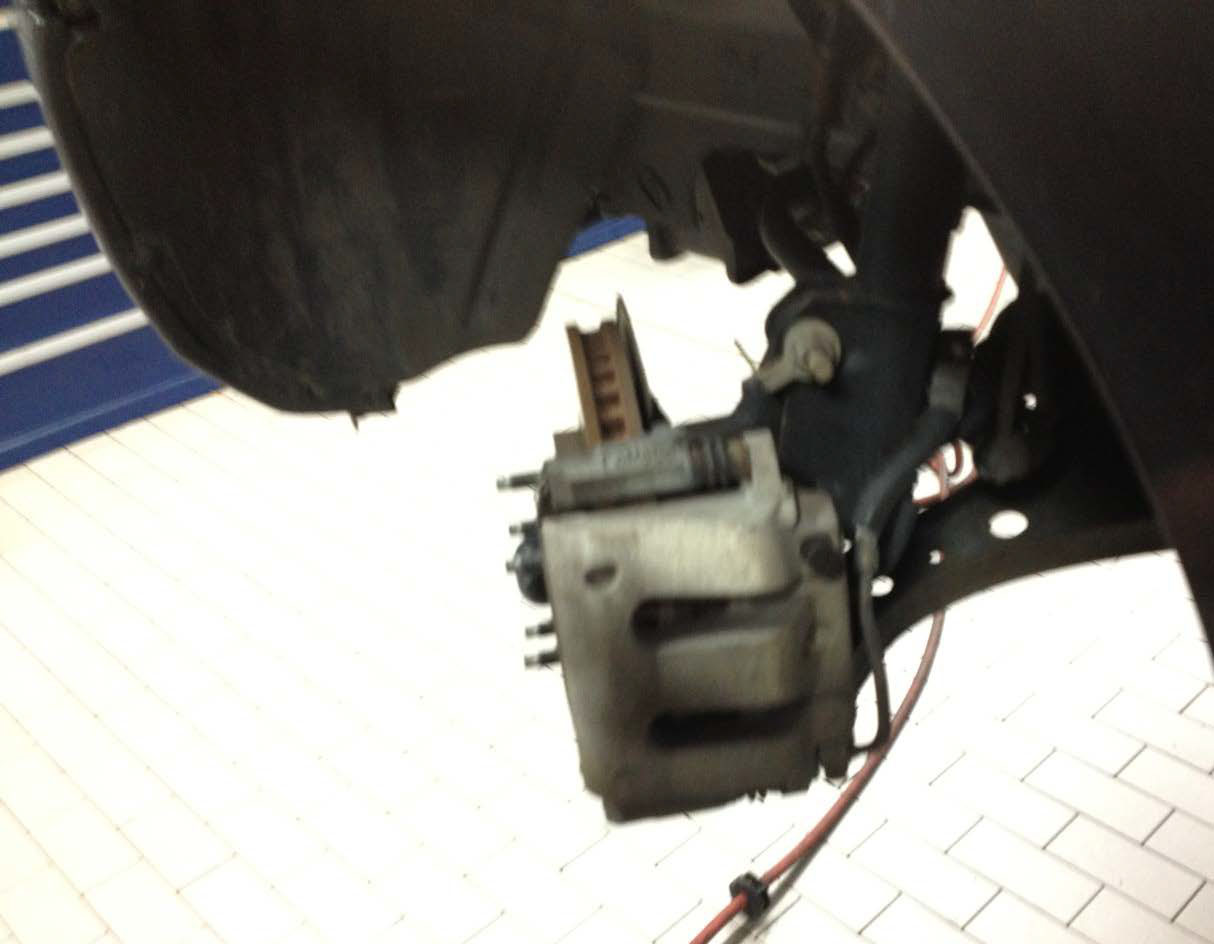
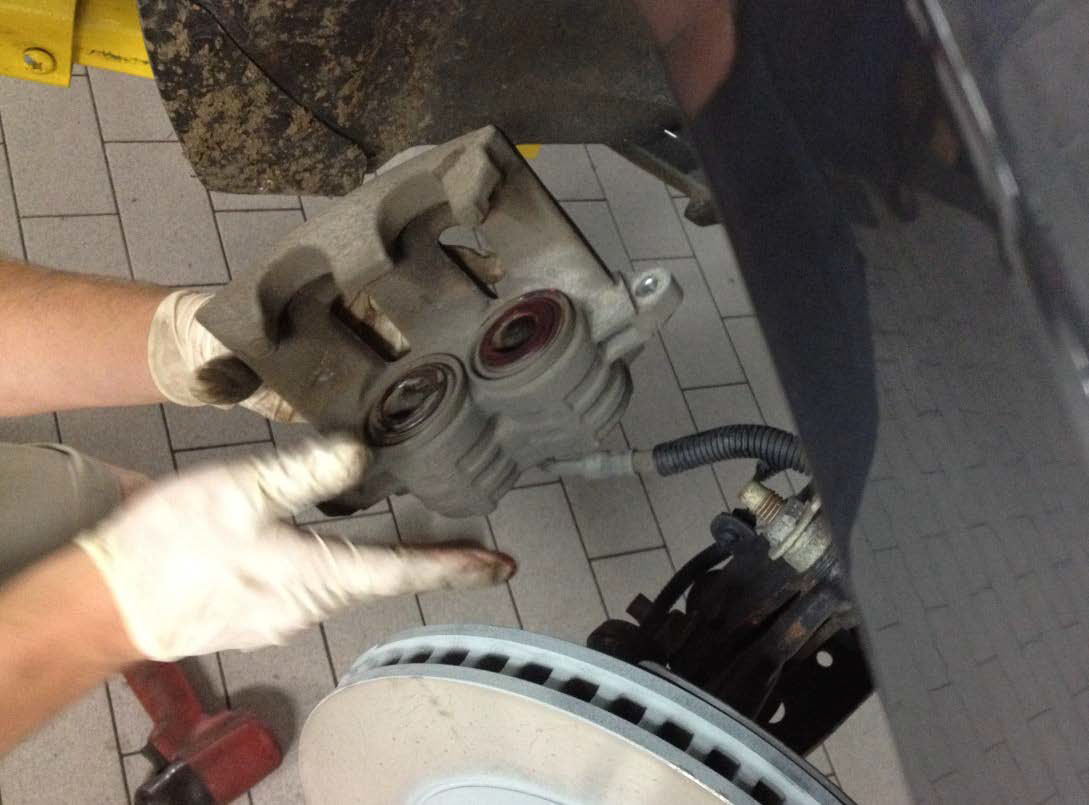
5. Now you can unbolt your calipers. There are 2 fine threaded bolts holding these on. Remove each one and set aside. The caliber should easily slide off at this point. Support it, or carefully let it hang, taking care not to damage your brake lines.

6. Your old brake pads should pop out now. One from each side of the rotor.
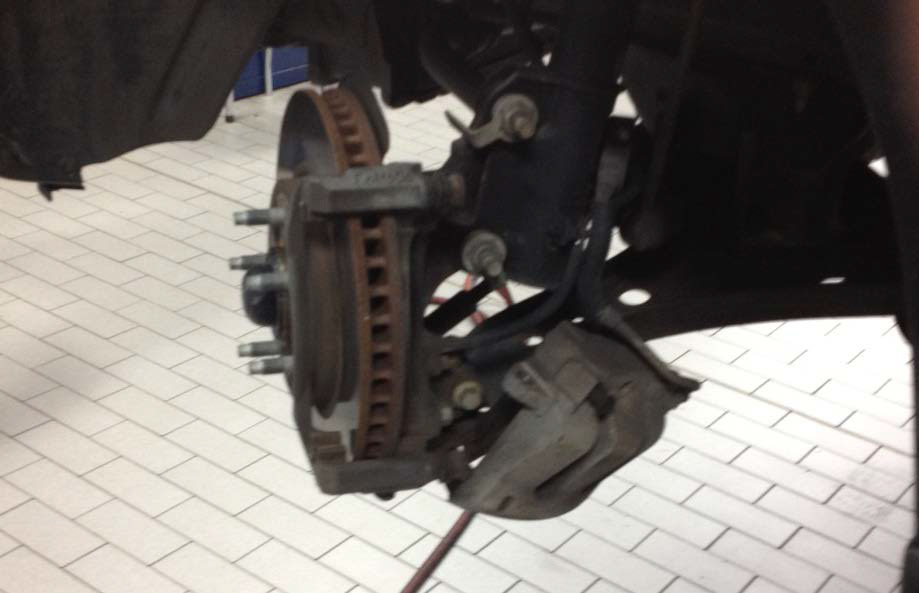
7. Next, you must take off the old Caliper bracket. This is very similar to taking off the caliper. Just 2 bolts in back of the piece and it’s out.
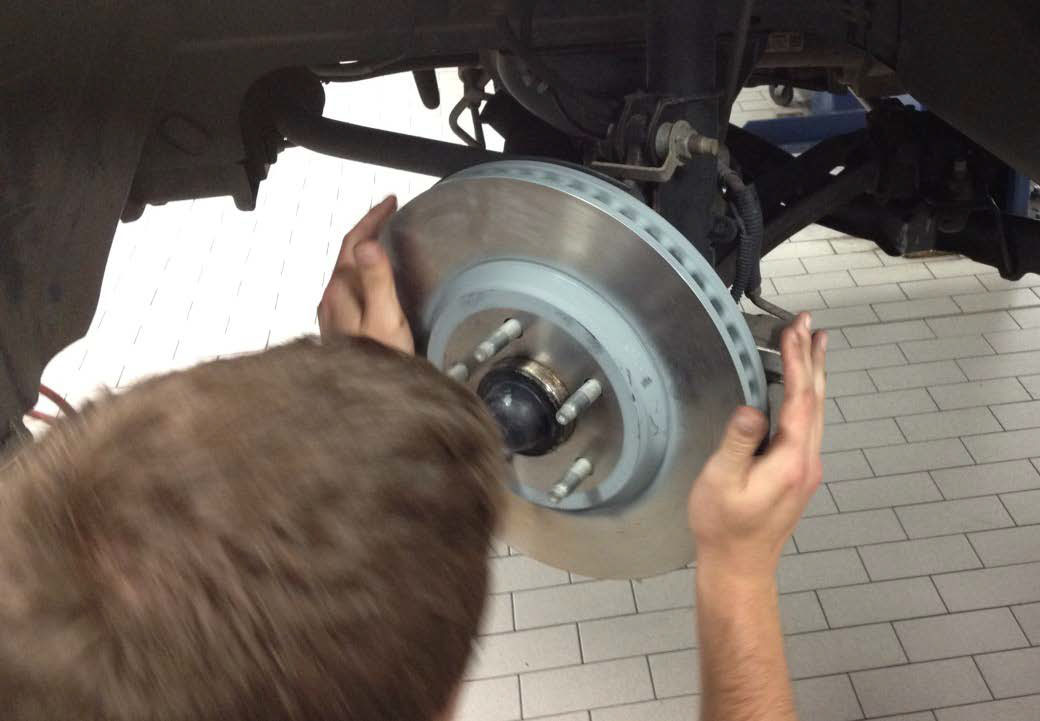
8. Now, remove the old rotor. If this is your original factory rotor, there will be a small retainer clip on one lug bolt that will need to be removed. It is un-necessary and just server to keep the rotors on the factory line when it was being built.
Installing New Hardware
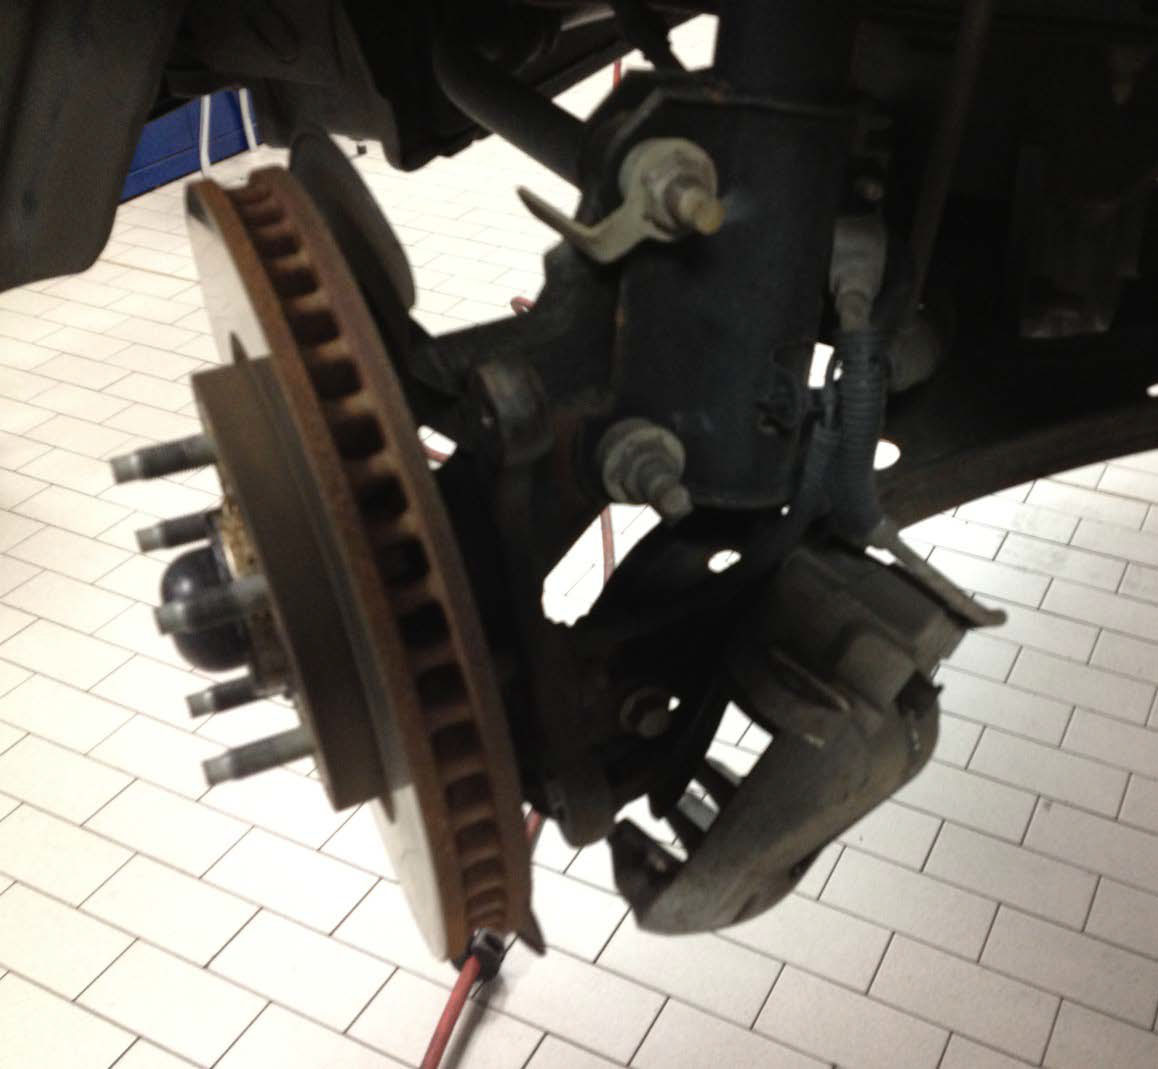
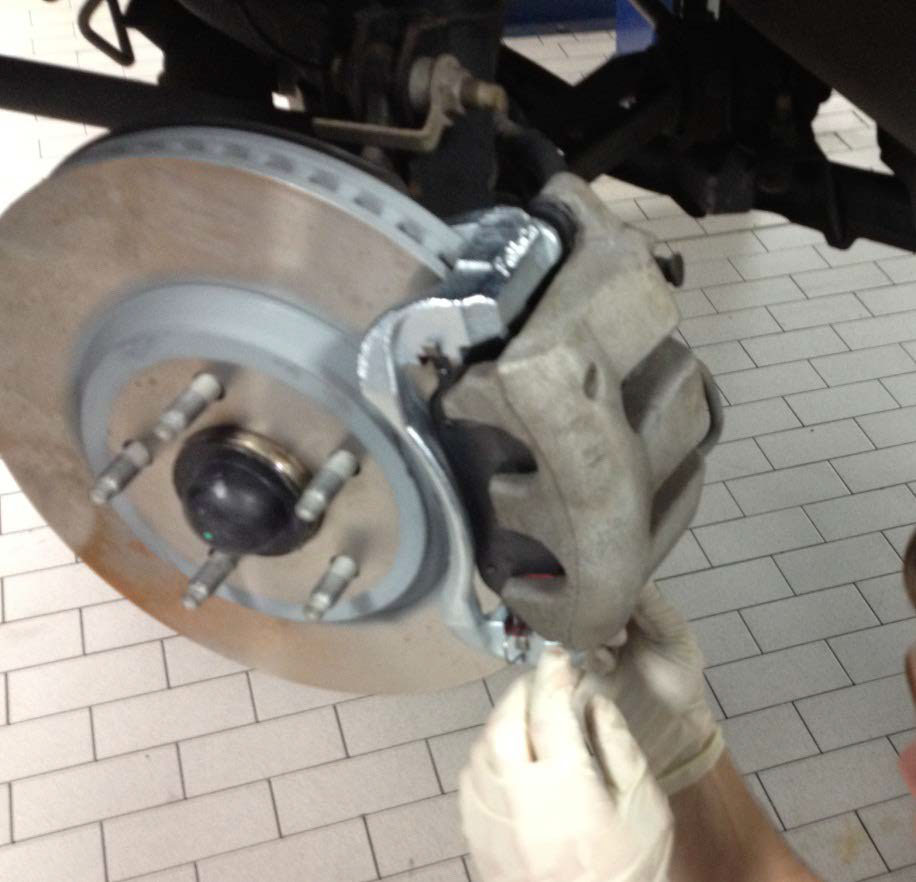
9. Next, place your new rotor in place of the old one.
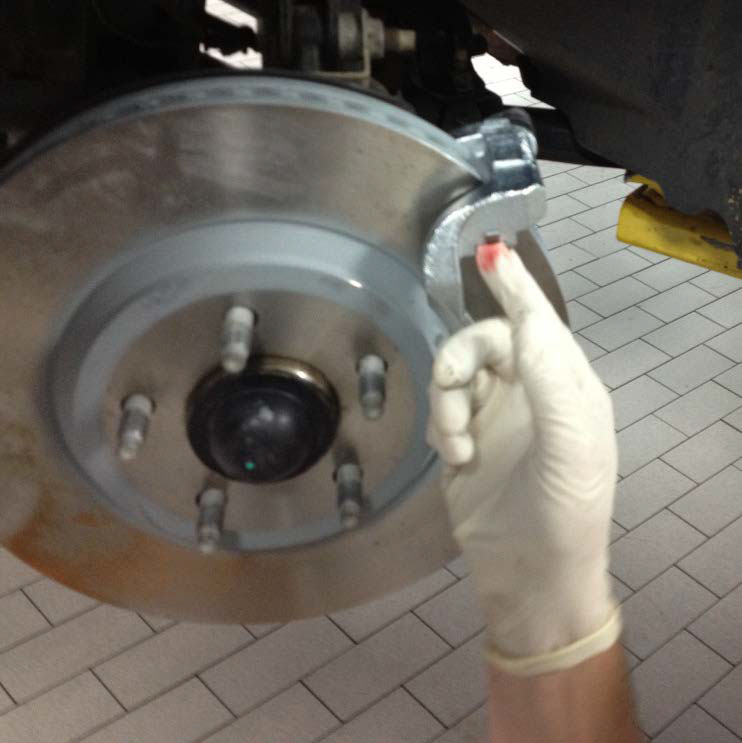
10. Attach your new Caliper bracket with the same bolts and holes you removed the old one with.
11. Now you want to apply the brake pad lube to the caliper brackets. Just add some where the moving parts touch. Too much isn’t helpful. Don’t forget to do both sides!
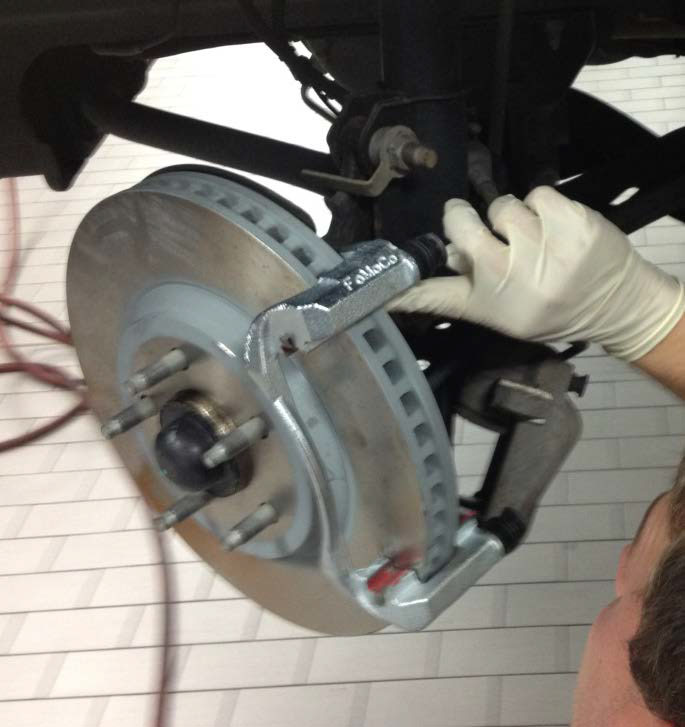
12. Install new Brake Pads in the caliper brackets. Once again both sides. Make sure the “friction side” is towards the rotor.
13. Apply Grease on the caliper where it comes in contact with the brake pads. If you apply it to the pads themselves, you will see the grease on the back of the pads whenever you look at your brakes.
14. Reinstall the caliper over the new brake pads. These should slide in place with perhaps a little persuasion. They will bolt into the caliper bracket using the bolts you set aside earlier.
15. At this point, you have finished one side. Now repeat the exact process on the other.
16. Reinstall your tires.
17. Pump the brakes a few times to insure you did not get any air bubbles in your brake lines.
18. Place car back on the ground and take the car for a test drive! You should “Work in” the new brakes by slowing from 35 MPH to 5 MPH, 5 times with steady even braking pressure.
Now Enjoy!