 FREE 1 to 3-Day Delivery on Orders $149+ Details
HID Dual Beam Headlight Conversion Kit for '05-'11 Mustang (H13 Bulb) - Installation Instructions
Installation Time
2 hours
Tools Required
- 8mm Socket
- 10mm Socket
- Electrical Tape
- 6in cable ties (included)
- Flat tip screwdriver
- 3M Tape (optional)
- Needle Nose Pliers (optional)
Installation
1. Park the car and turn it off, place it in neutral or park.
2. Disconnect the Battery.
Warning:While installing the HID kit you will be working with electricity. Ensure you take all proper precautions.
3. Wait for the engine to cool down.
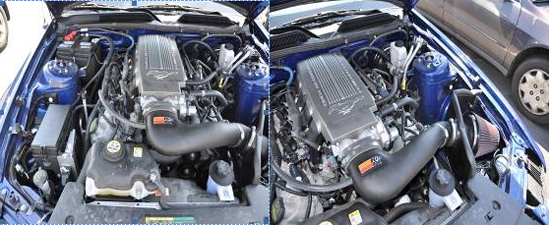
4. Remove the factory Air Filter Housing. If you have an after market Cold Air Intake you will need to remove the filter according to the installation instructions of your Intake. (Fig 2)
5. Use a flat tip screwdriver to lift the center portion of the quick fasteners holding the radiator cover in place. Once you have lifted the center, lift the outside removing the fasteners from the radiator cover. Remove the radiator cover and place it to the side. (Fig 2)
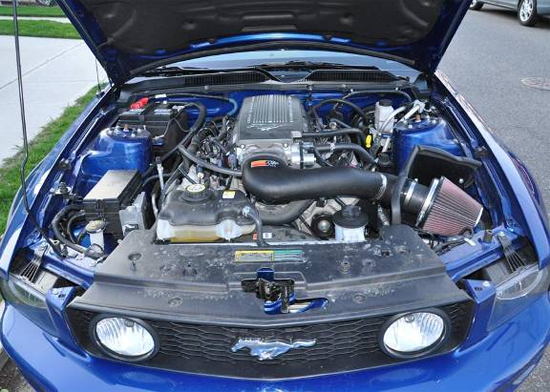
Fig 2
6. Remove the factory bulb by pressing the release tab and pulling the connector off the back of the bulb. Twist the bulb counterclockwise and pull it out. (Repeat for opposite side) (fig 3)
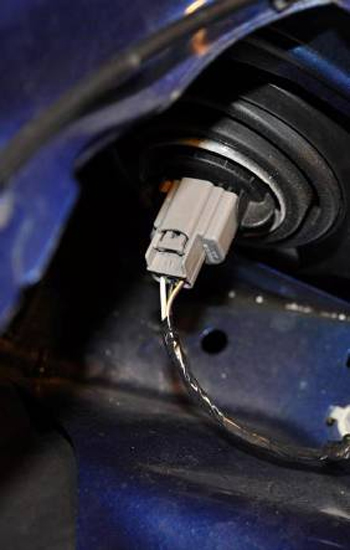
Fig. 3
7. Note:The factory electrical connector for the driver’s side will not be used for the installation of this kit. It is recommended that you do not remove this in case you need to replace the factory bulbs. Secure this connector to the existing cable harness with a zip tie and cover the connector with electrical tape to protect it.
8. Run the long side of the HID wiring harness from the driver’s side light underneath the radiator supports to the passenger side following the factory wiring harness. Secure the new HID wiring harness to the factory harness using zip ties or electrical tape.
9. Place the ballasts on the front sides of the strut covers. Check for fit and run the wires from the ballasts to the light along the underside of the hood bonnet. (Fig 4)
10. Tip: Keep the ballasts in place with 3M double sided tape so that you can adjust the positioning should you need to move them. After you are finished installing the light kit use the provided brackets to mount the ballasts.
11. Install the controller for the HID wiring harness on the fender well next to the engine compartment fuse and relay box. (Fig 5)
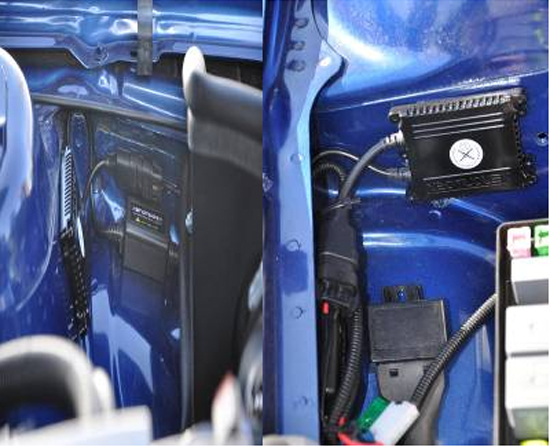
Fig. 4 Fig. 5
12. Secure the driver’s side grounding wire to the grounding point located behind and below the light.(Fig 6) Secure the passenger’s side grounding wire to the grounding point next to the hood support.(Fig 7)
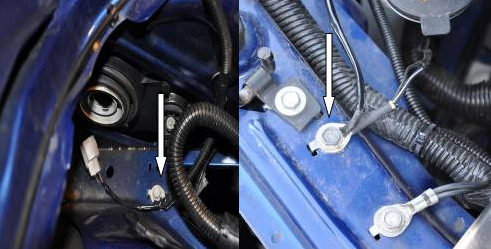
Fig. 6 Fig. 7
13. Install the HID bulbs by inserting them into the factory bulb housing and turning them clockwise..
14. Connect the wires from the back of the new bulbs to the connectors from the wiring kit harness. All the connections from the kit harness are snap on and as an extra precaution it is recommended that you cover the connections with electrical tape.
15. Take the stock electrical connector from the passenger side bulb which you removed from the bulb in step 6 and connect it to the electrical connector of the HID electrical harness. (Fig 8)
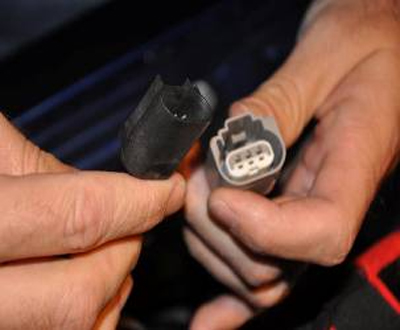
Fig. 8
16. Take the power connector provided with the HID kit harness and attach it to B terminal on the engine compartment fuse and relay box.(Fig 9)
Note:The kit instructions specify connecting the kit to the positive terminal of the battery. I opted to connect the light kit to the B terminal on the engine compartment fuse and relay box.

Fig. 9
17. Reconnect the battery
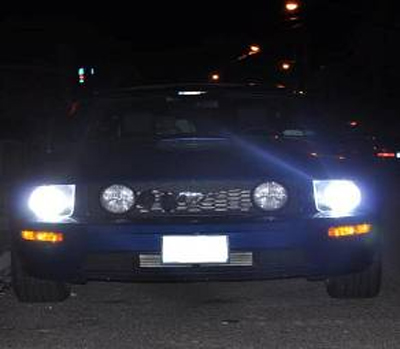
18. Test the installation by turning on the light switch. The lights should reach their full brightness within 5-10 seconds.
Note:The ballast will make noise when you turn on the lights, which is normal. The noise will go away after 5-10 seconds once the bulb reaches its full potential.
19. Clear any tools you may have left and ensure that none of the wires from the kit harness are interfering with any moving parts.
20. Reinstall the air filter housing or the air filter for after market cold air kits.
21. Reinstall the radiator cover.
Passenger Side Driver Side
22. Adjust the light beam. Enjoy your new lights.
Installation instructions provided by AmericanMuscle customer Don Buda 4.24.09
Related Guides
-
Installation
-
Installation
-
Installation

