 FREE 1 to 3-Day Delivery on Orders $149+ Details
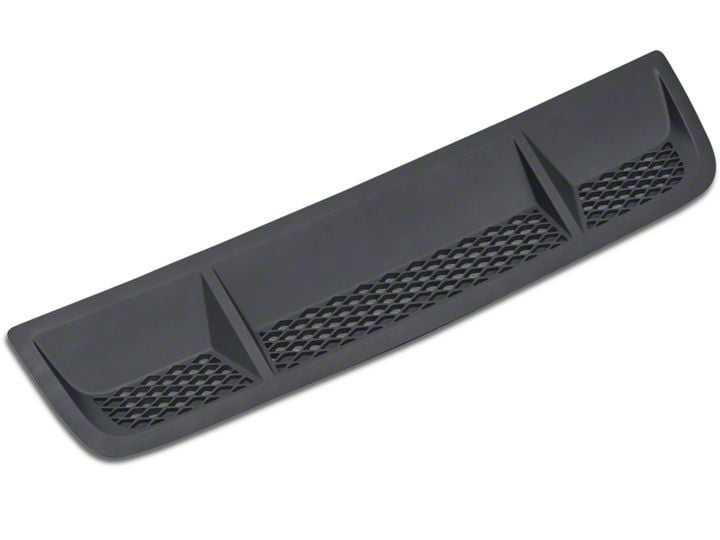
How to Install Ford GT500 Heat Extractor Hood Insert (10-12 GT500) on your Ford Mustang
Installation Time
60 minutes
Tools Required
- Socket Driver
- 11/32” Socket
- Flathead Screwdriver
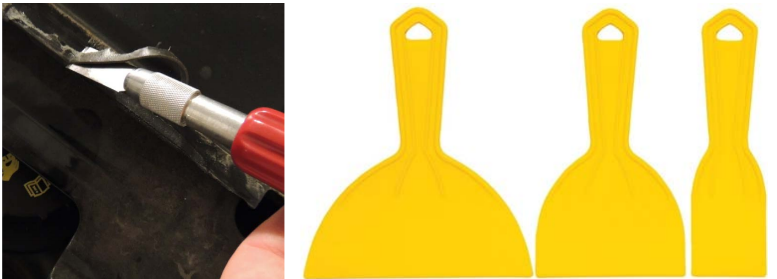
- Precision Knife (X-Acto or similar)
- 70% Isopropyl Alcohol or name-brand Adhesive Remover (I prefer Turtle Wax Label & Sticker Remover)
- Small Plastic Putty Knife
- Flat Blade for Precision Knife *Optional*
Shop Parts in this Guide
1. If you have a GT500 with this style heat extractor, you will need to remove it. If you have a hood with just the cutout, you should proceed to step 14.
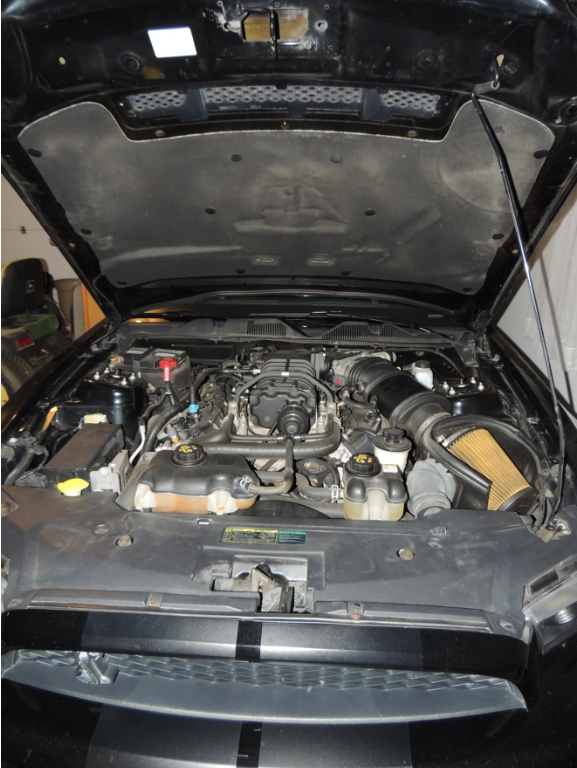
2. Raise the hood.
3. Locate the passenger tab, center nut, and driver tab on the underside of the extractor. These are on the rear side (closest to the windshield).
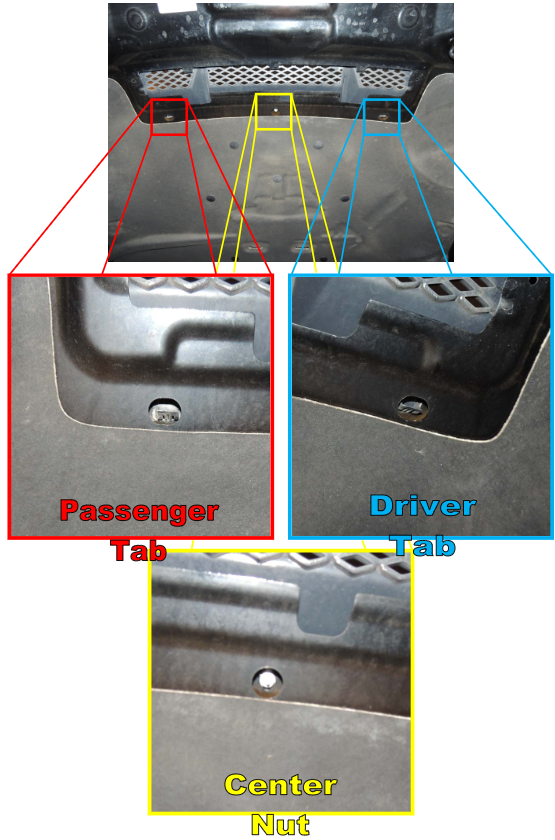
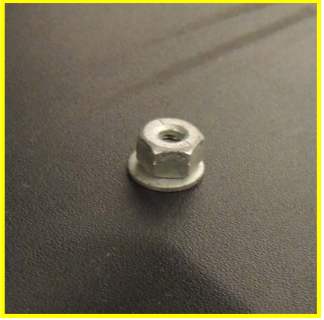
4. Use a 11/32” socket and driver to remove the center nut (with attached washer) from the heat extractor. Save the nut; you will need it to reinstall the new part.
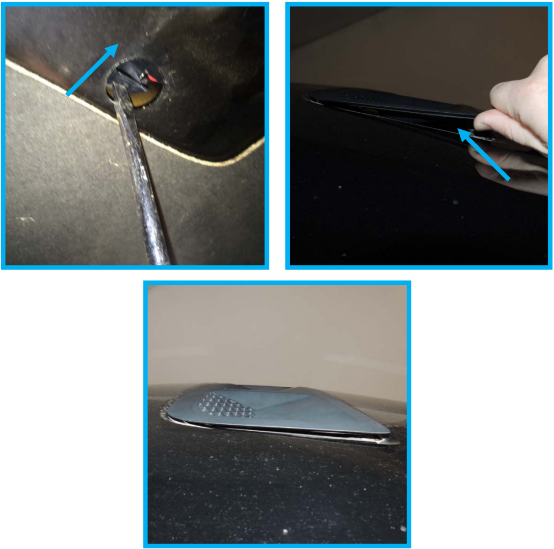
5. Use a flathead screwdriver to press the rear side of the passenger tab towards the front of the car. This will cause it to unlock from the hood. Simultaneously, pull the passenger side of the heat extractor up from the hood. This may require some force, as there is a strong adhesive tape holding the extractor to the hood.
6. Repeat step 5 on the driver side of the vehicle.
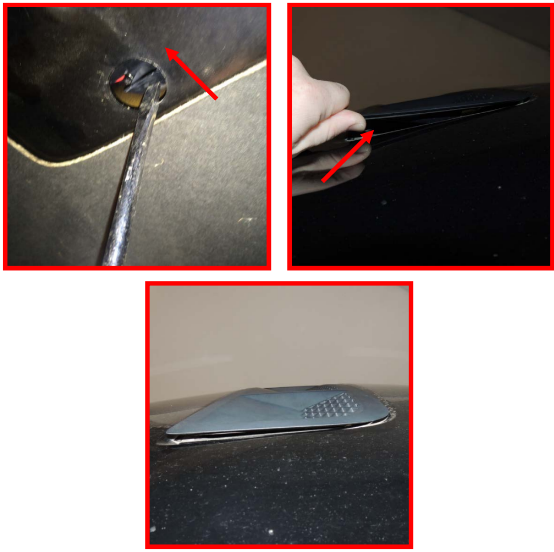
7. Continue to pull up on the passenger side, carefully using the precision knife to cut the adhesive tape as you go. Stop before you reach the center stud (which had the nut on it from Step 4). You can see I broke the tab on this side by not performing Step 5 correctly.
8. Continue to pull up on the driver side, carefully using the precision knife to cut the adhesive tape as you go. Again, stop before you reach the center stud (which had the nut on it from Step 4).
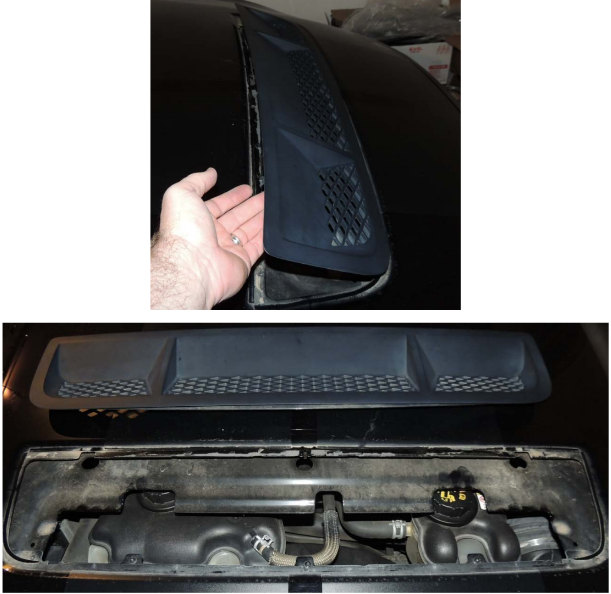
9. Now, you should be able to easily lift the rear of the heat extractor off of the hood. Pull the piece towards the rear of the car and it should slide out.
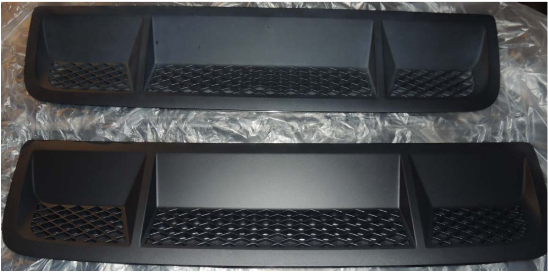
10. Old and faded (top) vs. new and pristine (bottom).
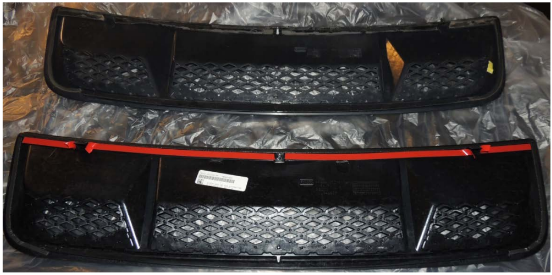
11. Old and dirty (top) vs. new with adhesive tape (bottom).
12. Remove excessive adhesive from the hood cut-out. Soaking the adhesive and using a flat blade with your precision knife works quickly to remove a majority of the residue. The area you are working on will not be seen, so any small scratches will be covered with the new adhesive. However, the most efficient way is to use a good adhesive remover (Turtle Wax Label & Sticker Remover works like MAGIC) and scrape away the excess with a plastic putty knife.
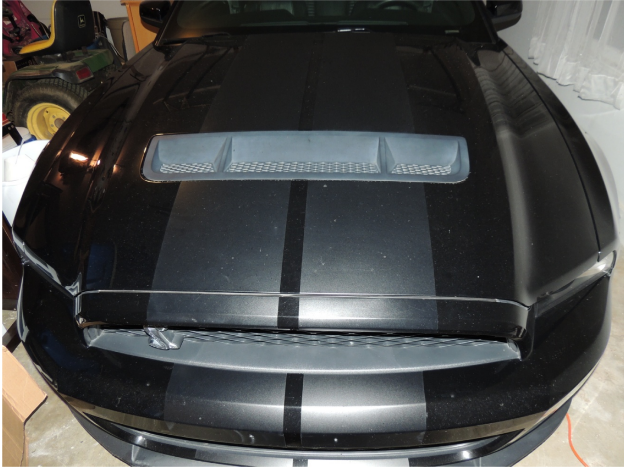
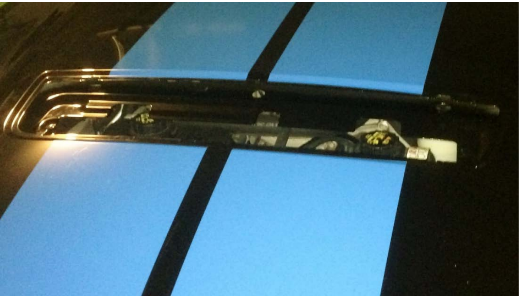
13. Take care not to damage your stripes. If you are re-striping your car, now is the time to do the hood, as the hood stripes adhere under the heat extractor. I took this opportunity to replace my faded black stripes with bright blue ones.
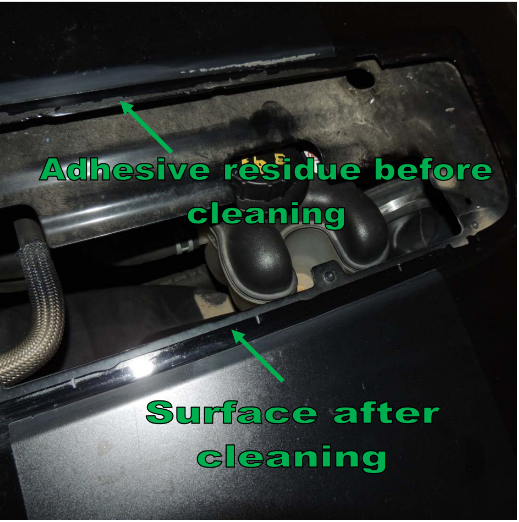
14. Thoroughly clean the hood cut-out. Wipe the area down with Isopropyl Alcohol and allow to evaporate so that no contaminants remain. This hood has been cleaned, restriped, and cleaned again in preparation for the new heat extractor.
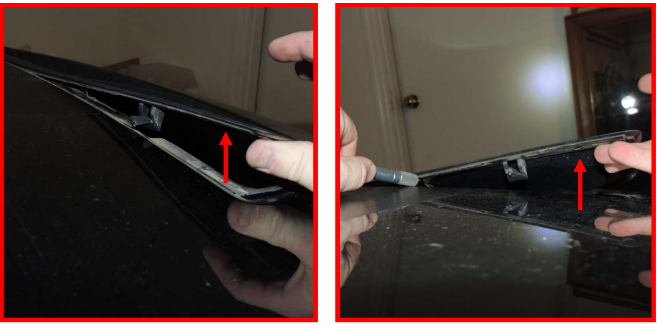
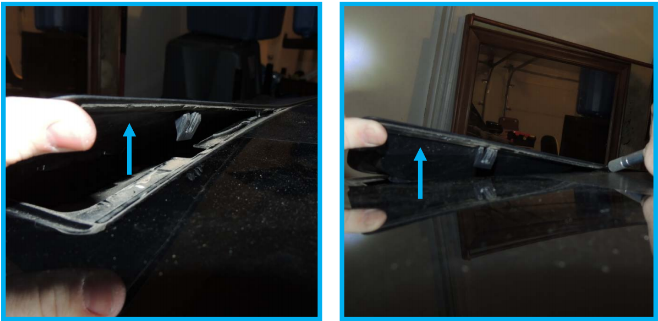
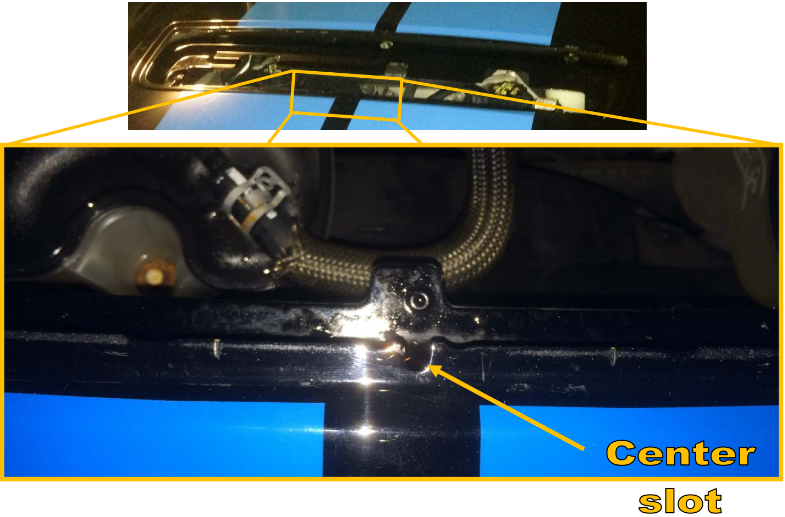
15. Inside the front edge of the new extractor, there is a center alignment tab.
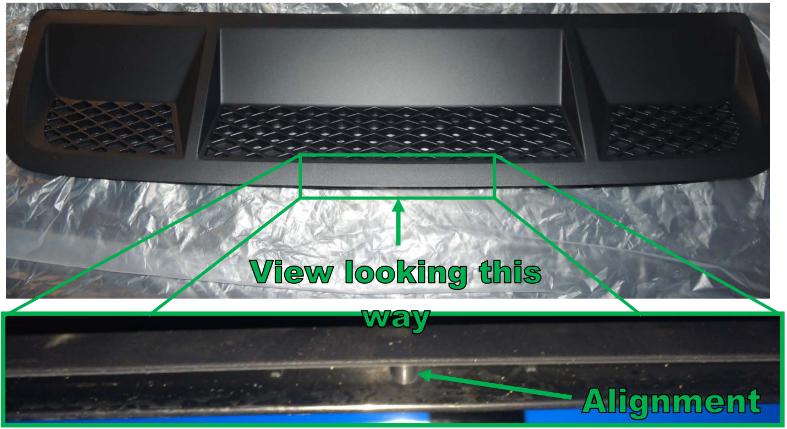
16. This tab fits perfectly into the center slot in the forward edge of the hood cutout.
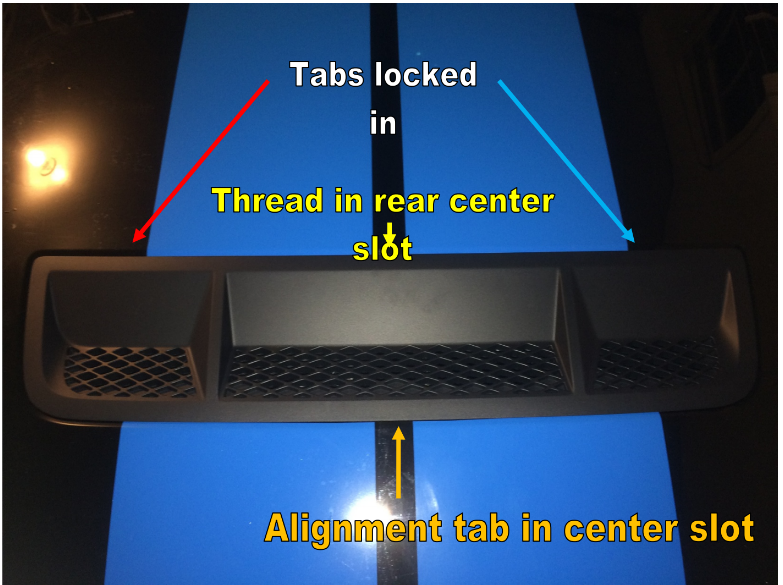
17. With the rear end of the heat extractor raised, insert the front end into the front edge of the hood cutout. Ensure the alignment tab slides into the center slot. Press firmly. Lower the rear end so that the tabs lock into the hood. If done correctly, the thread at the rear of the extractor will fit perfectly through the rear center slot.
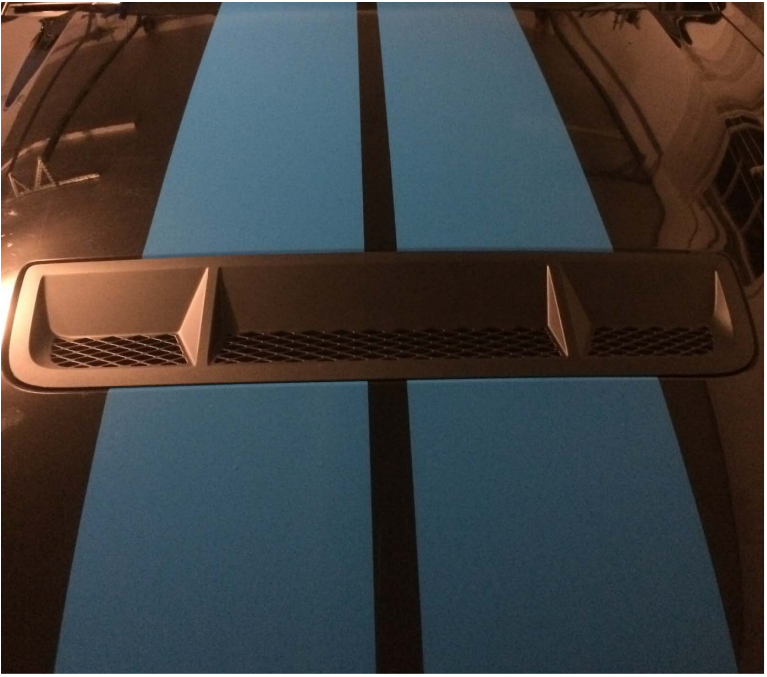
18. If you are satisfied with the look, release the tabs (Step 5) and raise the rear end of the extractor. Remove the adhesive tape backing and lower back into place. Press firmly across the entire surface where the tape lies beneath. Don’t forget to re-install the nut (Reverse Step 4). Allow the tape to cure in a dry environment (garage) for a few days before getting wet.
Installation Instructions written by AmericanMuscle Customer Brian Becker 12/02/2014

