 FREE 1 to 3-Day Delivery on Orders $149+ Details
Mach 1 Chin Spoiler Installation Guide - Intensive
Installation Time
30 minutes
Tools Required
- Safety glasses (x1)
- Car jack (x1)
- Jack stands (x2)
- fasteners (x10)
- Duct tape (x1) roll
- 1/2 inch bolts w/ lock washers and nuts (optional) (x9)
- 1/2 inch socket wrench (optional)
- Phillips head screwdriver (If using fastener)

Shop Parts in this Guide
Installation
1. First, the car needs to be jacked off of the ground so that the drill can be used to drill the holes for the spoiler.
IT IS IMPORTANT TO USE JACK STANDS SO THAT THERE IS NO RISK OF DAMAGE TO THE VEHICLE OR PERSONAL INJURY!
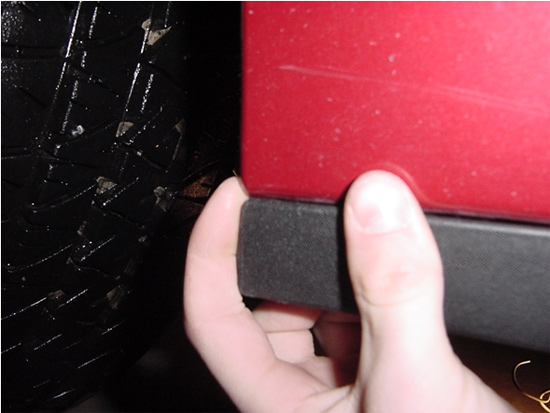
2. Next, take the spoiler and tape it to the car in the position desired. Start at one end, tape the corner and then place a piece of tape every few inches all the way to the other side as shown below.
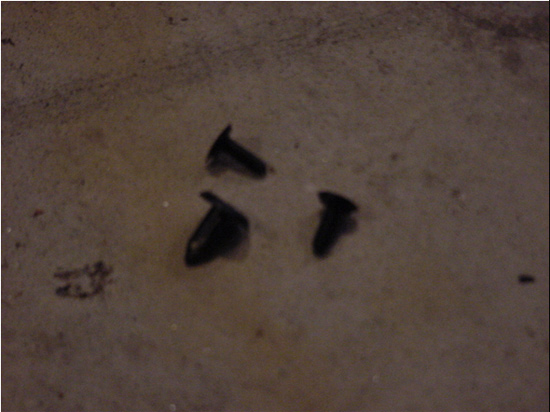
3. The spoiler comes with pushpins that are designed to be used with the spoiler. They are sturdy and dependable, but I felt that it was better to use nuts, bolts, and lock washers to install my spoiler. It is a matter of preference as either will secure the spoiler to the car. The pushpins that are included with the spoiler are shown below.
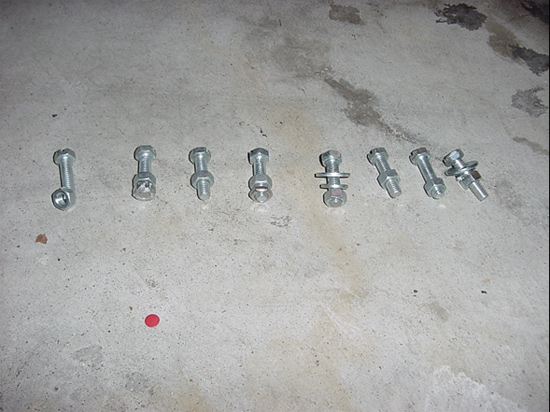
4. I used standard 1/2 inch bolts with matching nuts and lock washers as shown below
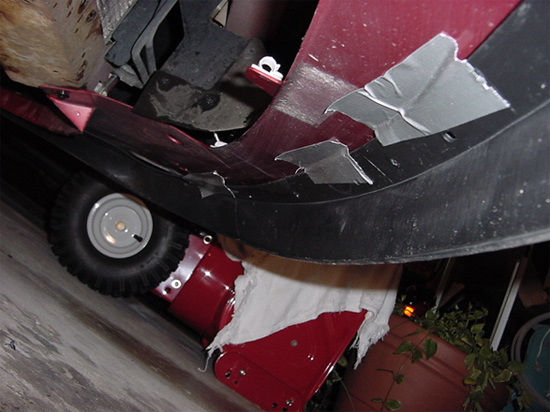
5. To install the chin spoiler, line up one corner of the chin spoiler with the front fascia next to the wheel as shown below.
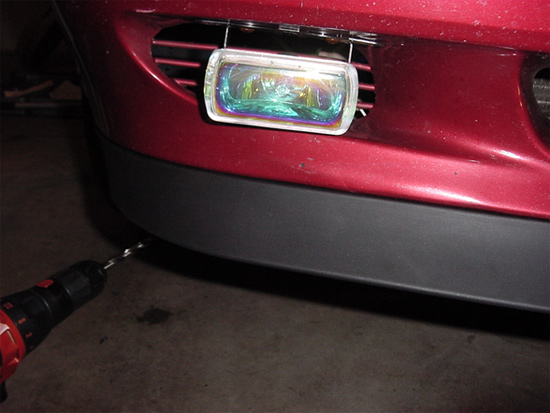
6. Next, locate the first hole on the corner of the spoiler. Using a drill, drill the hole out so that the bolt can be fastened. Only drill far enough into the fascia until the drill bit pokes through the inside of the fascia. (I used a 1/2 inch drill bit for my personal bolts. The fasteners that come with the kit use a 1/4 inch drill bit).
ALWAYS BE AWARE OF WHAT YOU ARE DRILLING THROUGH!
7. I am not aware of any wiring or other objects under the front fascia except for fog light wiring. I knew exactly where my wiring is because I put the lights in myself. In a standard mustang with fog lights, the wires are easy to locate and should be out of the way.
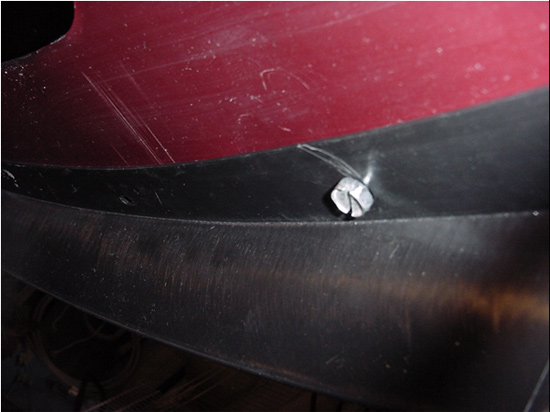
8. Make sure that the chin spoiler is flush with the front fascia as shown below.
9. After drilling the hole, insert the fastener and screw in the fastener insert tightening the fastener. The fasteners are strong, but to stop any un-needed stress on the fasteners and the spoiler, use something to prop the spoiler up so it is not simply dangling from the car.
10. Repeat the above steps for each hole. I personally used bolts and fastened the first four holes on either side and used one bolt for the very center hole. This I found to be adequate. This is all a matter of personal preference.
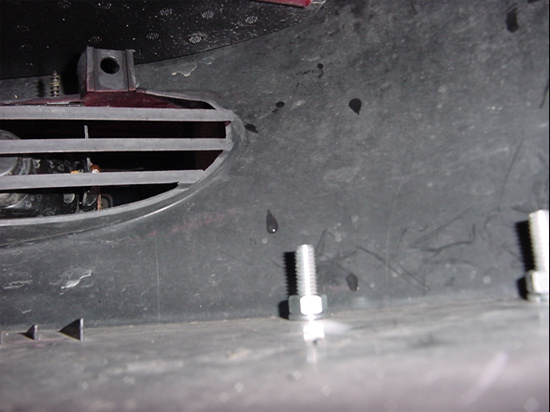
11. If installed correctly with bolts, there will be plenty of room inside the fascia for tightening of the nut and lock washers. The picture below shows the inside of the fascia with part of the spoiler installed.
12. Continue with the drilling and fastening process for each hole that you would like to utilize.
13. After bolting or fastening the entire chin spoiler to the front fascia, give it a tug to make sure that nothing is loose or it could potentially come loose. It takes quite a pounding and should be tight. Also, keep in mind that the very front of the car is lower to the ground so be conscious when parking in spaces with concrete barriers as they can become chin spoiler killers.
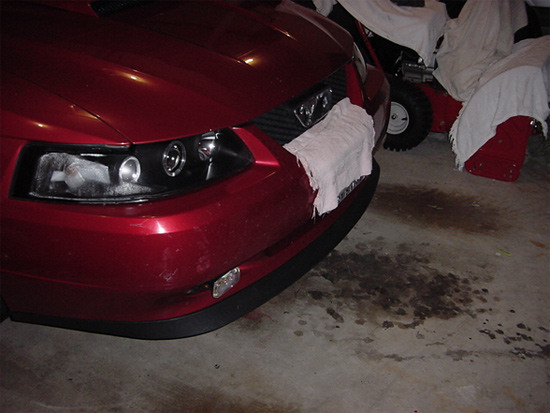
14. Now enjoy your meaner looking Pony!!
Installation instructions provided by AmericanMuscle customer Will Rimmler.
AutoHow.tv, AmericanMuscle's video sponsor - http://www.autohow.tv/node/35
Related Guides
-
Installation
-
Installation
-
Installation

