 FREE 1 to 3-Day Delivery on Orders $149+ Details
How To Install a JBA Off-Road H-Pipe on your 1999-2004 4.6L Mustang
Installation Time
2 hours
Tools Required
- 2 jack stands and 2 wheel chocks for safety, you can use 4 stands if you want the entire car off the ground for clearance under the car
- A floor jack
- 1/4” ratchet and 8mm socket
- 3/8” ratchet, 6” and 12” extensions, swivel
- 1/2” ratchet, 15mm deep socket, 3/8” to 1/2” adapters (I had to use some due to lack of a 1/2” swivel)
- 7/8” wrench for O2 sensors
- 9/16” socket and wrench for supplied bolts/nuts
- Never Seize assembly lubricant to prevent headaches later down the road
Pre-Work:
Spray manifold to mid pipe nuts (4) and mid pipe to cat back bolts/nuts (4) with penetrating lubricant so that removal of these fasteners will go smoothly and only require a bit of muscle and hand tools.
Installation Procedure:
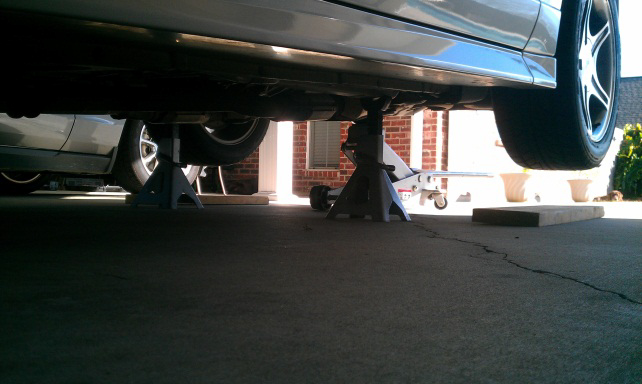
1. Make sure the engine and exhaust are completely cool. Make sure the car is on a level surface, set the emergency brake, and chock the rear wheels if you are only lifting the front of the car up.
2. Disconnect the battery using the 1/4” ratchet and 8mm socket. This needs to be done because you will be working around the starter, which is kept live at all times. You do not want to accidentally shock yourself.
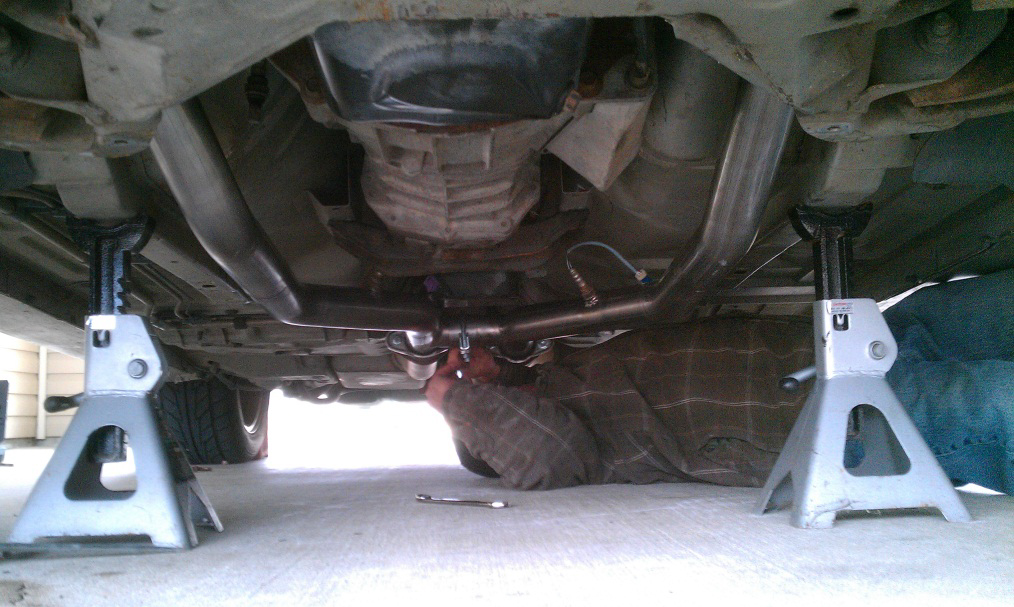
3. Jack the front of the car up by the K member under the engine. DO NOT jack the car up by the oil pan. Give yourself enough room to comfortably work under the car. Place the jack stands under the front sub frame.
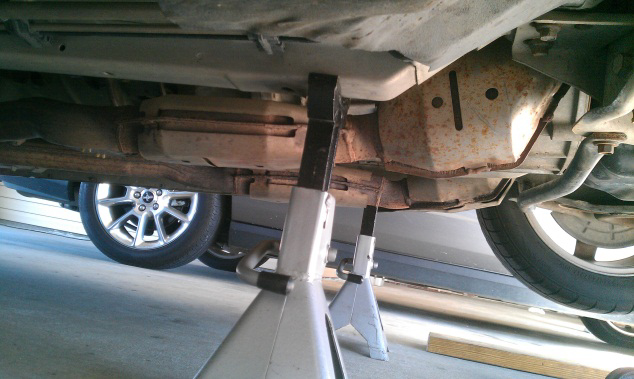
4. Remove the K member brace, which is the black bar you see behind the engine. It is held on by two 15mm bolts and some nuts on top that have a wing on them. You may need to use the 1/2” drive ratchet to put some muscle on them. Mine were very tight.
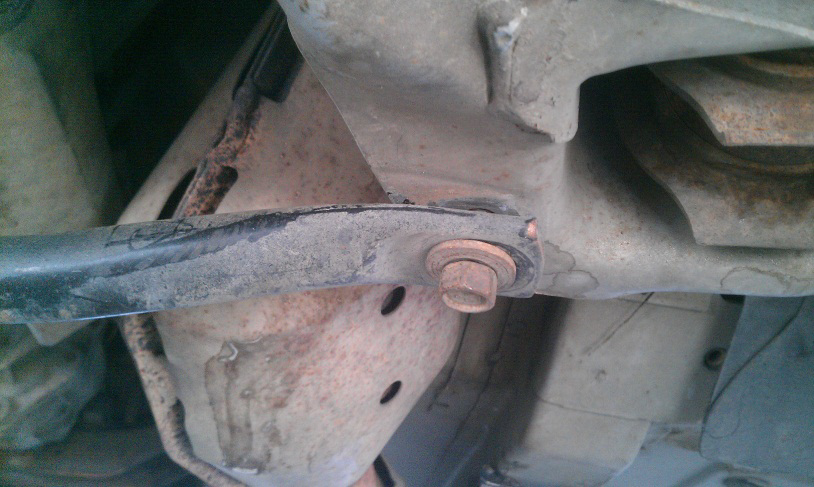
5. Loosen and remove the nuts and bolts on the cat back to mid pipe connection. Sizes will vary with this step, as not all cat backs come with the same size hardware. Mine had both 15mm and 17mm nuts on a stud. You may find it necessary to spray these connections again due to rust buildup. You can let the cat back hang down with no support. Be cautious of your exhaust tips hitting your bumper and scratching it up.
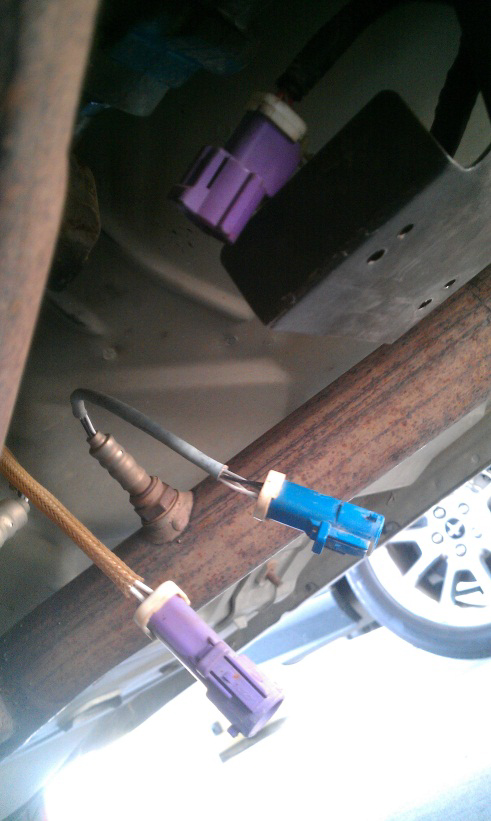
6. Remove the front O2 sensors from the mid pipe using the 7/8” wrench. It is a tight fit to get in there, but it is possible. I chose to remove them this way rather than disconnecting the harness because it is quite difficult to reach the harness near the top of the transmission. When they are removed, just let them hang out of the way.
7. Disconnect the rear O2 sensors from the harnesses. They come loose by depressing a small tab on the connector.
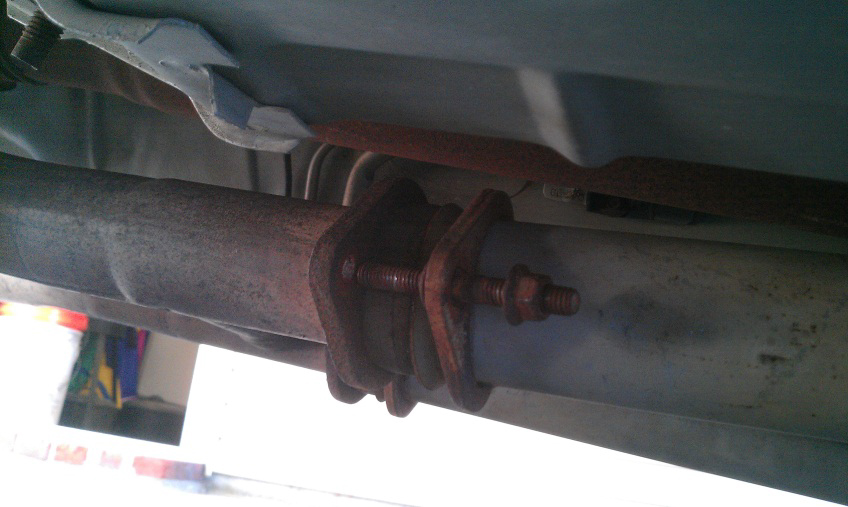
8. Now the fun begins. It is time to remove the mid pipe to manifold nuts. They are 15mm nuts and will require a deep socket if using 3/8” drive, but a 1/2” drive regular socket will work. I recommend using a 6 point deep socket so that you minimize the chance of rounding the nuts. You will need about a foot of extensions and a swivel to get most of the nuts. The top passenger side nut is easiest with a swivel and accessing it between the frame rail and catalytic converter. Once all of the nuts have been removed, the H pipe will drop down. Be careful, as it has a bit of weight to it.
***Tip: If you round one of the nuts like I happened to do, Craftsman makes some nice bolt extractors. They look like a socket with a reverse threading to them. They bit into the stripped or rounded head of the nut and lock onto it while you remove it. They worked like a charm to get my stripped nut off.
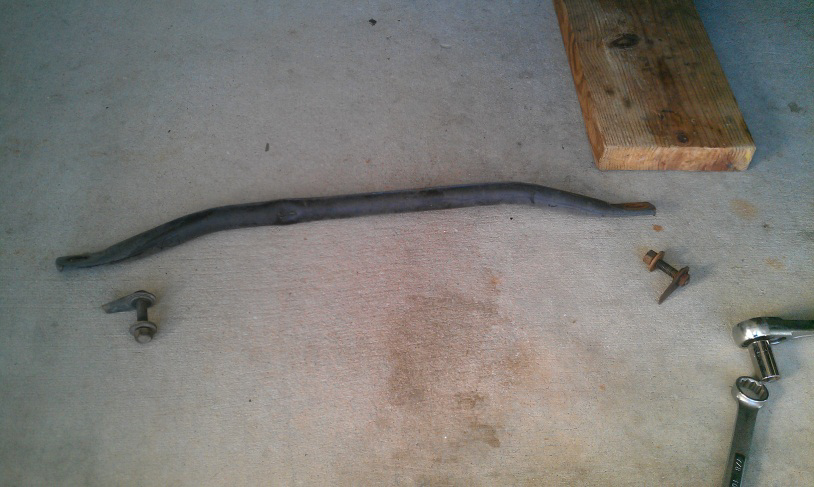
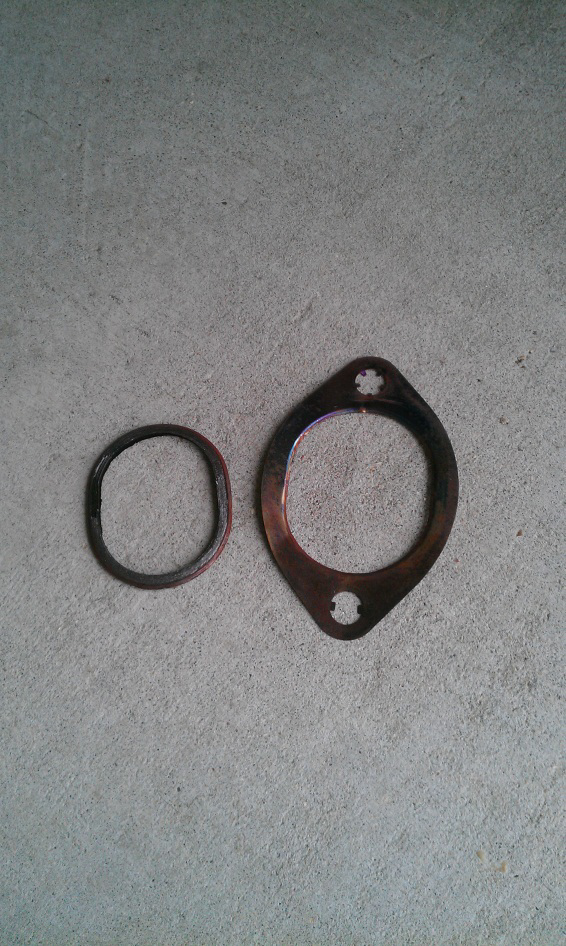
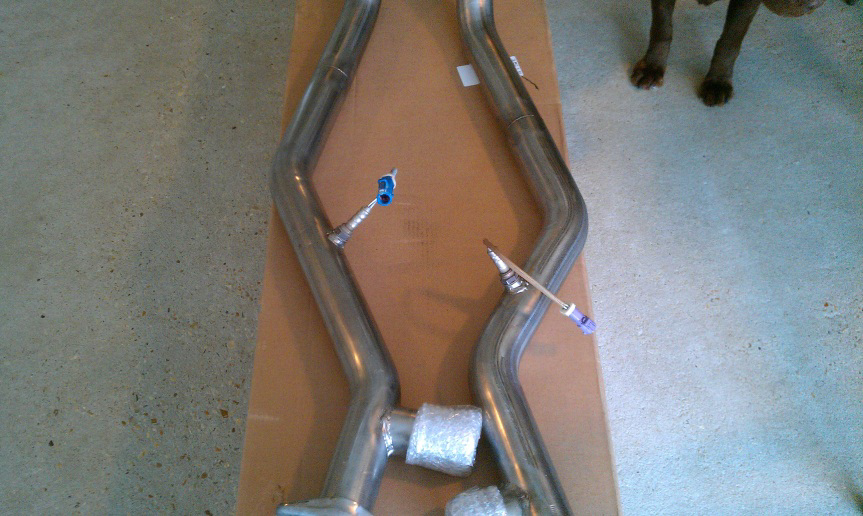
9. Pull the H from the car and make sure you remove the old gasket material from the manifold.
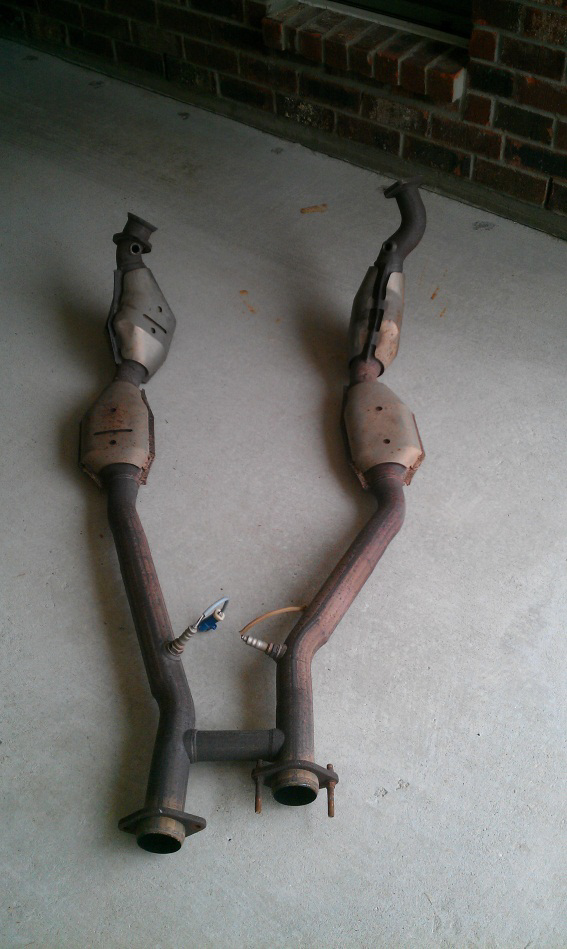
10. Remove the O2 sensors from the rear of the H pipe and put them into the new pipe. Put a dab of Never Seize on the threads so it won’t be stuck next time you remove them.
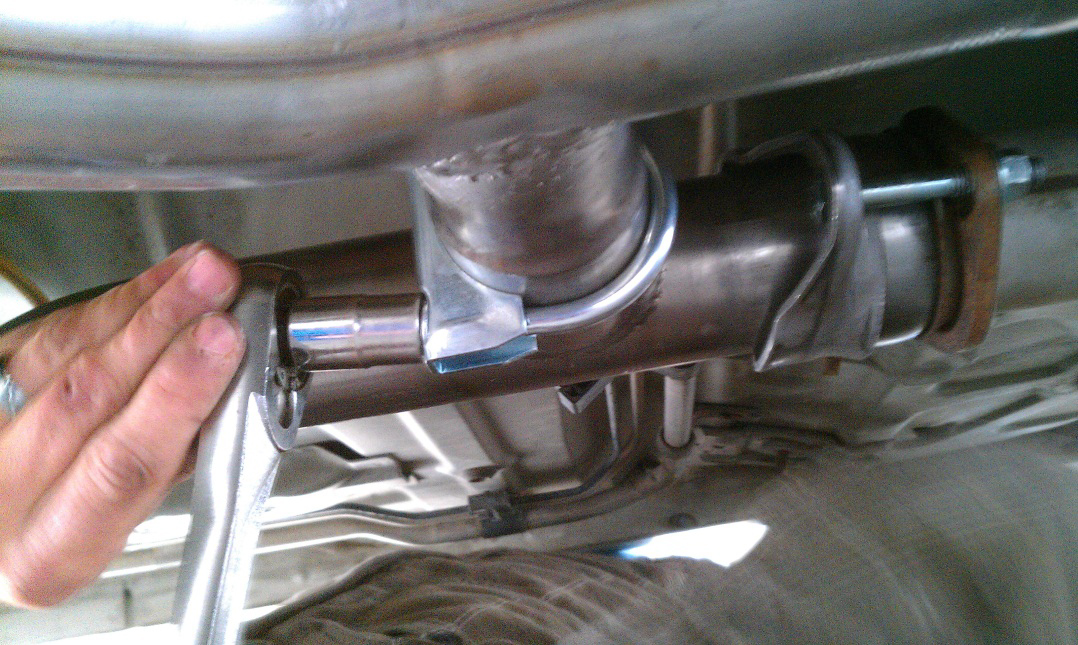
11. Start with whichever side you want to install the new pipe. Make sure you place the supplied gasket on the passenger side manifold flange. Line it up on the studs on the manifold and start the nuts to keep the pipe in place. Put a dab of Never Seize on the manifold studs. Do this with the other side also. Once it is held in place, connect the cat back in the same fashion, using some Never Seize on those bolts as well. The entire system should be mocked up and in place loosely.
12. You can now begin to snug things up starting with the manifold nuts. Make sure to tighten everything down evenly to minimize the chance of leaks and to seat everything properly. Replace the front O2 sensors into their bungs in the new pipe with a dab of Never Seize. It will help if you twist them up as if you were loosening them (counterclockwise) before putting them into the bung so that they will not be twisted when you get them tight. Move to the cat back connection and tighten the bolts and nuts up after you have verified that everything is lined up, including your exhaust tips. Be careful not to tighten too much, as the flanges will bend.
13. Now you can put the supplied clamp on the H connection between the pipes. Once again, a dab of Never Seize will not hurt anything. Snug this up pretty tight. I chose to orient the studs on the U bolt to the front of my car so that it gave me a bit more ground clearance due to being lowered.
14. Reconnect the rear O2 sensors to the harnesses. Reconnect your K member brace and reconnect your battery. Start the car up and check for leaks at any connections. If everything is sealed up tight, you are ready to go for a test drive. Let the car down and clean up your tools and you are now ready to go!
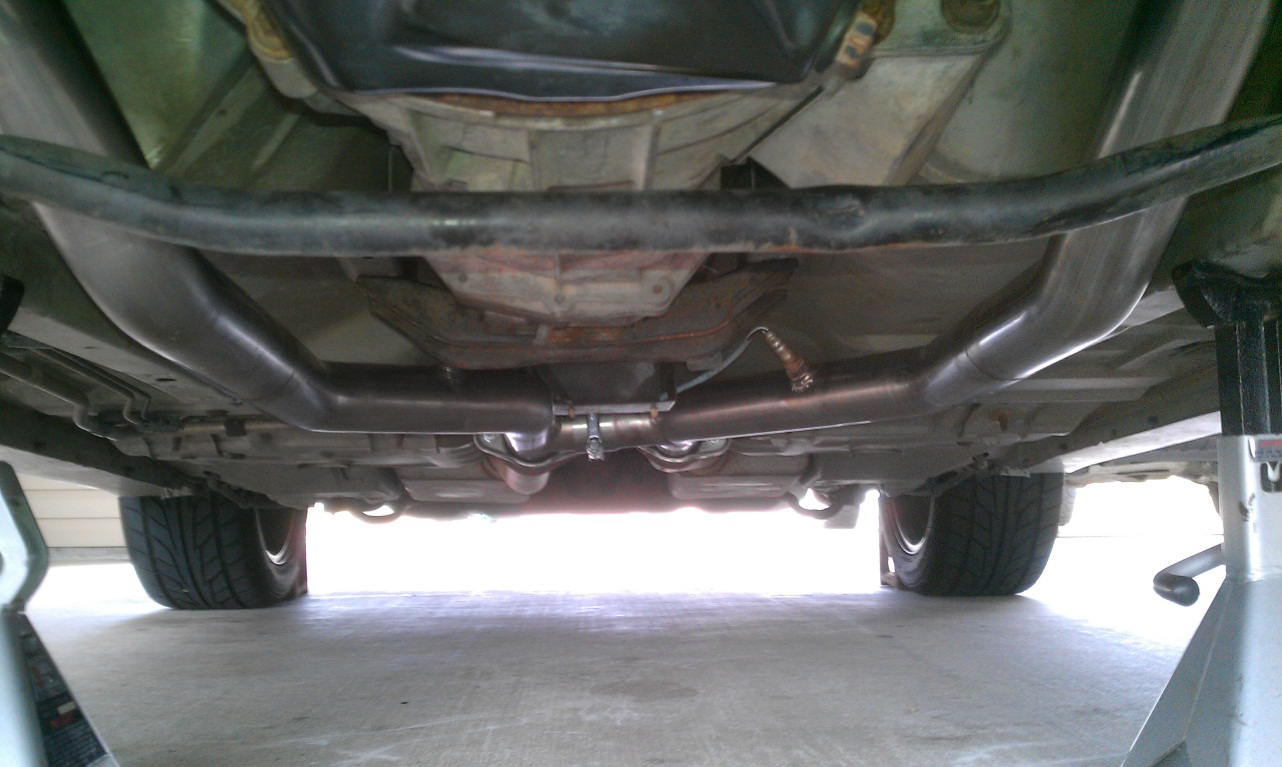
You’re all done! Go enjoy the American Muscle sound your Mustang now has!
Installation Instructions written by AmericanMuscle customer 2.1.13
