 FREE 1 to 3-Day Delivery on Orders $149+ Details
J&M Extreme Joint Mustang Upper Control Arm ('05-'10) - Installation Instructions
Installation Time
4 hours
Tools Required
- 18mm Deep Socket
- 21 mm Socket
- 18mm wrench
- 21mm wrench
- 1/2" Ratchet
- Breaker Bar
- Jack
- Jack Stands
- Wheel Chocks
- Torque Wrench

Shop Parts in this Guide
Installation
1. Place wheel chocks in front of the front wheels and raise the rear of the car. I recommend raising the rear end by using the differential as the jacking point. You may want to use a 2x4 to help spread out some of the weight. Place the jack stands on each side under the rear pinch welds and slowly lower the car on to the jack stands.
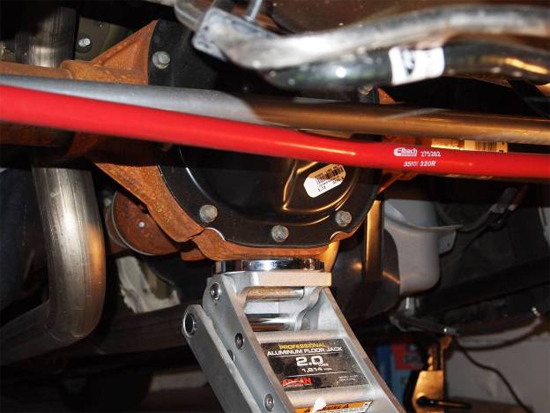
2. Use the 18mm deep socket to remove the nut that connects the stock upper control arm to the rear differential. I found it helpful to raise the differential slightly with the jack to remove the bolt.
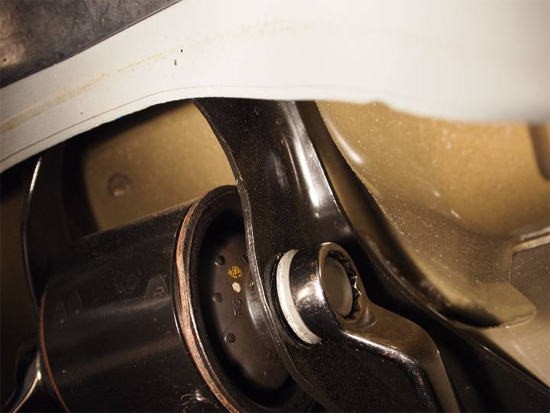
3. Using the 18mm and 21mm wrenches remove the nut from the upper control arm mount. I found this to be the most difficult step of the entire installation. If you have a ratcheting 18mm or 21mm wrench here use it! Loosen the nut all the way and remove, you will not be able to remove the bolt at this time.
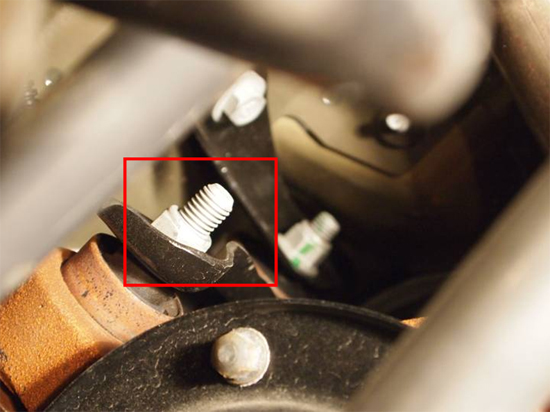
4. Using your 18mm socket loosen and remove the two bolts that hold the Upper Control Arm mount. Pictured below is just one of the bolts.
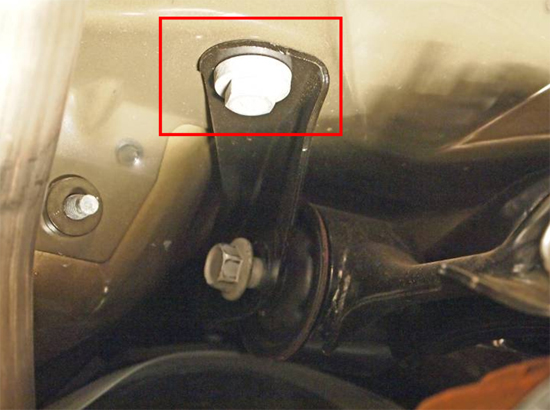
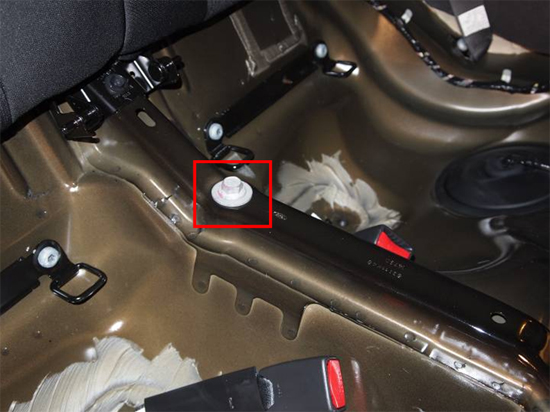
5. After the two bolts have been removed. Get inside of the rear of your Mustang and remove the rear seat cushion. This is a simple matter of finding the two tabs under the front of the rear seats. It's where the back of the knees of your passengers would be. After removing the cushion, locate the last Upper Control Mount and LOOSEN it. Do not remove it completely. The directions stated that this should be a 21mm bolt but I found that it was an 18mm bolt on mine. This could be due to the fact that my car is a 2010 Mustang. Use the breaker bar on this bolt as it is on very tight.
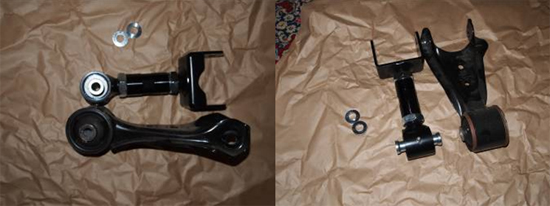
6. After loosening the bolt from inside the car get back underneath the car. You should now be able to remove the bolt holding the Upper Control Arm. In the pictures below you will see a comparison of the stock arm and J&M arm. I found that the J&M UCA came in the same length as the stock UCA and did not need to be adjusted.
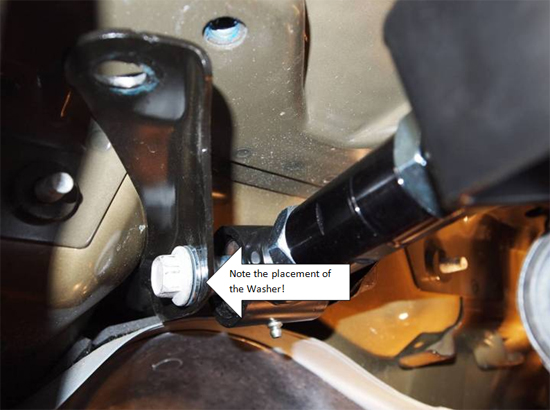
7. Install the J&M arm into the mount. Place the two bushings in the kit on the outside of the UCA mount holes. These are stepped washers that help correct the size of the holes in the mount. When installed correctly the control arm will not move. Loosely tighten the Upper Control Arm bolts, the one on the mount and the other on the differential. From underneath the car tighten the two UCA mount bolts to 85 ft-lbs. Climb inside the car and tighten the last UCA mount bolt to 129 ft-lbs.
8. After the mount has been tightened down. Load the suspension by raising the car and placing onto jack stands. Tighten the UCA bolts to 129 ft-lbs. You will find that the flag bolt that connects the UCA to the differential will spin because there is no longer an edge for it to catch on to. Use the 18mm wrench to keep the bolt from spinning as you tighten it down. You're done!
Installation instructions provided by AmericanMuscle customer James Yu 8.10.10
