 FREE 1 to 3-Day Delivery on Orders $149+ Details
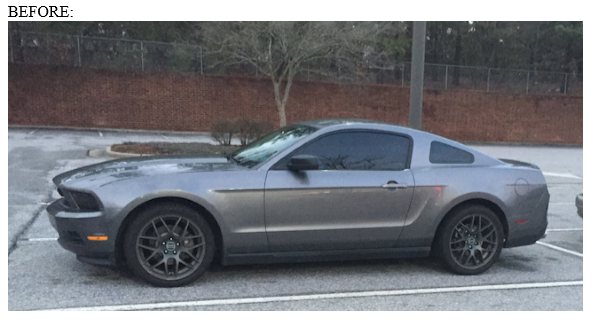
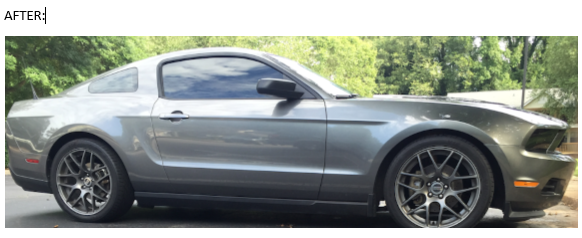
How to Install KONI Sport Adjustable Shock, Strut & Eibach Pro-Kit Lowering Spring Kit (11-14 GT, V6) on your Ford Mustang
Installation Time
4 hours
Tools Required
- Metric Deep Socket Set
- Adjustable Crescent Wrench
- Spring Compresors
- Jack
- Jack Stands
- Chock Blocks
- Impact Wrench (Recommended)
- Bench Vice (Recommended)

Shop Parts in this Guide
Front Strut Install
1. First set E-brake and properly secure wheels
2. Then, loosen nuts slightly on both front wheels( Bolt size depends on wheels)
3. You will now jack up the car’s entire front end
a. You need to do this to relieve pressure on the front sway bar to make the endlinks easier.
b. Each time placing a jack stand to support the car rather than leaving the jack.
4. Now you can remove the wheels on both sides (Excuse the after install photo, bolts are the same)
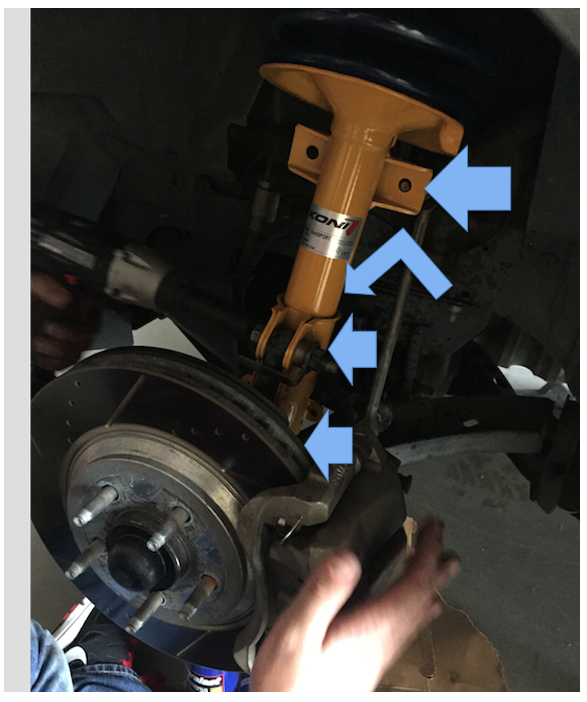
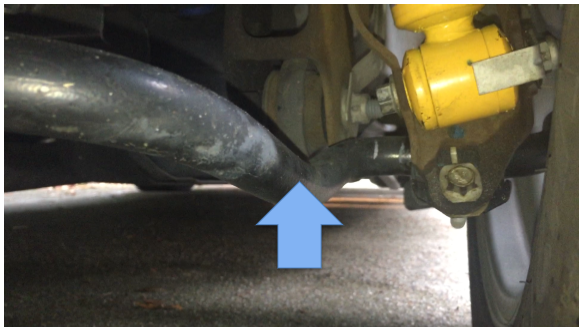
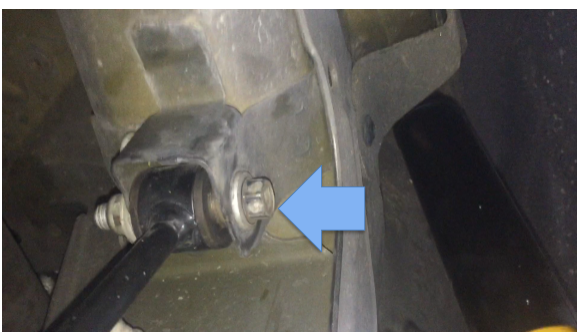
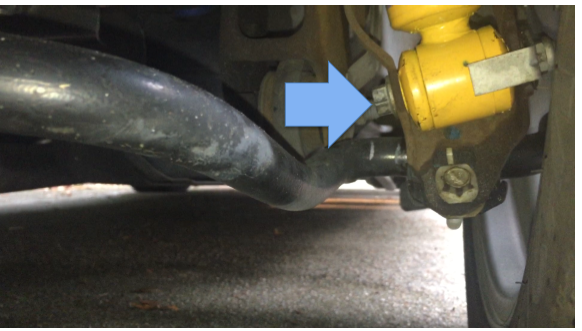
5. After both wheels are removed undo each of the nuts/bolts pictured with and arrow. There will be three obvious ones, but on the back there is a small bolt and clip holding in the brake lines. (Bolt sizes in order pictured - 18mm for sway bar endlink, 10mm for brake lines, 18mm for strut bolts).
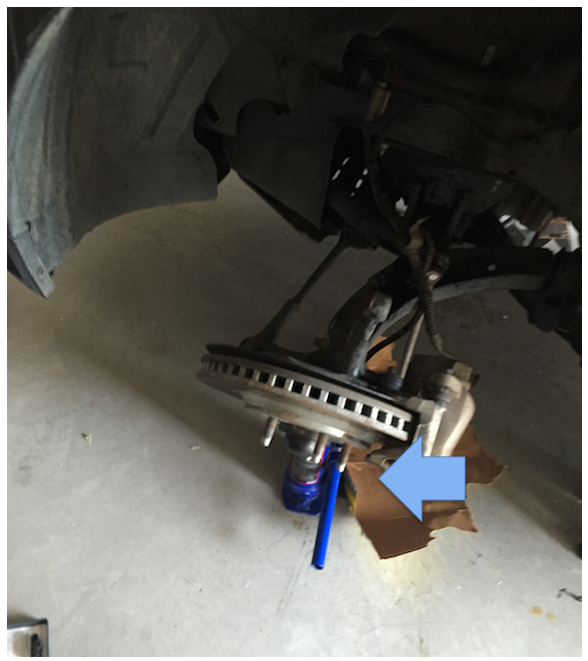
6. You should now use the jack from before to brace the A-arm that is holding the brake rotor.(This is a great time to do brake maintenance if necessary and check pad thickness if not sure).
7. You will now use a 13mm deep socket to remove the strut nuts from the strut tower, you will need to support the strut with your hand as you undo the last bolt because it will fall.
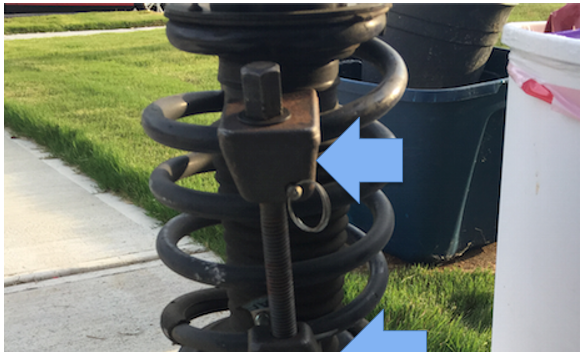
8. Next you will mount you spring compressors and compress the spring slightly to allow safe removal of the strut mount on top.
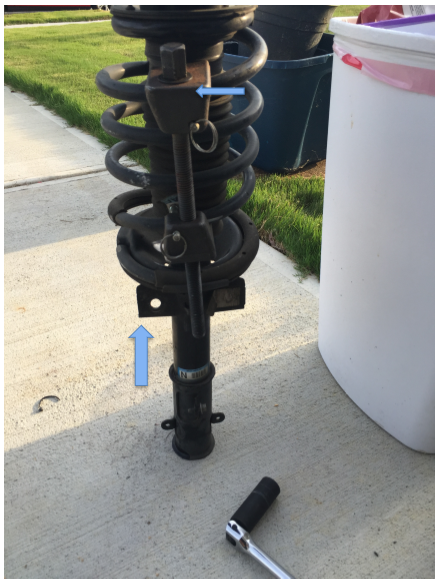
9. Now you will assemble the new Strut, springs you will set your springs on and rescrew down the strut mount once they are seated properly ( Make sure the spring cannot rotate freely, it should sit with the bottom pushing against the strut body)(Shown using OEM Setup).
a. You will install the bump stop and dust cover onto the new strut the same way they are positioned on the OEM strut ( Flat side up).
10. Now do these instructions in reverse, when tightening the strut to the strut tower be sure to torque to roughly 30ft/lb, and lower strut bolts and endlinks to 85ft/lb.
Rear Shock Installation
1. Repeat steps 1-4 from before on the rear.
a. Safe location for jack and stands will be right next to the front of the rear control arms.
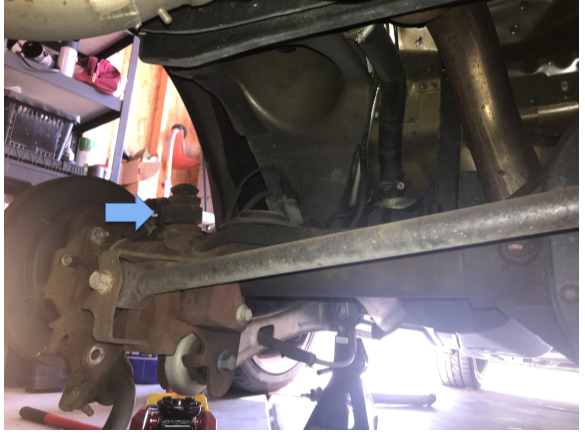
2. You will now notice that the shocks bolt is blocked by the rear sway bar, to move this you will need to undo the two central hangars and let it swing down out of the way. (15mm Sockets)
3. Now you can disconnect to bottom of the shocks (15mm socket). Place the jack underneath the differential to prevent unwanted movement of the rear axle.
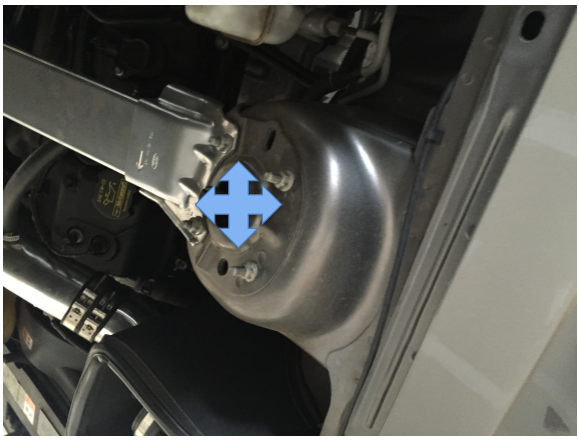
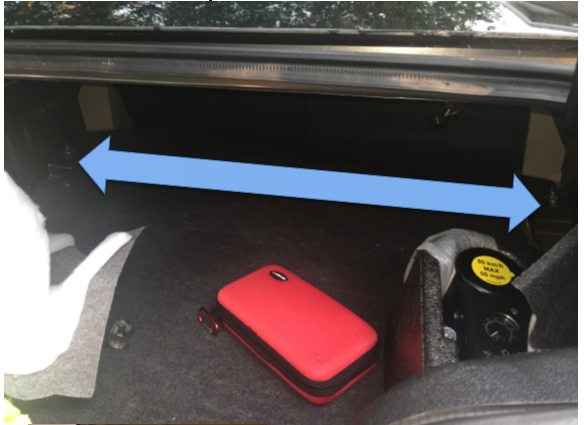
4. Now disconnect the top of the rear shocks( 15mm socket) that you can locate when you remove the bottom liner on the trunk and pull back the side lining from the front towards the rear bumper.
a. You will need to use your 7mm crescent wrench to hold the piston of the shock still while you turn the 15mm nut.
5. Now that the axle can be dropped you can change out the springs.
a. Remove the old springs and insure that the rubber isolator stays in place on the axle.
b. Replace with Eibach springs with the letters right-side up
c. Remove the bump stops and their housing and pull out the old bump stop (They may be stubborn, twist and pull)
d. Replace bump stops
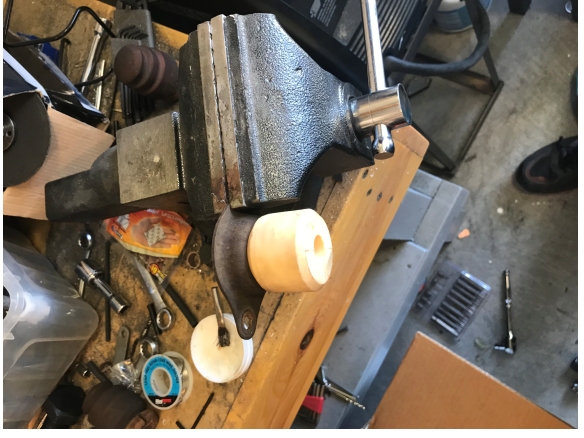
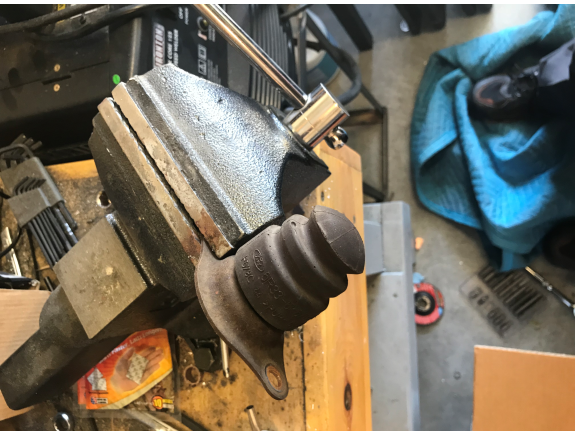
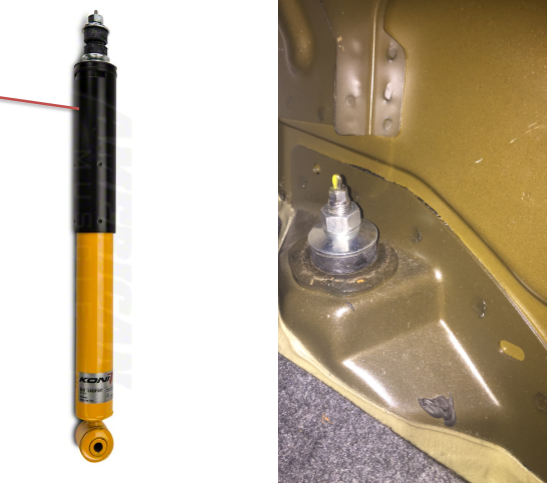
6. Once the springs are installed you will assemble the Koni shocks(removing the thread protector).
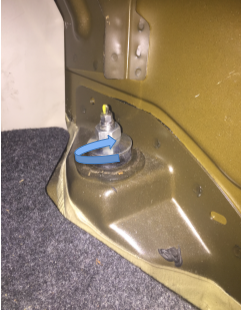
a. The order is rounded metal -- rubber bushing(flat side up) -- car -- bushing(Flat side down) -- rounded metal to washer to nut.
b. As pictured below(Red line represents the metal of the trunk).
c. Do NOT tighten with impact wrench if you have one, only snug down the top nut to avoid compressing the bushings, which in my case was 3-4 threads showing.
7. Now carefully lower your car and enjoy!
Installation Instructions written by AmericanMuscle customer Blaine W. 10/03/2017
