 FREE 1 to 3-Day Delivery on Orders $149+ Details
How To Install Kooks 1 3/4"Long Tube Headers on your 2011-2014 GT Mustang
Installation Time
10 hours
Tools Required
- Jack and jack stands or a car lift & pole jack
- 8mm, 10mm, 12mm, 13mm, 14mm, 15mm
- Deep and shallow sockets
- 1/4”, 3/8”& 1/2” drive ratchets
- A collection of extensions
- 13mm, 14mm, 15mm wrenches
- 7/8” wrench or 02 sensor socket
- Safety glasses & gloves
- Flathead screwdriver
- E8 inverted torx socket (a shallow 1/4 “ drive - worked best for me)
- 13/16” socket
- A 15mm mid-depth socket was helpful
- Anti seize
- Blue Loctite
- Zip ties
- step stool

Shop Parts in this Guide
Project car: 2014 Mustang GT

This project can be completed in 8 – 12 hours. Having a helper is also very useful.
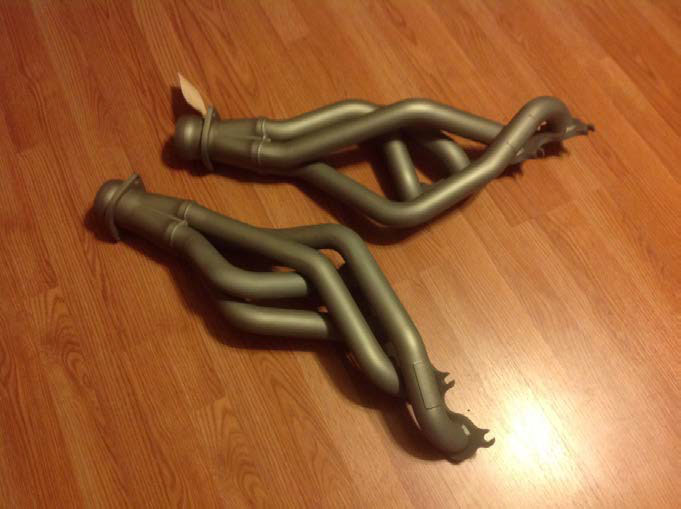
This write up will show you how to install Kooks 1 3/4" long tube headers on a 2014 Mustang GT by raising the engine. This eliminates the need to drop the K-member and is not as hard as some might think. I prefer to have my headers covered or coated, so I had my Kooks headers ceramic coated (titanium):
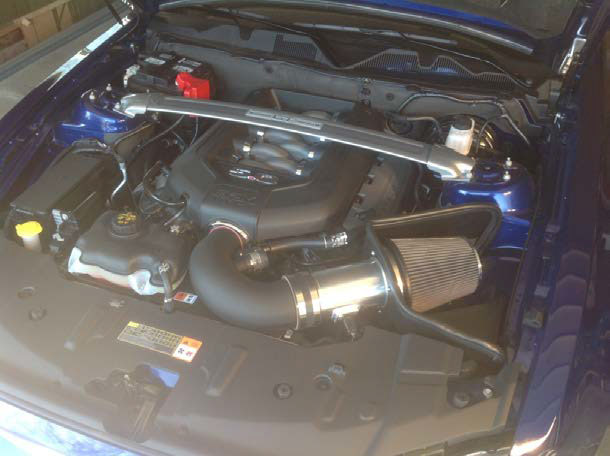
Before putting the car on jack stands, there are a few things in the engine bay that can be done.
1. Start by removing the strut tower bar (if equipped) by removing the four 13mm nuts holding it in place. Then, disconnect and removing the battery. Use an 8mm socket to unbolt and remove the negative terminal followed by the positive terminal. Remove the sleeve from around the battery. Unbolt the tie down strap using an 8mm socket. Loosen this bolt until it comes off.
2. The battery can now be lifted out. Set it safely aside.
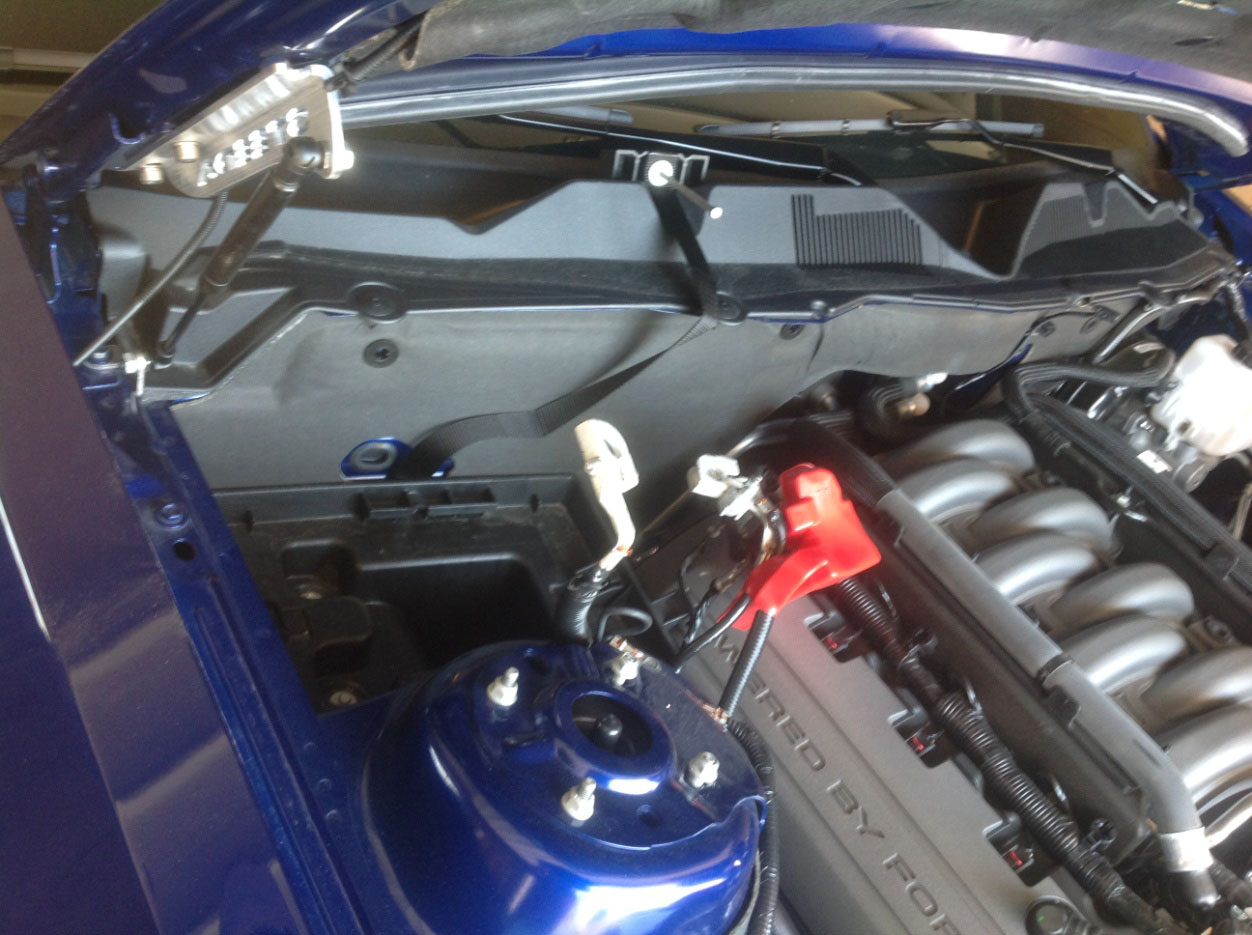
3. The positive terminal wires are secured to the battery tray –remove the wires to get the tray out.
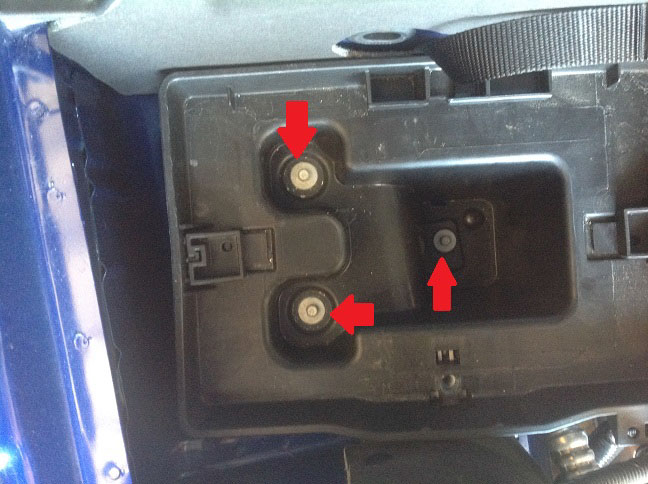
4. Remove the three 8mm bolts holding the tray in the car and set the tray aside.
5. The engine cover comes off by pulling it straight up. Remove the breather tube and sound tube (if equipped) from the intake.
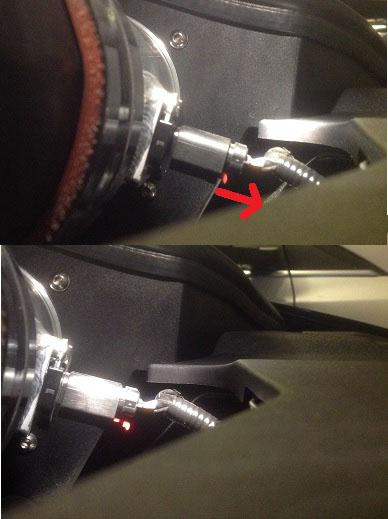
6. Unplug the mass airflow sensor by pulling the red tab back and pulling the connector off. Loosen the clamps holding the intake tube on. Remove the 10mm bolts holding the air box in and remove the intake from the car.
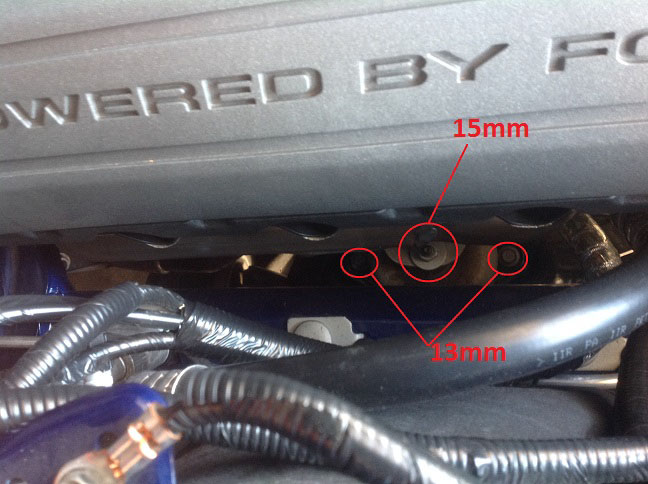
7. Loosen and remove the bolts holding the engine mounts on the k-member. There is a 15mm nut on the top and two 13mm bolts on the sides. Remove the nut and 2 bolts from the mounts on both sides. I used the 15mm mid-depth socket on these nuts because a regular deep socket is a tight fit against the headers. (the two 13mm bolts can be done after the engine is raised if space is an issue).
8. Inside the car, lock the steering wheel by turning it until it clicks and stops. Remove the retainer plate from the steering column inside the car by removing the two 10mm nuts. The plate comes off by hand or by using a pry bar.

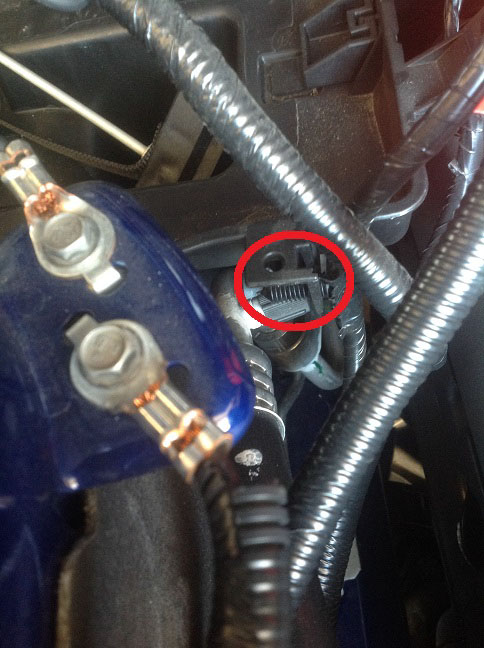
9. Back in the engine bay, there is a wire harness clip on the top front stud of the driver’s side engine mount. The easiest way to get this off is using a long pry bar (I used the sub frame support bar that comes off the car in a few steps). Slip the pry bar between the clip and the engine mount and pop that sucker off. It barely took any effort using the support bar.
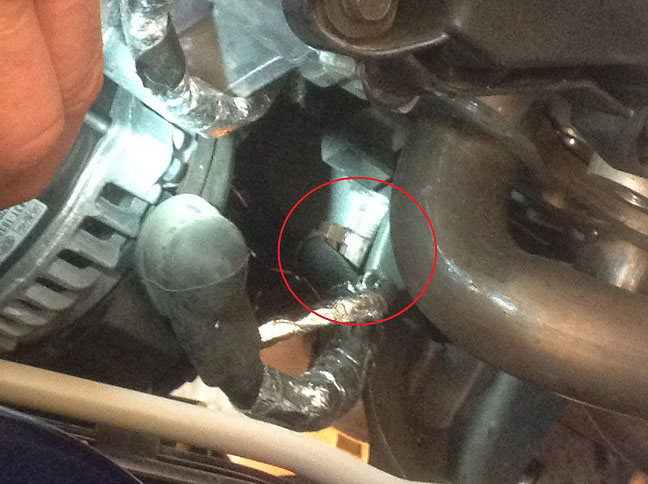
10. Remove as many 15mm exhaust manifold nuts as you can from the top. It was pretty easy to break the 15mm nuts loose, and then use the torx socket to remove the nut and stud together. This cannon be done on the top front passenger side stud because the AC line is in the way. Just remove the nut from that one for now.
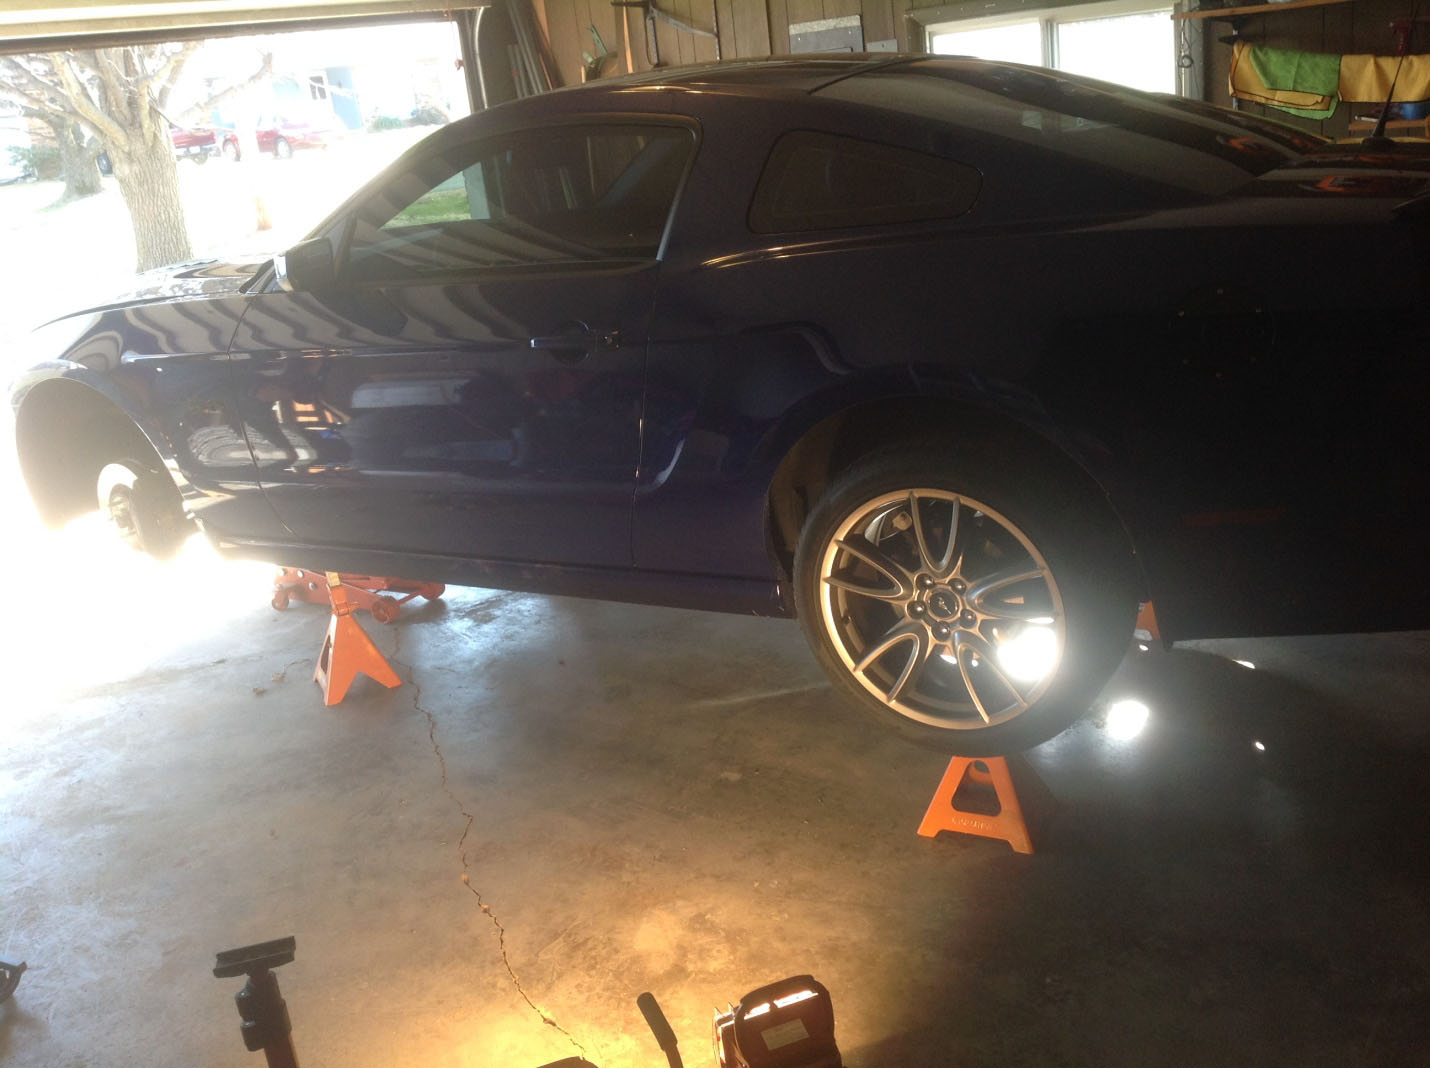
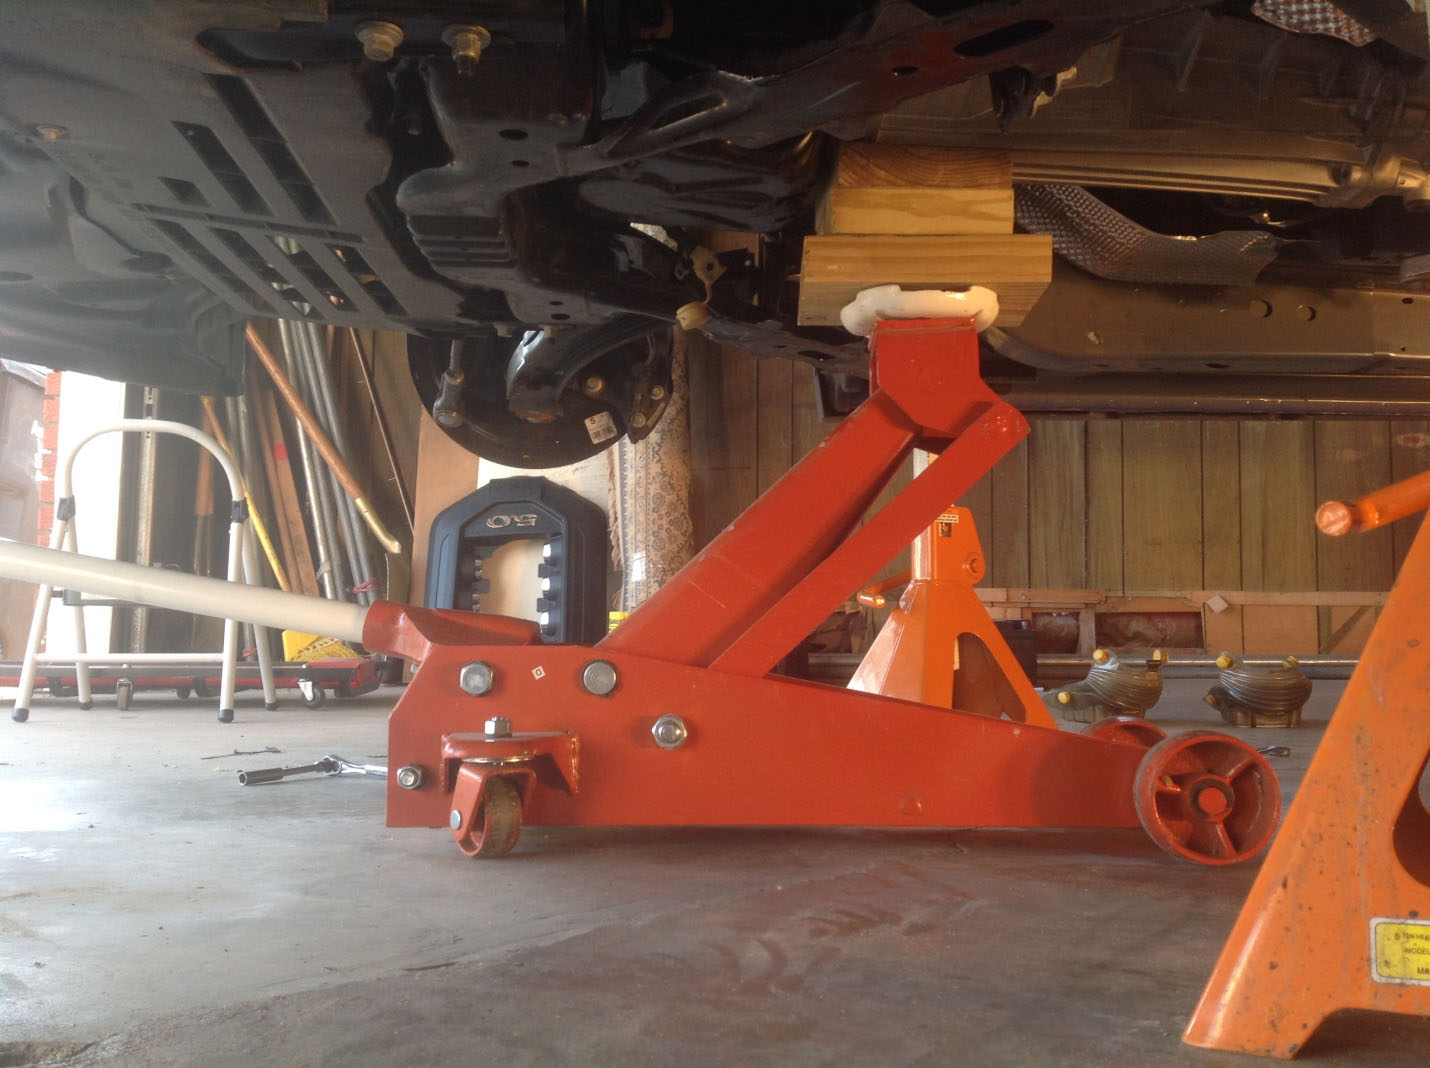
11. Once you’ve removed everything you can from the top, the next step is to safely raise the car and support it on a lift or on jack stands. I raised my car about 16 inches and it provided plenty of room to do everything I needed. Watch where you put your jack stands on the front; don’t block the opening to the sides of the engine where you will be removing and installing your exhaust pieces. Removing the front two tires is recommended, but not mandatory.
12. With the car safely raised, remove the 02 sensors using a 7/8” wrench or 02 socket. If any of them don’t want to come off, I would recommend you just unplug the sensor from the harness, remove it with the H-pipe or exhaust manifold and then remove the sensor using heat.
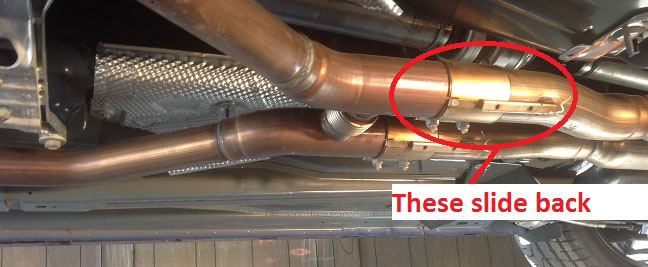
13. Loosen the four 15mm nuts at the rear of the stock H-pipe. Remove the four 15mm nuts from the front of the converters. The passenger side top nut can be reached by using a long extension from the top of the engine bay. After everything is loose, you can use a hammer and a block of wood to tap the H-pipe off the car. The stock cats are a little hefty, so watch out. You can leave the clamps on the rear part of the exhaust. They will be reused (unless you are replacing the section after the h/X pipe).
The clamps will slide to the back of the car on the alignment bracket they are on.
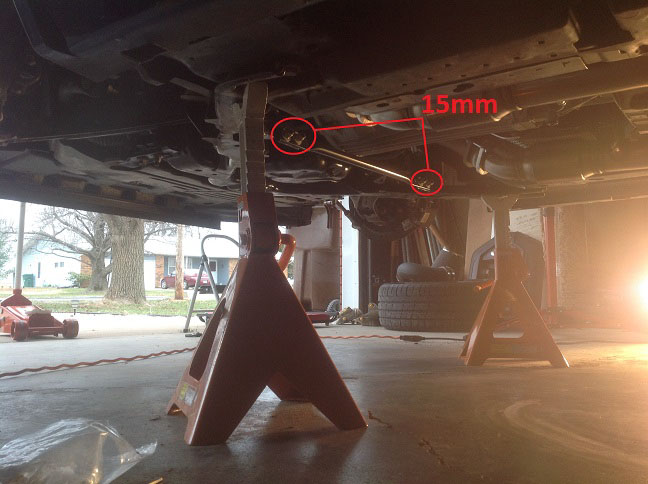
14. Remove the subframe bar by removing the 4 15mm nuts.
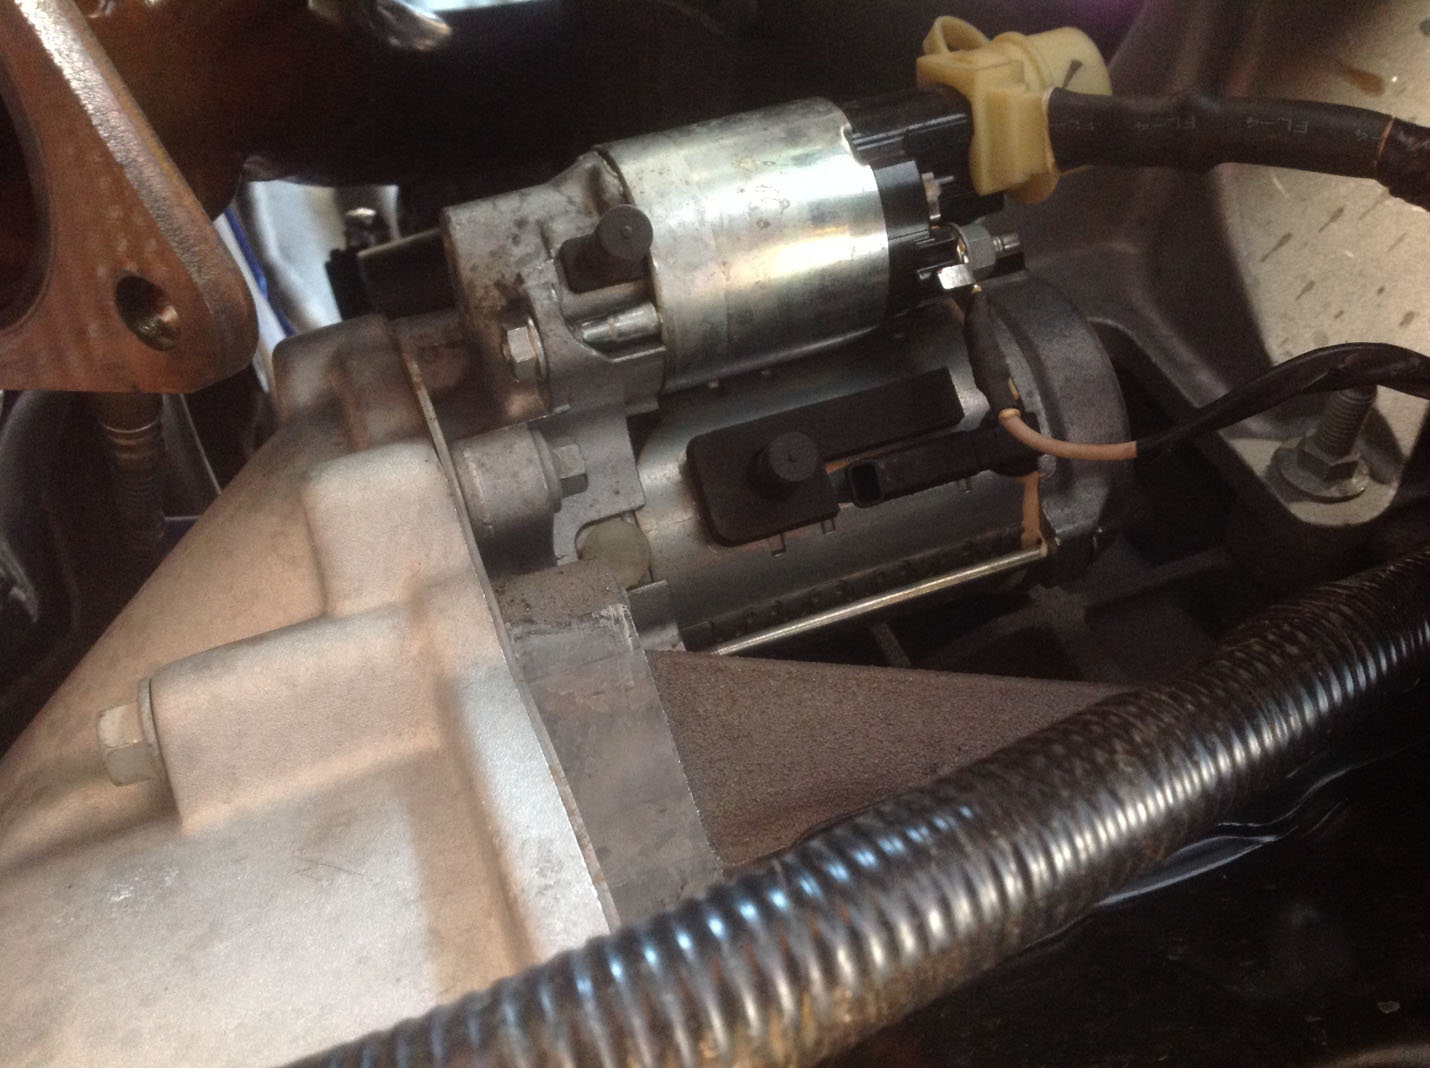
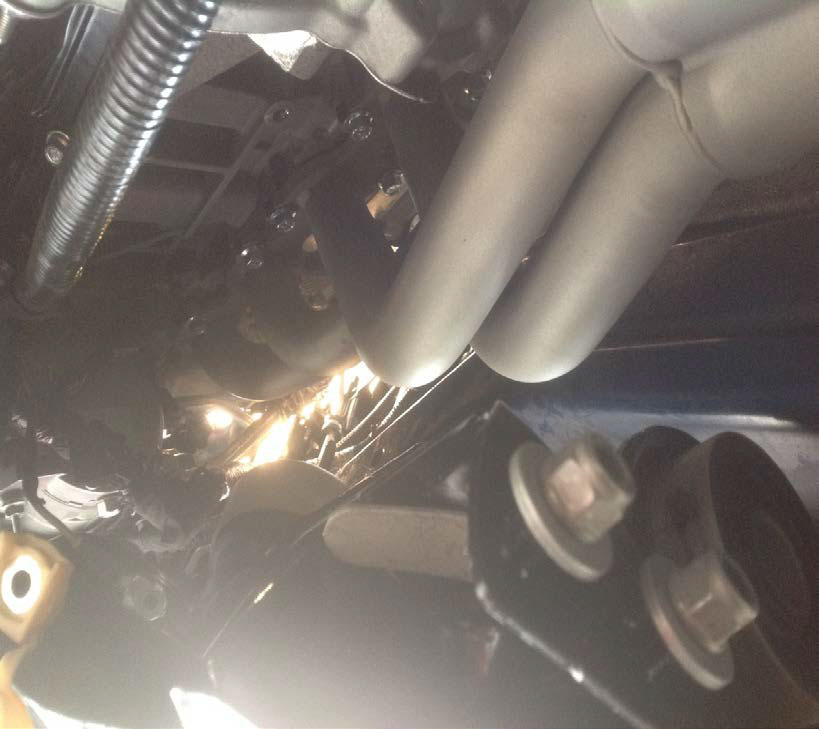
15. Remove the starter. There is a 13mm nut and a 10mm nut holding the starter wires on. The 13mm nut is under a protective cap which pulls off to expose the nut. Notice the connection has a groove on it so it can only be reinstalled one way. This will be significant later. There are three 10mm bolts holding the starter to the block. Once the wires and three bolts are removed, the starter will come right out.
16. The steering shaft u-joint/knuckle needs to be removed. Before removing it, make a mark on the steering column and joint, and the joint to the steering box so when you re-install it, your marks will line up so you know everything is properly lined up. I used a paint pen so the marks would not be easily smudged off. Loosen and remove the two 13mm bolts holding the joint on. The steering column telescopes, so just shove it up to the firewall to retract it out of your way.
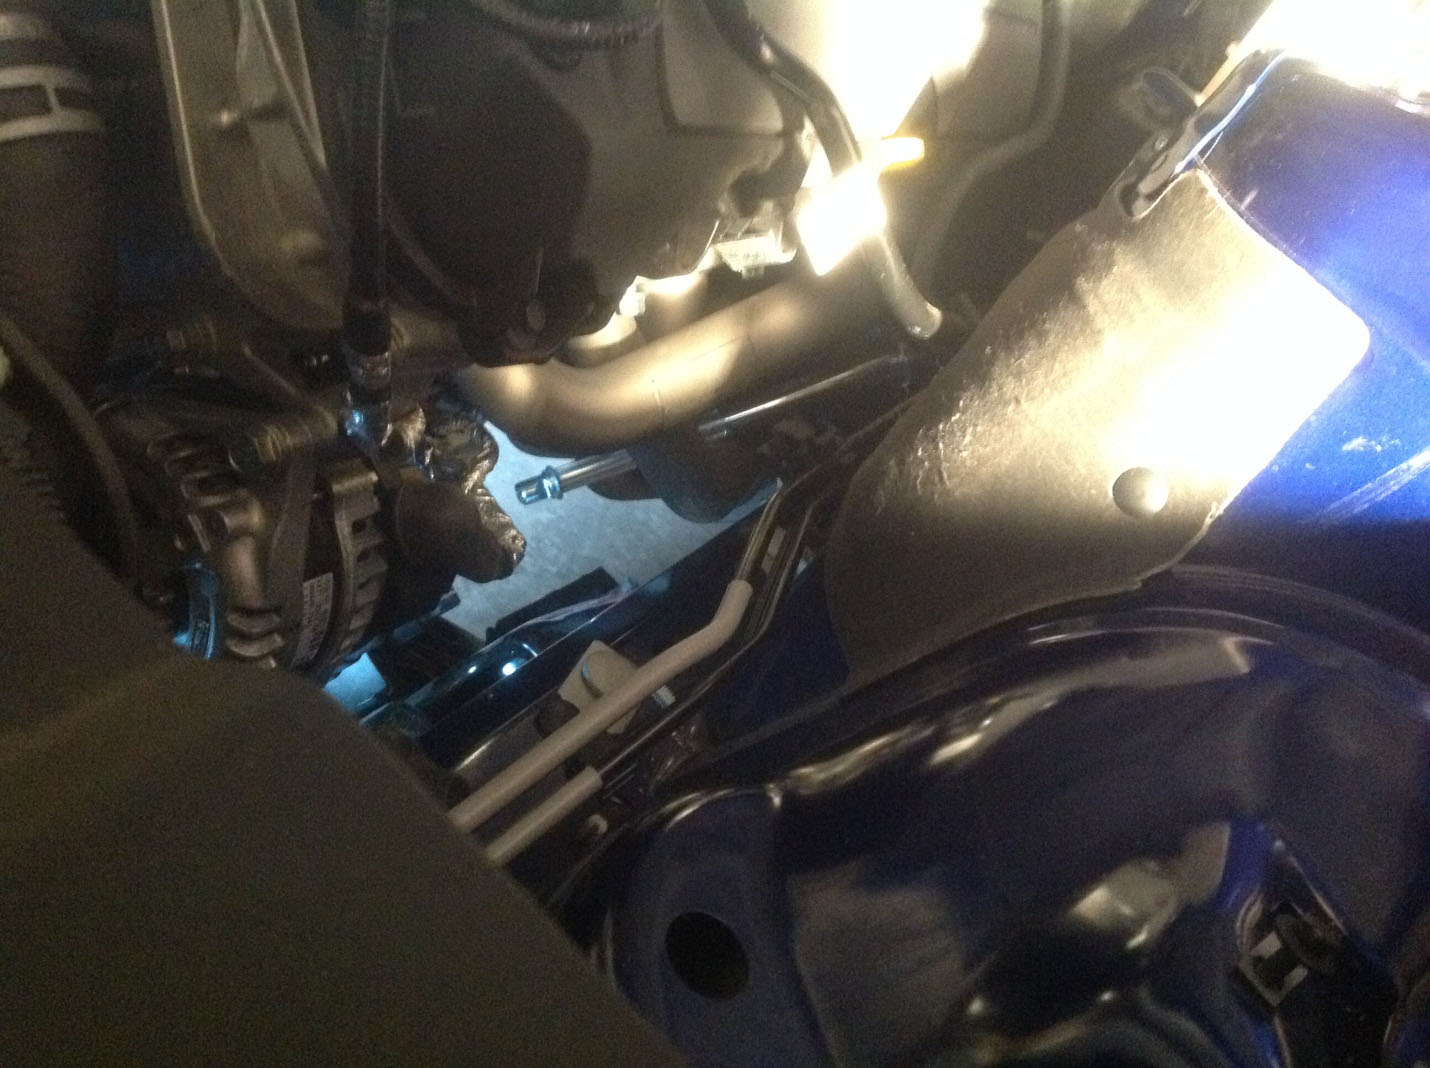
17. Next, the engine needs to be lifted about 1½”. Do not support the engine by the oil pan. I used some blocks of wood on the very forward portion of the transmission. Be mindful of lines as your are raising the engine so nothing gets pulled/pinched. To remove and install the headers, you can do one side at a time, or do them both progressively.
18. Remove the two 13mm studs and two 13mm bolts holding the aluminum driver’s side mount on the engine. Remove the aluminum mount from the block, and then remove the other part of the engine mount from the k-member. Since the bolts holding this part on the k-member were removed in step 4, this part of the mount will just lift out.
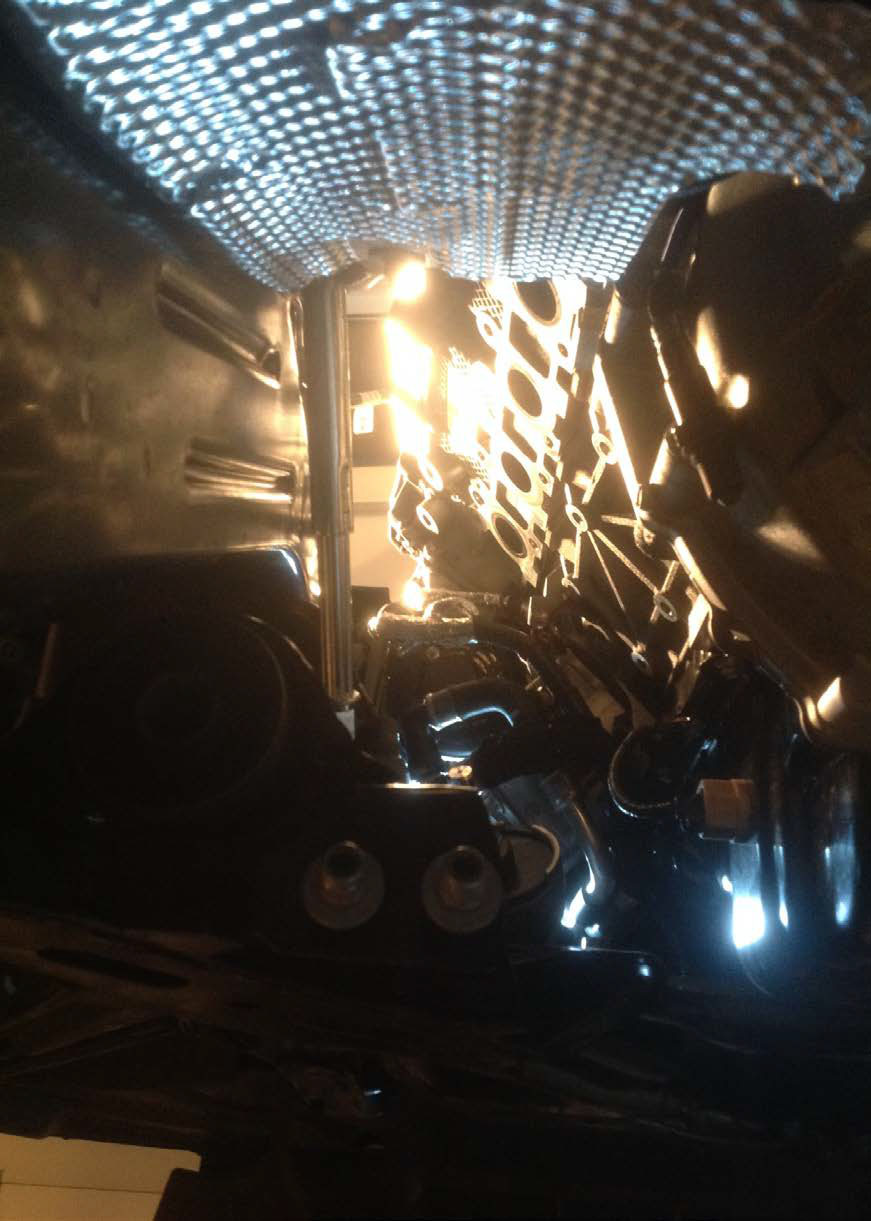
19. Begin removing the 15mm nuts from the exhaust manifold. It is pretty handy to have one person up top and one person on the bottom so you don’t have to keep getting under the car. Once all the nuts are removed, the header comes right out (remember to support the manifold so it doesn’t fall off). Remove any remaining studs from the block using the E8 inverted torx socket.
Exhaust manifold, engine mounts removed on driver’s side.
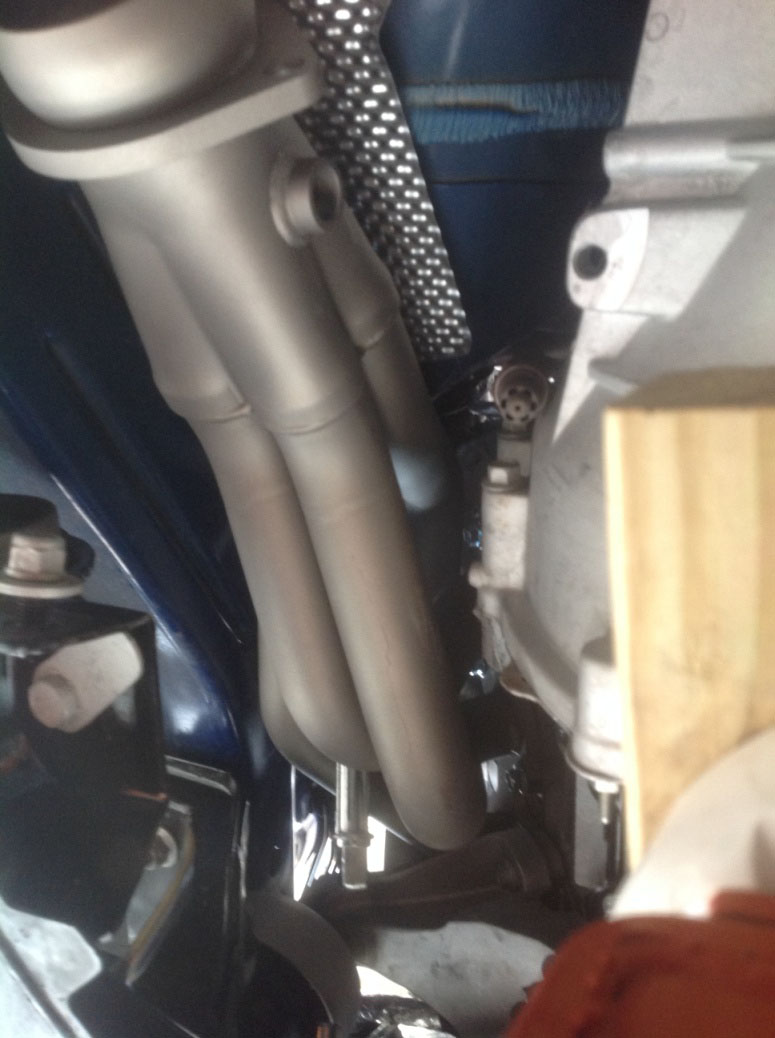
20. To install the header, first start two bolts along with the header gasket. From reading many reviews, it looks like the OEM gaskets work the best. I started the front and rear bottom bolts to give the header something to hang on when I got it in place. Keep in mind, there are two different threads depending on the year of your 5.0. Kooks supplied bolts for both threads so just use the ones that match the studs that came off with the stock exhaust manifold. To place the header, it may not be a straight shot to get it in, but you will not need to force it. Just use a little patience and try a few different angles to get the header up into place.
21. On the driver’s side, the steering shaft will be installed thru the header. While the engine is raised, it may look like the shaft will not line up to the steering box. This will correct itself when the engine is lowered.
22. Once the header is hanging on the two bolts we started previously, begin installing the rest of the bolts and running them down finger tight. I made several passes to progressively tighten the 14mm Kooks bolts to my satisfaction. I tightened them in this order:
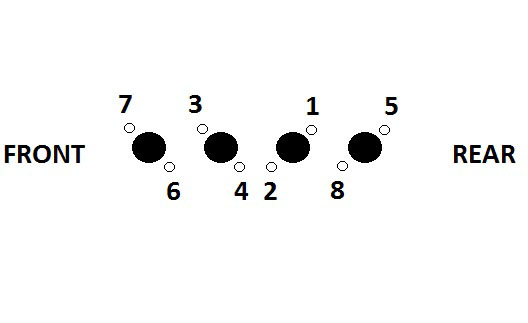
There is probably not enough room for a torque wrench, but if you can manage, tighten in one pass to 18 lb/ft, then 24 lb/ft in another pass.
23. The driver’s side header is now installed. Replace the motor mount on the K-member, and reinstall the aluminum mount on the engine block.
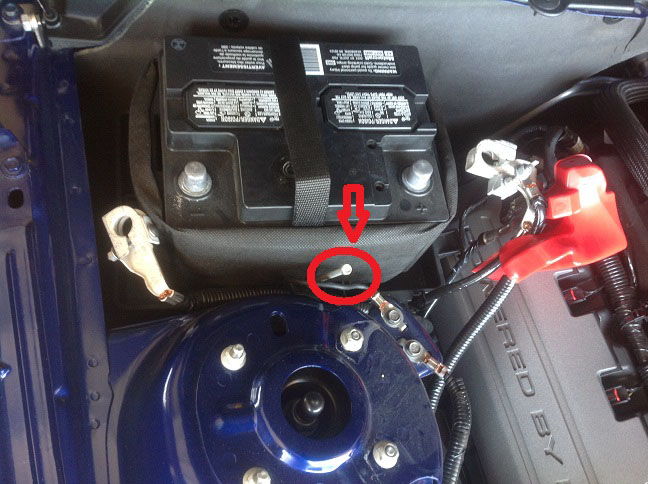
24. The passenger side comes off much like the driver’s side. Remove the 13mm nuts and studs holding the aluminum engine mount to the block. The one difference is the top front stud has a 15mm nut on it that has a ground attached to it. Remove the 15mm nut, remove the ground from the stud, and then remove the two 13mm studs and two 13mm bolts to remove the mount from the engine block.
25. After the aluminum mount is off, remove the engine mount from the K-member.
26. Start two 14mm Kooks bolts and header gasket, and then install the header. When the header is in place, run the remaining bolts in finger tight and then sequentially tighten the bolts.
27. Replace the Engine mount to the K-member. Reinstall the aluminum engine mount to the block. Remember to replace the ground wire on the top front stud and secure it with the 15mm nut.
28. Replace the starter before lowering the engine. The cable that has the cap on it may touch the header. I cut the portion that touches the header off and used the heat tape provided by kooks to wrap the starter wires and ‘tape’ the cap into place and protect the starter wires.
29. Ensure the motor mounts are lined up and carefully lower the engine. As the engine is lowered, keep an eye on that steering column. With it pushed up to the firewall, it should not be an issue.
30. When the engine is resting fully on the engine mounts, reinstall the steering joint by lining up the marks we made on the column and joint. The column can be a little tricky to get it to telescope back out, but it will come back out. Use some loctite on the threads of the 13mm bolts that secure the steering joint.
31. Install your Kooks midpipe.
32. Replace the 02 sensors using anti seize on the threads. For the front 02 sensors, the harness is secured at the top of the bell housing. You can pop the harness off its holder and this will give you enough slack in the harness to reinstall the sensor without needing an extension. For the rear 02 sensors, I only had to remove the driver’s side harness from the side of the transmission to reach my Kooks H-pipe. Zip tie the 02 sensor harness out of the way so it does not touch the exhaust.
33. Once everything is tight, look over everything once more to ensure no lines, tubes, cables are being pinched or touching the headers.
34. Replace the front wheels if you took them off. After everything is complete, you can lower the car.
35. From the top, tighten the two 13mm bolts and 15mm nut holding the motor mounts in the car. Do this on both sides.
36. Reinstall the intake, engine cover, battery and strut tower brace.
37. Remember to upload your tune!
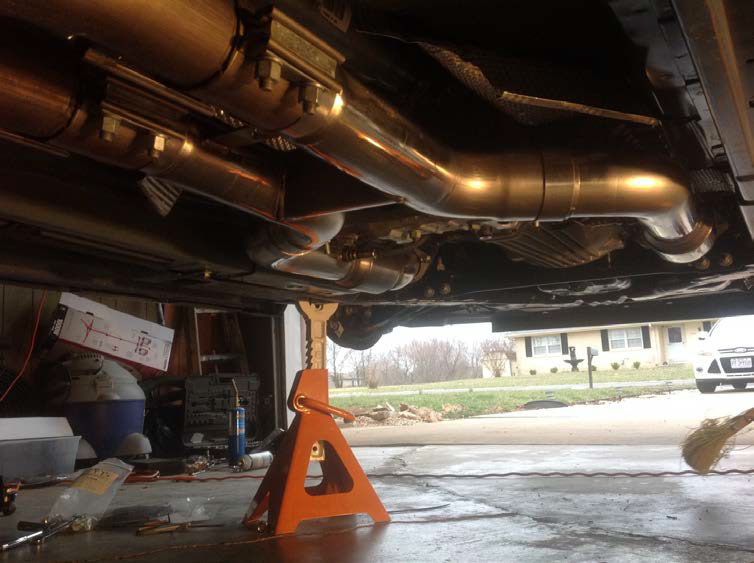
As you can see, the Kook’s headers aren’t quite as long as others therefore, I don’t expect to have any ground clearance issues. It also appeared that the transmission would easily come out with the headers installed.
Installation Instructions Written by AmericanMuscle Customer Matthew Hart 3/25/2014

