 FREE 1 to 3-Day Delivery on Orders $149+ Details
Pypes Long Tube Headers w/ Shorty X-pipe ('05-'10 GT) - Installation Instructions
Installation Time
1 days
Tools Required
- 3/8 drive ratchet with extensions, u-joint
- 10mm, 12mm, and 13mm sockets
- 15mm deep well socket
- 9/16 socket
- 9/16 wrench
- 7/8 wrench
- 1/2 wrench
- Jack and 4 jack stands
- drive ratchet w/5mm and 8mm sockets
- Tuner capable of turning off rear O2 sensors.
- Air ratchet (Optional)
- Impact Gun (Optional)
- 15mm deep well impact socket (Optional)
- Breaker bar (Optional)
Installation
1. Disconnect the negative battery cable using an 8mm socket on the terminal connection.
2. Jack the car up, front and back. Support the car by the frame as opposed to the suspension, which will allow you to get the most clearance for working below the car.
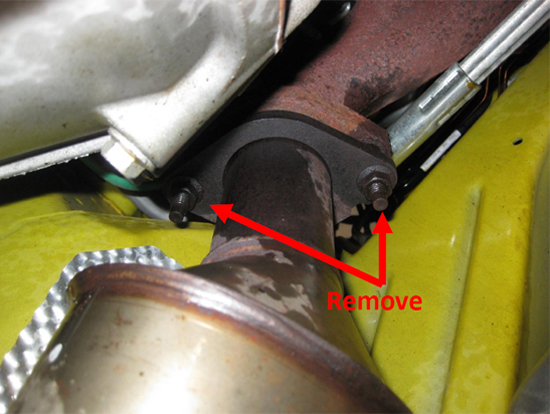
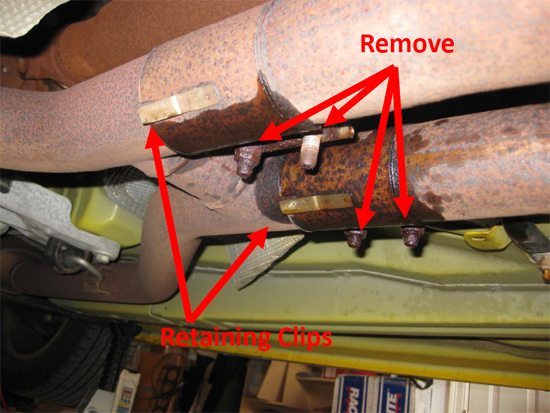
3. Unbolt the stock mid pipe from the over-axle pipes using 15mm deep well socket. Once the clamps have been loosened, pull the retaining clip back and slide it back down the over-axle pipe, releasing the mid-pipe. Unbolt the front of the mid pipe from the manifolds using the same 15mm socket.
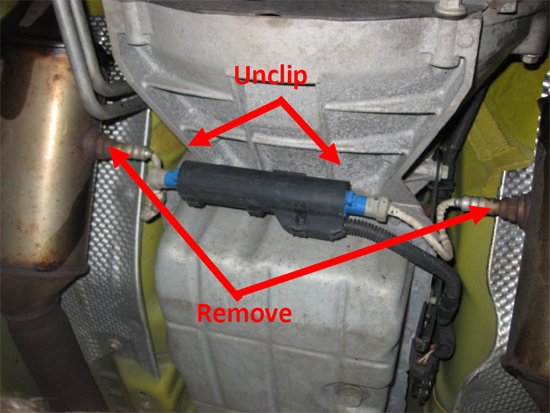
4. Remove the rear O2 sensors and the front passenger side O2 sensor. The sensors can be unclamped before you unscrew them so you don’t twist the wires. Use a 7/8 open end wrench to remove them.
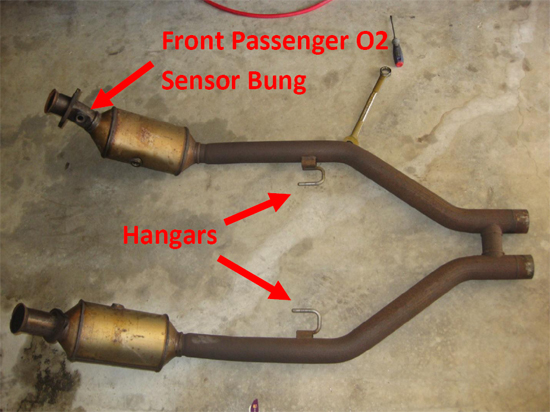
5. Remove the mid-pipe by sliding it towards the back of the car, out of the hangar mounts.
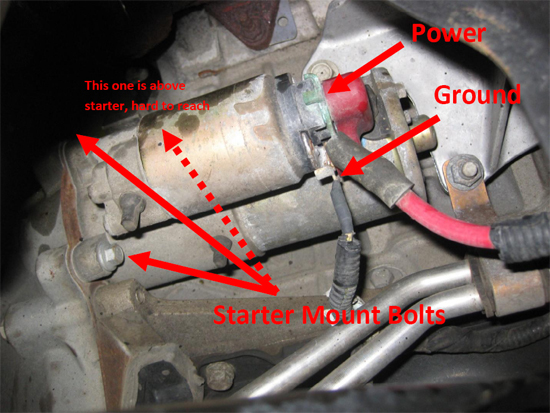
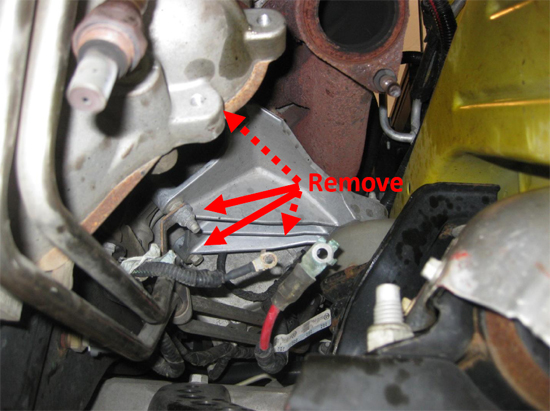
6. Pop the red cap off of the starter and disconnect the power and ground cables. The red power cable is fastened using a 13mm bolt and the black ground is a 10mm bolt. Once those have been disconnected, remove the three bolts that mount the starter tithe bell housing.
7. Loosen the engine support isolator nuts from the top of the vehicle but do not remove. Place a block of wood onto a jack, then jack the block up to just enough to relieve tension off the motor mounts.
8. Unbolt the driver side motor mount using a 13mm socket on the 4 bolts. From above, remove the engine support isolator nut.

9. Unbolt the passenger side motor mount using a 13mm socket on the 2 bolts and a 15mm deep well on the two stud bolts. Remove the engine support isolator nut from above.
10. Slowly lift the engine a couple inches; just enough to remove the motor mounts.
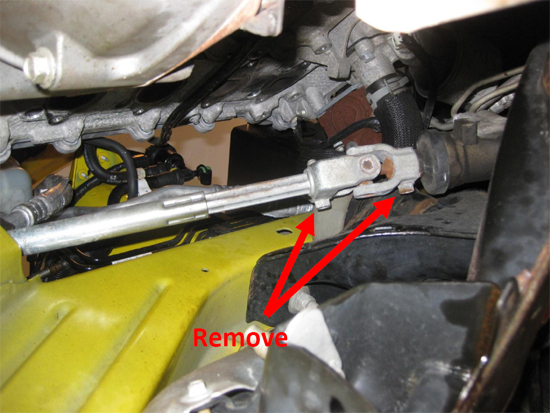
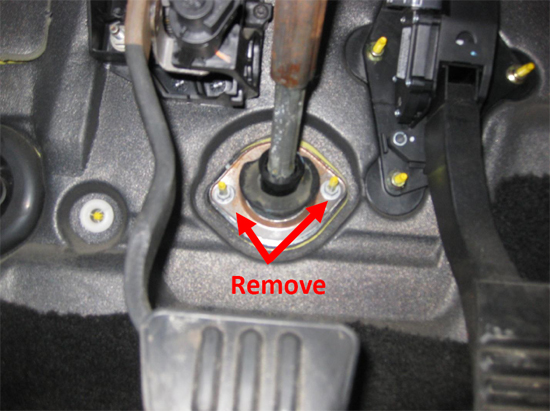
11. Turn the wheel to the straight ahead position and disconnect the steering column. You will need to remove the 2 bolts on the steering column coupling and also the two nuts on the dash boot, located inside the vehicle underneath the gas pedal. Once the bolts are removed, push the column in, towards the steering wheel and it should collapse enough to remove the coupling.
12. At this point, the driver’s side front O2 sensor should be easily accessible. Unclip the plastic sensor connection then remove it from the manifold.
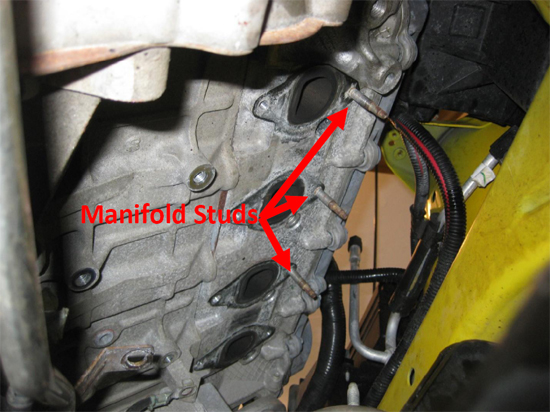
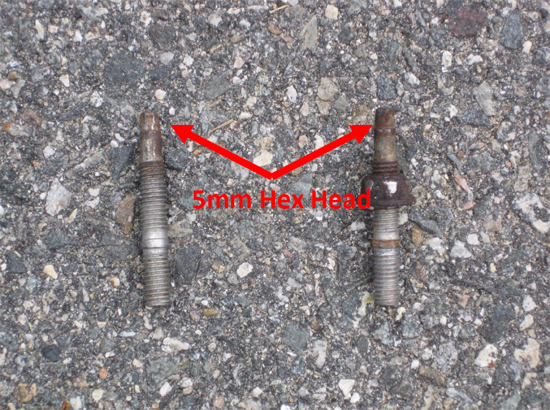
13. Starting with the driver’s side, remove the stock manifold nuts and studs. Many of the studs will come out with the nuts, however if they don’t, use a 5mm socket on the end of the studs to remove them. Be VERY careful as these studs are easy to strip.
14. Once all of the nuts have been removed, pull off the factory manifold and remove the old gasket. Remove any remaining studs. Repeat the same steps to remove the passenger side manifold.
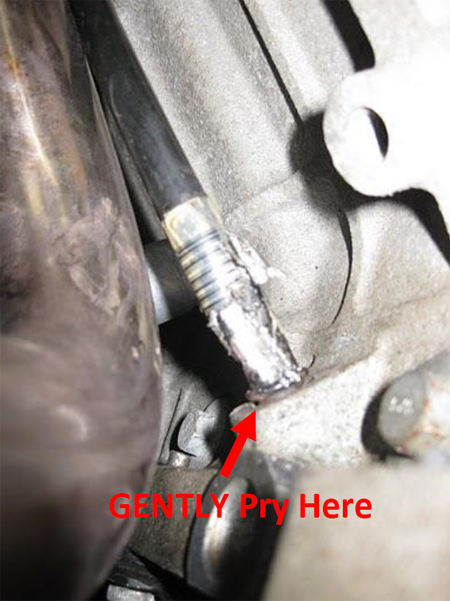
15. Remove the oil dipstick tube from the oil pan. There is a single bracket that mounts the tube to the engine about halfway up the tube. Once that is unbolted, the tube will pull out, however it is tough. Be careful not to bend the tube too much or it can break. You can use a pair of pliers or vise grips at the base of the tube and gently pry outwards to remove it, however be careful not to grip too hard or you may damage the tube.
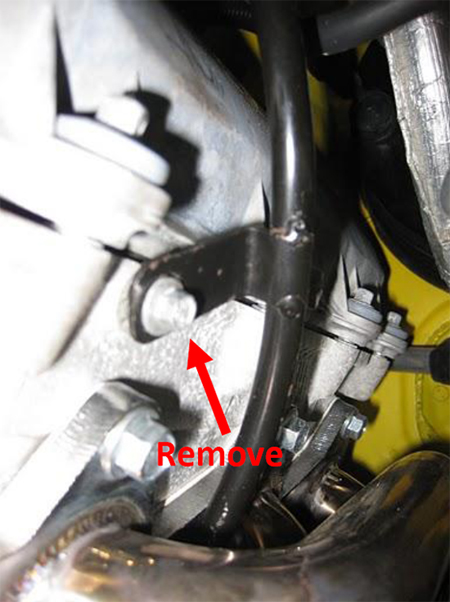
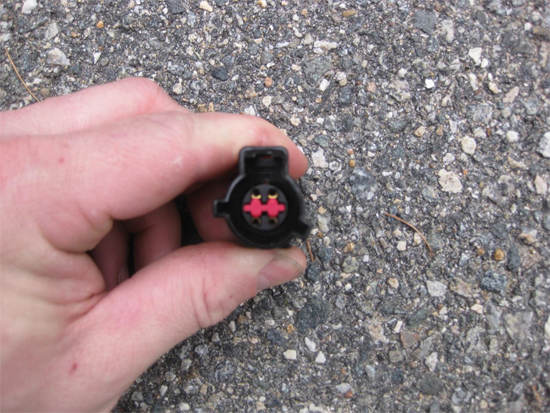
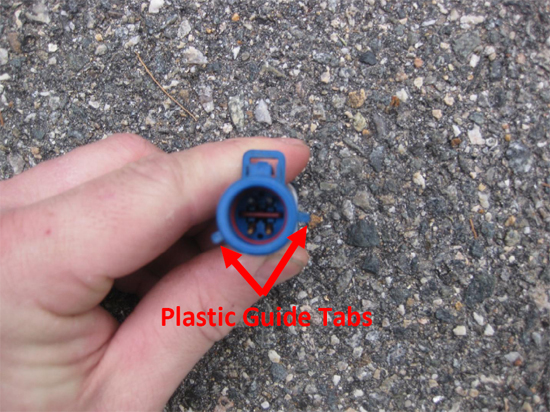
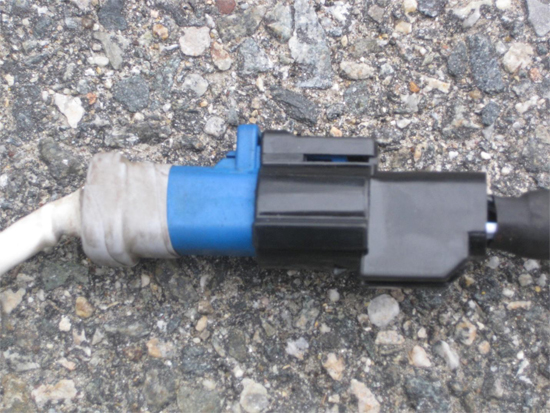
16. The Pypes headers come with an O2 extension for the driver’s side front O2 sensor; however mine matched a rear O2 sensor. The tabs from the rear sensor plug line up with the notches on the extension plug. Note in the photos below that the blue plastic is the rear O2 sensor color code. Pypes Tech Support instructed me to break the tab off of my front O2 sensor and plug it in to the extension. Instead, I chose to unfasten the stock O2 sensor harness from its mounting point in order to gain enough slack to reach thee bung. At this point, connect the O2 sensor extension to the harness or unfasten the stock sensor plug and let it hang down.
17. Starting with the driver’s side, prepare the block for the new header. Make sure the surface is clean and free of debris, including any pieces of the old gasket. Start the bottom four bolts into the block, threading them about ¼”in.
18. Slide the header up from underneath. The bottom of the flange is notched, which rests nicely on the 4 bolts that were started earlier. From above, slide one of the new gaskets in between the header and the block then start the top four bolts. Snug the bolts down, but do not tighten. Go back underneath the car and snug the 4 lower bolts.
19. Starting at the top-rear bolt, torque the bolt down to 18 lb-ft. Next, torque the lower rear bolt, then alternate top bolt-bottom bolt from the rear to front of the header.
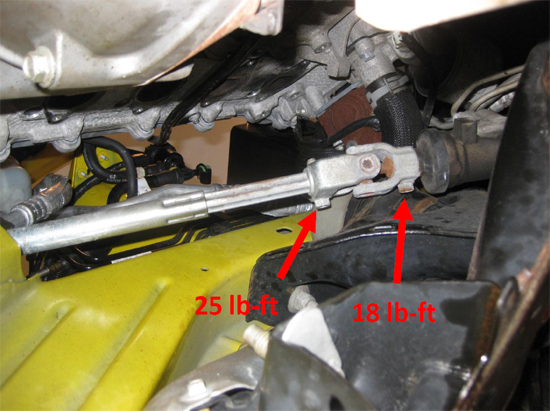
20. Reinstall the dip stick tube and reconnect the steering column. The upper bolt on the steering column coupling should be tightened to 25 lb-ft and the lower bolt should be tightened to 18 lb-ft.
21. Plug in the front driver’s side O2 sensor and screw it into the collector. If you elected to use the O2 extension provided by Pypes, at this point you may need to break the guide tab off of the O2 sensor plug in order for it to fit. If you decided not to use the extension, slide the wire retaining clip off of the stud.
22. Repeat steps 15-17 for the passenger side header.
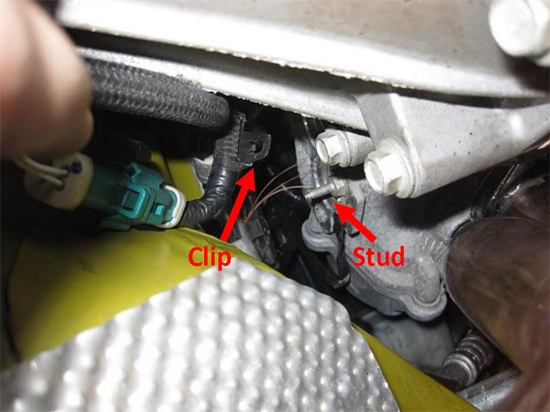
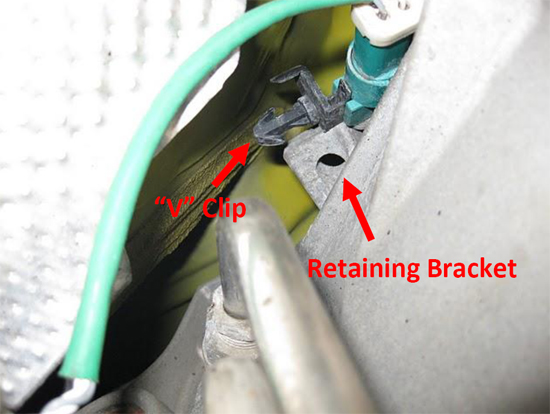
23. Thread the passenger side O2 sensor into the collector. Although there is no extension included for this sensor, I had to unclip mine from its mount in order to obtain enough slack for it to reach the bung. The sensor is help in place by a small plastic “V” clip. Pinch the “V” and push up in order to free it.
24. Reinstall the driver and passenger side motor mounts. Slide the mounts into place and then fasten them to the block using 41 lb-ft of torque. Once tightened to the block, secure the engine support isolator nuts on the top of the support using 46lb-ft of torque.
25. Reinstall the starter. Start the top bolt first, then finger tighten all 3 bolts. Next, torque the top two bolts down to 18 lb-ft and finally torque the last bolt down, also to 18 lb-ft.
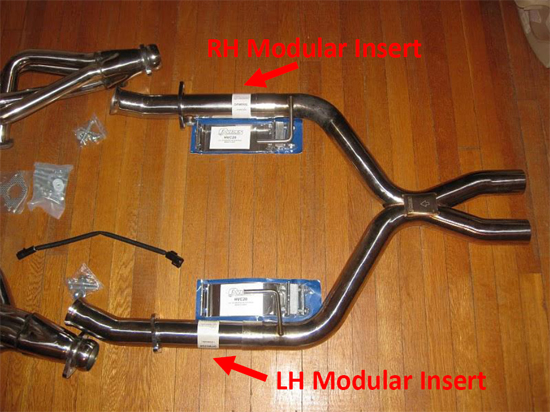
26. Before installing the X-pipe, install the modular pipe sections into the pipe. LH= Drivers side, RH=Passenger side. Tighten down the bung plugs.
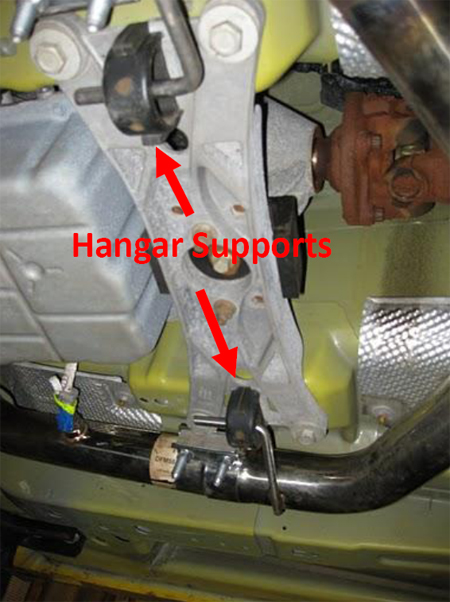
27. Move the pipe into position; slide the hangars into the rubber hangar supports, then mate the end of the pipes to the headers. Install the 4 long bolts through the flanges on the mid pipe and header, and then snug the nuts on each header.

28. Wrap the band clamps around section where the modular pipes join the X-pipe. Loosely tighten down the nuts.
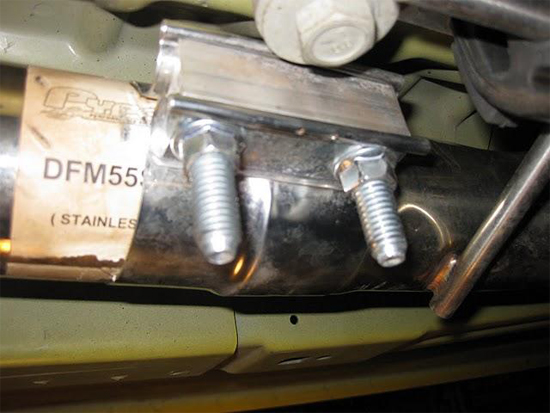
29. But the ends of the X-pipe and over-axle pipe together. Slide the clamp over the two pipes, but do not tighten.
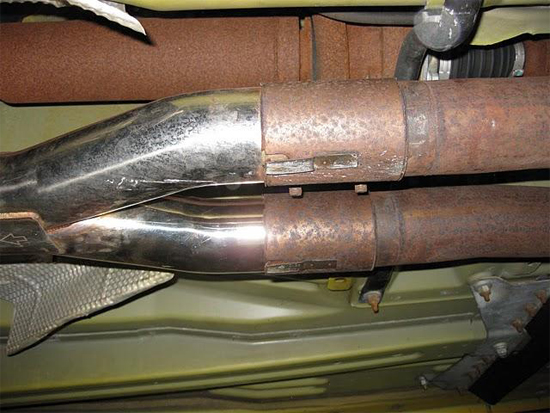
30. At this point, look over the exhaust, check the tail pipes, and make sure that nothing is out of line. If you have troubles joining anything together, it may help to undo the axle back hangers to allow for more play. One good way to adjust the tailpipes is to rotate the over-axle pipes before tightening the clamps that secure them to the mid pipe.
31. Once everything looks good, tighten everything down, front to back. Start with the X-pipe to header flanges, next tighten the band clamps, and finally tighten the X-pipe to over-axle pipe clamps.
Installation instructions provided by AmericanMuscle customer Jon Glennie 3.27.10
