 FREE 1 to 3-Day Delivery on Orders $149+ Details
How to install a Maximum Motorsports Aluminum Clutch Quadrant on your Mustang
Shop Parts in this Guide
Read all instructions before beginning work. Following instructions in the propersequence will ensure the best and easiest installation.
Proper installation of the MM Clutch Quadrant requires the use of a firewall adjuster or adjustable clutch cable. Some non-MM firewall adjusters may have a larger stack-up, making cable installation difficult.
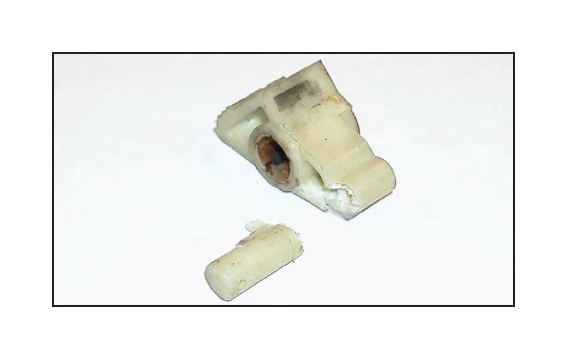
Remove Stock Clutch Quadrant
Removing the driver side front seat makes installation more comfortable. There are only four bolts to remove and one electrical plug to disconnect to remove the seat.
1. From under the dash, disconnect the clutch cable from the quadrant. Lift up on the clutch pedal, all of the way. This releases the self adjusting quadrant mechanism.
2. Push the top of the quadrant towards the firewall, then disconnect the cable from the quadrant.
3. To remove the quadrant, pull the two hairpin clips holding the quadrant and pawl to the arm.
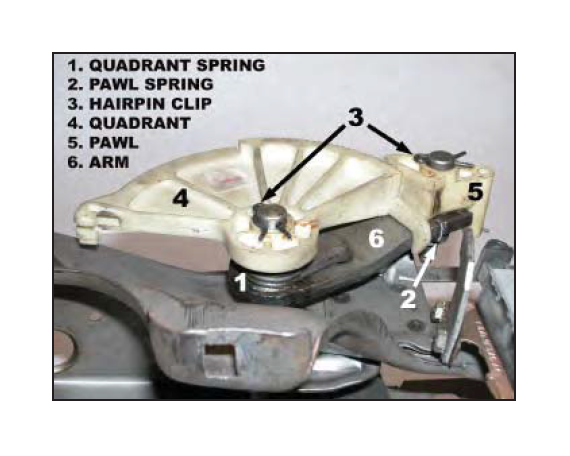
4. Remove the quadrant, quadrant spring, pawl and pawl spring.
NOTE: Breaking the pawl is the easiest way to remove it, although, the spring can be manipulated such that the pawl can be removed intact.
Install MM Clutch Quadrant
5. Lightly sand the Quadrant Shaft to remove any burrs or surface blemishes that may interfere with the MM Quadrant. A small needle file can also be used.
NOTE: Pay close attention to the area around the cross-drilled hole for any burrs that may hinder the installation ofthe MM Quadrant.
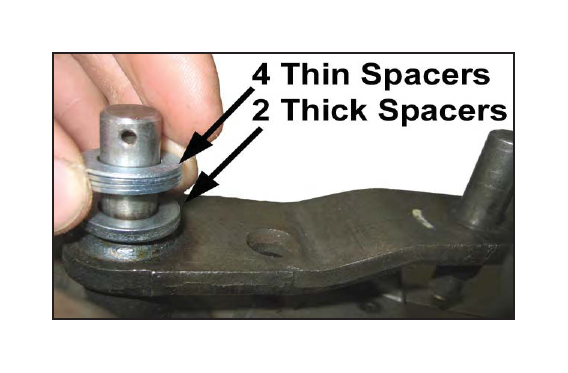
6. Slide 2 thick spacers and 4 thin spacers on the Quadrant Shaft as shown. This locates the quadrant in the proper place to ensure the clutch cable does not rub on the housing.
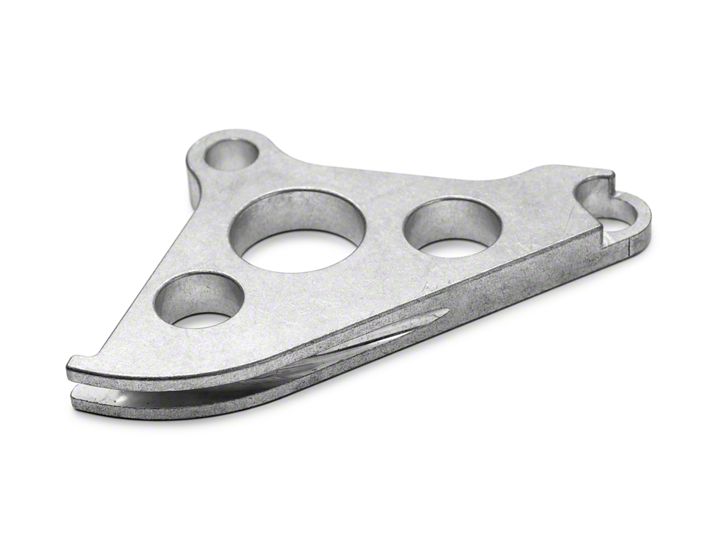
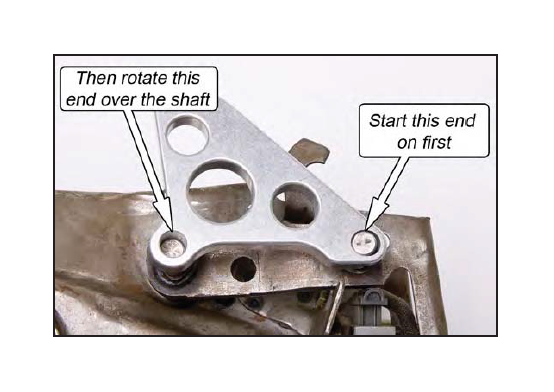
7. Install the MM Aluminum Clutch Quadrant. Place the ovalized hole onto the Quadrant Shaft about 1/8". Rotate the Quadrant so that the round mounting hole is aligned over the rearward shaft. Slide the Quadrant the rest of the way onto the shafts.
8. Place the three remaining thin spacers on the Quadrant Shaft.
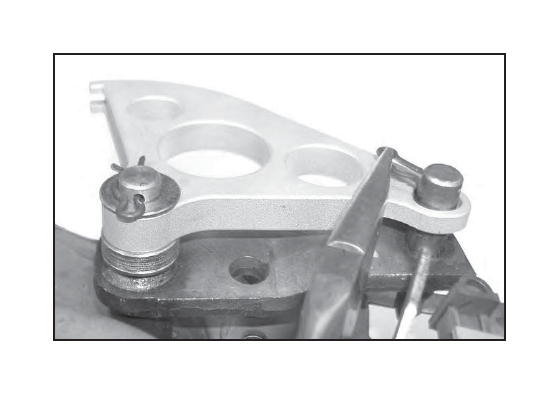
9. Reinstall the two hairpin clips. If the pin for the Quadrant Shaft will not go in the hole, remove one ofthe spacers installed in the previous step. Continue to remove the spacers until the hairpin clip can be fully inserted.
NOTE: Due to Ford's production tolerances, it may be possible that no thin spacers remain between the hairpin clip and the quadrant.
Firewall Adjuster Installation
A firewall adjuster, such as the MMCL-3, must be installed now. Follow your manufacturer's installation instructions.
Clutch Cable Replacement
If replacing the clutch cable with a new one (such as the MMCL-11 Universal Clutch Cable), please follow the manufacturer's installation instructions for proper cable routing now.
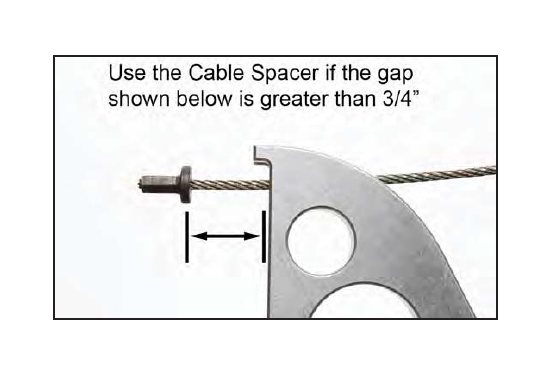
Cable Spacer Installation
To allow the use of the MM Clutch Quadrant with the widest range of clutch and bell housing combinations, a cable spacer is included. The Clutch Cable Spacer is needed if there is more than a 3/4" gap between the inner cable end and the quadrant when the firewall adjuster is screwed all the way into the firewall (with the cable attached to the clutch fork).
NOTE: Skip to the Clutch Cable Adjustment section on the lastpage ofthese instructions ifno spacer is being installed.
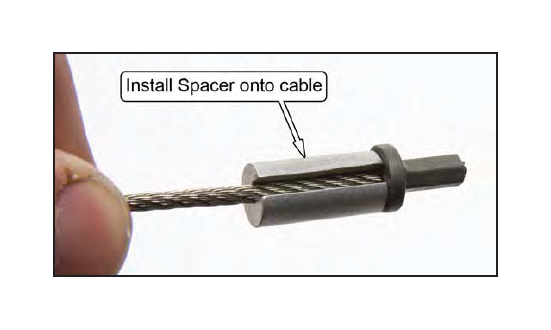
10. Remove the clutch cable from the firewall adjuster so you have access to the inner cable end.
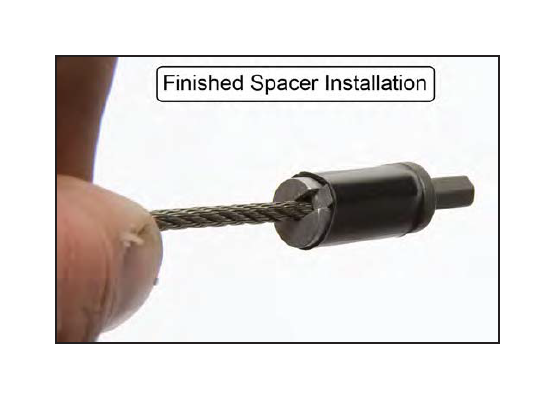
11. Place the provided Clutch Cable Spacer onto the end of the inner cable, adjacent to the crimped-on inner cable end.
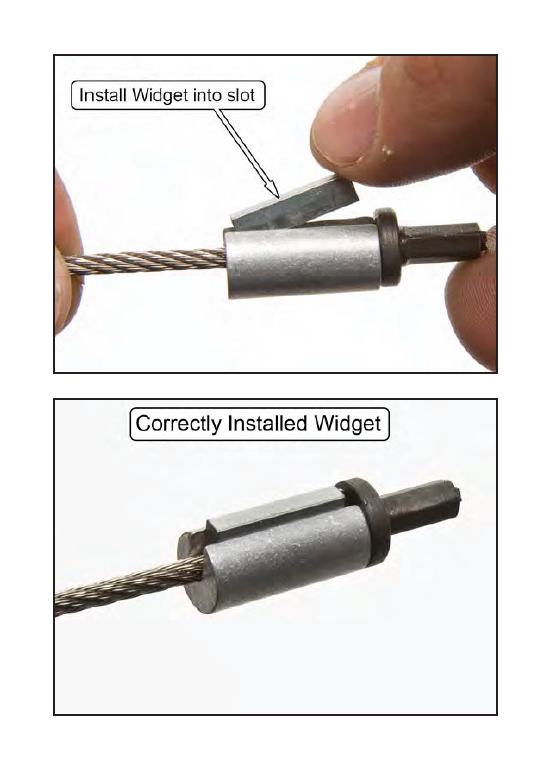
12 . Insert the Widget in to the slot in the spacer.
13. Slide the provided heat shrink tubing over the Cable Spacer Assembly.
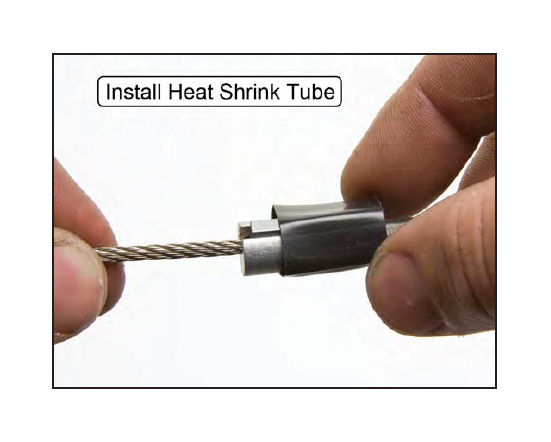
14. Use a small lighter to heat the tubing until it shrinks tightly around the assembly, capturing the Widget in place.
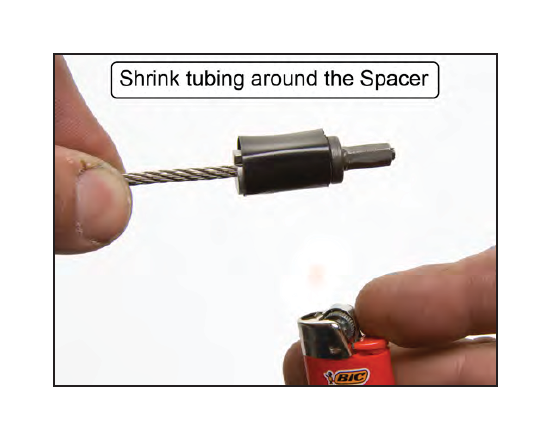
NOTE: Make sure the heat shrink does NOT wrap around the faces ofthe spacer. This will cause the spacer to improperly seat against the cable and quadrant.
Cable Installation
15. Insert the clutch cable into the firewall adjuster.
16. Reattach the inner clutch cable to the quadrant. If there is not enough slack available in the cable to allow installation with the Clutch Cable Spacer in place, remove the inner cable from the clutch fork at the bell housing, and install the inner cable onto the clutch quadrant first. Next, use a pry-bar as a lever to depress the clutch fork enough to reattach the inner cable to the clutch fork.
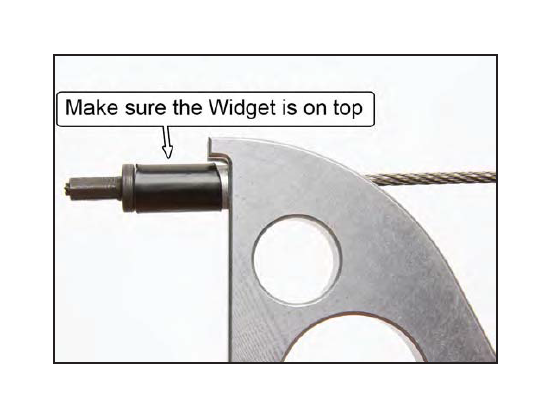
17. Rotate the Clutch Cable Spacer so the Widget is on top.
Clutch Cable Adjustment
As delivered from Ford, the Mustang has a plastic quadrant and pawl gear assembly designed to self-adjust the clutch cable tension over the life of the clutch. After you've upgraded your clutch quadrant to a stronger, aluminum design, it is necessary to manually adjust the tension on the clutch cable yourself. Before doing this, there are some things that need to be checked. The goal is to hold the clutch cable housing at right angles to the surfaces at each end it is mounted to. This will minimize slack in the cable system and ensure adequate clutch pedal travel.
• The firewall adjuster must be securely attached to the firewall.
• The clip that holds the transmission end of the clutch cable housing to the bell housing must be in place. This clip is located underneath the clutch fork cover.
Once the clutch cable housing has been properly secured and aligned, you can move on to adjusting the cable tension. The cable tension is adjusted by screwing the firewall adjuster out of the firewall.
18. Screw the firewall adjuster out of the firewall until the cable has just enough tension that 5-8 lb of force at the pedal will move the pedal down 1/2" inch. If the pedal moves more than Vz" when 5-8 lb of force is applied to it, increase the cable tension by screwing the firewall adjuster further out of the firewall.
NOTE: As the friction material on the clutch disc wears, the cable tension will increase, requiring a "clutch adjustmenf'to correct. Periodically decrease the clutch cable tension by threading the firewall adjuster into the firewallto maintain the 5-8 lbs offorce at the pedal as specified in Step 18.
NOTE: Ifthe clutch doesn't disengage with the pedal fully depressed, increase the cable tension by screwing the firewall adjuster out as required.
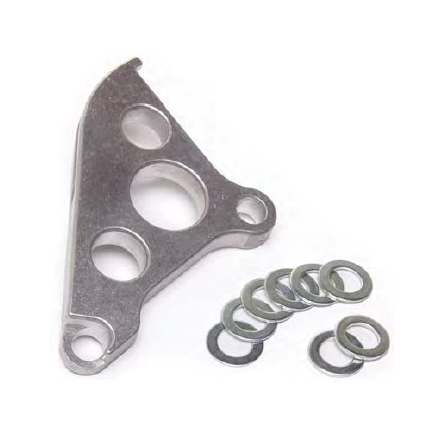
This Kit Includes
1 Clutch Quadrant
2 Thick Spacer 7 Thin Spacer
1 Clutch Cable Spacer
1 Widget
1 HeatShrink Tubing
