Installation Time
(approx) 2 Hours
Difficulty Level:
Light to Moderate mechanical skill required.
FREE 2 or 3-Day Delivery on Orders $119+ Details
$912.99 (kit)
FREE Shipping Market Price $1,126.99 You Save 19% ($214.00)Add Local Shop Installation
Saved - View your saved items
We're sorry. We couldn't save this product at this time.
or use
Jake: Jake here for American Muscle. And today, I've got the MBRP Black Series Cat-Back Race Version Exhaust for 2016 and newer Manual Transmission Camaro SSs with the NPP Dual Mode Exhaust. If your Camaro SS came stocked with that Dual Mode Exhaust but you're looking at a more aggressive tone, and more volume to the exhaust for that true race-inspired touch, MBRP has got you covered. This cat-back system adds that volume, a nice dose of visual flair, all at a very reasonable price. And the LT1 of the Camaro makes a great noise right out of the gate. But if you want more volume, getting rid of that stock exhaust setup is certainly gonna help. And since this is a full cat-back, it is going to eliminate your stock muffler and resonators. And that means, as you heard from the clips at the beginning of the video, the tone is aggressive and it is loud. Loud enough, in fact, to get a five out of five on our loudness meter.And look here might be kind of subtle, but the sound certainly is not. So if you're looking for that full-on racecar-inspired sound, look no further. Because this is MBRP's Race profile, that means that it is gonna have much more serious volume to it, a lot more so than some of their other setups. Now, outside of the car, again, you get that loud aggressive exhaust note. And you're gonna get quite a bit more volume inside the cabin as well. However, you aren't gonna get a lot of drone, like you might with other exhaust, thanks in no small part to these resonators. Now, these guys are known as Helmholtz resonators or J-pipes, hence the shape. And they're not something we see very often on aftermarket exhausts. It's typically something that only shows up on a custom setup. Now, the premise here is basically that these are gonna cancel out the frequencies that cause that droning sound without affecting the overall tone or volume of the exhaust.So you can see there's no outlet here. It's just in and out in the same spot. This is really a great best-of-both-worlds type of deal. And having these resonators is a really cool feature that I don't see on many other exhausts on the market. This system also includes this X-pipe, which is also not something you find on a lot of other systems. X-pipes help even out exhaust pulses caused by uneven firing orders like you find in a traditional pushrod V8 like the LT1. So this allows a crossover right here in the center, and it's also gonna help even out exhaust pressure, which all combines to eliminate exhaust thrown in the cabin. So between this and those resonators, you're gonna get the noise you want without all the drone that usually comes along with it.Now, the piping here is all 3-inch mandrel bent aluminum stainless steel, so it's gonna allow the exhaust gases to flow smoothly. And your axle-back portions have this high temp black powder coat finish. That means it's gonna be protected against the elements and still look pretty good too. This is a great option from an aesthetics perspective if you want a bit more of a subtle look than the standard chrome finish. This black powder coating will blend in nicely with your rear diffuser or your lower rear bumper, and it looks just different enough that people are gonna take notice. Now, part of that is due to these dual 4-inch tips. So you get two for each side. These are dual wall T304 stainless tips finished in that same black powder coat. And they have a similar angle cut to your factory exhaust. They've also got the MBRP logo stamped on the edge here, and the staggered setup, this is how they'll mount, means that they're gonna be pretty much flush with the bottom of your bumper, again, much like your stock tip.So it's gonna give a nice tasteful look when installed, but you're still gonna know that it's a little bit different than stock due in part also to the fact that these are larger than your stock tips. Now, price-wise, this setup is gonna run you around $950. And for a full cat-back system for the Camaro SS, that's almost as inexpensive as it gets. MBRP has been known for making good quality exhausts at an affordable price. This one combines good build quality with some standout features like these resonators, the X-pipe, and a price that is definitely more palatable than some other options in the category. Now, of course, you're not gonna be getting the full active exhaust here, which is a big part of that cost savings. But I think what you do get more than justifies the price.As far as installation goes, this one, like most exhausts, will get a two out of three on our difficulty meter, and it should take you around two hours to get it all done. Now, everything you need, including all new clamps and hardware is included in the box. However, one thing to note is that since the stock exhaust on the Camaro SS is not a bolt-together setup, you will need to make two cuts in order to remove that stock system. However, these are easy to do and you do get instructions on how to measure it out in the box. You're also gonna have to unbolt those active exhaust valves. But once that's done, the new system will just bolt right on it.Again, you get all new hardware included in the kit, and you're gonna use all your factory exhaust hanger locations. There's no modification needed to the car or the exhaust as they come out of the box. Now, if you've done an exhaust in your driveway before, you know it can be a little fiddly just because of lack of space. But even with the cutting that's involved here, this is absolutely something you can get done at home in your driveway. And to show you just how to do that process, let's head over to the install bay right now.Man: Tools required for this install include an impact gun, a ratchet, a marker, a tape measure, a 5/16 ratcheting wrench, an 8-mil Allen, a 3/18 to quarter-inch adapter, a 7, 13, and 15-millimeter socket, an electric ratchet, pair of safety glasses, an exhaust hanger remover tool, a Sawzall, and a grinder.What's up, guys? Today we're gonna be installing an exhaust on our Camaro. So let's get started. So our first step to removing our exhaust is gonna be to disconnect our valves. Now, these are gonna be found on the outside of each side tip. So we'll get the harness, press the tab, and disconnect them. So, now, our first step is gonna be to disconnect the wiring harness to our valve controller. So, to do that, we're gonna remove these two 7-millimeter bolts to clear up some access. You're gonna have to take these out later on, eventually, because we're gonna have to slide our exhaust back this way, and the valves are gonna slide under this.So I'll get a 7-millimeter socket to get these off. And we can push that back out of the way, and then reach in there and disconnect our wire harness. And then we'll do that same thing on the other side. So the factory exhaust system has six hangers. We have two here, two here, and then two by our tips. So we're gonna remove the inner four here. That way we can still have our two hangers in the back holding our exhaust up while we disconnect our flanges up front. So we can get the two on our passenger side first. So I'll grab an exhaust hanger remover tool, and pop off these isolators.And then on this one, the hanger on our pipe's a little, longer than the one from our chassis. So we'll pop off our top isolator. And then we can pop it off at the bottom, slide it back on the top. Now, we can do the same thing on our driver's side.Now, our next step is to remove our brace here. We have five 13-millimeter bolts holding that in. So I'll get a 13-millimeter socket on the impact gun to get these off.Now, our next step is gonna be to disconnect our O2 sensors on both sides. You can do this either by unscrewing the O2 sensor or simply just unplugging the harness. We're gonna unplug the harness. So there's a white tab that you're gonna push up, and then push in, and then we'll separate our connector. We'll take our white tab, push up on it, and then we can press down, and slide our connector out. Now, this side is gonna be the same thing, just a little deeper in there, pull back on that tab, and then disconnect our connector.So now, we can work on our two flanges. We'll get those disconnected with a 15-millimeter socket. We've got a pole jack here to hold the exhaust in place, so it doesn't drop down once we disconnect it. And then once we have our two flanges disconnected, we'll grab a buddy to help us pull the whole exhaust out of the car.So now, on this side, we don't have much clearance. So I'm gonna get a 15-millimeter socket with a ratchet on this side, and then we can use our impact gun on this side. I've got some penetrating lubricant sprayed on here just to make it a little bit easier to get these off.Now, on this side, we can use a 15-millimeter socket on an impact gun to loosen this clamp. So now, I have a pull jack setup underneath our muffler to keep it in place. And then we're gonna be removing the two bolts on our hanger on both sides to release the muffler. So now, we can take a 15-millimeter socket on a ratchet to get our two nuts off.And then we'll do that same thing on the other side. So now would be a good time to grab yourself a body, and you can take one end while your buddy takes the others, and then we'll just simply slide it out and remove it from the car.So, now, with the exhausts removed from our car, we can take our valves off. Now, we'll be using a 5/16-inch ratcheting wrench to remove this.And then we can repeat that same process on the other side. And now, we can remove our final two hangers on our stock exhaust using an exhaust hanger remover tool.So, now, for this kit, you're gonna have to cut your factory exhaust. So, we're gonna need on the driver side 1.7 inches of straight pipe, and on the passenger side 2.1 inches of straight pipe. So, if you got time, you grab your tape measure and your marker, and we can measure out where our cuts will be made. So, now, we're gonna start on our passenger side. So once again, we want 2.1 inches of straight pipe. So instead of measuring from the weld here, we're gonna come out to about right here where our pipe straightens out. We'll get a tape measure down there, and then we can mark probably around 2.1 inches.Now, on our driver side, we need 1.7 inches of straight pipe. So it comes out pretty straight right here behind the weld. So we'll start our tape measure there, and mark down 1.7 inches. So, now, with our lines laid down for where we're gonna make our cuts, you can grab whatever cutting tool you'd like. We're gonna use a Sawzall and we can make our cuts.So now, once we have our cuts made, we can go ahead and come over to the grinder, and clean up our edges.So our first step is gonna be to mount our valve actuators to our brackets. Now, this system allows you to retain your valve so that you can plug it in and not get any check-engine lights. However, there are no actual valves in the system. So, using sport mode to track and to your normal driving won't change your sound at all with this setup. So, we can lay our bracket down on top of our actuator, and then grab our 5/16 bolts and thread them into the holes. And we'll do that same thing on this side.And we'll take a 5/16 ratcheting wrench to tighten these bolts down. Now, we can reinstall our valve actuator. So we'll reconnect our wire harness. And then this is gonna sandwich in between our diffuser and this metal heat shield. And then we can reuse our factory 7-millimeter bolt. And then we can take our 7-millimeter socket to tighten these down. And then we can repeat that same process on the other side.So, now, with our cuts made, and our edges cleaned up, we can reinstall our secondary cats. So, we'll get it on here, get our nuts back in place, tighten those down, and then we can reconnect our O2 sensor. And then we can take our 15-millimeter socket to tighten our knots down. And I'll get normal hand rachet on the other side. You don't have a lot of clearance.And then with our nuts tightened down, we can reconnect our O2 sensor. And then we'll push that white clip back in to lock it into place. So, now, on our driver side, we can reconnect our O2 sensor because we didn't end up having to take that out. We'll click that white pin back into place on this side as well. So, now, on the other side, we can take our driver-side secondary cat, slide that over the edge, and then we can get a 15-millimeter socket on our clamp to tighten that down.So, now, we can install our driver-side front pipe. I'm just gonna take a 2 and 3/4-inch clamp. I'll slide that over the edge here. And we can slide it into our secondary cap. And then we can slide our clamps into position, and we can tighten that down for 15-millimeter socketAnd now, we can install our passenger-side front pipe. So, we'll take another 2 and 3/4-inch clamp, slide it over the edge, and then lift our pipe up into place.And now, once we have our front pipe and our clamp in position, we can take a 15-millimeter socket to tighten down our clamp. So, now, we can take our X-pipe. I will slide two 3-inch clamps over each side, and then we can get this onto our front pipes. And then once we have our X-pipe in place, we'll just slide our clamps into position, and tighten those down with that same 15-millimeter socket.So, now, we can take another one of our 3-inch clamps, and slide that over our X-pipe, and then we can get our tailpipe, and slide it over our X-pipe, and wiggle that down into place. And then we can work on getting our hanger into our isolator. And now, we can slide our clamp into position. Now, we can take another one of our 3-inch clamps and slide that over our tailpipe outlet. And then we can install our Y-pipe. And then we can install our hanger into our isolator. And then we can grab that clamp, and slide it into position, and tighten that down with that same 15-millimeter socket.Now, we can reinstall our hanger bracket, so slide that right over the edge, get it over those posts, and then we can reinstall our factory nuts. And then we'll take our 15-millimeter socket to tighten these down. And then next, we can grab our tips, slide those over the edge, and then tighten that down with an eight-millimeter Allen. And then once we have our tips installed, we can repeat that same process on the other side.Now, we can reinstall our driveshaft tunnel brace. We'll be reinstalling our factory 13-millimeter bolts. And then we can take our 13-millimeter socket to tighten down these bolts.So that'll wrap up this review and install of the MBRP Black Series Cat-Back Exhaust-Race Version for your 2016 and newer Camaro SS Coupe with Manual Transmission and NPP Dual Mode Exhaust. Thank you for watching, and remember, for all things Camaro, keep it right here at americanmuscle.com.
Subscribe to our YouTube Channel
Features, Description, Reviews, Q&A, Specs & Installation
Brand | MBRP |
Exhaust System Type | Cat-Back System |
Exhaust System Material | Aluminized Steel |
Exhaust System Tip Finish | Black, Black Chrome |
Exhaust System Tubing Diameter | 3.00 Inch |
Exhaust Loudness | Loud |
Aggressive Exhaust Note. Add an aggressive exhaust note to the sound of your Camaro's exhaust with a MBRP Black Series Cat-Back Exhaust - Race Version System. This Race Cat-Back Exhaust features specially tuned resonators that will produce an aggressive exhaust note under acceleration, but a mellow tone at idle. Besides an increase in sound, this MBRP Race Cat-Back, with its full mandrel bent piping, will reduce restrictions giving your Camaro a more free-flowing exhaust for gains in both power and performance.
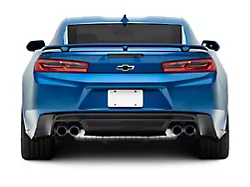
Black Coated Steel Construction. MBRP proudly manufactures their Black Series Cat-Back Exhaust Systems from 3-inch diameter, mandrel-bent, heavy duty, black coated, aluminized 16-gauge steel tubing for excellent exhaust flow and corrosion resistance. Besides the crossover X-pipe, this system features quad, 4-inch, black ceramic coated, T-409 stainless steel exhaust tips with embossed MBRP logo.
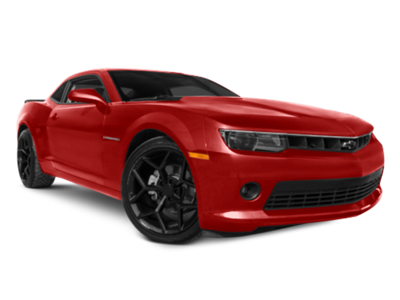
Application. This MBRP Black Series Cat-Back Exhaust; Race Version is designed to fit 2016-2023 Chevrolet Camaro SS Coupe with Manual Transmission and NPP Dual Mode Exhaust.
Fitment:
MBRP S7033BLK
CA Residents: WARNING: Cancer and Reproductive Harm - www.P65Warnings.ca.gov
Installation Info
Installation Time
(approx) 2 Hours
Difficulty Level:
Light to Moderate mechanical skill required.
What's in the Box
10 More Questions