
Mishimoto Performance Aluminum Mustang Radiator - Automatic - (97-04 GT/Cobra/MACH1/Bullitt) - Insta
Installation Time
2 hours
Tools Required
- 8mm Socket/Ratchet or Wrench
- 11mm Deep Socket/Ratchet or Wrench
- 13mm or 1/2" Open End Wrench
- Slip Joint Pliers
- Miniature Pick
- Crescent Wrench
- Bucket/Container
- Quart of Transmission Fluid and Funnel
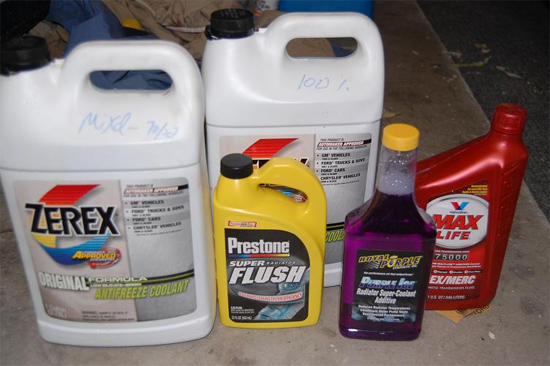
- 2 Gallons of Antifreeze (Zerex Original or Ford is Recommended)
- 2 Gallons of Distilled Water
- Royal Purple Purple Ice or Water Wetter (Optional)
- Radiator Flush (Optional)
- Teflon Tape (Optional but Recommended)

Shop Parts in this Guide
Installation
1. First, drain the radiator by locating the drain cock on the bottom right (passenger) side of the radiator. Put the bucket/container under the drain cock and loosen it, using the crescent wrench. Once it starts to drain, you will want to remove the cap from the overflow tank to allow the radiator to drain.
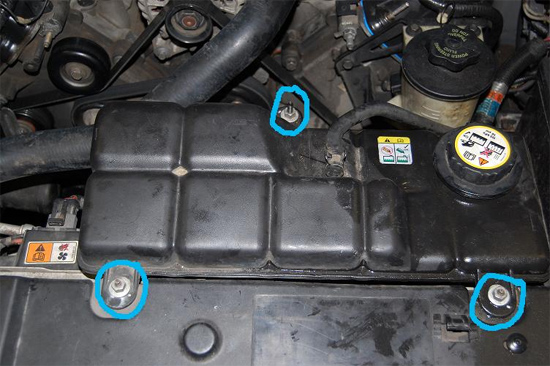
2. Once the radiator has drained, remove the three, 11mm nuts holding the overflow tank to the car which are circled in the picture above. Remove the hose on the bottom side of the overflow tank and the smaller diameter hose connected to the top of the overflow tank, where it connects to the radiator.
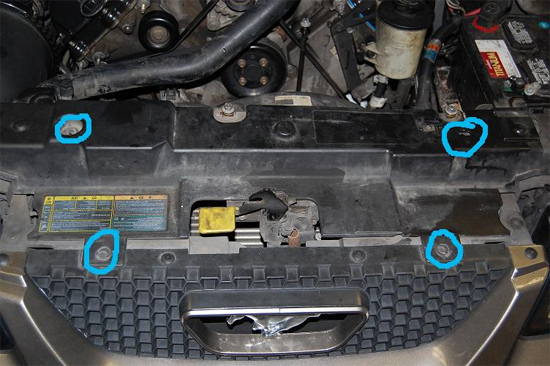
3. Remove the 4 plastic push-in clips that hold the plastic radiator cover on and remove the cover.
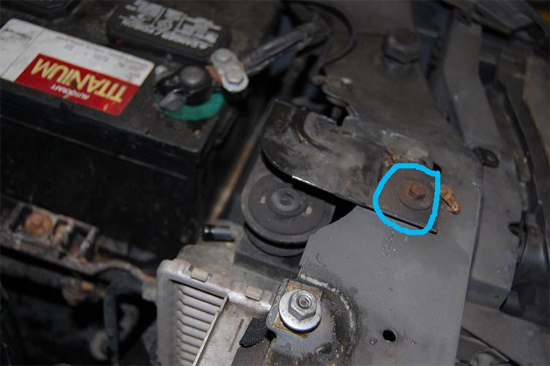
4. Remove the 8mm bolt, which holds the radiator mount to the radiator support and set the mounts aside. Then disconnect and remove the upper radiator hose. You do not have to remove it from the thermostat housing, but it does make things easier as it won’t be in the way when putting in the new radiator.
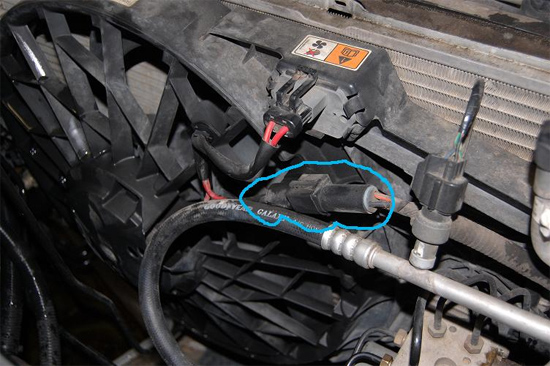
5. Unplug the fan. This is where the miniature pick comes in handy to lift up the tabs on the plug. There is a tab on the top and bottom side.
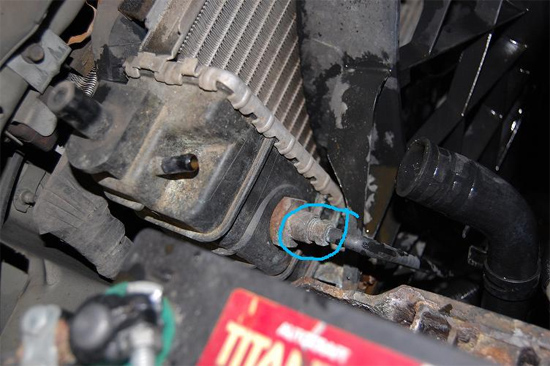
6. At this point, you want to close the drain on the right side of the radiator and move your drain pan to the left side placing it under the lower radiator hose. Using your 13mm or ½” wrench, remove the two transmission lines that connect to the left/driver side of the radiator and the lower radiator hose. The radiator/fan assembly should now lift right out together; it may take a little wiggling.
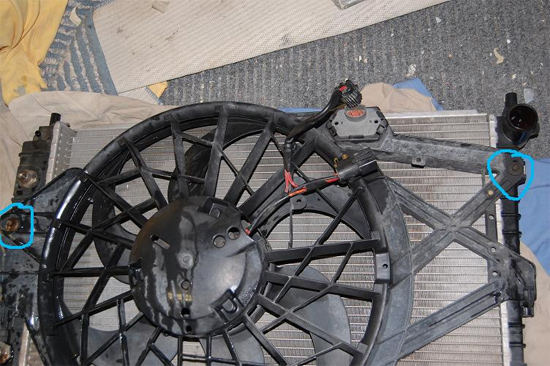
7. Remove the two, 8mm bolts holding the fan assembly to the radiator and slide the fan assembly towards the top of the radiator to slip it out of its mounting slots. At this point, if you have a bunch of junk in the overflow tank fill it with 1/3 the bottle of flush and hot water shake it up and drain, repeat this until the tank is clean.
8. Onto installing your new Mishimoto radiator. There are a few things that you have to do different than if you were installing another OEM one. This is because the upper transmission line does not fit/run around the back side of the fan assembly with the Mishimoto. The line runs between the fan assembly and the radiator.
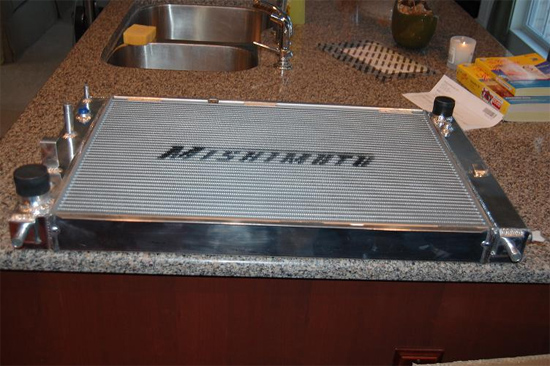
9. After unpacking the radiator, remove the drain cock, inlet/outlet caps, and transmission line plugs. Once removed, place the radiator in the car, making sure the dowels on the bottom go into the rubber mounts. Reach under the right/passenger side of the car and reinstall the drain cock.
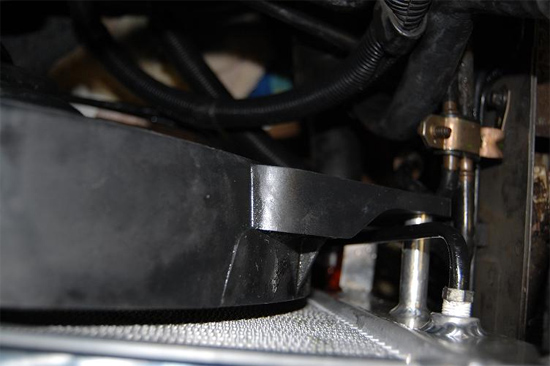
10. Put a little Teflon tape on the transmission line threads, making sure to start the tape a few threads back from the edge so it does not get into the radiator (if you decided to use Teflon tape) and thread the lines into the radiator using the 13mmor ½” wrench. You do need to get them fairly sung so they do not leak. In the picture above, you can see how the line runs between the fan assembly and radiator.
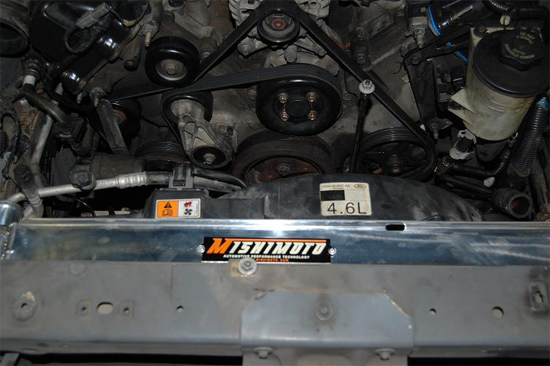
11. Slide in the fan assembly, making sure it slips into its mounting slots/tabs, and bolt it to the radiator using the two, 8mm bolts you previously removed. Reconnect the lower radiator hose, fan wiring/plug. Install the upper radiator mounts and the radiator cover in the same fashion you removed them.
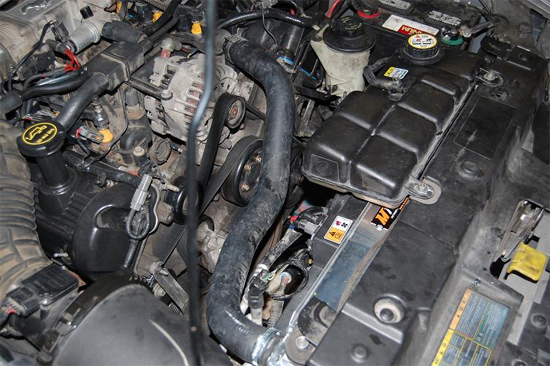
12. Connect the overflow tank to the larger diameter hose and then slip it over the 3 mounting studs. Install the three, 11mm nuts and connect the smaller diameter hose to the radiator.
13. Time to fill everything up.
14. Mix antifreeze to your preferred mixture with the distilled water.
15. Fill the overflow tank to full line and let sit for a few Mins.
16. If antifreeze level dropped add more antifreeze.
17. Start car and let it idle, adding more antifreeze as needed.
18. Once car reaches operating temp add 4 oz. of transmission fluid.
19. Wait 60-90 seconds and check transmission fluid level.
20. Repeat until transmission is full.
21. Check for leaks & go for a 5-10 mile drive.
22. Recheck fluid levels and leaks.
23. Add purple ice or water wetter, if you decide to use any.
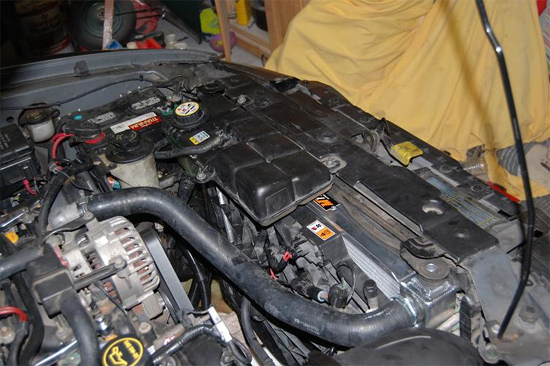
24. Picture of the radiator installed after everything is completed. Operating temps. dropped by a bar or two on the factory temp. gauge compared to the factory radiator. In some pictures, you may see that my air filter/housing was removed. It is not necessary to remove the air filter or air filter housing to install the radiator I was just cleaning the air filter at the same time I was changing the radiator. From start to finish, including taking pictures and refilling fluids, it took about an hour to complete.
Installation instructions provided by AmericanMuscle customer Aaron McBride 1.16.09
