FREE 1 to 3-Day Delivery on Orders $149+ Details
How to Install MMD V-Series Side Exit Cat-Back Exhaust w/ Rocker Panels (15-17 GT Fastback) on your Ford Mustang

Shop Parts in this Guide
Removal
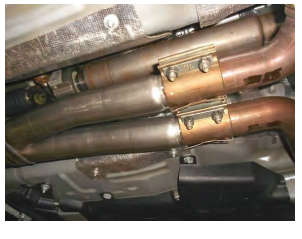
1) Raise the vehicle up on a hoist or rack to working height. If you don’t have access to a hoist or rack, raise the vehicle and support securely with jack stands. To ease the removal of the stock system, spray a penetrating lubricant onto the bolts of the two clamp connections just forward of the center resonator as well as the rubber hangers just behind the rear differential and at the rear of the vehicle.
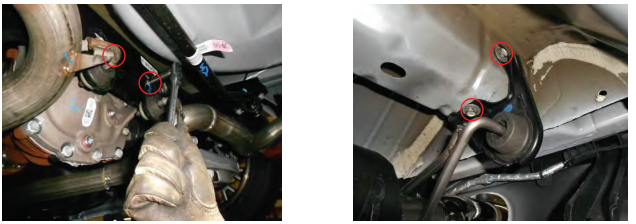
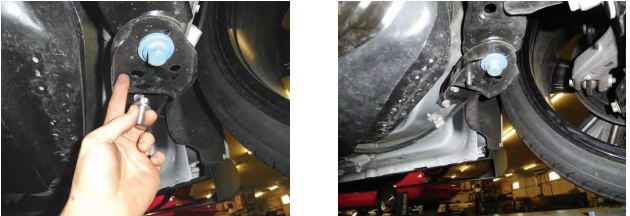
2) Place a stand under the center resonator as well as under the rear muffler assemblies. Using a 13mm wrench, loosen the two hangers just behind the rear differential from the cross member and the two hanger mounts at the rear of the vehicle from the frame.
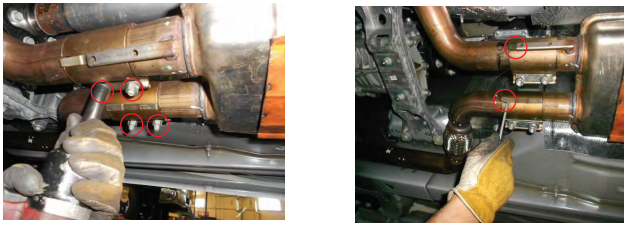
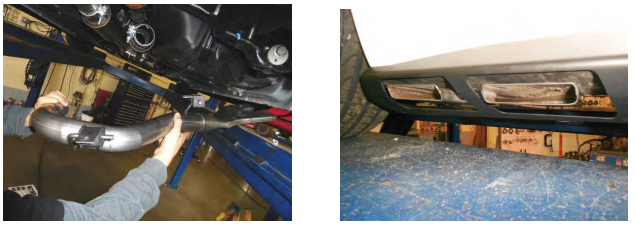
3) Loosen the four nuts at the two band clamp connections at the inlet of the center resonator. Using a screwdriver, pry up the clips on the clamp body to release the clip from the tab on the inlet pipes. Slide the clamp assemblies slightly back to clear the tabs. With the help of an assistant, lower the stands at the rear of the vehicle as well as under the center resonator, slide the exhaust system to the rear of the vehicle to disengage the system from the inlet pipes. Lower the system from the vehicle and set aside.
MMD Side Skirt Installation
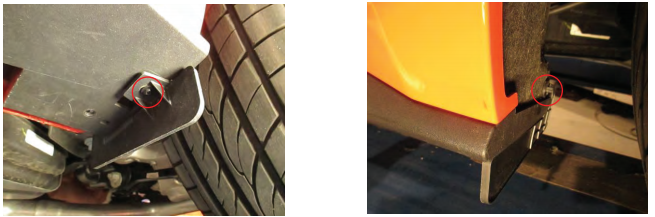
1) Remove the factory mud flap. Remove the torx head screws and push clips holding it to the vehicle.
2) Clean the factory side skirt of dirt and debris using soap and water. Once thoroughly dry, wipe the top of the factory side skirt with the supplied alcohol wipes to ensure a wax and grease free surface. Then apply the supplied adhesion promoter, allow the adhesion promoter to haze prior to adhering the MMD side skirt to the vehicle.
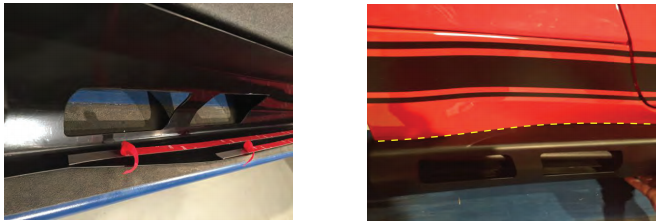
3) Once the adhesion promoter is haze, peel the backing off the 3M double sided tape and install the rocker. It is helpful to install the rocker on an angle so that the innermost edge touches the factory rocker first, then lay the rocker down. Apply firm pressure to ensure proper adhesion.
4) Remove the rear wheel to gain access to the inner wheel well. Line up the top edge of the MMD side skirt and the factory side skirt, drill a 1/4" hole through the MMD side skirt and the factory side skirt, then install the supplied push clip.
Exhaust Installation

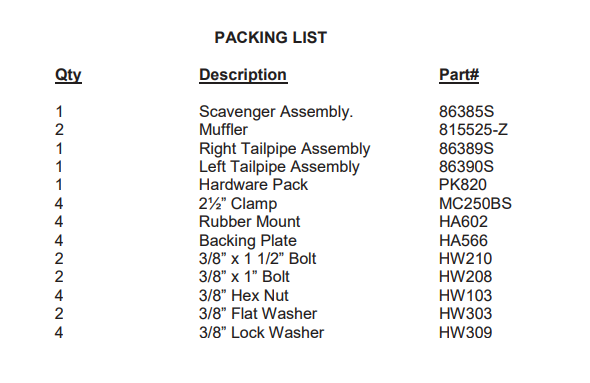
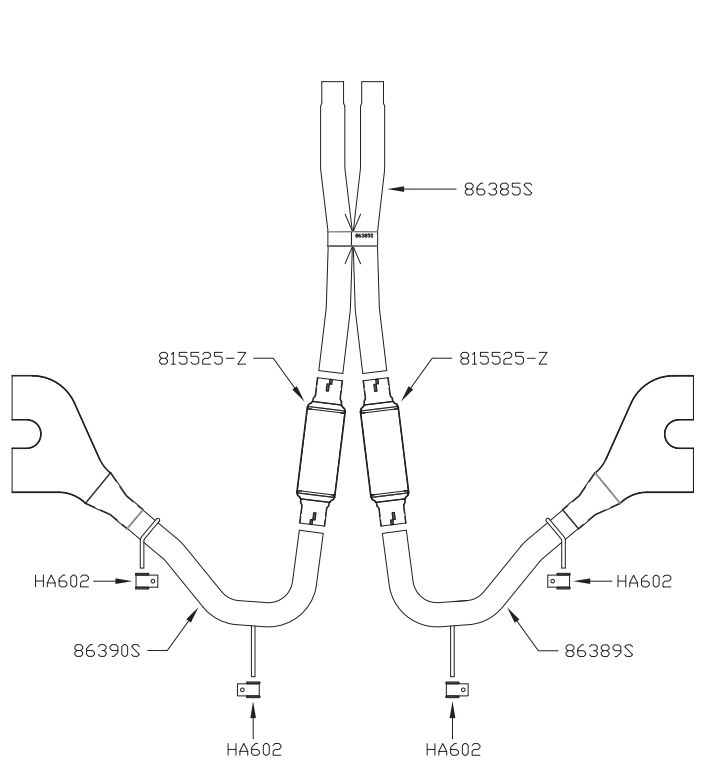
1) Locate the 86385S Scavenger pipe and make a mark 2.00” from the end of each outlet pipe. This is where the front edge of the muffler inlets should be located on the Scavenger assembly after the system is installed and adjusted.
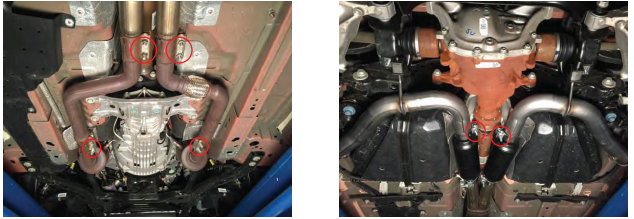
2) Remove the factory band clamps from the factory exhaust system and place them onto the downpipes behind the catalytic converters. Place the 86385S Scavenger assembly into place behind the factory downpipes while supporting the rear of the assembly with a stand. Slide the clamps back to the bump stops on the Scavenger pipe and tighten both band clamps enough to hold, but still allow for adjustment. Be sure that the Scavenger assembly is fully forward, and that the embossed Flowmaster in the center case is facing the ground before tightening.
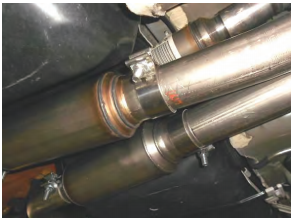
3) Place a provided clamp onto the inlet of both 815525-Z mufflers and slide them onto the back of the 86385S Scavenger assembly. Slide them past the marks at 2.00” to allow for the installation of the tailpipe assemblies. Place a provided clamp onto the outlets of each muffler in preparation for installing the tailpipes.
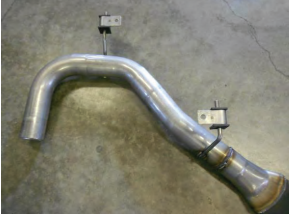
4) Place a provided HA602 hanger mount onto the two wire hangers of each tailpipe assembly.
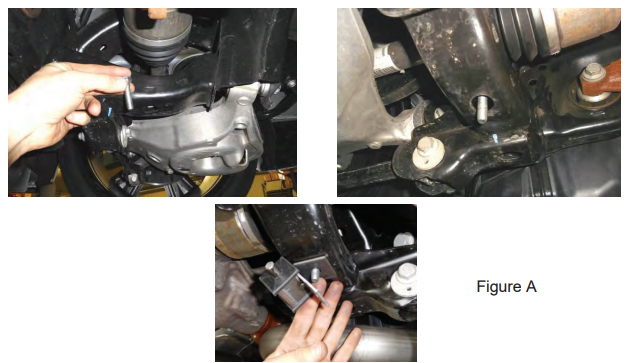
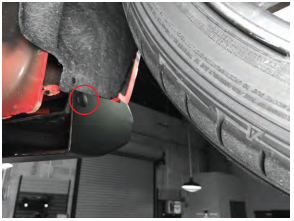
5) Locate the provided 3/8” X 1 1/2” bolts in the hardware pack, drop the bolts down thru the hole in the rear sub frame underneath the rear axles. This is where the HA566 backing plate and HA602 rubber mount located on the rear of the tailpipe assembly will mount. See figure A. Use the backing plates as needed for clearance, 4 are provided. On our car we used one backing plate on the passenger side and no backing plate on the driver side.
6) Locate the provided 3/8” X 1” bolts and 3/8” flat washers in the hardware pack. Place a washer over each of the bolts and drop a bolt thru the oval hole in the sub-frame brace on either side of the vehicle. This is where the HA602 rubber mount located near the tip on the tailpipe assembly will mount.
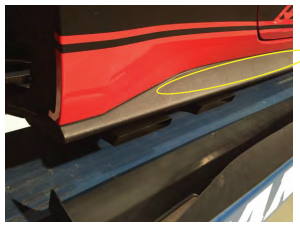
7) Place the tip of the right tailpipe assembly #86389S into position in the cut-out of the side skirt, then place the front of the pipe into the muffler outlet. Push the two HA602 mounts over the bolts installed in the two previous steps. Support the tailpipe with a stand and place a 3/8” lock washer and nut over each of the bolts. Tighten enough to hold but still allow for adjustment. Repeat this step on the left side of the vehicle with tailpipe #86390S. See the two photos above.
8) Adjust the inlet of both mufflers back to the lines drawn on the Scavenger assembly and snug up the clamps enough to hold their position. Adjust the position of the tailpipes forward or back to get the desired location of the tips in the cut-outs of the side skirts. Once the desired location is achieved, snug up the fasteners on the HA602 hanger mounts and then the muffler outlets.
9) A minimum of 1/2” clearance around all parts of the system must be maintained; while keeping suspension travel and vibration in mind. To maintain these clearances, it may be necessary to adjust the exhaust at the factory locations. If you cannot get the required exhaust clearance, try loosening the above nuts, then readjust the exhaust for clearance. After adjustments have been made, you may now securely tighten the clamped connections.
10) After several heat cycles, roughly 100 miles, ensure all clamps are still tight and clearances are where they should be. For a more secure installation, we highly recommend placing a minimum 1” weld on either side of the mufflers inlet and outlet slip-fit connections.
Exhaust Cut Out Block Off Plates Installation
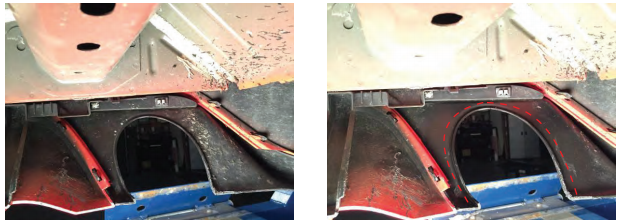
1) Clean the back side of the rear bumper around the factory exhaust cut outs of dirt and debris using soap and water. Once thoroughly dry, wipe the back side of the factory exhaust cut out with the supplied alcohol wipes to ensure a wax and grease free surface. Then apply the supplied adhesion promoter, allow the adhesion promoter to haze prior to adhering the MMD exhaust cut out deletes. Apply firm pressure to ensure proper adhesion.
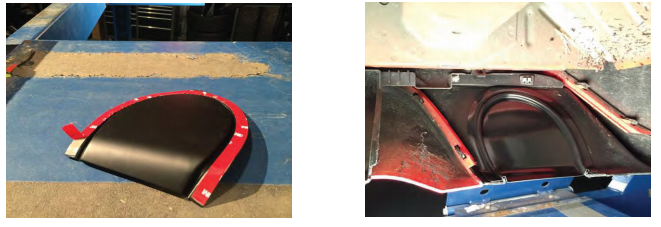
2) Peel the 3M tape backing off and install the cut out delete to the back side of the bumper.