 FREE 1 to 3-Day Delivery on Orders $149+ Details
How to Install Moroso Aluminum Supercharger Coolant Tank (03-04 Cobra) on your Ford Mustang
Installation Time
60 minutes
Tools Required
- Phillips Screwdriver
- Flathead Screwdriver (Optional)
- 13mm Socket
- 8mm Socket
- Ratchet (1/4” for better access)
- Pump (Optional but recommended)
- Clean Container
- Coolant/ Distilled Water
- Shop Towels
- Pliers

Shop Parts in this Guide
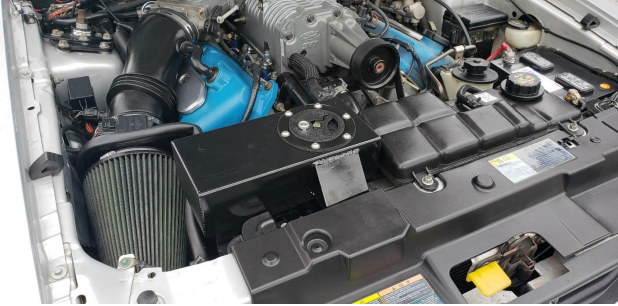
Please note: I painted my Moroso Coolant tank black to change the appearance.
Removal Procedure of old reservoir tank:
1. Park on level ground release hood latch to open hood.
2. Confirm engine is cool to the touch before beginning work with coolant fluids.
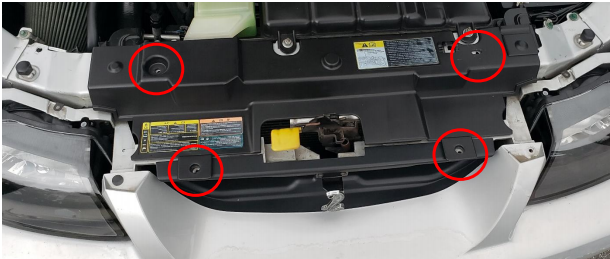
3. With the hood lifted and the hood prop in place remove the four (4) plastic screw style fasteners holding the trim piece in place. A Philips screwdriver can be used to unscrew and then pull out the fasteners.
Note: some fasteners are stripped and require using a flathead under the head of the screw for it to properly unthread.
4. Once the trim panel has been set aside, remove the cap from the reservoir.
5. At this time, the coolant in the tank can be pumped into a clean container.. Try to remove some of the fluid from the lower hose to avoid spills. If you do not pump out the fluid now you can let it drain via the lower hose once removed.
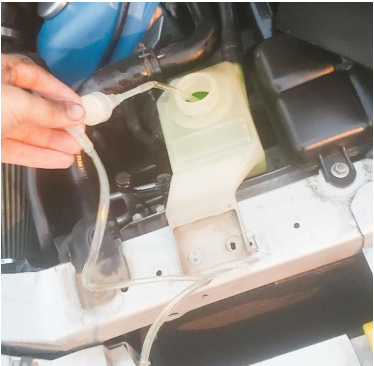
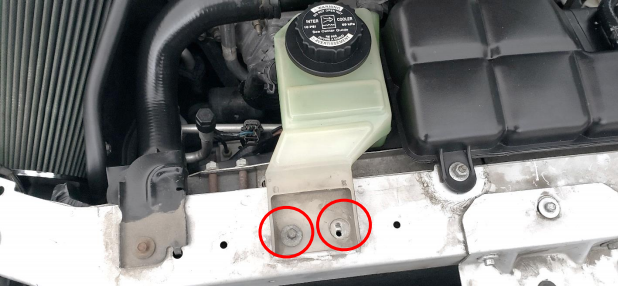
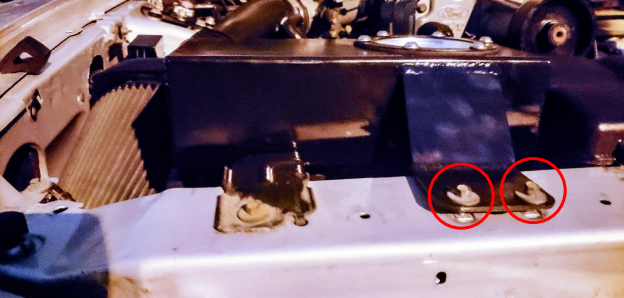
6. Once all the fluid has been removed from the tank and set aside, remove the two (2) fasteners that hold the tank to the radiator support beam using a 8mm socket and ratchet.
7. Now is a good time to place some shop towels under the upper hose leading to the tank.
8. Using the pliers pinch the metal retaining clip and slide it down the hose towards the engine block away from the tank. Pull and slightly twist to remove the upper hose from the coolant tank.
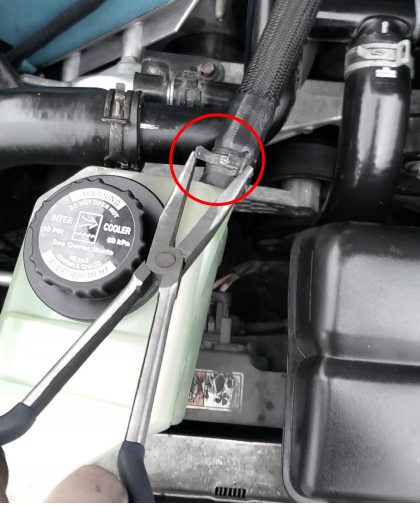
9. Loosely place some of the shop towel in the end of those hose to prevent drips.
10. Once the top hose has been removed, lift the tank to gain better access to the lower hose.
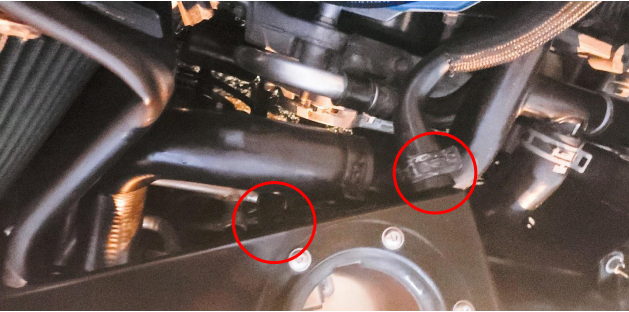
11. Using a similar process to the upper retaining clip, pinch and slide the clip away from the tank about 3” down. Pull and twist the hose to remove it from the tank. Please note: this hose still has coolant so be mindful of splashing when pulling hard to remove.
12. At this time, remove the fastener near the radiator support beam with a 13mm socket and ratchet. (Cars with aftermarket air intakes may share this bolt location with the Moroso supercharger coolant tank.

Installation Procedure of new Moroso tank:
13. Once the old tank has been set aside, start to connect the new tank.
14. Push the lower hose onto the new tank until it seats against the base of the tank. Using the pliers pinch and side the metal retaining clip along the hose close to the tank. Note the Moroso tanks has a shorter connector than the OEM tank so be sure the clip is behind the retaining flange.
15. Once the lower hose has been attached, bolt in the larger (13mm) fastener through the lower support bracket and into the side of the radiator support. Do not tighten this bolt yet. (Those with an aftermarket Air intake may have to reposition both brackets or leave the air intake bracket un-attached.)
16. After the lower fastener has been attached, bolt in the two (2) smaller (8mm) fasteners into the top of the radiator support beam. Tighten the bolts snug and then snug the lower bolt as well.
17. At this point, remove any towel in the hose and attach the upper coolant hose to the upper inlet of the tank. Use pliers to pinch and slide the retaining clip over the flange to hold the hose in place.
18. Twist and unlock the lid of the Moroso Supercharger Coolant tank. Refill tank with either new coolant or the coolant collected with the pump. As this tank is larger than the OEM tank, top off with distilled water or more coolant. Fill till there is around an inch of air gap from the top of the tank to the fluid.
19. Remove any shop towels placed in the engine bay to collect drips.
20. Start vehicle to ensure supercharger coolant is pumping correctly. If necessary squeeze upper coolant hose to remove air if no fluid is moving.
21. Once confirmed that coolant is flowing, replace the tank cap back in place, making sure the tabs align with the slits in the opening of the tank. Twist and lock cap.
22. Reinstall trim panel with plastic fasteners.
Enjoy staying cool with your new Moroso Supercharger Coolant tank!
Installation Instructions Written By AmericanMuscle Customer 5/22/2018.