 FREE 1 to 3-Day Delivery on Orders $149+ Details
How to Install MP Concepts Full Replacement Decklid Panel - Gloss Black (15-17 All) on your Ford Mustang
Installation Time
30 minutes
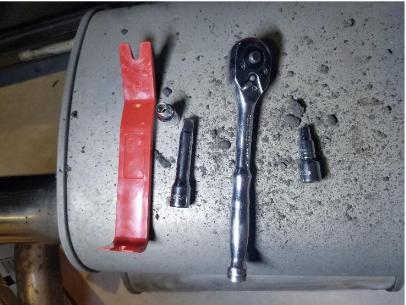
Tools Required
- 7mm Socket
- 7mm Deep Socket (optional)
- 6 inch Extension (optional)
- Ratchet
- 5mm Socket
- Panel Removal Tool
- Flat Head Screwdriver (optional)
- Needle Nose Pliers (optional)

Shop Parts in this Guide
Removing the OEM Decklid
1. Start by ensuring the mustang is turned off, as you will be disconnecting an electrical connection, and the trunk is opened.
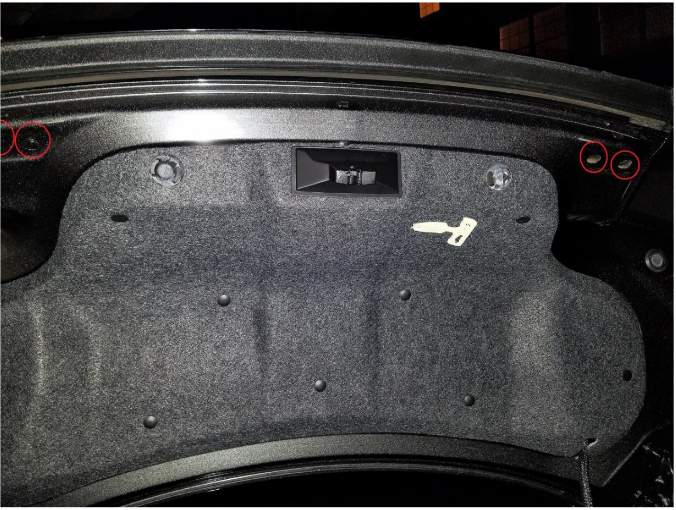
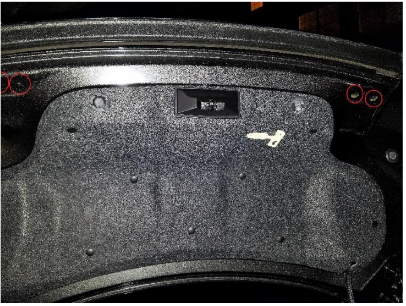
2. Remove the two small covers utilizing a panel removal tool. (indicated in photo 1 with the red circles)
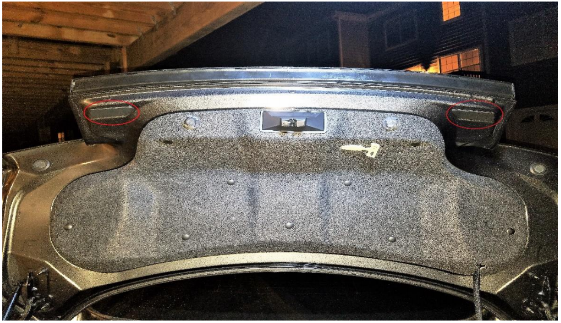
3. Loosen the 4 7mm bolts and remove them for safe keep as you will re-install them later that are located under the two small covers. There are 2 on each side.
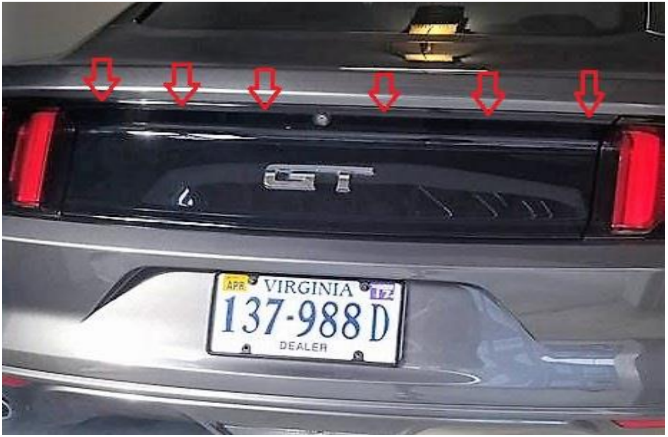
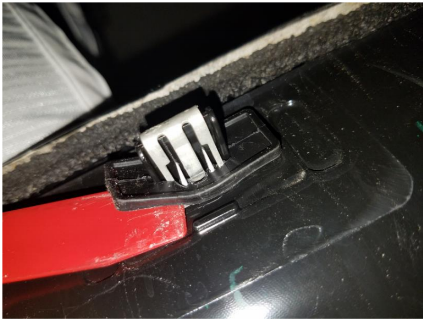
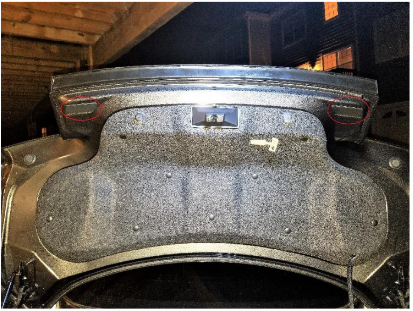
4. Slowly utilizing the panel removal tool separate the top of the panel from the body of the trunk. Take care as the electrical connection for the backup camera will require disconnecting before the panel can be completely removed. There are a total of six clips holding the plate to the back of the car.
5. Disconnect the electrical connection to the backup camera, located directly behind the camera.
6. Remove the panel by lifting away from the top and slightly down to unhook the bottom from the trunk.
Transferring the hardware
7. Once removed remove the 4 rubber gaskets around the clips that are to be transferred from the OEM piece to MP concepts decklid.
8. You may reuse these rubber gaskets if they are undamaged (optional).
9. Remove the 4 clips to be reused on the MP Concepts decklid. Re-install them onto the new MP Concept decklid in the identical spots from the OEM piece.
10. Remove the 4 bolt retaining clips and transfer them to the MP Concepts decklid in the identical spots from the OEM piece. (two of the four are illustrated in red)
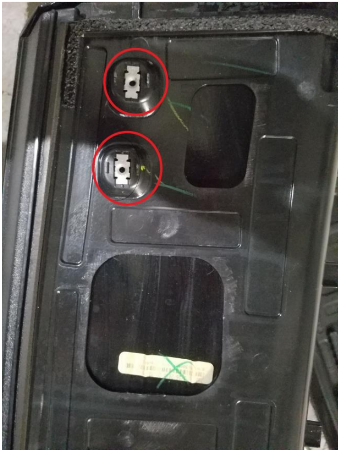
NOTE: It may require you to slightly pinch the clips to re-install them. I found it easiest to accomplish with a needle nose plier.
11. Remove the backup camera by removing the two 5mm bolts on either side.
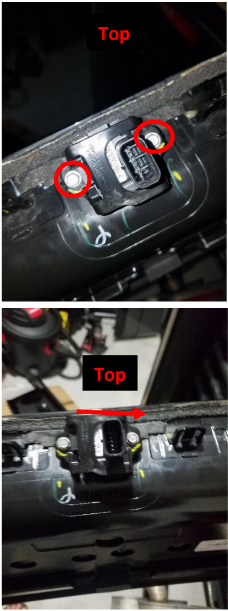
CAUTION: Take note of the camera’s orientation in the photo as installation in the reverse will cause your camera to be upside down. The connector should be closer to the right side when viewed from behind.
12. Re-install the backup camera cable and install the decklid. Be sure to allow the bottom to slide into the retaining bracket then push in the six clips on the top.
13. Re-install the four 7mm bolts . Two on each side.
14. Re-install the two bolt covers.
15. Slowly lower your trunk to ensure fitment before completely closing the truck. Cycle the trunk opening and closing and operationally check the backup camera.
Installation Instructions provided by Christophe Mateo

