 FREE 1 to 3-Day Delivery on Orders $149+ Details
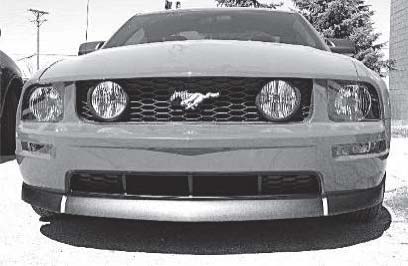
How to install a CDC Classic Chin Spoiler on your 2005-2009 Mustang GT

Shop Parts in this Guide
Installation
Note: Read installation instructions before starting and test fit component before painting. Chin spoiler is a molded TPO part. To ensure the quality of your vehicle and the product, have your chin spoiler painted by a qualified professional automotive painting facility (if applicable). We recommend that paint curing temperature not exceed 150°F
- Chin spoiler
- Push-pin retainer (2)
- 1 - Roll of 1/2"x44" 3M Acrylic bonding tape (#950010)
- 2 - Alcohol packs
- 1 - adhesion promoter pack
Attention:
Failure to follow instructions may result in loss of this product. Classic Design Concepts is not responsible for improperly installed Chin Spoiler. Tape surfaces must have a temperature of 70°F or above to properly adhere. If necessary, warm the vehicle and chin spoiler areas with a heat gun or hair dryer.
Apply 3M acrylic bonding tape
1. Sand area to be taped on the part with 80-120 grit sandpaper.
2. Clean with supplied alcohol swabs. allow time to dry.
Caution: proper ventilation should be used when handling all solvents.
Inhalation and direct contact with skin and eyes should be avoided.
3. Apply supplied adhesion promoter. Allow time to dry. Note: Adhesion promoter may discolor paint, only apply where needed. The drying time is generally 30-45 seconds but may depend on conditions. Tape should be applied within 1 hour of applying promoter, in a dust free environment.
4. Apply 3M acrylic foam tape. Cut tape with a razor blade where a continuous piece is not possible. Note: it is recommended that the temperature of the part be 60-110°F at the time of application.
5. Apply even pressure around part to set tape. As a general rule, a minimum of 15PSI should be used. Note: Immediately after the tape is applied about 60% of the bond strenth is achieved. After 24 hours approximately 75%-80% is achieved. After 72 hours 95% bond strength is achieved.
apply 3M Acrylic Bonding Tape as shown on bottom side of Chin spoiler, approximately 44"
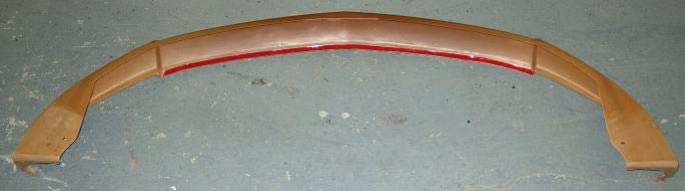
Figure 1
Classic Chin spoiler install:
1. You can install the chin spoiler with the vehicle on the ground or raise front of vehicle using ramp, hoist, jacks, etc. and properly support. to help ease installation, remove front wheels.
2. Remove the 2 lower screws from wheel opening that secure the wheel well liner to the front fascia. (Figure 2)
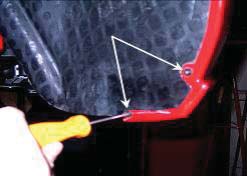
Figure 2
3. Clean the fascia where the acrylic bonding tape will contact and wipe with Isopropyl alcohol, allow drying.
4. Attach one end of Chin Spoiler into wheel opening with the 2 factory screws removed in step #2. (Figure 3)
5. Peel 2"-3" of the red backing from the Acrylic bonding tape. (Figure 4)
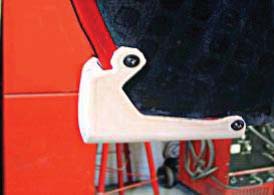
Figure 3
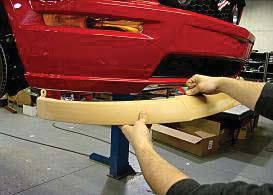
Figure 4
6. Place the chin spoiler in place along the ledge in front of the lower grille and press exposed portion of acrylic tape to fascia. (Figure 5)
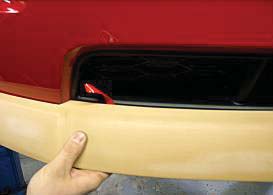
Figure 5
7. Stretch other end of Chin spoiler into wheel opening and secure with the factory screws.
8. Finish peeling the red backing from acrylic bonding tape and press over the tape area to seat tape.
9. Install push-pin retainer (supplied in kit) through Chin spoiler securing to bottom side of fascia, one on each side. the holes are in the fascia from the factory.
Thank you for choosing Classic Design concepts for your restyling needs. If you have any questions or concerns regarding installation please contact [email protected]
