 FREE 1 to 3-Day Delivery on Orders $149+ Details
How to Install a Pre-Painted GT Style Hood Scoop on your 1999-2004 Mustang GT, V6 and Bullitt
Installation Time
1 hours
Tools Required
- Trim Removal Tool
- Flathead Screwdriver
- 3/8" Drill Bit
- Xacto Knife or Razor Blade
- Electric Drill
- Center Punch
- 7mm Socket
- Masking Tape

Shop Parts in this Guide
Tools Required
► Trim Removal Tool
► Flat Head Screwdriver
► 3/8 Drill Bit
► X-acto Knife or Razor Blade
► Electric Drill
► Center Punch
► 7mm Socket
► Masking Tape
Step 1
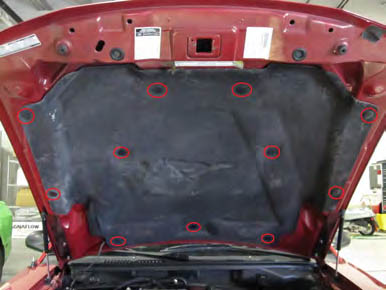
Open the hood and remove the 11 plastic retaining pins securing the hood insulation pad. A trim removal tool works best for this job, but a flat head screwdriver can be used. Once all of the clips are removed, set the insulation pad aside.
Step 2
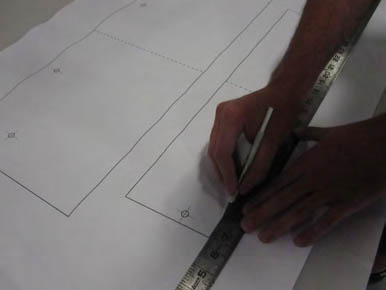
Using an X-Acto knife or sharp razor blade, cut out the two sections of the drill template on the OUTSIDE of the black lines as shown.
Step 3
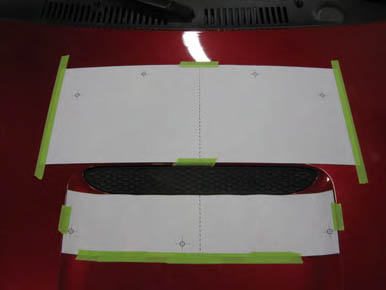
Install the lower template first by lining it up on the edge of the factory insert and along the two outside edges as shown. The upper template is installed on the upper edge of the factory insert, using the dotted center line as a guide (this dotted line should be matched with the dotted line on the lower template). The photo below shows both templates properly installed on the hood.
Step 4
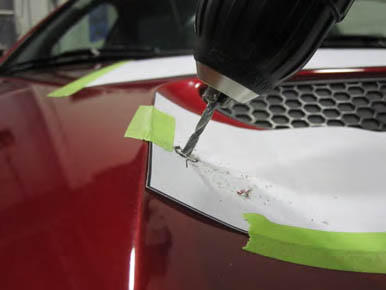
Center punch the 7 holes and drill up to a 3/8” hole. (It may help to step up gradually to 3/8” by using 3/16” then 1/4” bits) When finished, remove the drill templates and clean up any leftover fiberglass shavings using a Shop Vac.
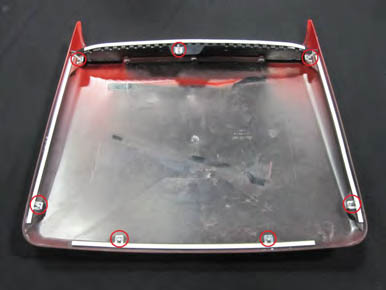
Step 5
Install the honeycomb insert into the scoop and secure it with the 3 provided locking rings.
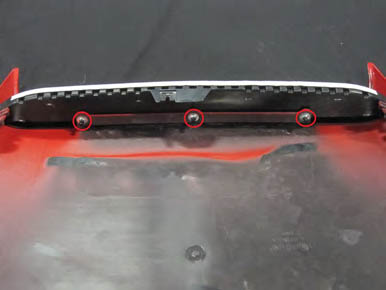
Step 6a
Install the 7 U-tabs/studs onto the designated areas on the scoop.
Step 6b
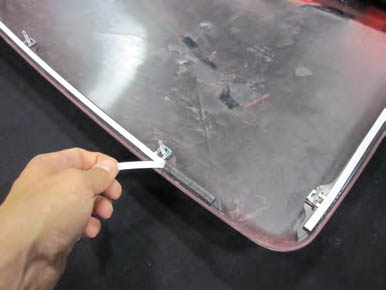
Remove the adhesive foam backing as
shown above.
Step 7
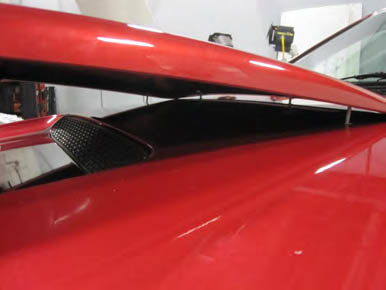
Place the scoop on the hood aligning the rear studs first. Don’t fully press down on the scoop until all studs are properly located and the scoop is in its desired location. Once it is properly aligned, move around the edges and firmly press down to fully seat the adhesive.
Step 8

Install the washer & nuts on the underside of
the hood using a 7mm socket. Just tighten
until snug, over tightening the nuts could
possibly damage the hardware. Once all 7
sets of washers & nuts are installed and the
scoop is secure, re-install the hood insulation pad removed in Step 1 to complete the installation.
