FREE 1 to 3-Day Delivery on Orders $149+ Details
How to Install a Radiator Center and Extension Cover Kit - Pre-painted on your 2005-2009 GT and V6 M
Installation Time
30 minutes
Tools Required
- 10mm socket
- Extension
- Ratchet
- Flat blade screw driver or tool to pry small parts
- Dremel or rotary cutting tool with cutoff bit (if vehicle equipped with cold air intake)
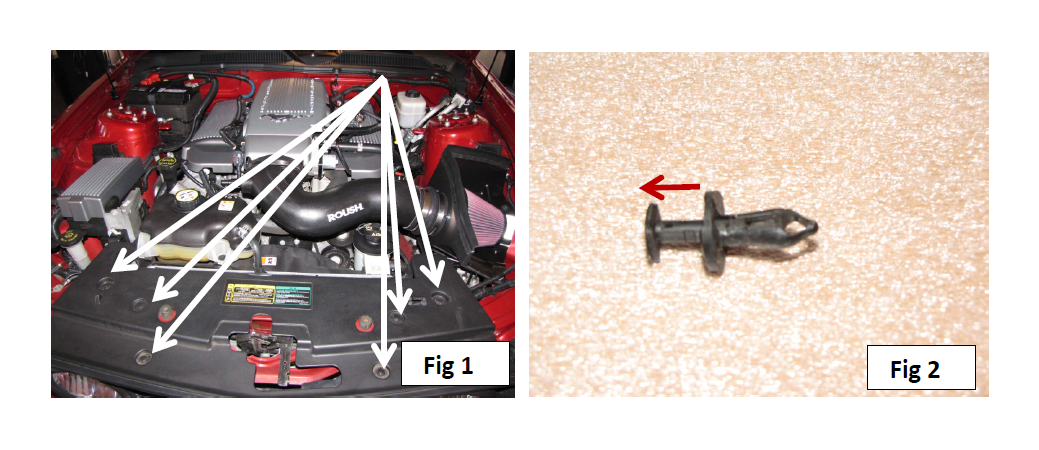
Note: -Fig.1 shows the engine bay before installation of the pre-painted radiator center and extension covers. Note that this car has a ROUSH Cold Air Intake installed which will require trimming later during this installation. The factory hood prop rod has also been replaced by a hood strut kit on this vehicle.
STEP 1 Using a flat blade screw driver, remove the factory center cover by prying up on the centers of the six push pin retainers indicated in -Fig.1 . The flanges on the push pins are slotted to allow easier access to the center pins. Make sure the center pin is pulled as far out as possible as shown in –Fig.2, and then pry up on the flange part of the retainers to completely remove them from the factory cover.
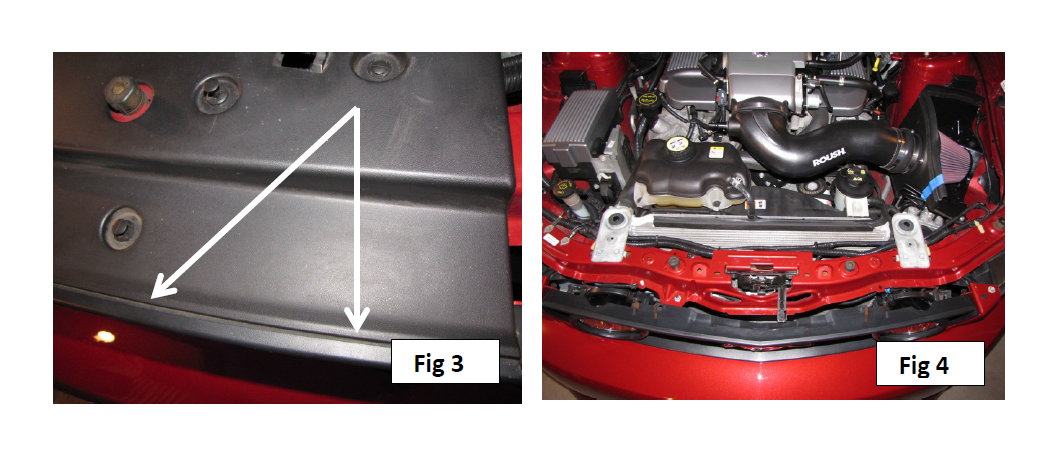
Note that the front edge of the factory cover is slid under the top edge of the grill as shown in –Fig.3. The pre-painted center cover will be installed the same way. Remove the factory cover by sliding it back and then set it aside. –Fig.4 shows the factory cover removed.
STEP 2 Using a 10mm socket, remove the upper bolts holding the top of the front fascia on both sides of the grill –Fig.5 and set the bolts aside. The kit comes with replacement bolts which will be installed later.

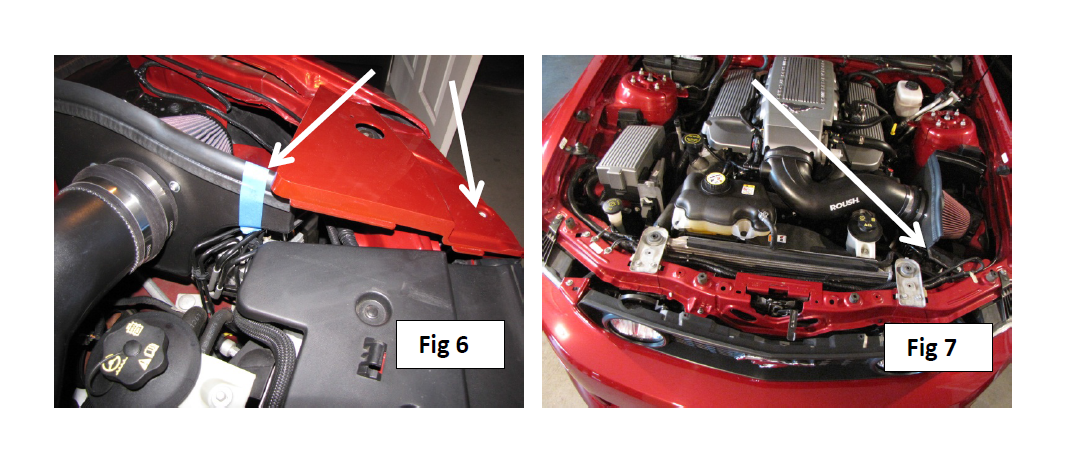
STEP 3 Skip this step if your car has the factory air filter box. For cars equipped with an aftermarket cold air intake system, some trimming of the airbox may be required to fit the driver’s side extension cover. Position the driver’s side extension cover so the front hole matches up with the front fascia bolt hole (where the bolt was removed in STEP 2). Mark with tape how far back the CAI air box must be trimmed to fit the extension cover as shown in –Fig.6. Using a rotary tool with cutoff bit, carefully cut out a notch so that the extension cover will lie flat. –Fig.7 shows the notch trimmed from the air box.
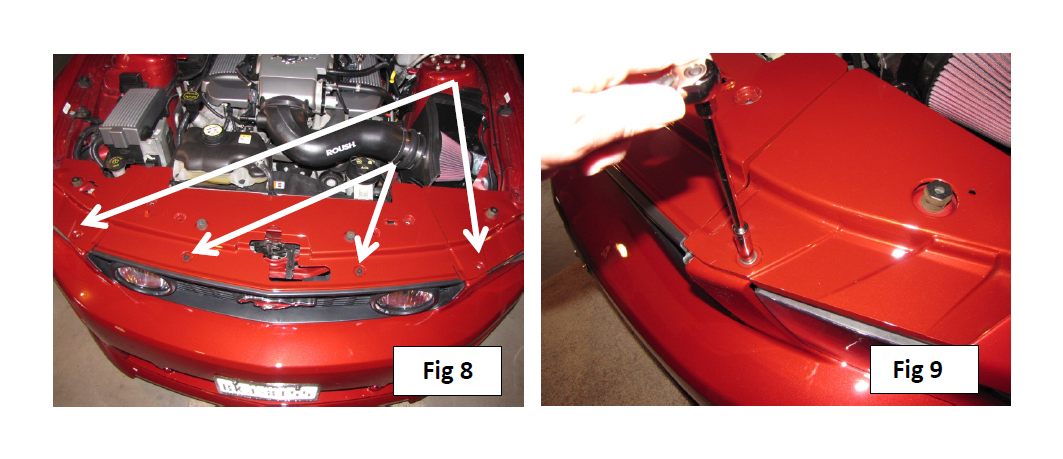
STEP 4 Position the pre-painted center cover by sliding the leading edge under the top of the grill and insert the two front most push pins to hold it in place as shown in –Fig 8. Position both pre-painted extension covers by sliding the flanges on the inside edges under the outside edges of the center cover and aligning the holes with the bolt holes on the top of the front fascia. If your car still has the factory hood prop rod, it may take some help to temporarily hold the hood up while the rectangular opening on the passenger side extension cover is slid down the prop rod and into position. Install the two bolts provided in the kit using a 10mm socket as shown in –Fig 9. Re-install all of the remaining push pins removed in STEP 1, making sure the center pin is pushed all the way down to seat it correctly.
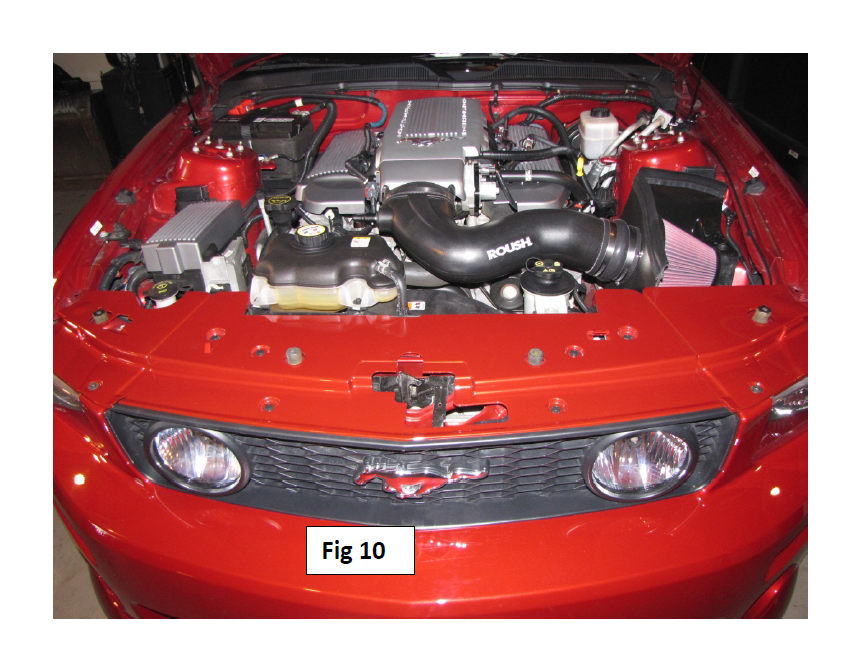
Congratulations! The finished installation should look like –Fig. 10.