FREE 1 to 3-Day Delivery on Orders $149+ Details
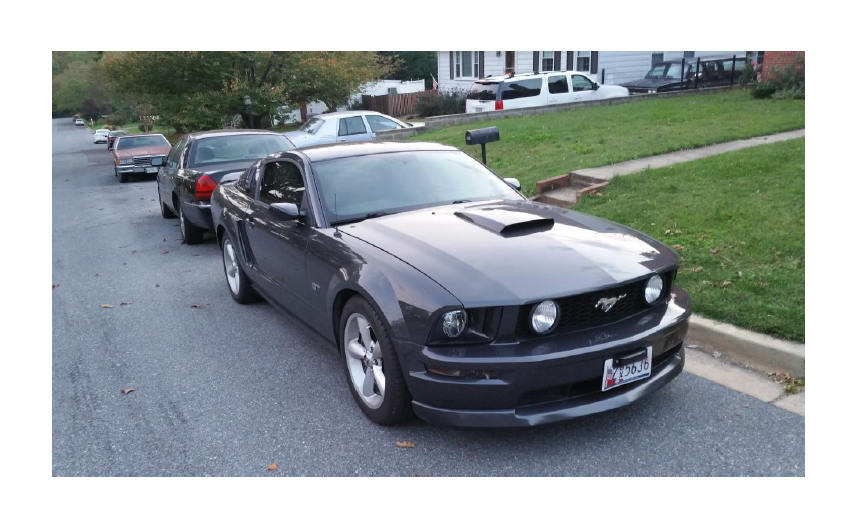
How to Install SR Performance Underdrive Pulleys - Black on your Mustang
Installation Time
2 hours
Tools Required
- Flat Head Screwdriver
- Phillips-Head Screwdriver
- 3/8 or 1/4 Drive Ratchet
- 4mm Socket
- 11mm Socket
- T10 Torx Screwdriver
- Needle Nose Pliers
- Shop Towels (Optional)
- Mechanics Gloves (Optional)

Shop Parts in this Guide
1. Place the car in park (automatic) or first gear (manual). Engage the emergency brake.
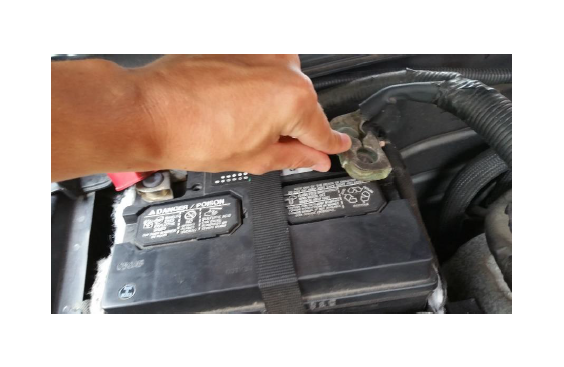
2. Since you will be disconnecting and reconnecting electrical harnesses, it’s a good idea to disconnect the negative battery cable with an 8mm socket. See Picture Directly Below.
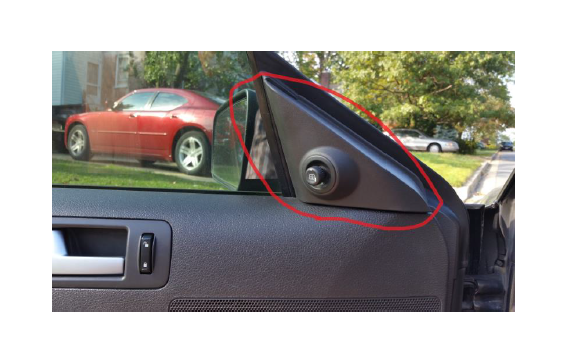
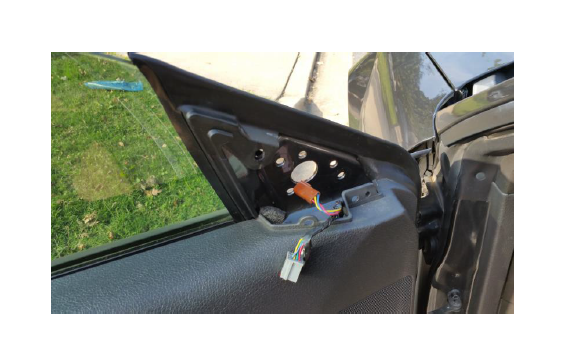
3. Pull the interior side view mirror cover away from the car by pulling it straight away from the door. The cover is only held on by clips and should pull right off. I have circled the cover in the picture directly below. Note that it will still be held to the car by a gray electrical connector so you will not be able to pull it entirely away from the car.
4. Once you have pulled the cover away from the car, disconnect the gray electrical harness by depressing the clip and pulling away. You can now put the cover in a safe place so that it does not get scratched or damaged while you perform the rest of the mirror install. The gray harness is circled in the picture directly below.
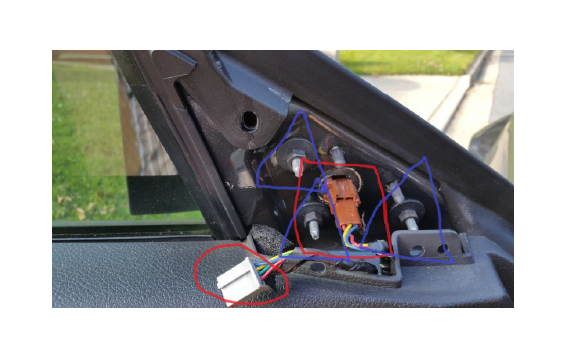
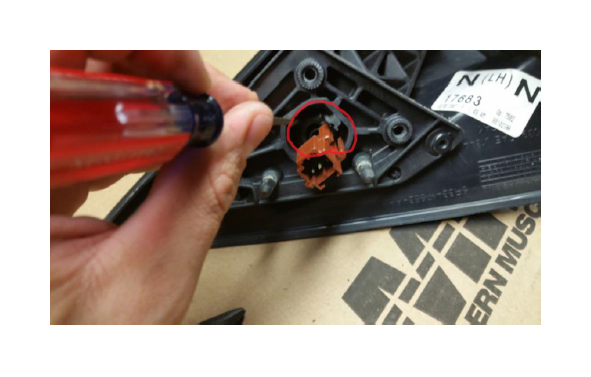
5. Disconnect the brown electrical harness by depressing the tab and pulling it apart. I have placed a square around this harness in the picture directly above.
6. Using the 11mm socket and ratchet, remove the three (3) nuts which fasten the mirror to the vehicle. Be very careful not to drop the nuts into the door panel. If you do, you will probably need to remove the door panel to retrieve them (or get lucky with a long magnet). The nuts and washers are one piece so you can hold the washer portion while spinning the nut off to decrease the chance of dropping them. The nuts have blue triangles around them in the picture directly above.
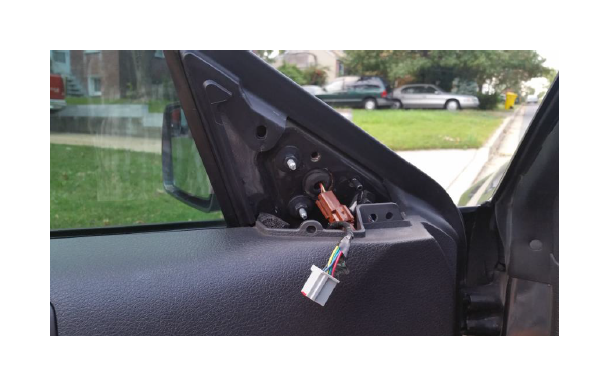
7. Pull the mirror away from the vehicle—be careful not to scratch your paint with the bolts. The vehicle will look like the picture below after you have removed the mirror from the car.
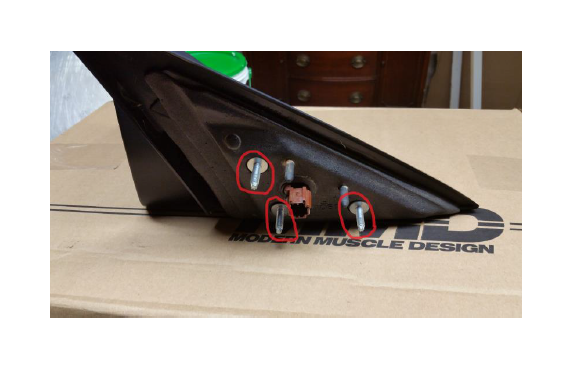
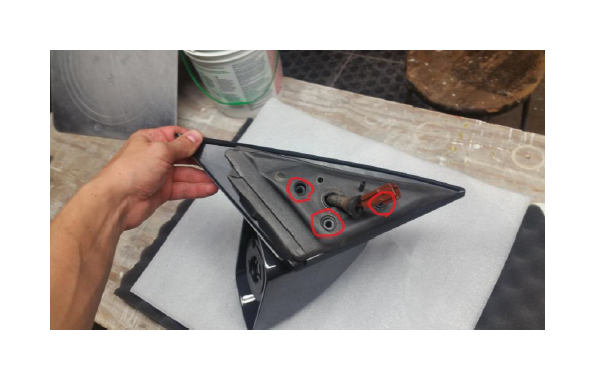
8. Place the old mirror onto a bench and remove the three (3) bolts with the 4mm socket and ratchet. The bolts do not require much force to remove. The bolts are circled in the picture directly below.
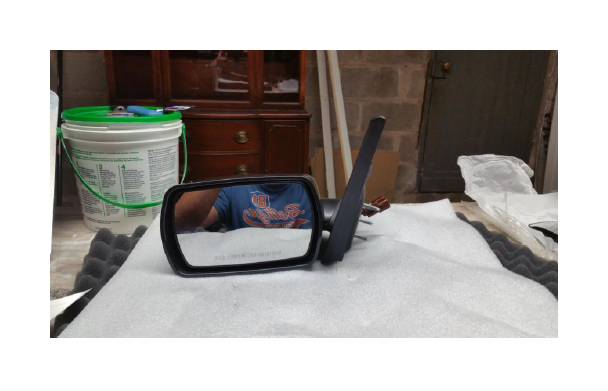
9. Once the bolts are removed, pull the foam piece away from the old mirror. The picture directly below is intended to provide a reference point.
10. Pull the mirror glass (connected to a plastic backing) away from the mirror housing by pulling from the inside of the mirror outward. This will require some force but be careful not to break the glass. The glass is held on with clips that suddenly come free when you apply just enough force. I pulled a little too hard on the first mirror and broke the glass as it came free. I was easily able to remove the second mirror glass from the other side without breaking it once I understood how it was held on. You may want to wear mechanics gloves for this step so that in the event that the glass does break, you are less likely to cut your hands. The picture below shows the broken glass.
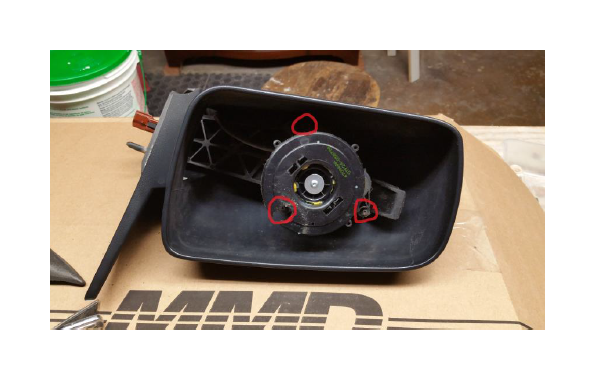
11. Using the T10 Torx Screwdriver, remove the three (3) T10 screws from the mirror motor. I have circled the screws in the picture directly below.
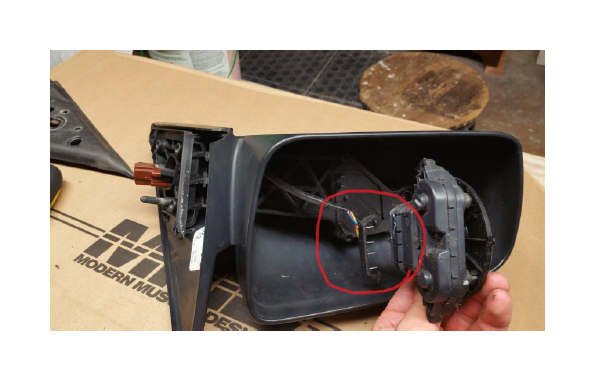
12. Use the flathead screwdriver or your finger to gently pull two (2) the clips away from the wiring harness that attaches the wiring harness to the mirror motor (there is one clip on each side). Be careful not to snap the clips from the harness – these do not require much force to remove. I have circled the plug and clips in the picture directly below (note: this picture displays the harness just after separation so that you can see how it is connected).
13. Remove the rubber grommet from the inside of the mirror housing so that the wiring can be removed for reinstallation into the new mirror. This can be accomplished using a dull flathead screwdriver (it should be dull so that you don’t pierce the rubber) and needle nose pliers. First, try to pull the edges of the grommet away from the mirror housing. Once you have something to grip, pull the grommet out of the housing using the needle-nose pliers. I have circled the grommet in the picture below.
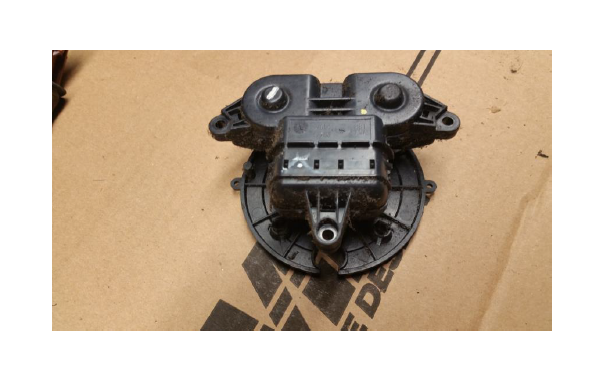
14. The mirror motors that I removed were filthy so I took a minute to clean them up with shop towels. See picture directly below.
15. Fish the wiring harness out of the old mirror housing for re-installation into the new mirror housing. It will fit if you are careful to fish the plastic wiring piece piece around the obstructions.
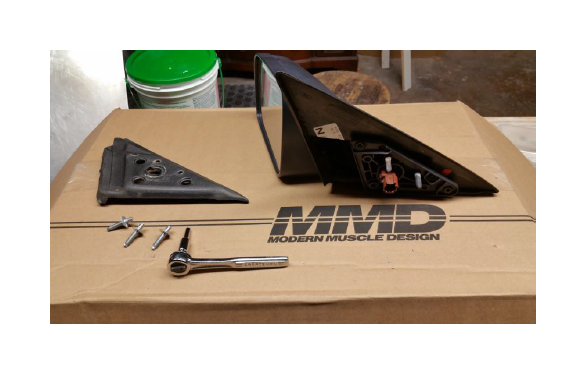
16. Unpack the new mirror housing and place it on top of the non-abrasive, clean packing that it was shipped in to reduce the risk of scratches or damage to the new mirror.
17. Fish the wiring harness, including the attached grommet, into the new housing in the same way that you removed it from the old housing. See picture directly below.

18. Secure the mirror motor to the new housing using the same three (3) T10 screws that you removed from the old housing. Do not overtighten these screws as you are screwing them into plastic. I have circled the screw locations in the picture directly above.
19. Reinstall the foam piece that you removed from the old mirror housing. Install the three (3) bolts that you removed from the old mirror housing using the 4mm socket and ratchet. I have circled the bolt locations in the picture directly below. Note: the grommet does not fit into the new mirror housing as well as the OEM mirror housing since the cutout in the new mirror housing is oval but the grommet is designed for a round cutout.
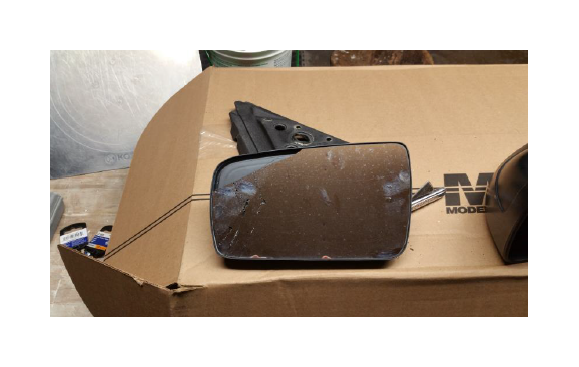
20. Install the new mirror glass into the new mirror housing by firmly pressing it into the mirror housing until it locks in place. Make sure that the cutout of the mirror glass backing is on the bottom of the mirror housing. See picture directly below. Note: the glass which contains the writing “Objects in mirror are closer that they appear” belongs on the passenger side mirror since it is convex glass and the driver’s side mirror is not.
21. Line the three (3) bolts and the wiring harness on the new mirror housing up with the holes in the vehicle and push the new mirror housing through. See picture directly below.
22. Using the 11mm socket and ratchet, reinstall the three (3) nuts onto the bolts. Plug in the brown wiring harness.
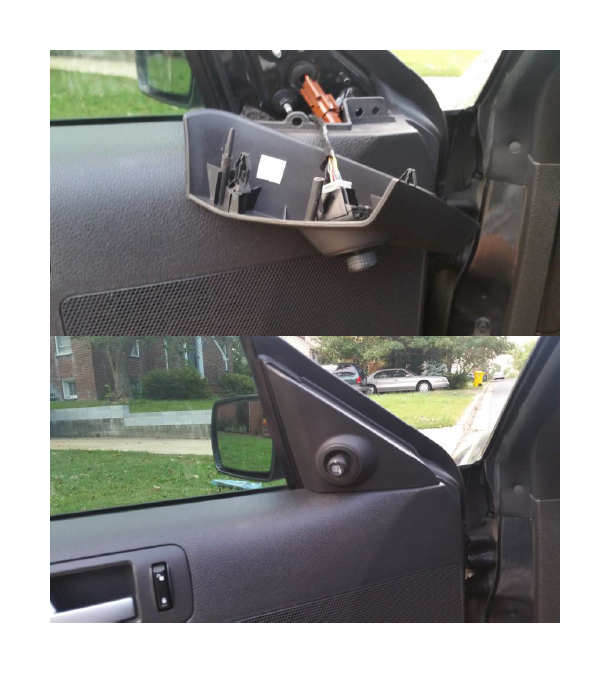
23. Plug the grey wiring harness into the plastic interior mirror cover and reinstall the interior mirror cover by lining up the clips and then pushing it into place. See pictures directly below.
24. Reinstall the battery cable. Turn the key to the “on” position (you don’t need to start the car) and check the mirror for proper operation.
25. Installation of the passenger mirror is the same as the driver side.
26. Enjoy the classic muscle car look of your new retro mirrors!
Before:
After: