 FREE 1 to 3-Day Delivery on Orders $149+ Details
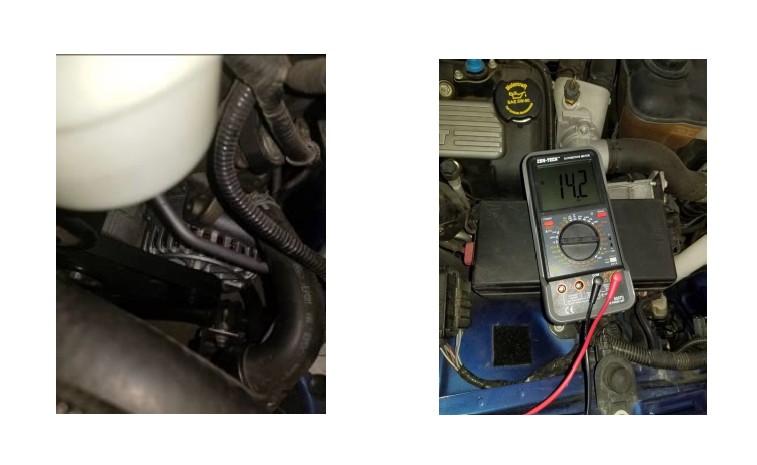
How to Install PA Performance Alternator - 130 Amp (07-08 GT500) on your Ford Mustang
Installation Time
2 hours
Tools Required
- 8mm Socket
- 10mm Socket
- 15mm Deep Socket
- Ratchet Handle
- 15mm Ratcheting Box Wrench
- X2 Jack Stands
- Factory Jack / Drive on ramps / Post Lift
- Fastener Removal Tool
- 15mm Box End Wrenches

Shop Parts in this Guide
Install Procedures:
1. Unhook your battery using an 8mm.
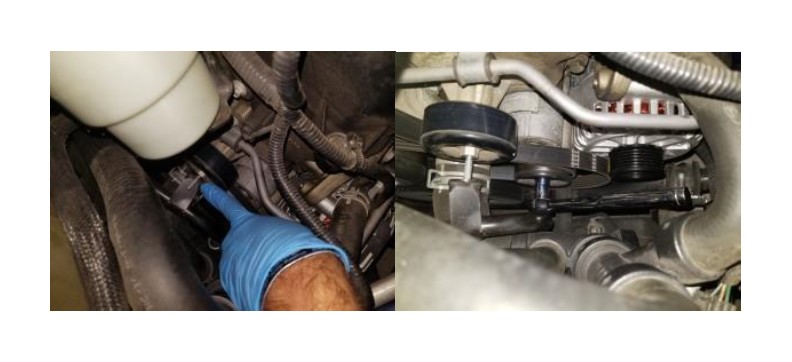
2. Using a 10mm, remove the nut that stabilizes a metal line to an accessory belt pulley. Using a 15mm box end, unload the factory tensioner for the accessory belt by pushing down in a clockwise direction (i.e. tighten the bolt). With pressure on the tensioner, slip the belt off the power steering idler.
3. Jack the vehicle up, and place on jackstands. Other options are using drive-on
service ramps or using a post lift. Ensure the vehicle is stabilized before going
underneath.
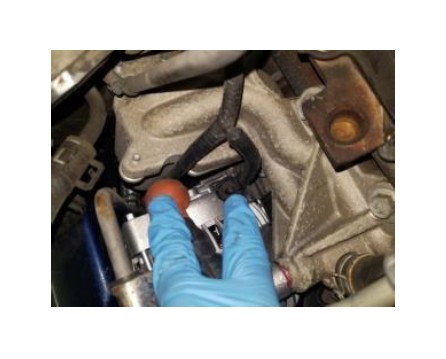
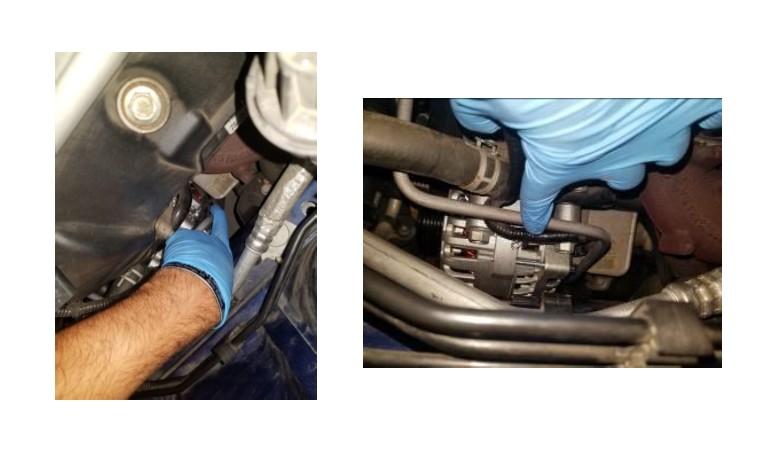
4. While under the vehicle, unhook the two connectors from the alternator. One is a
clip-type and one is a bolt/nut (8mm) covered by a red rubber boot.
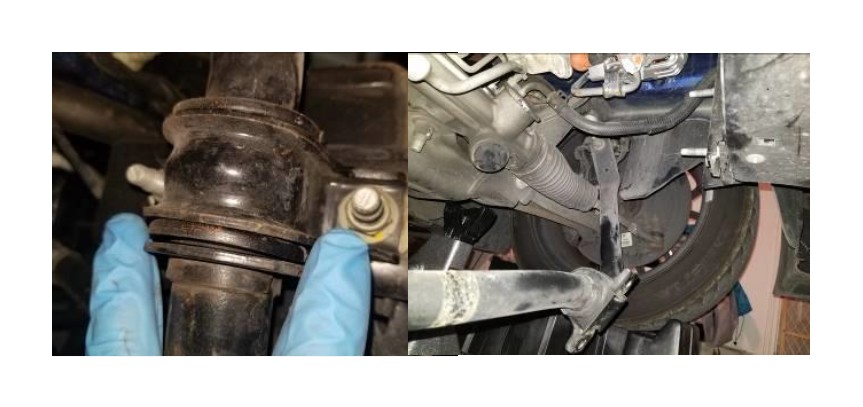
5. Remove the x4 (15mm) bolts holding on the sway bar to the front support. Once
loose, pull it forward and let it hang to make room for the alternator to drop out.
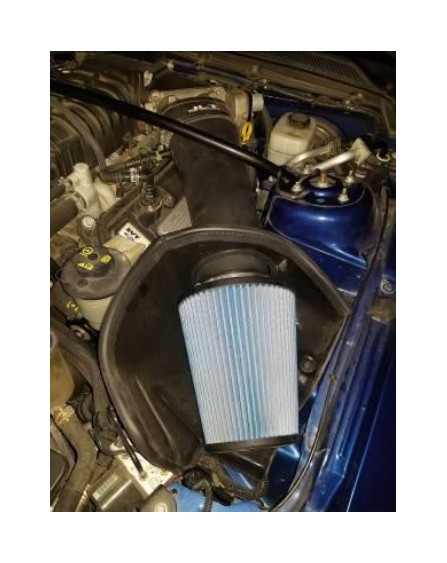
6. Now crawl out and head up top. You'll need to remove the cold air assembly to get to
the two upper bolts. There are x3 10mm. Start by removing the cone filter, then
remove the plastic airbox shield. Unplug the MAF sensor, PCV valve, and vacuum line
from the intake tube. There is one last 10mm to remove the intake tube from the
throttle body. Cover the intake to ensure nothing contaminates the engine.
7. Remove the two plastic push pins holding an electrical line to the top and back of the
alternator.
8. Unthread the x2 15mm alternator mounting bolts. They are long will not be fully
removed until the alternator is fully out from under the vehicle. Use a ratcheting box
end to maximize your time.
9. Crawl back underneath. Remove the 10mm nut that secures the power steering line
to the single 15mm lower mounting bolt for the alternator. Remove that 15mm
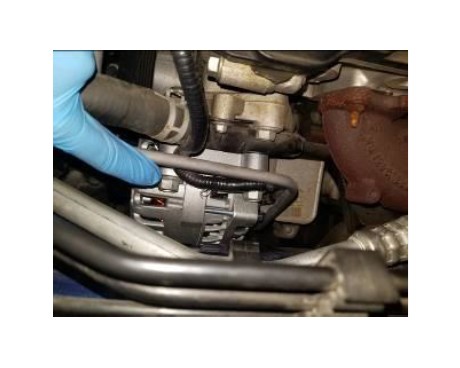
alternator mounting bolt. Once this bolt is removed, the alternator will be free hanging.
Tilt the unit backwards and counterclockwise about 20 degrees and it should slide out.
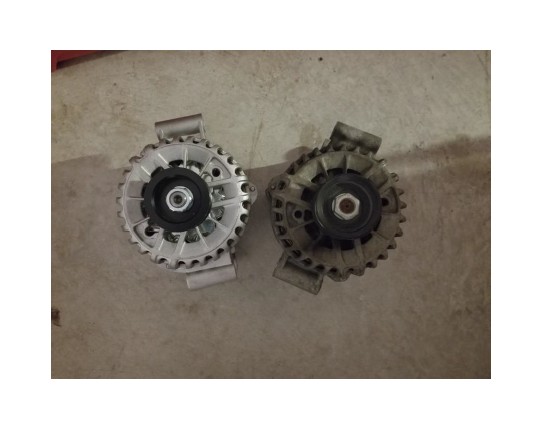
10. Once the alternator is removed, the upper bolts are available to be fully removed.
Install them into the corresponding holes in the new alternator.
11. Maneuver the unit into position and insert the bottom 15mm mounting bolt until
it's just shy of being fully tightened.
12. Back up top, thread and tighten the x2 upper 15mm alternator bolts.
13. Back underneath, tighten the lower 15mm alternator bolt. Then install and tighten
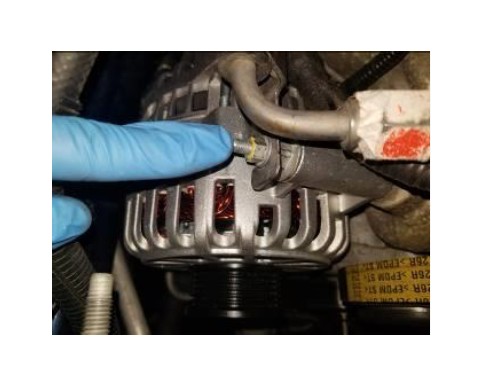
the single 10mm nut securing the power steering line. Plug in the clip connector and
install the charge wire with the 10mm nut.
14. Reinstall the sway bar using the x4 15mm nuts.
15. Head back up top. Reinstall the electrical line by pressing the x2 push pins back in
place.
16. Next we tighten the accessory belt tensioner via the 15mm bolts. While tightened,
slip the accessory belt back onto the new alternator pulley. Once done, reinstall the
single 10mm nut that stabilizes the line to the tensioner bolt.
17. Now double check your work.
18. Reinstall the intake tube, air box, and cone filter (x3 10mm). Install MAF sensor
wire, PCV valve, and vacuum line.
19. Start your car. You're done! Use a multimeter to verify alternator is indeed
charging.
By Robbie M. on 9/15/2017
