 FREE 1 to 3-Day Delivery on Orders $149+ Details
Pypes 409 Stainless Steel Off-Road X-Pipe ('05-'10 GT) - Installation Instructions
Installation Time
2 hours
Tools Required
- 15mm Deep Socket
- 15mm Regular Socket
- Swivel Connection for the Socket Wrench
- Socket wrench large enough to allow maximum torque for loosening and tightening nuts
- Channel Locks
- Nut loosening oil to make it easier to get the nuts off that are really tight and stuck
- Floor Jack
- 2-4 Jack Stands depending on how you want to lift your car
- Flat head Screw Driver
Installation
Removing the Stock H-Pipe:
1. On the sides of your car, right behind the front tire, and right in front of the rear tire, is points designed to lift your car. I raised just the front of my car; however, you can raise both the front and rear if you’d like to provide more room.
2. Lift the car at the lift points and next to each lift point is a second one to put the jack stand on. Do not leave your car on just the jack in case of pneumatic failure that could easily result in serious injury. Now that your car is lifted up, you are ready to begin removing your stock H-pipe.
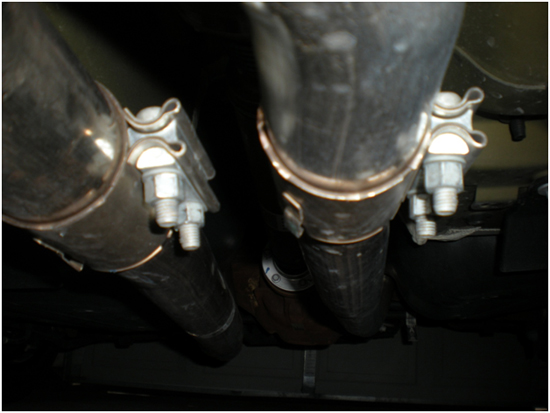
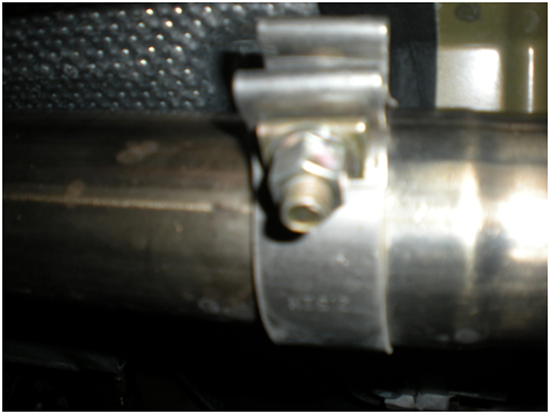
3. Find where the stock H-pipe connects to the rear pipes that go to the mufflers. There should be two sleeves, one on each pipe that connects the mid pipe to the rear pipe.
4. Loosen those four nuts with a 15mm socket; you do not have to completely remove the nut. You can see on each on how there is a little piece of metal that bends that clips around the pipe to hold it in place, use the flat head screw driver to pry thought out to allow the sleeves to move. You may also need to use the flat head to pry the sleeves open where the bolt goes through to tighten them down.
5. Now, slide the sleeves back to the rear pipes, disconnecting the mid pipes and the rear pipes. You do not want to slide them forward because you need to re-use them for your new x-pipe. You may have to get a hammer and use the flat head to hammer them evenly backwards as they may be stuck due to rust and other effects.
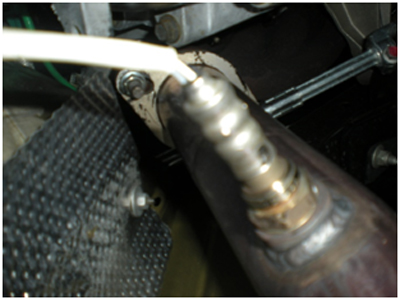
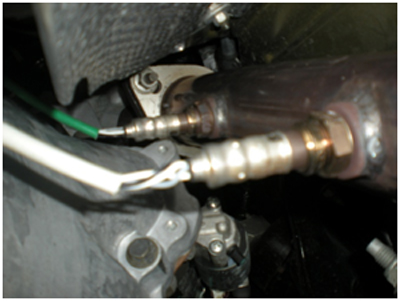
6. Now use the channel locks to unscrew the 3 O2 Sensors from your stock H-pipe, there should be 2 on the passenger side and one on the driver side. Once unscrewed and removed you can just let them hang until re-installation.
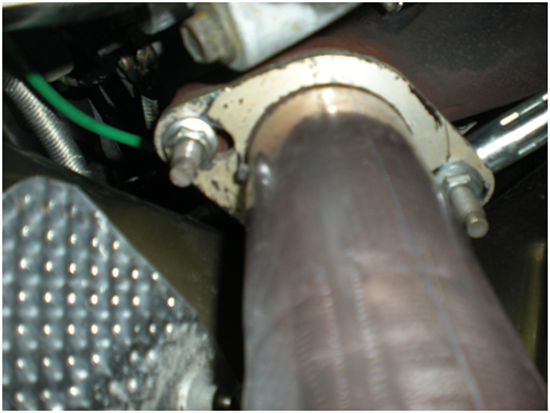
7. Now follow the H-pipe past the catalytic converters, up to the flange mounts where the H-pipe connects to the exhaust manifolds (headers). There are 2 nuts for each side and this is where you will need the deep 15mm Socket, the swivel connection, as some of the nuts and nut a straight shot because of the catalytic converters being in the way, and the larger socket wrench to provide maximum torque.
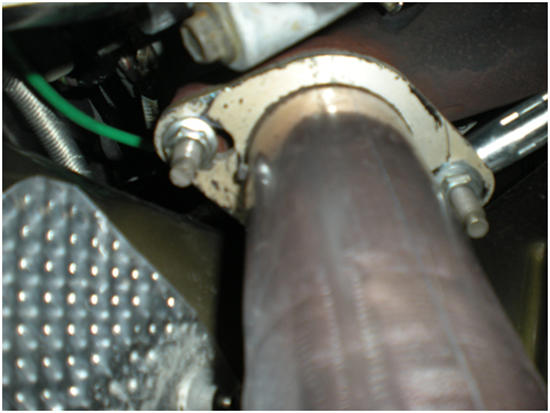
8. Make sure you have a solid connection on the nuts with the socket and begin to loosen them. You may have to spray lubricating oil or WD-40 to make it easier to get them off. Save those four nuts because you will re-use them for re-installation.
9. After removing those nuts you are now ready to slide off your stock H-pipe. It may be kind of tricky but just wiggle it different ways until it just slides off. Now it’s time to install your new X-pipe.
Installing the Pypes X-Pipe
1. The x-pipe assembly comes with inserts that fit into the pipes that connect to the exhaust manifold (headers); if your GT is 07 and newer you will need to use these inserts. Slide the inserts into the end of the down pipes
2. Next you will need to look for the pipes with one, and two O2 sensor connections to determine the side it installs one. 1 is driver side and 2 connections is passenger side.
3. Put the new down pipes up to the exhaust manifolds and slide the flange mounts over the bolts lining them up and hand tighten the nuts on the bolts.
4. Now take connection rings that came with your x-pipe and slide them over the pipe where it connects to the down pipe from the manifold.
5. Slide the crossover pipe connections over both down pipes you just hand tightened to the manifolds but do not tighten the connection rings. You may want to use a jack or something to prop the x-pipe up while tightening everything down.
6. Once you have the crossover pipes slid onto the down pipes now take the sleeves for connecting the new x-pipe to the rear pipes and slide them up over the new x pipe, but do not tighten the nuts down yet. Use a jack or something else propped up at the crossover of the pipes to hold the pipes at the right height and desired location for mounting.
7. Now, after all connections are lined up, begin by tightening the 4 bolts connecting the exhaust manifolds to your new x-pipe at the flange mounts. You need to tighten these down as hard as humanly possible to prevent exhaust leaks.
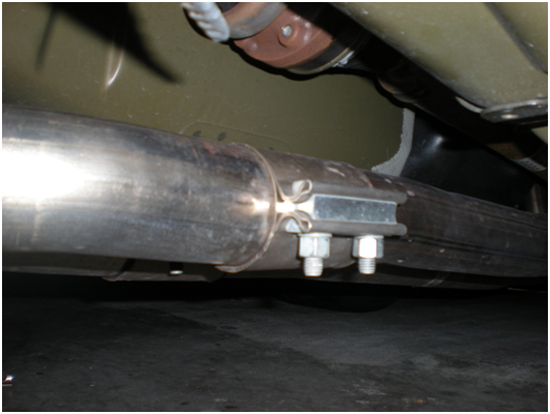
8. Next, slide the ring clamps that connect the down pipes to the mid pipe over the connections. Make sure to get the as close to the front of the connection as possible to prevent exhaust leak. Now tighten these nuts down, keeping the clamp behind the bolt, over one of the slits in the pipe to prevent leakage. Tighten as hard as possible.
9. Now, make sure the sleeves at the rear of the x-pipe are centered with the same distance on each pipe for the best connection. Tighten these four nuts down as hard as possible also.
10. Now you can hand tighten the O2 sensors back in and tighten them down with the channel locks.
11. Before letting your car back down, check all nuts to ensure they are all tightened.
12. Now start your car. As it runs, check all the connections for leaks. You may have to tighten or adjust a few nuts and bolts to get a snug connection to prevent leakage.
13. After checking for leaks you are now ready to safely let your GT down with the new X-pipe and take it for a test drive!
Installation instructions provided by AmericanMuscle customer Josh Harman 10.13.09
Related Guides
-
-
-
Installation
