 FREE 1 to 3-Day Delivery on Orders $149+ Details
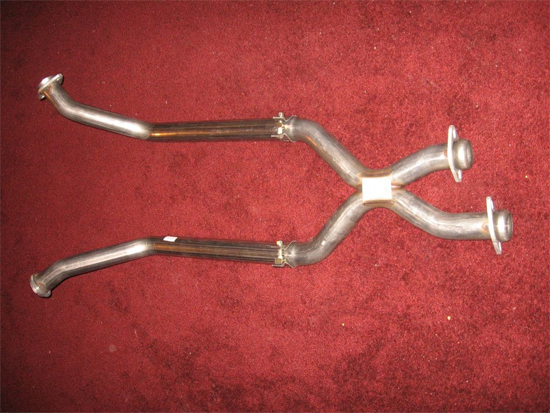
Pypes 409 Stainless Steel Off-Road X-Pipe ('79-'95 5.0L) - Installation Instructions
Installation Time
2 hours
Tools Required
- Socket Wrenches
- 7/8" Wrench
- 10mm Socket
- 9/16" Deep Socket
- 5/8" Socket
- WD-40 (or similar chemical)
- Lok-tite

Shop Parts in this Guide
Installation
Note
Keep all hardware (nuts and bolts) removed, as they will be reused during reassembly, unless you buy new hardware. Also, allow the car to cool off sufficiently before beginning, as the exhaust can be very hot.
1. Disconnect the battery for safety.
2. Jack the front end of the car up and safely support with jack stands (make sure the parking brake is engaged). If you have a lift, you’ll want to use it.
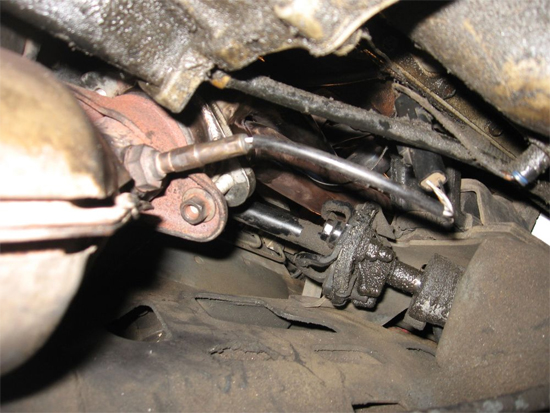
3. Locate the O2 Sensors. There are two: one before the catalytic converter on each side.

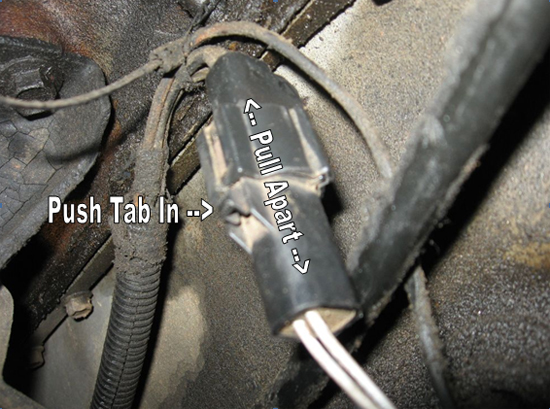
4. Unplug the O2 sensors by pushing in the small tab and pulling to disconnect them.
5. Using the 7/8” wrench, unscrew the O2 sensors and remove them. They may be hard to break loose, but once they are, you can typically unscrew them with your hand.
6. Spray the bolts connecting the exhaust manifold to the mid-pipe with WD-40. This will help if the bolts are rusted on.
7. Using the 5/8” Socket, unbolt the 4 bolts attaching the exhaust manifolds to the mid-pipe (2 on each side). The bolts are attached to the stock exhaust manifold, unless you’ve upgraded to aftermarket headers.
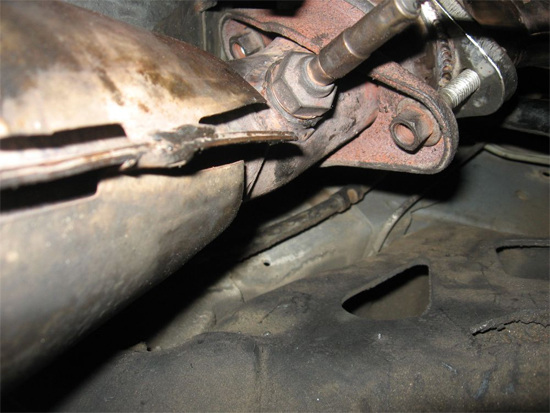
8. Using the 9/16” Socket, unbolt the 4 bolts connecting the mid-pipe to the rest of the exhaust using the WD-40 as needed. You will want to connect the socket to the nuts furthest to the rear of the car, as the front nuts are locking nuts.
9. Using the 10 mm Socket, unbolt the clamp holding the Exhaust Gas Recirculation (EGR) piping to the mid-pipe.
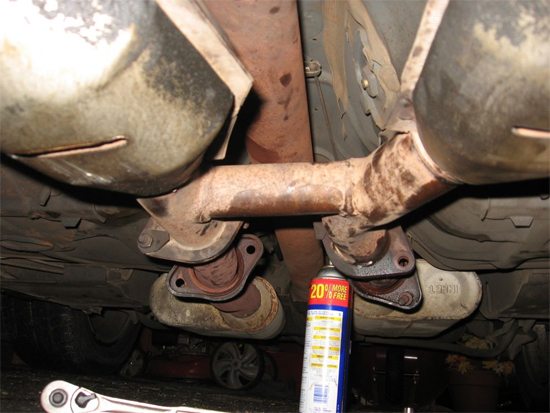
10. Remove the stock mid-pipe. This will take some work and there are two hangars in the middle to remove it from. If you have a saw, it will be very beneficial to cut the old mid-pipe off. Otherwise, be persistent.
11. Assemble the X-pipe as shown, making sure the left and right pipes are on their designated side (pointing outwards) and that the "X" is oriented to fit the rest of the exhaust. Also, be sure the clamps are loosely fitted as shown. They will not be tightened until later. You will want the pipe assembled before it goes on the car.
12. If you choose to use the stock exhaust hangars, you will have to grind them off the stock mid-pipe. I would advise welding them to the new X-pipe LAST, in order to ensure they will fit properly.
13. Place the new X-pipe on the car and reattach all bolts as they were removed, making sure everything lines up before reattaching any bolts. Then LOOSELY attach all nuts in their respective locations.
14. Tighten the 8 bolts (4 front, 4 rear) attaching the X-pipe to the rest of the exhaust system. You may want to use thread locker for safety.
15. Tighten the clamps to secure the pipes of the X-pipe together with the 5/8”Socket.
16. Reconnect the O2 sensors in their respective locations. The mounts are already connected to the new pipes.
17. Reconnect the wiring for the O2 sensors.
18. Reconnect the battery.
19. Start the car and listen for exhaust leaks. If you hear/see any, check that all connections are secure until the leak is sealed. Also, if the check engine light is on, check the O2 sensors, making sure they are connected. If this doesn’t work, check that the O2 sensors didn’t somehow get damaged.
Installation instructions provided by AmericanMuscle customer Callaway Turner 3.28.09
