 FREE 1 to 3-Day Delivery on Orders $149+ Details
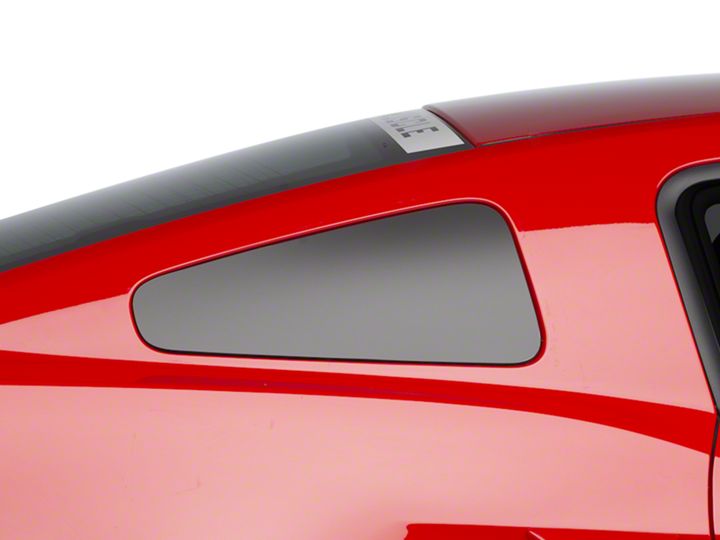
How to Install Matte Black Quarter Window Blackout on your 2010-2014 Mustang
Installation Time
1 hours
Tools Required
- 1 Driver's Side Quarter Window Blackout Decal
- 1 Passenger's Side Quarter Window Blackout Decal
- 1 Small Plastic Squeegee
- 1 Instruction Sheets
- Window cleaner and lint-free towels
- Rubbing alcohol and applicator pad (suggested)
- Small spray bottle filled with water and a small amount of liquid soap (we used dish detergent, the instructions suggest baby shampoo). Use two or three drops of liquid soap.
- Hair dryer with adjustable heat setting
Shop Parts in this Guide
Overview
These instructions are for installing the Matte Black Quarter Window Blackout. Generally, the blackout is used to keep passengers from seeing the unpainted underside of quarter window louvers. Installing vinyl for both quarter windows should take about 1 hour. It is recommended that the vinyl be applied with the car in a warm shady location, not in the hot sun or very cold.
Step-by-Step Instructions:
1. Assemble the parts and tools and place them conveniently near the car windows. Dry test each of the blackout vinyl decals to be sure you know which one goes with which window.
2. Use automotive window cleaner and lint-free towels to remove all dirt, grime and oils from the outside of the quarter windows. Use rubbing alcohol and applicator pad if you think there might be oily residue. Remember, this will be your last chance to clean the windows.
3. Spray enough soapy water on the window to coat it thoroughly to keep the decal from prematurely sticking but not so much as to cause the decal to slide off the window.
4. Carefully peel the paper backing from the decal. Avoid pinching or stretching the vinyl and avoid getting too much oil from your hands on it as you peel. Just before you have completed peeling the backing away entirely, spray the sticky side with soapy water. Recommend peeling the backing upward and letting the vinyl dangle while holding it from the top but be careful that it doesn't fall off and land on the ground. A second pair of hands can help with the spraying but one person can do it.
5. With the vinyl and the window still wet with soapy water, place the back of the vinyl carefully on the window, avoiding the car body surface so that the vinyl doesn't stick to the body. It should be relatively easy to position the vinyl while the window is wet. See Photo #1.
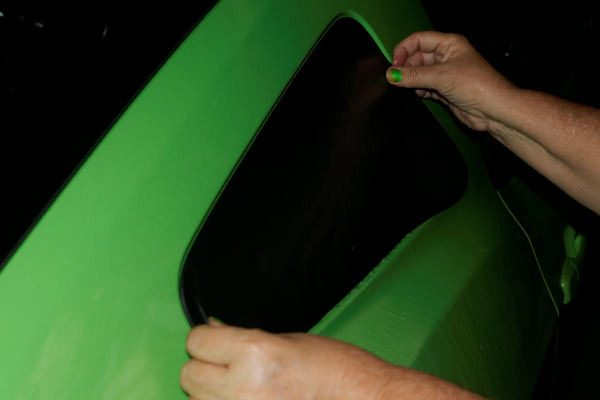
Photo #1: Placing the vinyl on the glass.
6. Work from one edge and slowly press the vinyl against the window using the plastic squeegee and making sure that the edge of the vinyl is lined up with the edge of the window. See Photo #2. Inspect the vinyl as you work to make sure that there are no air bubbles and no pieces of dirt under the vinyl. If you find a piece of dirt or a bubble that cannot be removed with the squeegee, peel back the vinyl taking care not to stretch the vinyl, remove the dirt, and re-wet the vinyl and window, then continue with the squeegee.
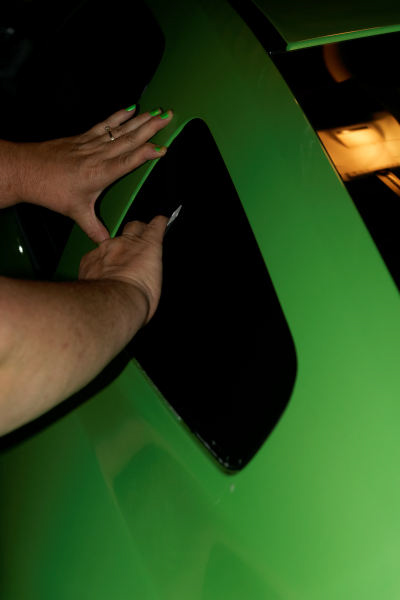
Photo #2: Using the squeegee to smooth the vinyl.
7. When you are satisfied that it looks smooth and straight, use the hair dryer on a medium or low heat setting and stay at least 6 inches from the vinyl and slowly heat the vinyl. See Photo #3. This will dry the remaining soapy and it also softens the vinyl allowing you to carefully mold and smooth out any overhanging edges. If any small crimps or bulges persist, gently smooth and press them until they disappear. Take care not to get oil from your fingers on the sticky side of the decal. Do not get the vinyl too hot or it may wrinkle or discolor. Clean up any remaining soapy water from the edges of the window and surrounding car body.
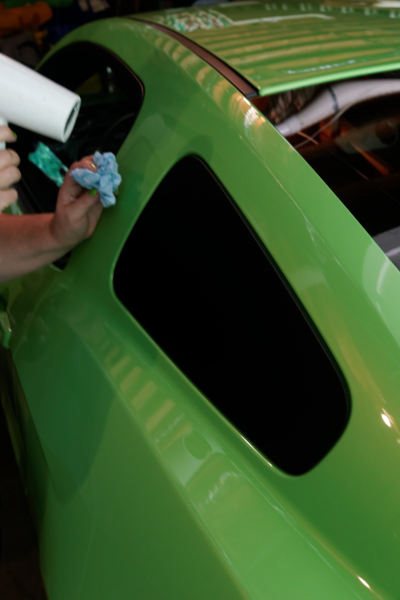
Photo #3: Use hairdryer to slowly heat the vinyl.
8. Complete Steps 3-7 for the other window.
9. The completed vinyl should have a nice matte black look and be smooth and clean. See Photo #4.
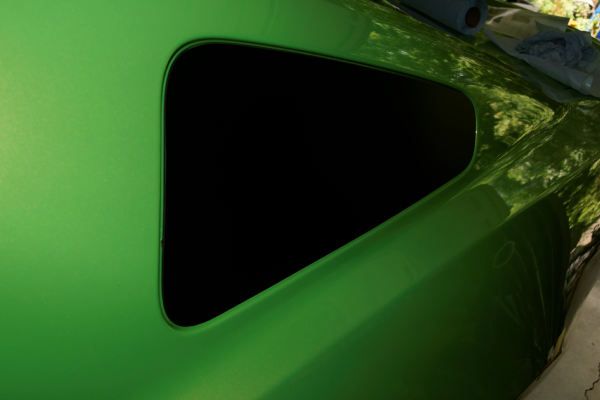
Photo #4: Completed black vinyl installation.
10. Wait at least 48 hours before washing your car or applying louvers. Even then, it’s recommended that vinyl not be pressure washed or scrubbed too vigorously.
Installation Instructions Written By AmericanMuscle Customer John Chulick 6.26.2013
