FREE 1 to 3-Day Delivery on Orders $149+ Details
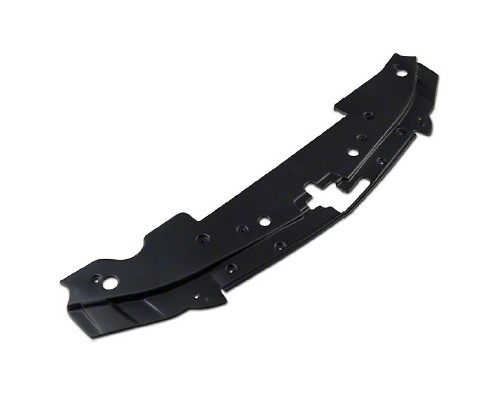
How to Install California Pony Cars Full Length Radiator Cover on your Mustang
Installation Time
15 minutes
Tools Required
- Flathead Screwdriver or Pick
- 10mm Wrench
- Ratchet
- 10mm Socket
Optional Tools – CSM Badge Bezel Cutout:
White Masking Tape
Scissors
Pencil
Drill & Drill Bit
Air Saw
File
Adhesive or Silicon
Please Note: With the Installation of this California Pony Cars (CPC) Full Length Radiator Cover, you will no longer be able to use the factory prop rod. This cover is designed to be in conjunction with a Hood Strut Kit. In addition, if your Shelby GT500 is equipped with a Ford Racing Cold Air Intake, some trimming to the Radiator Cover will be required.
1. Make sure the car is turned off and is cool down before proceeding with the removal of the factory radiator cover and installation of the CPC Full Length Radiator Cover.
2. Set Emergency Brake and block wheels.
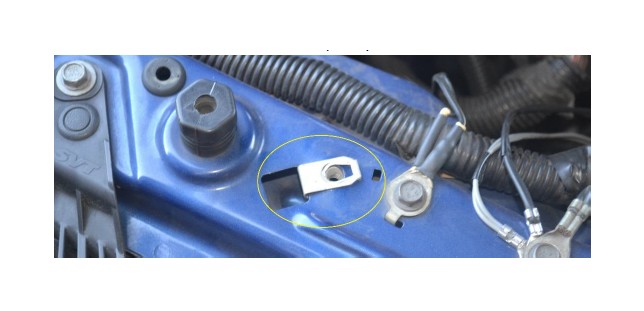
3. Remove the 10mm bolt on the prop rod and remove the Prop Rod from the car.

a) Optional: Once the Prop Rod is removed there will be a “J” nut left behind. The nut can be left there or can be removed completely.
4. Remove the factory eight (8) retainer clips from the factory radiator cover and remove the two (2) 10mm bolts that are located next to the grille.
5. Remove the factory Radiator Cover from the Vehicle.
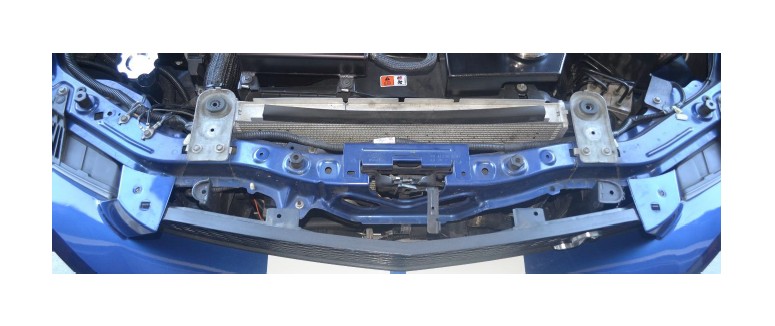
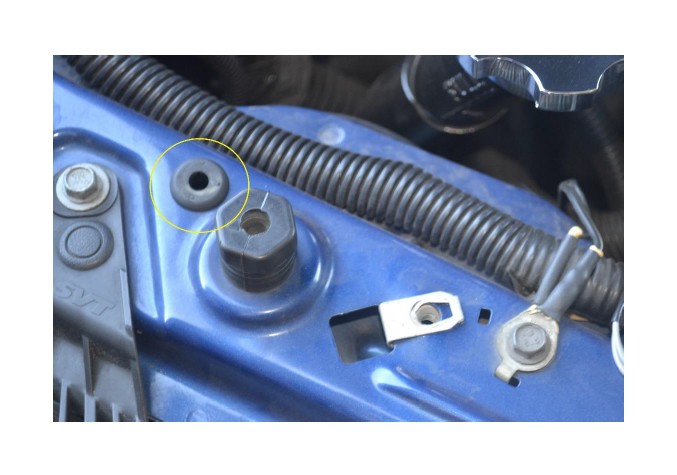
6. With the two (2) provided rubber grommets, insert them into the holes (one on each side) furthest to the outside of the GT500. The holes are located above the headlights. You’ll need to squeeze the grommet together in order for the metal to fit snugly within the groove of the grommet.
7. Install the California Pony Cars Full Length Radiator Cover on your vehicle. Make sure you have the front lip under the top portion of the grille.
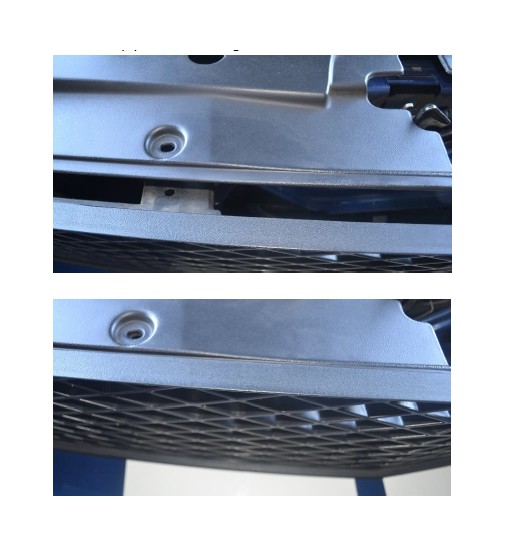
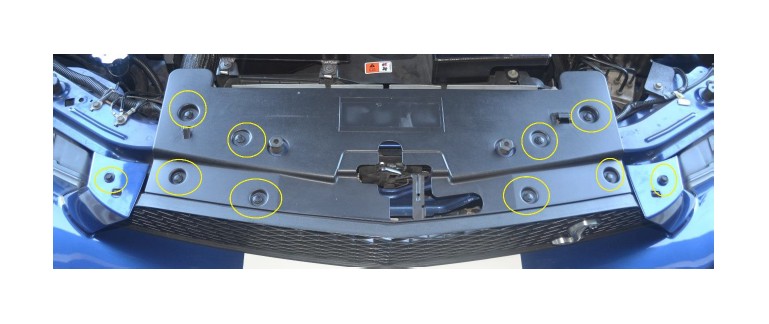
8. Install the included ten (10) retainer clips and two (2) 10mm bolts onto the CPC Radiator Cover.
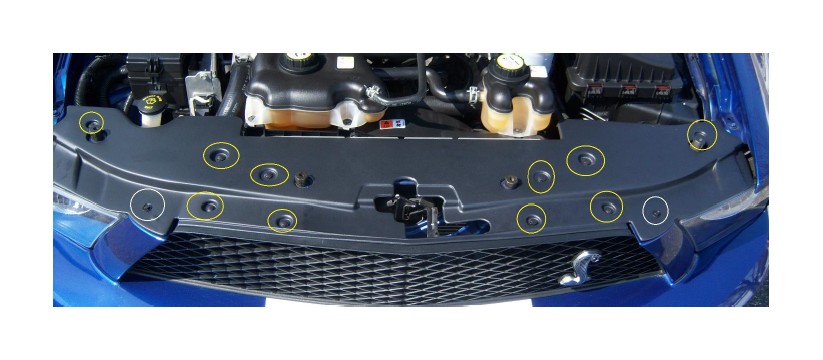
a) Install the ten (10) retainer clips in the areas highlighted by the yellow circles.
b) Install the two (2) 10mm bolts in the areas highlighted by the white circles.
Congratulations!
The California Pony Cars Full Length Radiator Cover is installed on your Shelby GT500.
CSM Identification Badge Cutout Bezel Installation – Optional.
If you’ll be installing this Full Length Radiator Cover on a Shelby GT500 equipped with a CSM Identification Badge, such as a GT500KR or GT500 Super Snake, CPC includes a template so you can use to cut a hole in the cover to install a bezel so you can view the CSM Identification Badge.
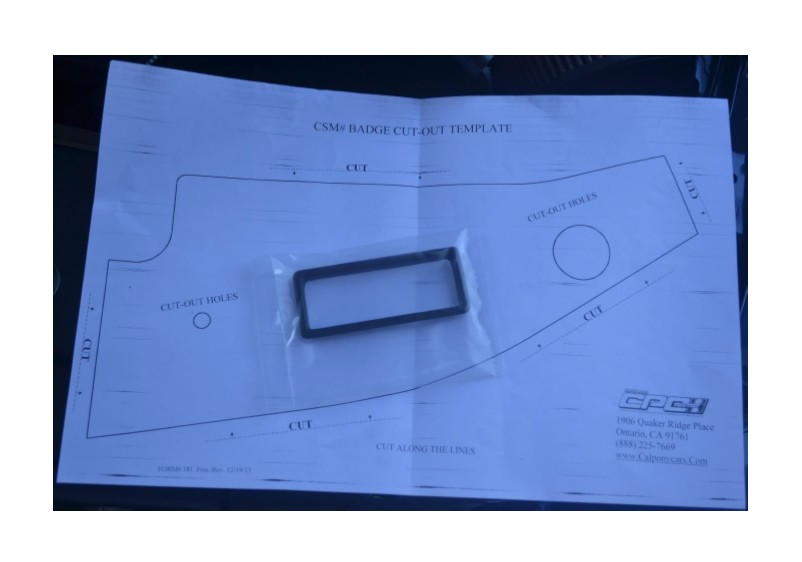
Important Note: Due to variances with the location of the CSM Identification Badge, CPC didn’t include a pre-cut template so you can cut for the viewing hole.
***Make Sure You Measure Twice & Cut Once.***
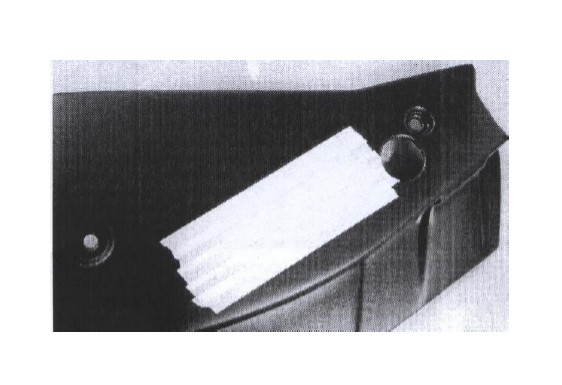
1. With the Radiator Cover not installed on your vehicle, cover the area around where your CSM Identification Badge should be with white masking tape.
2. Use a pair of scissors and cut the included template and holes.
3. Place the template onto your car and use a retainer clip to hold the template in place.
4. With a pencil, shade the area over your CSM Identification Badge to create an outline of the badge on the template.
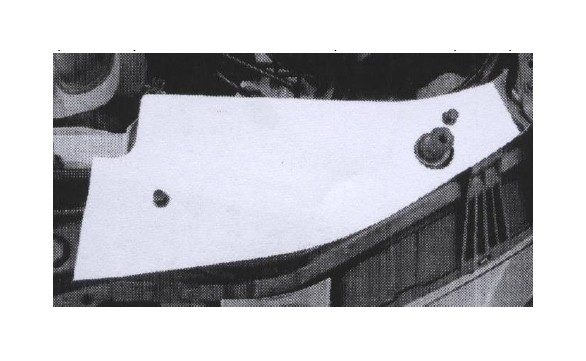
5. Remove the template your car and cut out the outline you just created.
6. Move the template over to the CPC Radiator Cover and use some retainer clips and tape to keep the template in place on your radiator cover.
7. Trace the badge cutout on the template onto the masking tape that you laid down back on Step
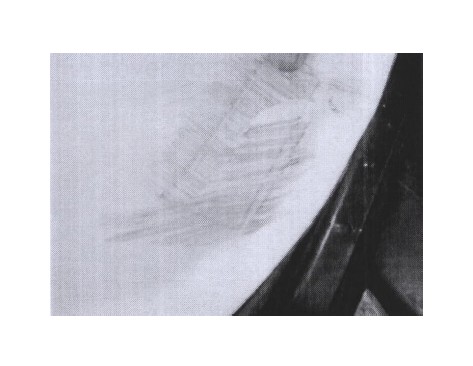
8. Once you traced the cutout on the masking tape, remove the template from the radiator cover.
9. With the included bezel, place it over the badge tracing and center the bezel around the outline.
10. With the bezel centered around the outline, trace another outline inside of the bezel.
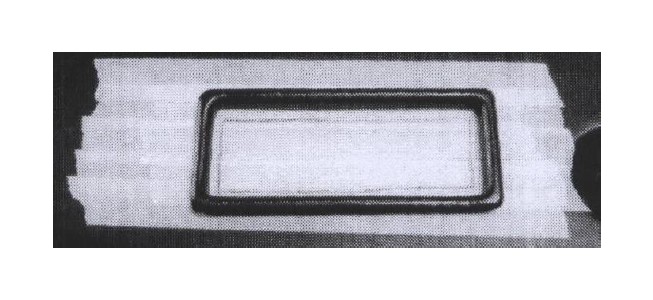
11. Once you traced an outline of the bezel, remove it from the radiator cover.
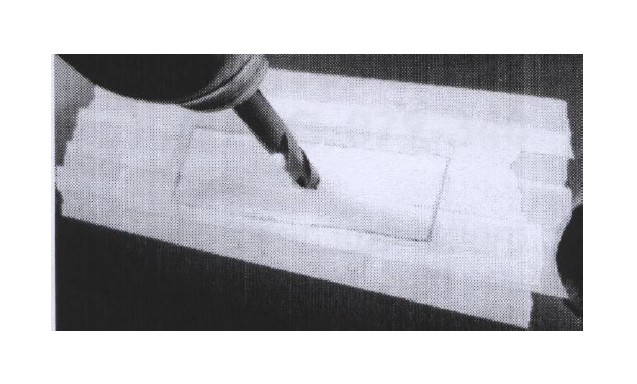
12. Use a drill bit to drill a hole into the Radiator and cut out the outline from the bezel with an air saw.
13. Once you have cutout the outline, test fit the bezel to see if it fits. If it doesn’t fit, then use a file to shave off small amounts of the radiator cover until the bezel fits snug in the hole.
14. Once the bezel fits snugly in the hole, use some adhesive or silicone to permanently secure the bezel to the CPC Radiator Cover from the backside.