FREE 1 to 3-Day Delivery on Orders $149+ Details
How to Install Raxiom Switchback Turn Signal Conversion Kit w/ Resistors in your 1994-2004 Mustang
Installation Time
30 minutes
Tools Required
- Soldering Equipment
- Razor Blade
- 3M Double Sided Tape
- Electrical Tape
- Wire Cutters
- Wire Strippers

Shop Parts in this Guide
Installation Instructions:
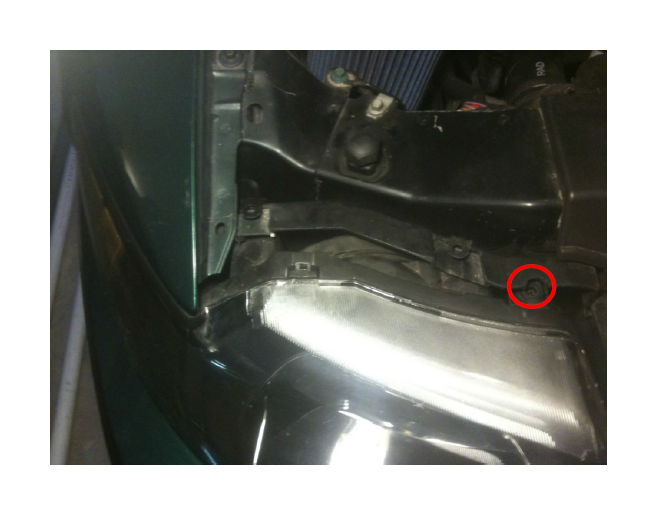
1. Removing the headlamps. Pull the two slider pins up and out located on the top of each headlight. Gently pull the headlight out and disconnect the headlight and turn signal connectors.

2. Changing out the LED’s Turn the turn signal socket counter clockwise and remove.
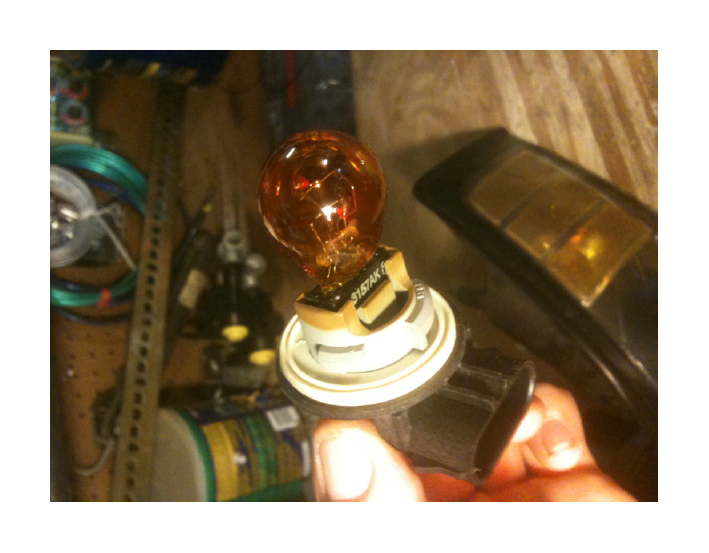
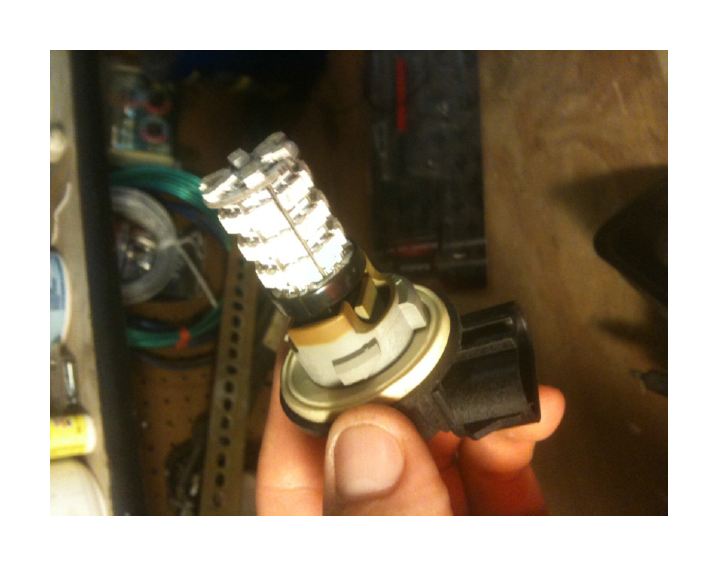
3. Remove the bulb by pulling straight out. Then take the new LED bulbs and replace by sliding straight into the socket
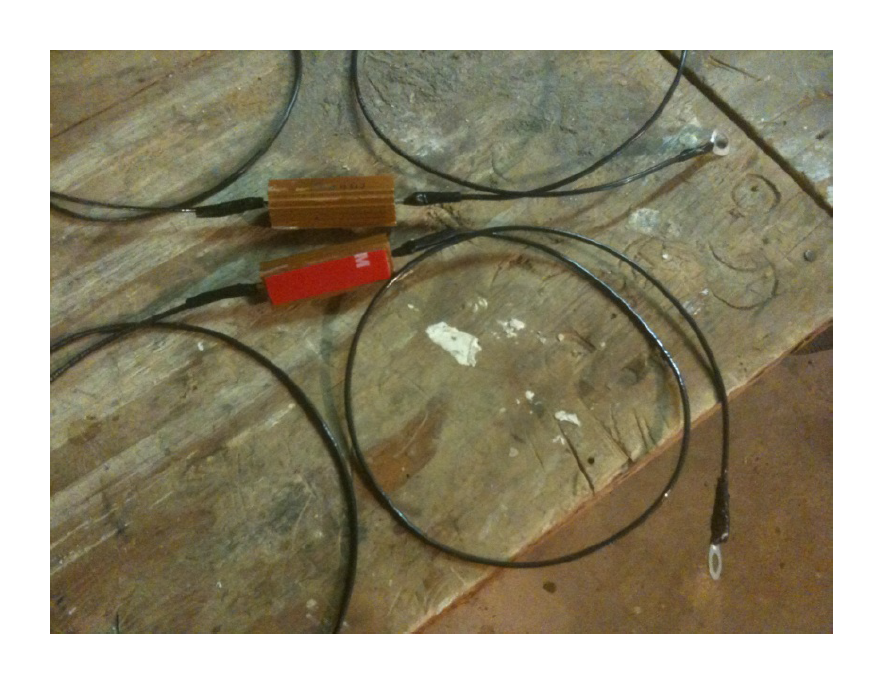
4. Putting in the resistors *The resistors are needed, but not necessary to be soldered.*
I first found a place to mount the resistors where they were not out in the open or against exterior paint or plastic as they get hot.
I then melted off the old, short wires and soldered two feet, 18 gauge wires onto each side of the resistors.
After that I soldered on two ring terminals; one on each resistor to ground to the frame with a bolt or screw.
Then placed strips of 3M double sided tape on the bottom of the resistors. I left the other two ends of the wires open to be soldered into the turn signal supply wire.
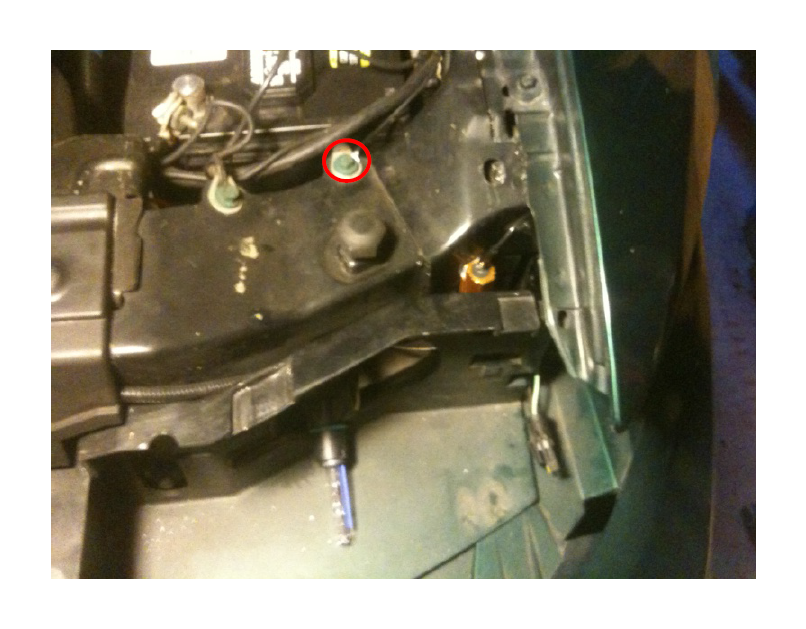
5. I placed the resistors behind the head light bracket using the 3M tape. I ran the wires through the framing and behind the fender using holes drilled from the factory. I connected the ring terminals to factory green ground bolts located on the frame.
*The ground side can be connected to the ground black wire running to the turn signal bulb*
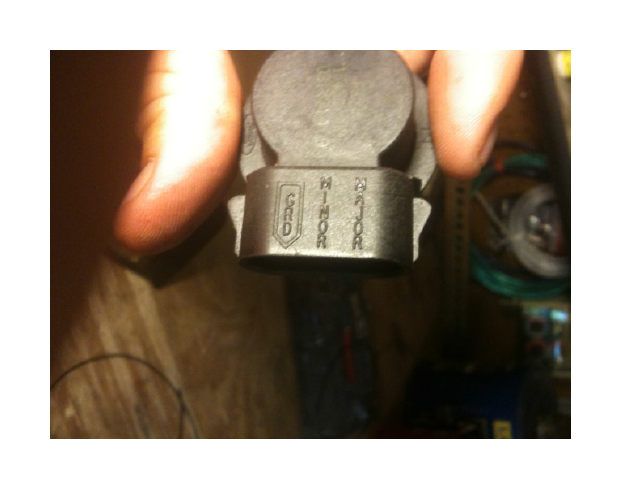
6. The other end is run through the rectangular hole where the turn signal wires are run through. I cut back the plastic wire protector cover and electrical tape to expose the wires. I then stripped the “major” wire which is the turn signal supply wire. Located on the back of the bulb connector is labeled ground wire, minor or running light power supply, and the major or turn signal supply. On mine (2003) the major wire is white and green, the ground is black, and the minor is brown. I then soldered the resistor wire to that major or white and green wire.
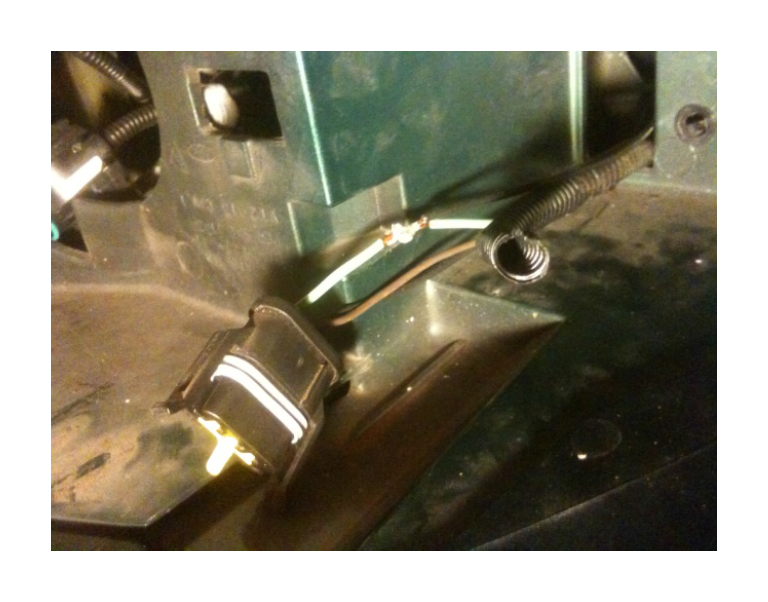
7. After the solder has cooled, tape the connection with electrical tape and replace the plastic wire protector cover. Put the turn signal bulbs back into the headlamp and turn clock wise till clicks into place. Reconnect the headlights and turn signal connectors. Before putting the headlamps all the way back in, test the LED’s.
*If the lights do not work, pull the LED’s back out of the sockets and spin them 180 degrees. They are one directional so only work on way.*
Once they work, place the headlamps back into the car fully and replace the four slider pins.
*The headlamps may have to be readjusted using a 6mm Allen wrench and the screw found on the top of the headlamps towards the center of the car.*