 FREE 1 to 3-Day Delivery on Orders $149+ Details
Redline Tuning Quicklift Mustang Hood Struts (2005-2011) - Installation Instructions
Installation Time
1 hours
Tools Required
- Power Drill
- 3/16" Bit, Indexed #11 and 5/16" Drill Bits
- Fine Permanent Marker or Felt Tip Pen
- Tape Measure or Ruler
- Masking Tape
- Hammer and Center Punch
- Rivet Gun, Capable of 3/16" Rivets (Most brands can handle this size) - Only use rivets supplied in QuickLIFT system
Installation
1. Leave your hood closed.
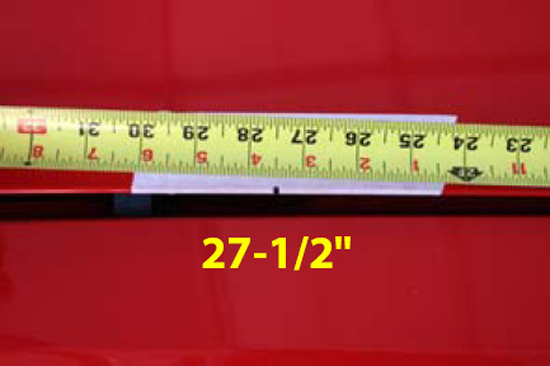
2. Using a piece of masking tape and a permanent marker, carefully measure from the hood's corner (near hinge and windshield) and along the fender line. Wrap the end of the tape measure over the corner lip and place a mark on the hood masking tape at 271/2"
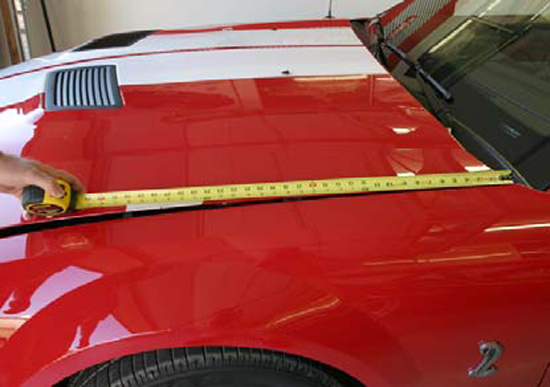
3. This mark will be used to align the centerline of the bracket's ball-stud in the next step.
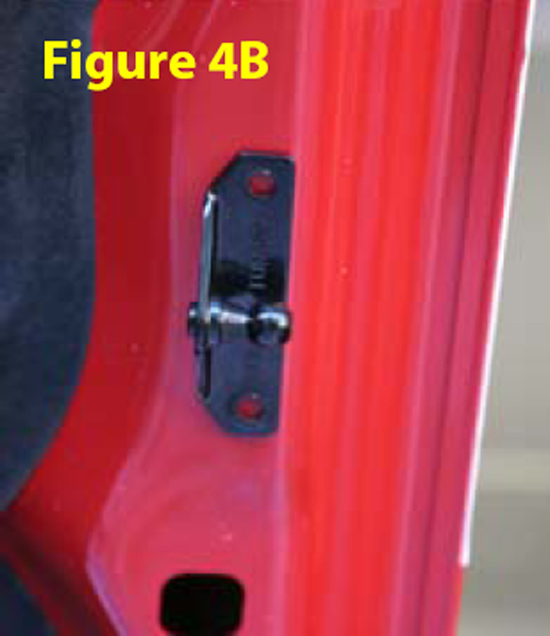
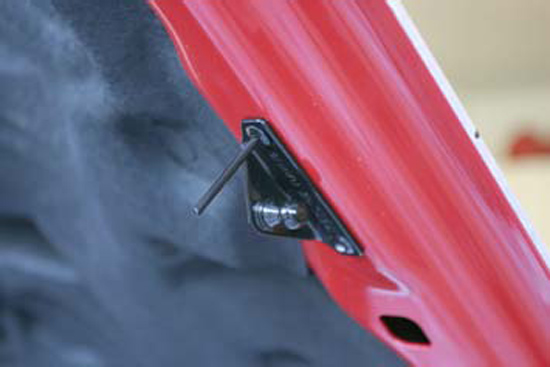
4. Align the center of the bracket with the mark you just made on the hood. You will need to view the hood directly from the side as shown in Figure 4A. The bracket should sit on the flat hood frame just inside the round edge with the ball stud facing outward or away from vehicle (Figure 4B).
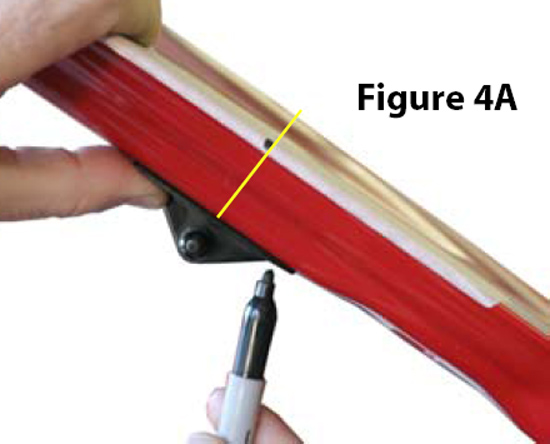
5. Holding bracket in place, mark the center of the lower hole using a permanent felt tip marker. Be sure the bracket is straight and sitting flat against the hood's frame.
6. Set bracket aside. Using a center punch and a hammer, tap the center of the mark you just made (this indention will help guide the drill bit and keep it from wandering).
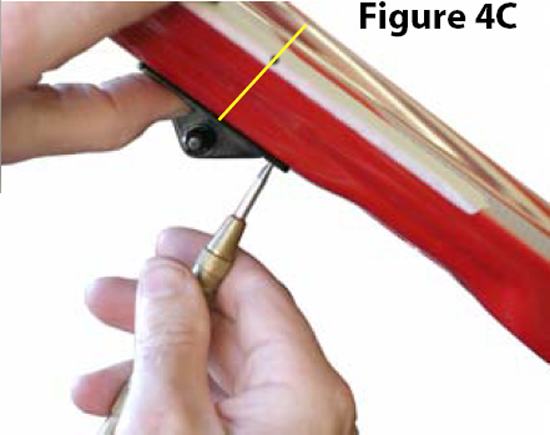
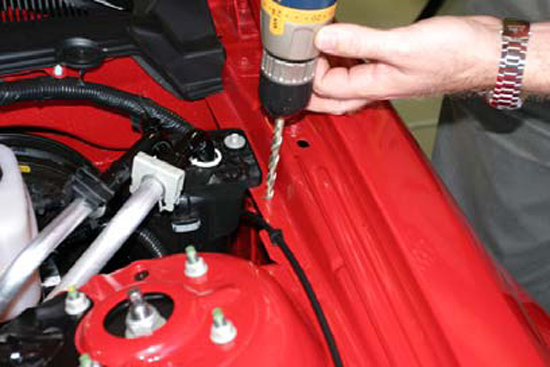
7. Carefully drill the hole as shown to the right using a (#11 indexed bit) or (use 3/16" bit if #11 bit is not available).
8. If you do not have a #11 indexed bit, you can use the 3/16" bit, however you may have to test fit the rivet and slightly ream hole until rivet fits tightly through bracket and hole - 3/16" is slightly smaller than the #11 bit.

9. Wrap a piece of electrical tape around the drill bit about 1/4" from the tip to prevent the bit from denting the hood skin. Use new and sharp bits!
10. Hold the bracket in position.
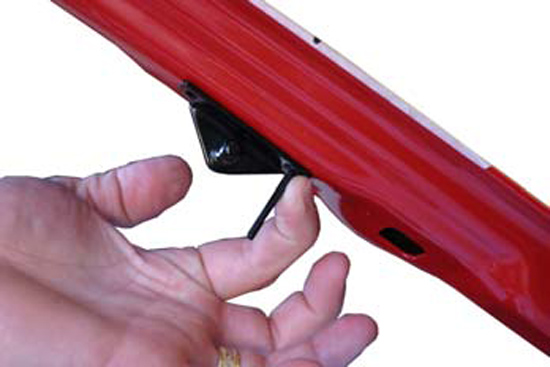
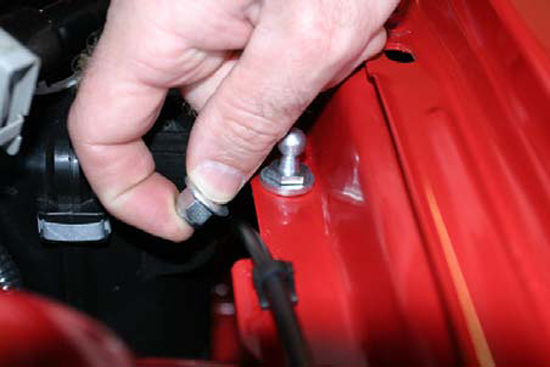
11. With the bracket lined up again, place the rivet through the bracket and hole with the long stem sticking outward - shown to the right. The rivet may require a few twists while pushing it in.

12. Check to be sure your rivet gun has the 3/16" rivet head installed, then slide rivet gun onto rivet. While applying downward force on rivet and bracket, firmly squeeze riveter handle multiple times until rivet gun pops and snaps off the rivet stem.
13. Reposition or rotate bracket into the proper position against hood lip. Carefully drill the second hole through bracket hole and hood.
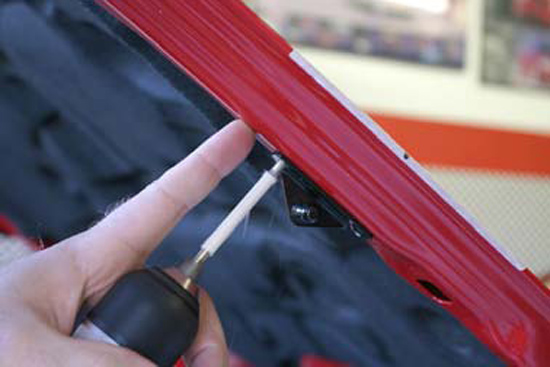
14. Wrap end of drill bit 1/4" down from tip with electrical tape to keep drill bit from pulling through and hitting hood skin.
15. Repeat steps 1-14 and install the passenger side hood bracket. The Mustang hood has a symmetrical hood frame. Repeat Steps 3-7 to install the upper passenger hood bracket. Take your time.
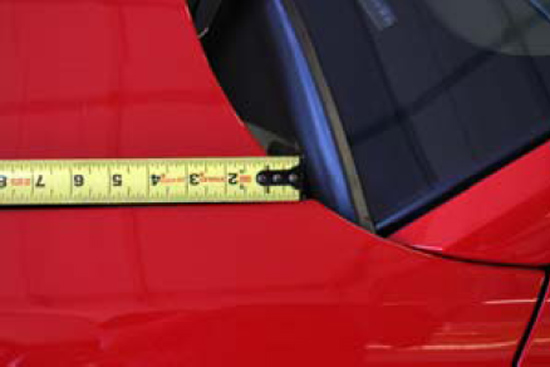
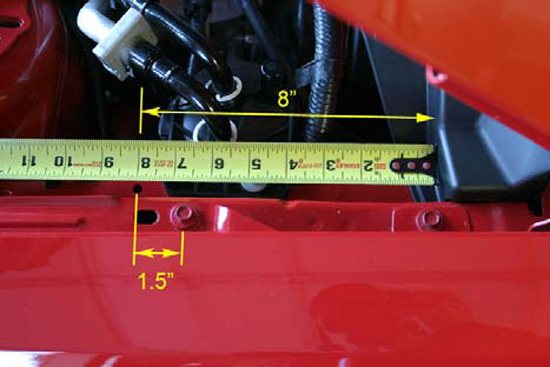
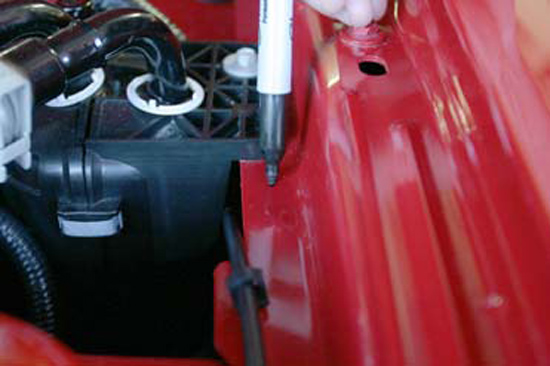
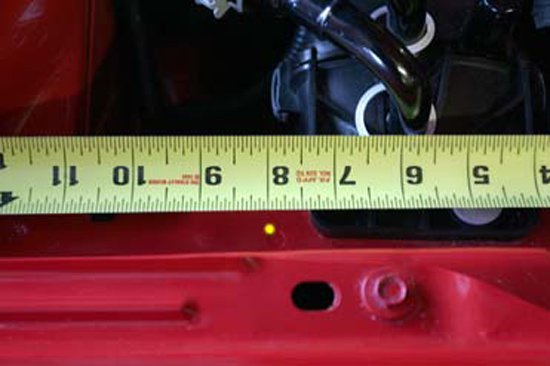
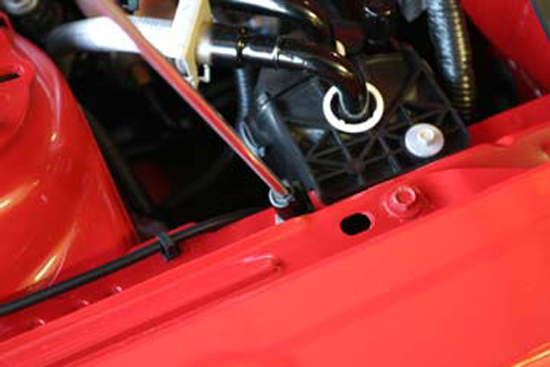
16. On the inner fender, measure 8" from the plastic cowl as shown (or 1-1/2" from fender bolt). Using a permanent marker, place a mark at this location centered on the inner fender lip. Note: Mark will be made on the lower fender lip under the tape as shown in the photos to the right.
17. Using a center punch, tap the center of the mark you just made - this will help guide the drill bit in Step 10.
18. Drill the hole at the marked position using a sharp 5/16" drill bit.
19. Tip: First drilling a smaller pilot hole will make the final 5/16" hole much easier to drill.
20. Using a color matching paint, touch up the area where you just drilled the hole.
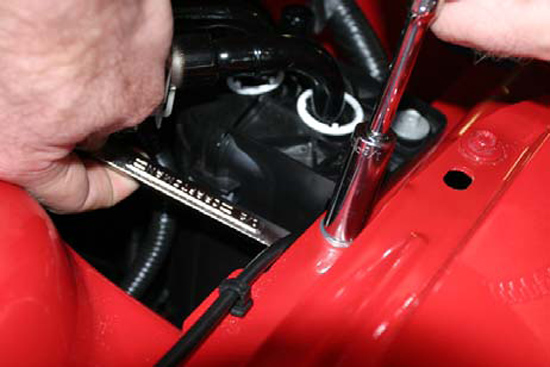
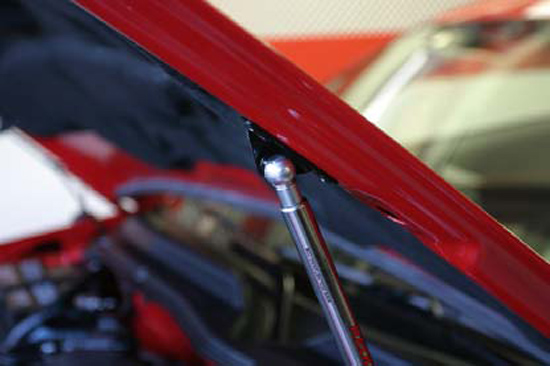
21. Place one washer onto ball-stud shaft, then insert into hole. Place the lock-nut onto the ball-stud shaft. Tighten using 1/2" wrenches or a deep well 1/2" socket on top and a wrench on the lower locking nut.
22. Repeat Steps 16-21 to attach the passenger side fender bracket. The vehicle is symmetrical so the same locators can be used. Feel free to measure off of key areas to ensure a symmetrical installation.
23. CYCLE EACH GAS SPRING BEFORE INSTALLING - firmly hold a gas spring with both hands by the thick cylindrical end - firmly press down on the floor or carpet and compress the spring. Compress both springs. Have a friend hold the hood up.
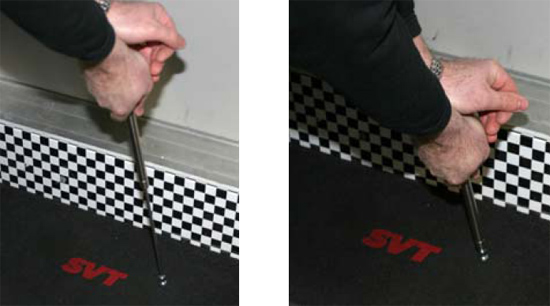
24. Compress each gas spring a few times - Note: If you unable to compress the gas springs, do not worry. Normal function after installation will also serve the same purpose.
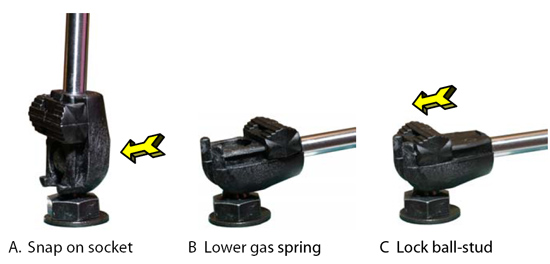
25. Firmly press the open end of the socket onto the ball-stud.
26. Lower gas spring down such that the locking mechanism is on top.
27. Slide the locking mechanism over the ball-stud to secure the gas spring.
28. Holding curved end of locking clip, slide the straight end back through both holes in the hood’s ball-stud socket. Once securely through both holes, rotate clip to ‘snap’ the locking clip onto shaft.

Installation instructions provided by Redline Tuning

