 FREE 1 to 3-Day Delivery on Orders $149+ Details
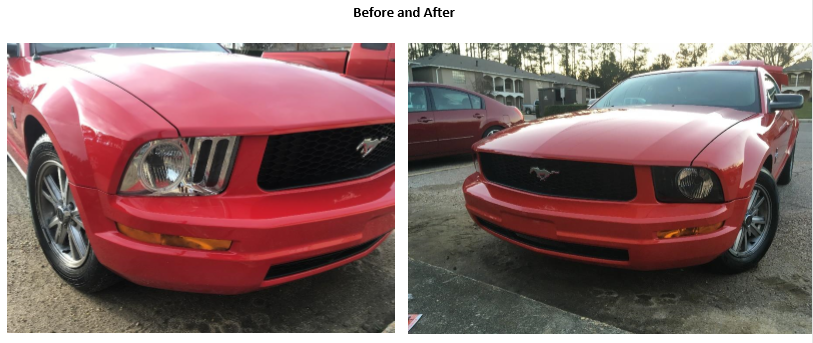
How to Install OPR Stock Replacement Headlight - Left Side (05-09 GT, V6) on your Ford Mustang
Installation Time
1 hours
Tools Required
- Ratchet wrench
- 10mm socket
- 8mm socket
- #2 Phillips screwdriver
- T-30 star bit, and driver

Shop Parts in this Guide
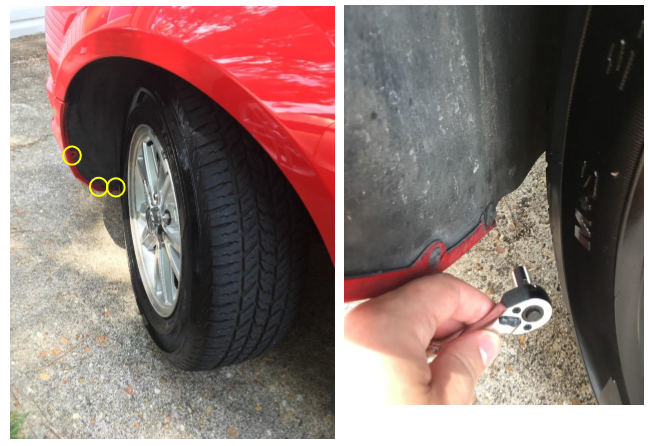
Step 1
Turn your steering wheel all the way to the right. Optionally, you can put the front end of your car on jack
stands and remove the front wheels, but this is not necessary. Once the wheels are turned into a sharp
right, use your ratchet with the 8mm socket and your Philips screwdriver to remove the screws holding
the splash shield to the bumper directly in front of your front left tire (circled in yellow). These screws may
be entirely 8mm, or Philips head, or a mix of both.
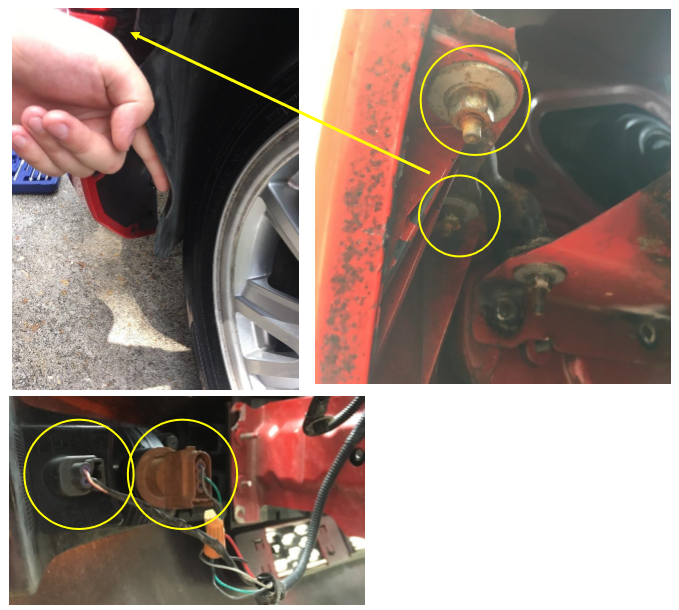
Step 2
Once the screws are removed from the splash shield, pry the shield away from the bumper and pull it
back toward the tire until you can easily see into the bumper. Looking up, there will be two 10mm nuts
holding the bumper onto the fender (circled in yellow). Note the yellow arrow to help you locate these
nuts. Use your ratchet and your 10mm socket to remove them. Reach into the bumper and disconnect
the two electrical plugs which are plugged into the front left turn signal fixture (circled in yellow). They
should easily pop out with little resistance, but if they are dirty and stuck, be careful not to force them as
they become brittle over time and may crack under pressure.
Step 3
Once the nuts are removed, gentle pry the bumper downward. It will pop loose from the fender. Next,
turn your wheels sharply to the left and repeat Steps 1-2 on the passenger’s side of the car.

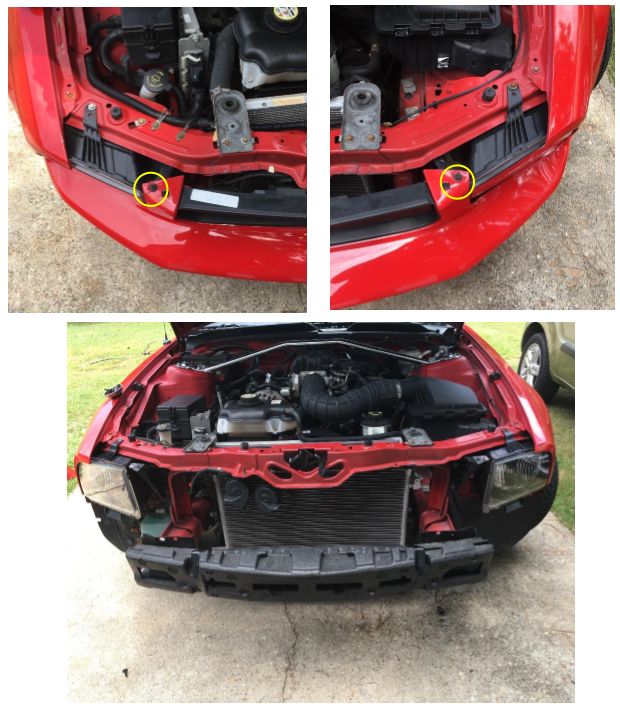
Step 4
Lift the hood of your car and locate the two star head screws which are holding the bumper to the frame
of the car. They will be to either side of the radiator (circled in yellow). Remove them using your T-30 star
bit and drive, and then gently pry the bumper mounts up and over their locking tabs. The bumper should
be easy to remove now by pulling it away from the car.
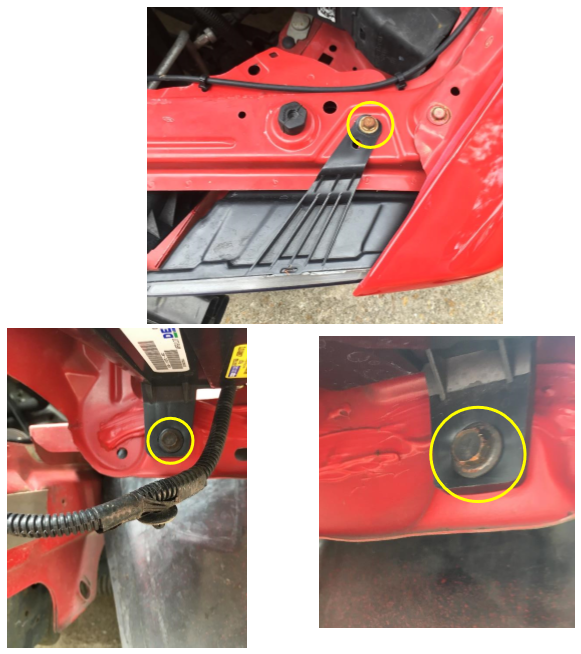
Step 5
Locate the three 10mm bolts holding the driver’s side headlight to the frame of the car (circled in yellow).
One will be above the headlight, and two will be below it. Remove them using your socket and 10mm
ratchet, then disconnect the wiring from the read of your headlight assembly. It will be connected in the
form of a plastic plug similar to those in step 2 on the turn signal lights. Don’t force it. Once it is removed
and the three bolts are removed, the entire headlight assembly will slide right out. Repeat these this step
on the passenger’s side of the car.
Step 6
Complete Step 5 in reverse to install your new headlight assembly. Plug the wires into the back of the light
first, then slide it into place and replace all three 10mm bolts. When this is complete on both sides of the
car, replace the bumper of the car and by first hanging it on the support tabs on either side of the radiator,
then sliding it into place under the headlights and replacing all screws and nuts. Reconnect the turn signal
lights with their wiring harness, and then reaffix the splash shields to the bumper with their screws. Your
install is now complete.
Installation Instructions submitted by AmericanMuscle customer: Eli King on 7/27/17
