 FREE 1 to 3-Day Delivery on Orders $149+ Details
Roush Mustang Hood Scoop ('05-'09) - Unpainted - Installation Instructions
Installation Time
60 minutes
Tools Required
- Side Cutters
- Automatic Center Punch
- 5mm Drill Bit
- Ratchet
- 9mm Socket
- 11mm Socket
- Soft Cloth
- Roll of Masking Tape
- Torque Wrench
Installation
Paint Preparation :
1. Wipe each part with plastic prep (Dupont 2319 or equivalent).
2. Wipe entire part with tack cloth.
3. Apply adhesion promoter (Dupont 23305 or equivalent) prior to color and clear coat applications. This part is made of TPO (Thermoplastic Polyolefin) and requires a promotor for paint adhesion.
Vehicle Preparation:
1. Clean hood surface thoroughly before using drill templates.
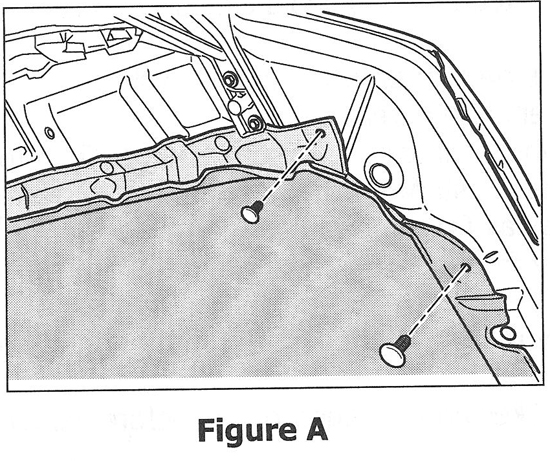
2. Open hood and remove pushpins from insulating liner (Refer to Figure A).
3. Remove liner and set all removed parts, including pushpins, aside for reinstallation.
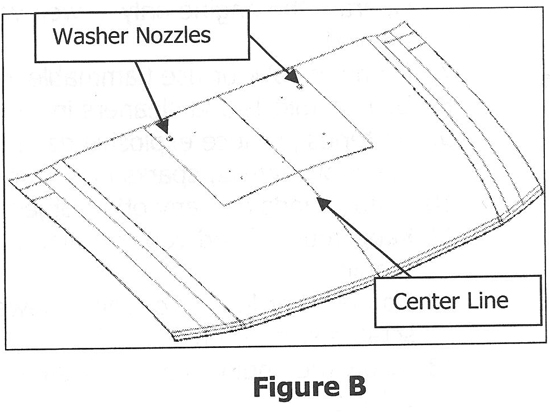
4. Find hood centerline by measuring side-to-side at front and rear of hood. Mark center with tape.
5. Align drill template with centerline of tape marks and washer nozzles (Refer to Figure B). Secure template in place with tape, using care to avoid covering over hole positions.
6. Mark hole centers with automatic center punch. Be careful not to use excessive force and damage hood.
7. Remove template and drill seven 5mm holes from topside of hood.
8. De-Burr all holes and remove shavings from area.
NOTE:It is recommended that a rust prohibitor be used for all metal that has been drilled or cut.
Hood Scoop Preparation:
1. Install supplied Grille to hood scoop using supplied M6 Hex Flange Nuts (Refer to Figure C).

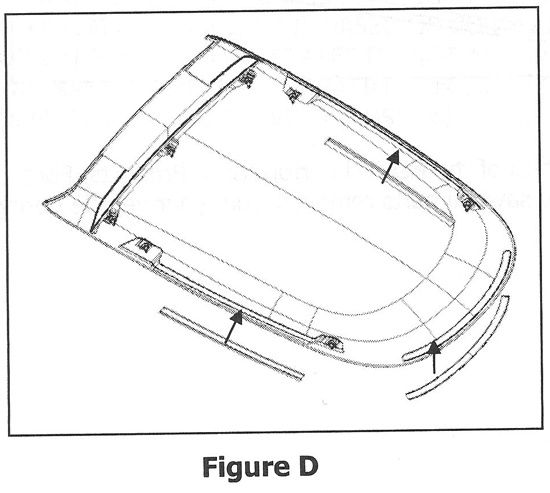
2. Install supplied tape to hood scoop (Refer to Figure D).
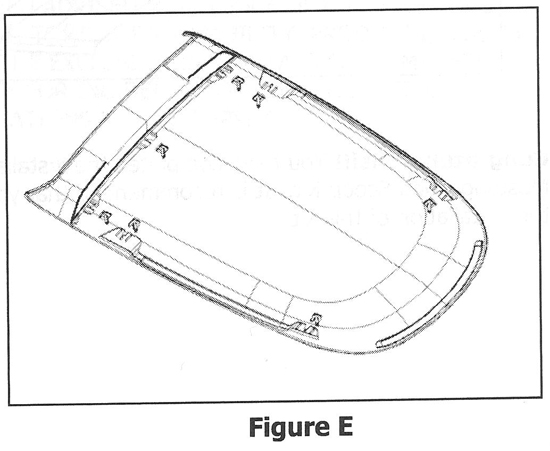
3. Install supplied u-studs to hood scoop (Refer to Figure E).
Hood Scoop Installation:
1. Trial fit Hood Scoop to hood. DO NOT remove red tape backing at this time. Verify proper alignment and consistent gaping to hood surface.
2. After fit is reviewed, remove parts for final assembly.
3. Remove 1" section of protective backing from tape strip creating tab for easy removal with hood scoop in installed position.
4. Position hood scoop to hood and verify proper alignment.
5. Remove remaining red protective covering from tape strip by pulling tab.
6. Install the supplied 7 nuts and torque to 2.3 - 3 N-m (20 lb/in - 26 lb/in.). Reduce torque if sheet metal starts to bend.
7. Reinstall hood insulating liner and push pins.
8. Congratulations! You have completed the installation of the ROUSH Performance Products Ford Mustang Hood Scoop Kit. It is recommended that you save all parts removed from your vehicle during the installation of this kit.
Installation instructions provided by Roush
Related Guides
-
Installation
-
Installation
-
Installation
