 FREE 1 to 3-Day Delivery on Orders $149+ Details
How to Install a Roush Billet Shifter Arm on Your 2005-2010 Mustang GT
Installation Time
30 minutes
Tools Required
- 7/32" Hex Driver or Allen wrench
- 17mm Wrench
- Torque Wrench
Installation
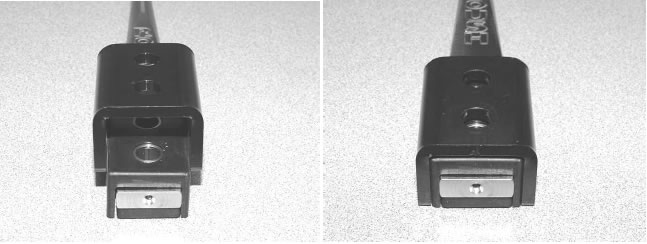
Packaging List for Complete Roush Billet Shifter Arm with Damper
| Item | Quantity |
|---|---|
| Billet Shifter Arm (#R15040034) | 1 |
| Steel Damper Clamp (#R15040035) | 1 |
| Rubber Damper – Male (#R15040036) | 1 |
| Rubber Damper – Female (#R15040037) | 1 |
| Steel Sleeve – 3/8” ID x ½” OD x 0.85” L (#R15040038) | 2 |
| 3/8-24 x 1.75” Bolts (#R18100003) | 2 |
| Shifter Boot Retainer (#R15040030) | 1 |
| Installation Instructions (#R15040039) | 1 |

Recommended Supplies
Loctite® 242 Medium Strength Thread Locker (or equivalent)
Glass Cleaner
LIMIT OF LIABILITY STATEMENT
The information contained in this publication was accurate and in effect at the time the publication was approved for printing and is subject to change without notice or liability. Roush Performance Products (RPP) reserves the right to revise the information presented herein or to discontinue the production of parts described at any time.
STOP! READ IMPORTANT SAFETY PRECAUTIONS AND WARNINGS BEFORE PROCEEDING.
SAFETY REQUIREMENTS
IMPORTANT SAFETY NOTICE
Appropriate disassembly, assembly methods and procedures are essential to ensure the personal safety of the individual performing the kit installation. Improper installation due to the failure to correctly follow these instructions could cause personal injury or death. Read each step of the installation manual carefully before starting the actual installation.
1. Always wear safety glasses for eye protection.
2. Place ignition switch in the OFF position.
3. Always apply the parking brake when working on a vehicle.
4. Block the front and rear tire surface to prevent unexpected vehicle movement.
5. Operate the engine only in well-ventilated areas to avoid exposure to carbon monoxide.
6. Do not smoke or use flammable items near or around the fuel system.
7. Use chemicals and cleaners in well-ventilated areas.
8. Batteries produce explosive gases, which can cause personal injury. Therefore, do not allow flames, sparks or flammable substances to come near the battery.
9. Keeps hands and any other objects away from the radiator fan blades.
10. Keep yourself and your clothing away from moving parts when the engine is running.
11. Do not wear loose clothing or jewelry that can get caught in rotating parts or scratch surface finishes.
WORK SAFELY! Perform this installation on a good clean level surface for maximum safety and with the engine turned “off”. Installation of this shifter requires working underneath vehicle.
USE EXTREME CAUTION WHEN WORKING UNDERNEATH VEHICLE. Never get near or underneath vehicle until you are confident that it is safely supported and will not move or fall from its raised position.
DO NOT USE A BUMPER JACK!
NOTE! There is a limited amount of working space underneath the car around the transmission and floor pan area while replacing and installing the shifter assembly, however, shifter removal and replacement can be performed without removal of drive shaft. If drive shaft is removed to facilitate the installation, consult the manufacturer’s service manual for correct procedure.
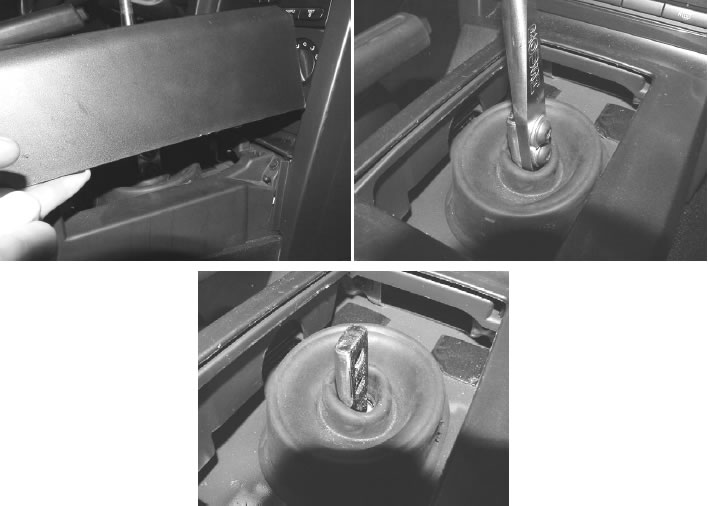
Disassembly (ROUSH Billet Shifter Handle Removal)
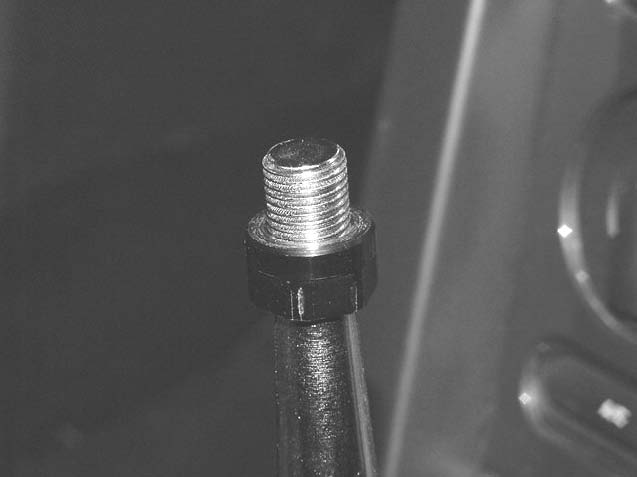
1. Use a 17mm wrench to loosen the jam nut below the shifter knob. Turn the jam nut clockwise to unlock it from the knob.
2. Remove the shifter knob from the handle by turning the knob counter-clockwise. Then remove the jam nut from the handle by turning it counter-clockwise.
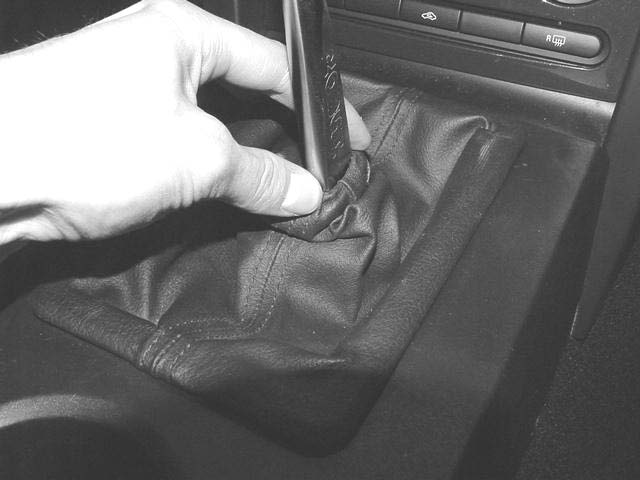
3. Remove the shifter boot, by lifting up on the boot surround (the shifter boot just snaps in place on the console).

4. Use a 7/32” hex driver to remove the two 1" length bolts that attach the shifter handle to the short throw shifter. Remove the shifter handle. The center console may need to be elevated, by lifting up on it, to access the bolts.
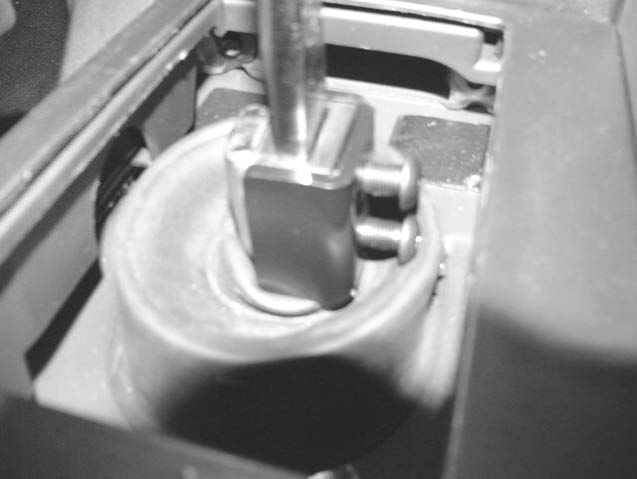
Assembly (ROUSH Shifter Damper)
1. Push male rubber damper into shifter handle.
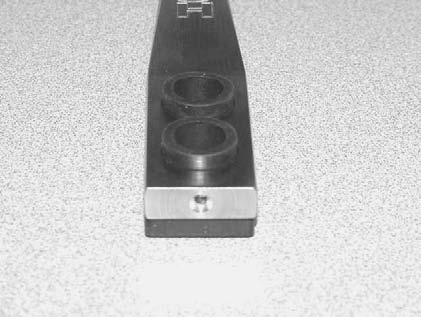
2. Slide female rubber damper over shifter handle.
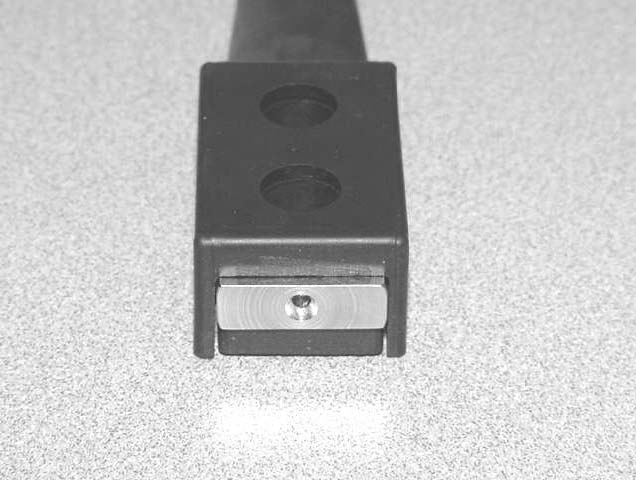
3. Using a non-oil based lubricant (glass cleaner works well), push the (2) spacers into the shifter handle. Make sure that the spacers are flush with the outside surface.
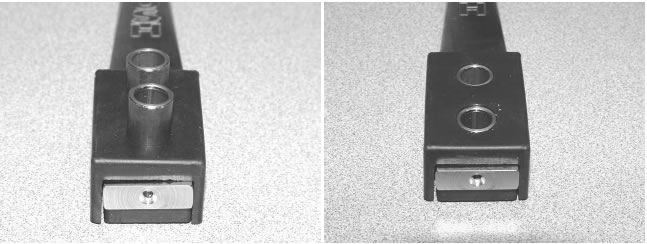
4. Again using a non-oil based lubricant (as in step 3), push the damper clamp over the female rubber damper on the shifter handle.
Assembly (ROUSH Billet Shifter Handle with Damper Installation)
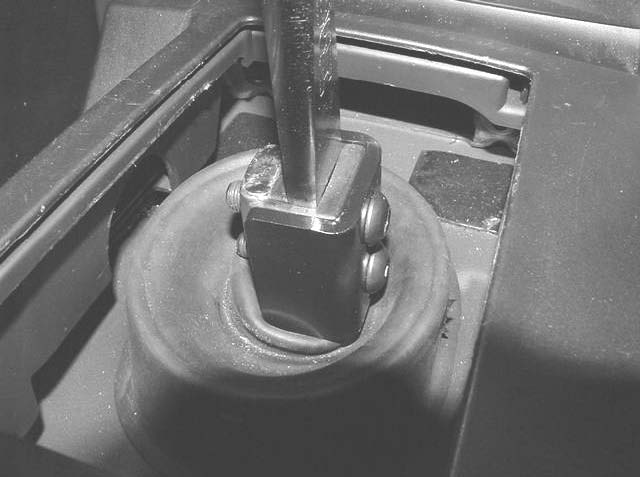
1. Install the shifter handle with damper onto the short throw shifter.
A. Slide the shifter handle and damper assembly over the short throw shifter (the dust boot will have to be pressed down).
B. Place a few drops of Loctite® 242 medium strength thread locker (or equivalent) on end of each 1.75" length bolt and on the shifter threads before installation (be sure to use the new 1.75” length bolts included in the kit).
2. Hand-tighten the bolts, making sure that the rubber damper assembly is compressing evenly around the shifter handle. The bolt heads should tighten against the steel damper clamp.
3. Use a 7/32” hex driver and torque wrench to torque the (2) 1.75” length bolts to 35 Nm (25 lb-ft).
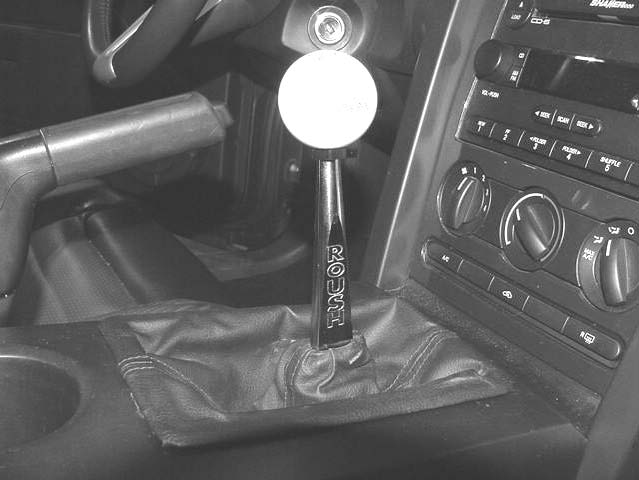
4. Re-install the shifter boot over the top of the shifter handle and snap it into place on the console. Slide the shifter boot collar down on the handle until “ROUSH” is visible.
5. Re-install the jam nut onto the handle until it bottoms on the threads.
6. Re-install the knob onto the handle until it bottoms on the jam nut, and then turn it counter-clockwise until the shifter pattern is lined up.
7. While holding the knob in position, turn the jam nut counter-clockwise until it seats against the knob. Tighten the jam nut to hold the knob in position, using a 17mm wrench.
Related Guides
-
Installation
-
Installation
-
Installation
