FREE 1 to 3-Day Delivery on Orders $149+ Details
How to Install Roush Side Rocker Panel Splitters on your 2010-2013 Mustang
Installation Time
2 hours
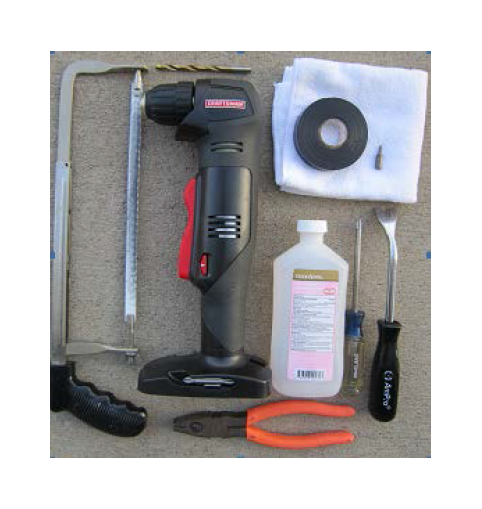
Tools Required
- Jack stands (2)
- Floor jack (1 is required but 2 is preferred)
- Pliers
- Small Phillips screw driver
- Drill
- ¼” Drill bit
- T15 Torx bit (for some models of vehicle)
- Hacksaw (for some models of vehicle)
- Electrical tape
- Isopropyl Alcohol
- 3M Adhesion Promoter
- Lint-free cloth
- Panel Puller tool
- Right-angle drill
- 3M Adhesive Cleaner

Shop Parts in this Guide
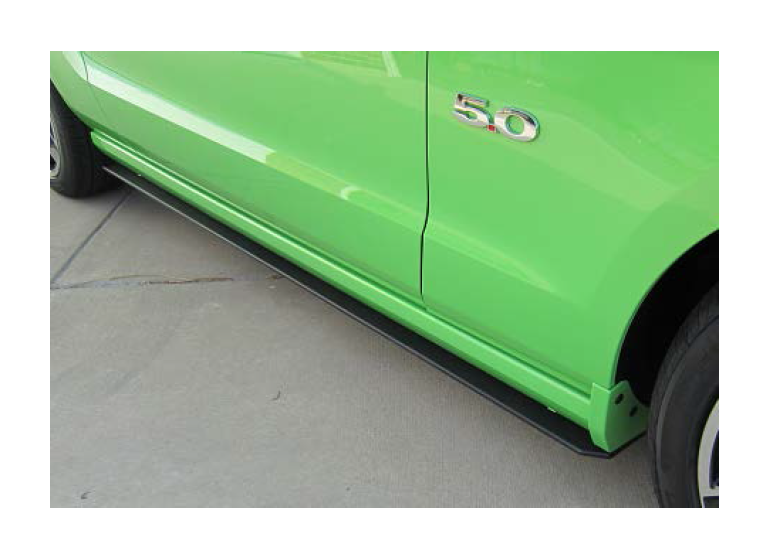
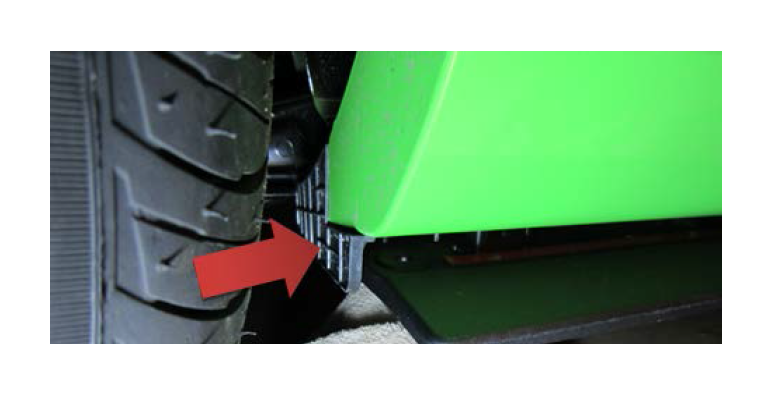
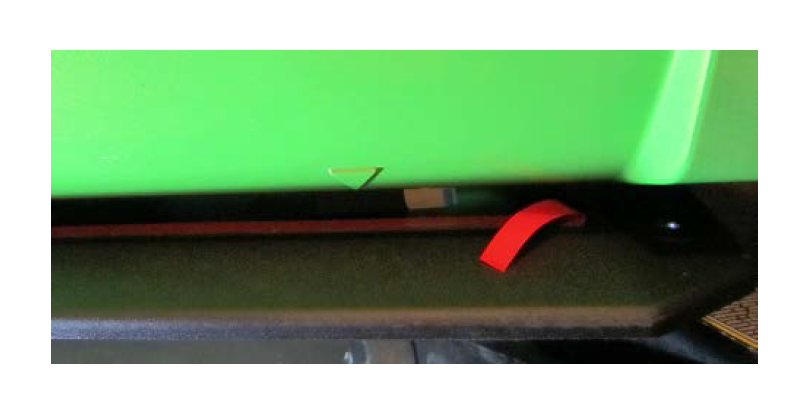
- The below illustration is of the rocker panel before the ROUSH splitter installation.
Front Strut Installation
1. Verify that you have all items on the Roush Splitter Packaging list and the required tools listed above before beginning this installation.
2. Set the emergency brake.
3. Block the driver side wheel.
4. Raise the passenger side of the vehicle and secure with jack stands.
Note: the car needs to be lifted high enough that a drill with the ¼” bit installed can fit between the ground and the bottom of the rocker panel. If you have a right-angle drill, the car will only need to be lifted a few inches off of the ground.
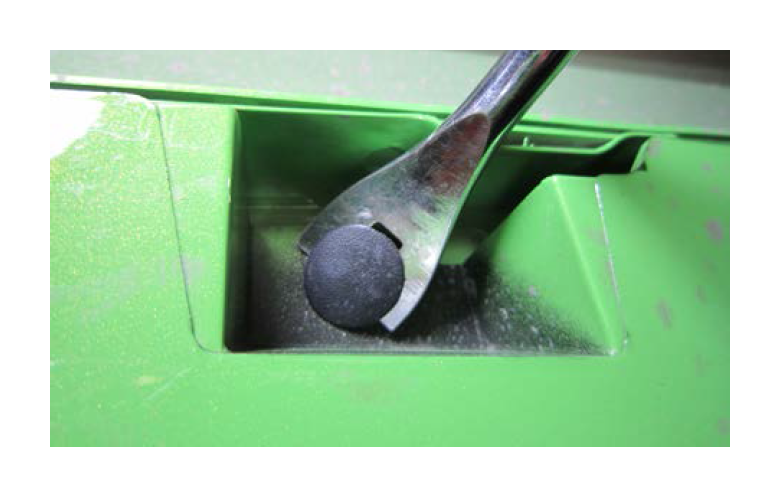
5. Under the passenger rocker panel, use Pliers (or) a Panel Puller tool to remove all (8) of the plastic push pins and discard them.
Note: the rocker panel will remain in place.
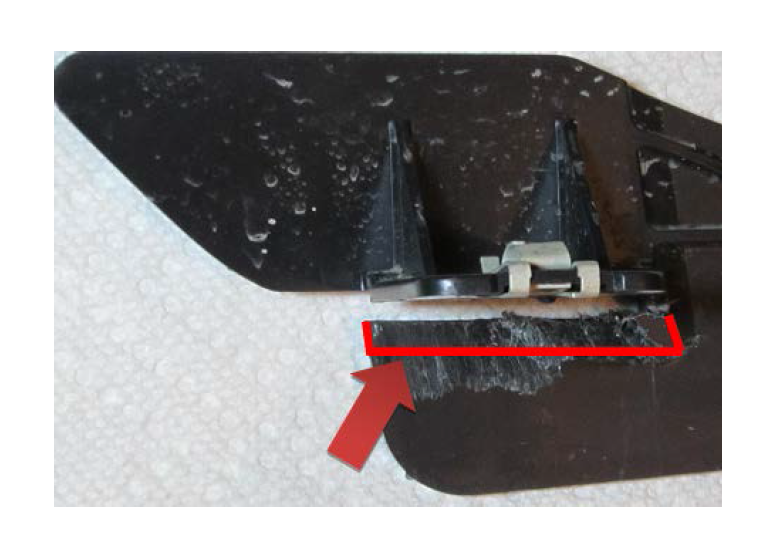
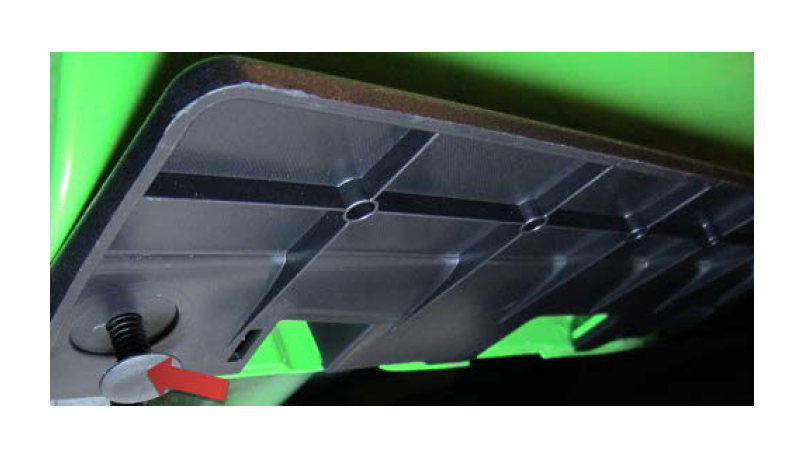
6. At the end of the rocker panel (at the rear tire) check to see if your model of vehicle is equipped with a rocker panel extension (This will be a black plastic piece as shown below).
7. If your vehicle is equipped with the rocker panel extension, it will interfere with the ROUSH splitter so it must be modified using the steps below:
• Using a T15 Torx bit, remove the screw from the bottom of the rocker panel.

• While pulling down on the rocker panel, pull the rocker panel extension out towards the center of the vehicle.
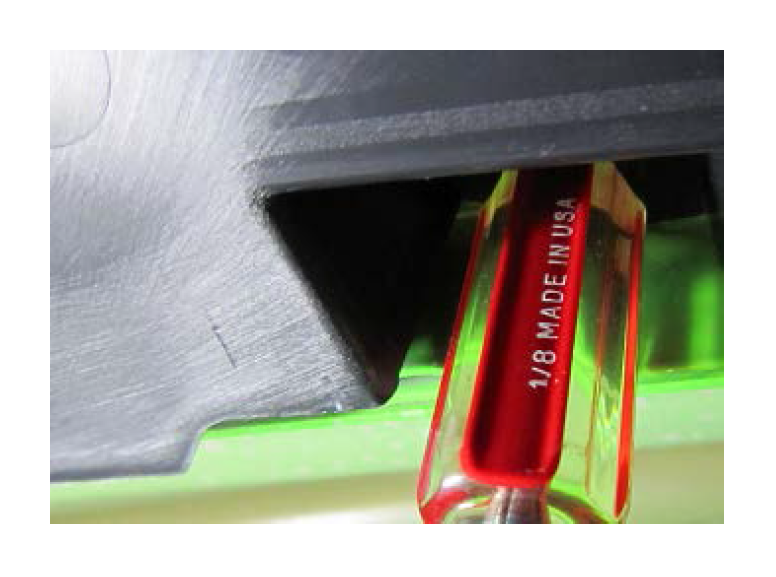
• Using a Hacksaw, trim 2-1/8” of the raised tab area so that is flush with the adjacent surface as shown below:
• Reinstall the rocker panel extension and Torx screw.
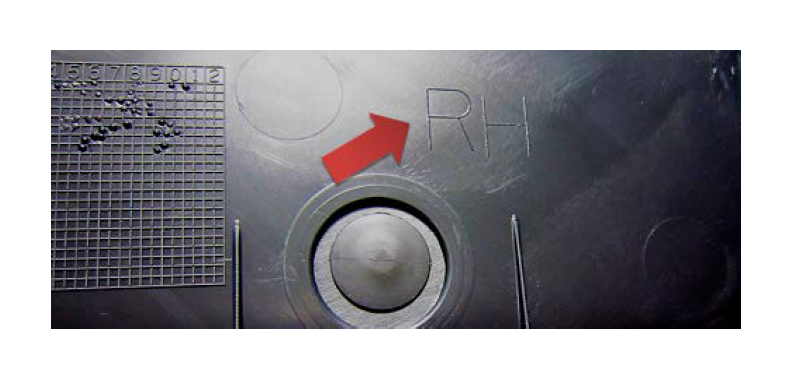
8. Locate the passenger side ROUSH splitter by looking for the “RH” engraving on the bottom of the part.
9. Loosely hold the splitter in place and check that it does not interfere with the rear rocker panel extension if equipped.
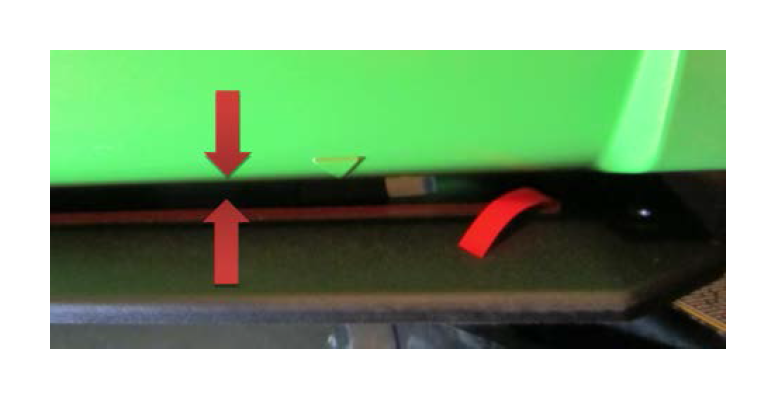
10. While still holding the splitter in place, note where the red foam tape is located in relation to the existing rocker panel.
11. Using Isopropyl Alcohol (or) 3M adhesive remover and a lint-free cloth, clean the underside of the existing rocker panel in the area noted above.
12. Apply 3M adhesion promoter (Use 3M specifications for applying promoter) to the same noted area of the existing rocker panel.
13. Bend and crease the red film pull tabs (4 places) as shown (You will need to be able to access these pull tabs after the rocker splitter has been loosely installed on the vehicle.)
14. Remove (8) new push pins from the ROUSH hardware package.
15. Loosely install the “RH” rocker splitter and partially install (8) new push pins.
NOTE: Leave a 1/8” to ¼” gap between the existing rocker and rocker splitter.
16. Starting at the front of the vehicle, verify that the rocker splitter is properly fitted to the existing rocker panel so that there is no interference.
17. Using the end of a small screw driver handle, push all (8) push pins up until they are fully inserted.
18. Remove the red film from the foam tape by pulling the creased tabs (4 places).
19. Push the rocker splitter in place to adhere the foam tape to the existing rocker panel (Apply firm pressure at 3”-4” intervals to ensure a proper bond.)
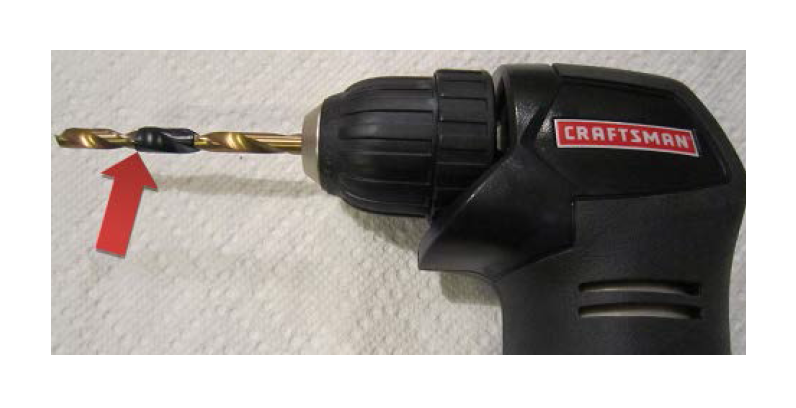
20. With a ¼” drill bit installed in your drill, apply several wraps of electrical tape around the bit 1” from the drill bit end as shown (The tape is to be used a drill stop.)
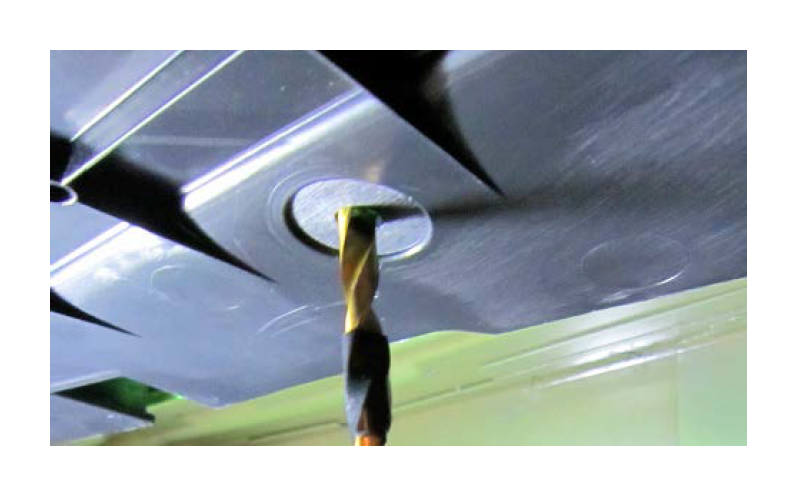
21. Using the (5) remaining empty ROUSH rocker splitter holes as a guide, drill ¼” holes into the existing rocker panel.
22. Insert (5) new push pins from the ROUSH hardware package into the newly drilled holes.
23. Remove jack stands and lower the vehicle.
24. Unblock the driver side wheel.
25. Repeat the same process to install the driver side (“LH”) rocker splitter.
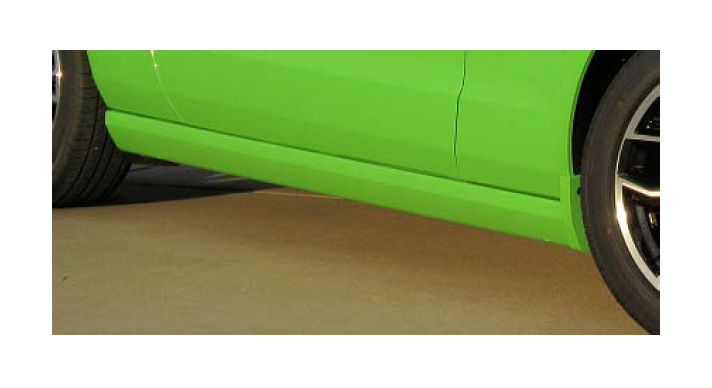
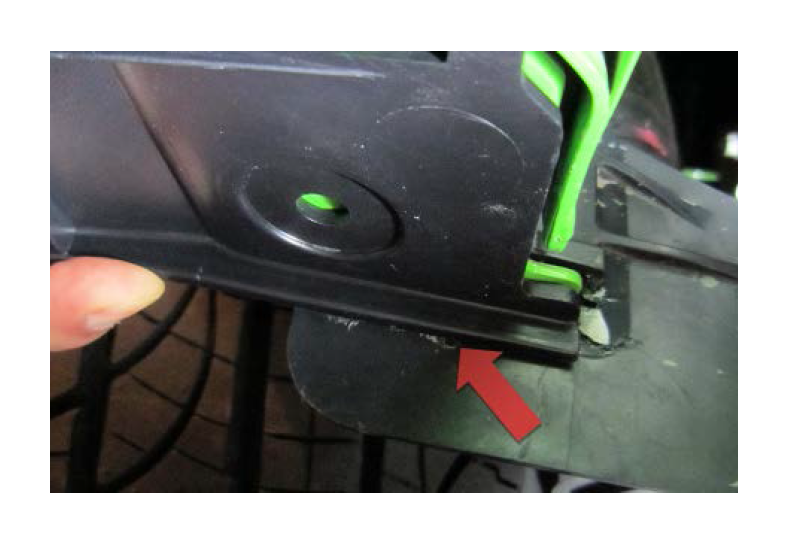
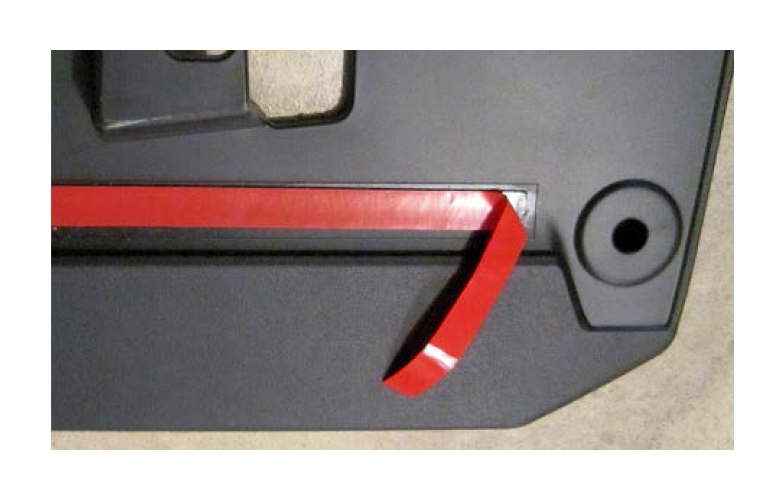
The below illustration is of the Roush splitter after the installation has been completed