 FREE 1 to 3-Day Delivery on Orders $149+ Details
How to install a Roush Side Skirt on your 1999-2004 Mustang
Installation
Contents of kit
- 1 — 2 Side Skirts
- 2 — Double-Sided Tape
- 3 — 4 Screws (per skirt)
IMPORTANT SAFETY NOTICE
Appropriate disassembly, assembly methods and procedures are essential to ensure the personal safety of the individual doing the work. Improper installation due to the failure to properly follow these instructions could cause personal injury or death. Read each step of the installation manual carefully before starting the actual installation.
- Always wear safety glasses for eye protection.
- Place the ignition switch in the OFF position.
- Always apply the parking brake when working on the vehicle.
- Block the front and rear tire surface to prevent unexpected vehicle movement.
- Operate the engine only in well-ventilated areas to avoid exposure to carbon monoxide.
- Do not smoke or use flammable items near or around the vehicle fuel system.
- Use chemicals and cleaners in well-ventilated areas.
- Batteries produce explosive gases, which can cause personal injury. Therefore, do not allow flames, sparks or flammable substances to come near the battery.
- Keep hands and any other objects away from the radiator fan blades.
- Keep yourself and your clothing away from moving parts when the engine is running.
- Do not wear loose clothing or jewelry that can get caught in rotating parts.
Urethane Component Preparation Procedure
IMPORTANT: This procedure must be followed for all Roush urethane components installed on this vehicle!
CAUTION: These instructions must be followed to ensure proper tape adhesion to the part. Mask the tape groove area on the parts prior to painting.
NOTE: All components should be painted prior to installation. Handle the components gently to prevent damage to the vehicle surface and/or the cover. It is recommended to place the components on a soft, non-abrasive surface for all installation operations. For best results and ease of installation, the body components can be placed in the sunlight or a warm area to stabilize. Installation should occur in ambient conditions of 70 to 100 degrees Fahrenheit.
WARNING: Chemicals and cleaners such as acetone must be used only in well-ventilated areas and discarded properly. Improper use can cause severe injury or death.
Follow the manufacturer’s instructions for proper usage.
1. Inspect the back sides of each component. Remove any masking tape as a result of the painting process.
2. Using a Scotch-brite pad, scuff the entire tape groove for each component if needed. If necessary, smooth any imperfections or seams in the tape groove only.
3. Using a clean cloth, wipe all tape groove surfaces with acetone to remove any dirt, debris, or contaminants.
4. Wipe all the tape groove surfaces with an adhesion promoter such as Pro-Bond or 3M #4298. Let all components dry.
5. In preparation for final installation, pull back 2 to 3 inches of tape backing on each end of the tape section. The tape backing should peel upward.
Roush Mustang Side Skirts Removal Procedure
IMPORTANT: It is imperative that all vehicle surfaces be dry and free from dirt, debris and contaminants during the installation process.
NOTE: For installation of Roush side skirts, removal of the factory side skirts is necessary.
1. The following steps may require the help of an additional person. Prior to installation, the vehicle should be washed with mild soap and water and thoroughly dried.
2. Locate vehicle safely on a hoist and remove all four tire and wheel assemblies for better access.
3. Remove the factory side skirt fasteners located in each wheel opening using a Phillips head screwdriver.
4. Remove all the plastic fasteners along the pinch rail (this is the area between the front and rear wheel openings). See Figure 1. Open the vehicle doors and remove the black “Mustang” trim piece by lifting it upward. Save for reuse. See Figure 2. Remove the side skirt from each side of the vehicle by pulling out and downward on the side skirt. The factory side skirt consists of two interlocking pieces. NOTE: It is important that all vehicle surfaces be dry and free from debris during the installation process for proper adhesion of the components.
5. Install 3M mounting tape along the tape groove of each applicable component. Unroll the tape and secure it just below the top edge of the body component by pressing firmly. It will be necessary to trim the 3M mounting tape to the appropriate lengths using a pair of scissors or a razor knife.
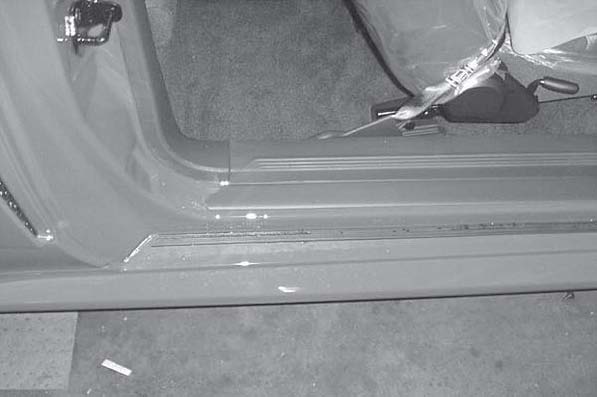
Figure 1
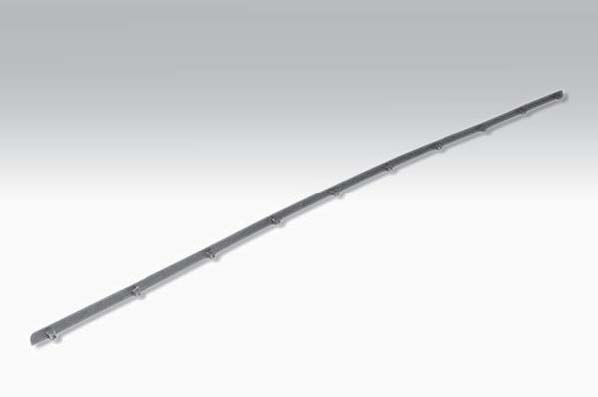
Figure 2
Roush Mustang Side Skirts Installation Procedure
1. Pre-fit all body components to the vehicle and using a wax pencil, mark a guide line on the vehicle surface 1/4-inch below the body contour line. See Figure 3. This will be used during the final installation step.
2. Using a Scotch-brite pad, scuff a 1-inch wide section of the vehicle surface (clear coat) 1/8-inch below the guide line defined in Step 1.
3. Using a clean cloth, wipe with acetone all of the vehicle surfaces which will come in contact with the 3M mounting tape. Do not remove the wax guide line. Allow the surfaces to dry. Wipe the vehicle surfaces with an adhesion promoter such as Pro-Bond or 3M #4298. Allow the surfaces to dry.
4. Reinstall the black push-pin strip and the punch flange push-pins. It may be necessary to drill additional pinch flange holes. See Figure 4.
5. Install each end of the side skirt by realigning its top edge with the wax pencil guide line on the vehicle and pressing the exposed mounting tape surface to the vehicle. Holding the orange backing tape, pull it gently along the top edge of the component at approximately a 45-degree angle. Be careful not to break the backing tape. Continue to press the component and exposed tape surface to the vehicle until all of the orange backing tape has been removed and the component is securely in place. Be certain all corners are tight.
6. Reinstall the screws in the wheel well openings. Do not overtighten the screws. Overtightening the screws will cause visible skirt distortion.
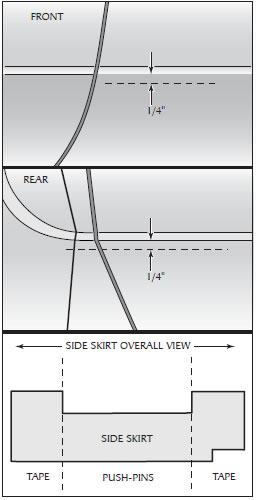
Figure 3
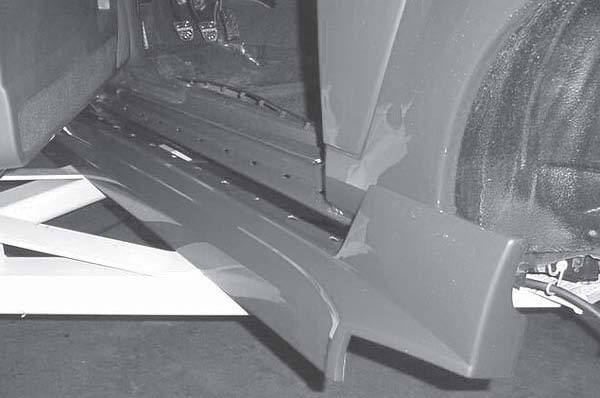
Figure 4
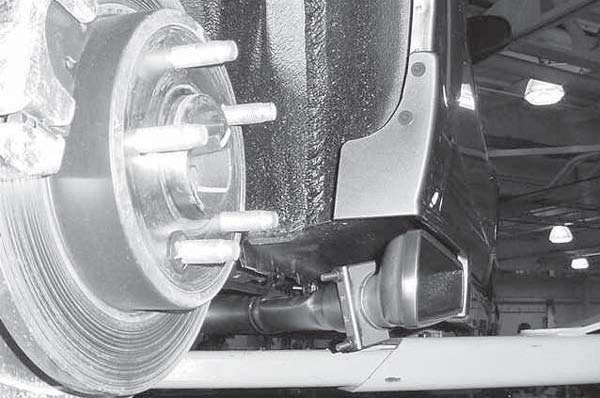
Figure 5
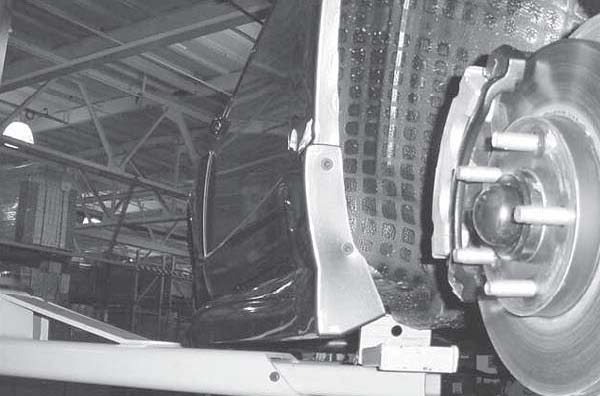
Figure 6
