 FREE 1 to 3-Day Delivery on Orders $149+ Details
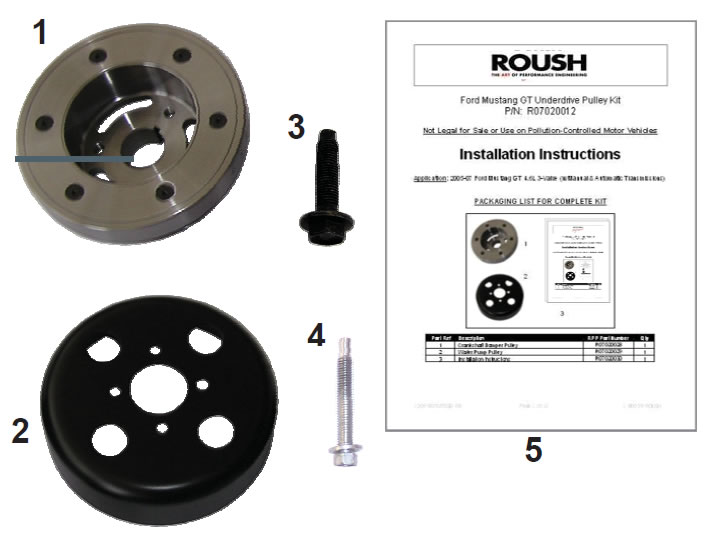
How to install a Roush Underdrive Pulleys on your 2005-2010 GT Mustang
Installation Time
2 hours
Tools Required
- Metric and Standard Socket Sets with 3/8" Drive
- Torque Wrench
- ½" Drive Breaker Bar or Ratchet
- 3-Jaw Pulley Puller (Recommended Ford Service Tool # 303-D121 shown below)
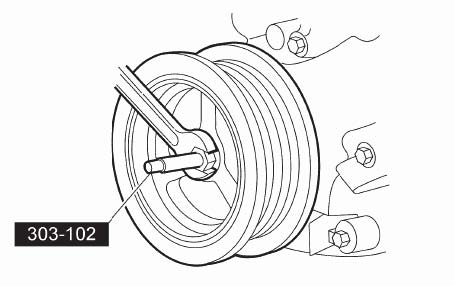
- Crankshaft Vibration Damper Installer (Recommended Ford Service Tool # 303-102 shown below)
- Brake Clean
- Silicone Gasket and Sealant (Recommended Ford Service P/N: TA-30)
Installation

GLOSSARY OF TERMS
FEAD - Front End Accessory Drive
PCV - Positive Crankcase Ventilation
LIMIT OF LIABILITY STATEMENT
The information contained in this publication was accurate and in effect at the time the publication was approved for printing and is subject to change without notice or liability. ROUSH Performance Products (RPP) reserves the right to revise the information presented herein or to discontinue the production of parts described at any time.
SAFETY REQUIREMENTS
STOP! READ IMPORTANT SAFETY CAUTIONS AND WARNINGS BEFORE PROCEEDING.
IMPORTANT SAFETY NOTICE
Appropriate disassembly, assembly methods and procedures are essential to ensure the personal safety of the individual performing the kit installation. Improper installation due to the failure to correctly follow these instructions could cause personal injury or death. Read each step of the installation manual carefully before starting the actual installation.
Therefore, do not allow flames, sparks or flammable substances to come near the battery.
1. Always wear safety glasses for eye protection.
2. Place ignition switch in the OFF position.
3. Always apply the parking brake when working on a vehicle.
4. Chock the front and rear tires to prevent unexpected vehicle movement.
5. If working without a lift, always consult vehicle manual for correct lifting specifications.
6. Operate the engine only in well-ventilated areas to avoid exposure to carbon monoxide.
7. Do not smoke or use flammable items near or around the fuel system.
8. Use chemicals and cleaners in well-ventilated areas.
9. Batteries produce explosive gases, which can cause personal injury.
10. Keeps hands and any other objects away from the radiator fan blades.
11. Keep yourself and your clothing away from moving parts when the engine is running.
12. Do not wear loose clothing or jewelry that can get caught in rotating parts or scratch surface finishes.
13. Allow the engine, cooling system, brakes and exhaust to cool before working on a vehicle.
WORK SAFELY!
Perform this installation on a good clean level surface for maximum safety and with the engine turned off.
SECTION A - DISASSEMBLY
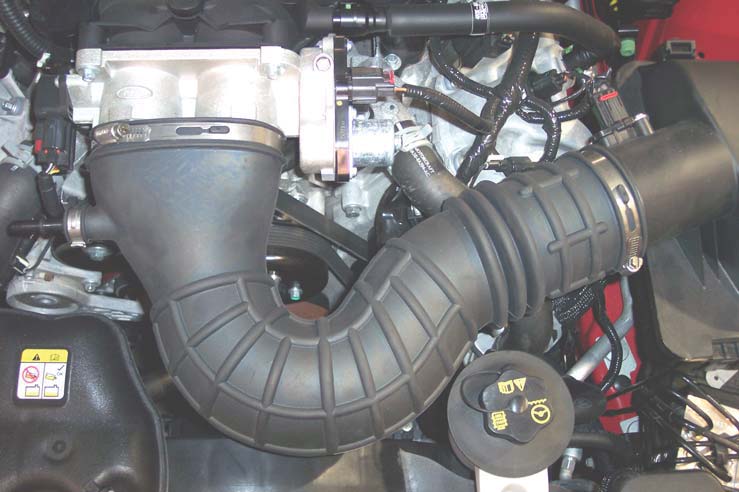
1. Disconnect the PCV breather tube from the clean air tube and rotate out of the way.
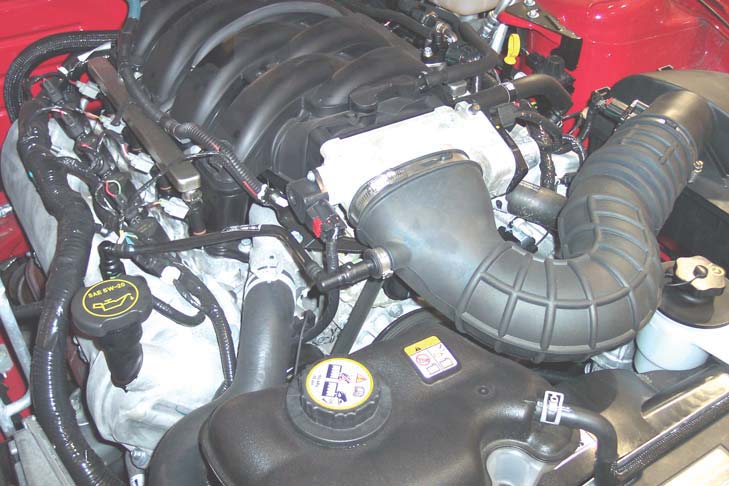
2. Loosen the clamps on both ends of the clean air tube and remove from the vehicle.
3. Remove the bolt holding the power steering reservoir to the fan shroud and fold out of the way. (not required on 2010 models. PS reservoir is mounted on the engine)
4. Remove the bolts holding the engine coolant reservoir to the fan shroud and fold out of the way.
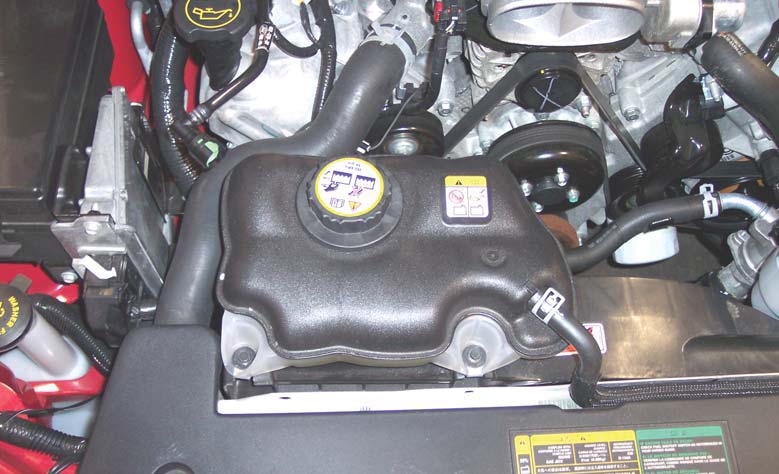
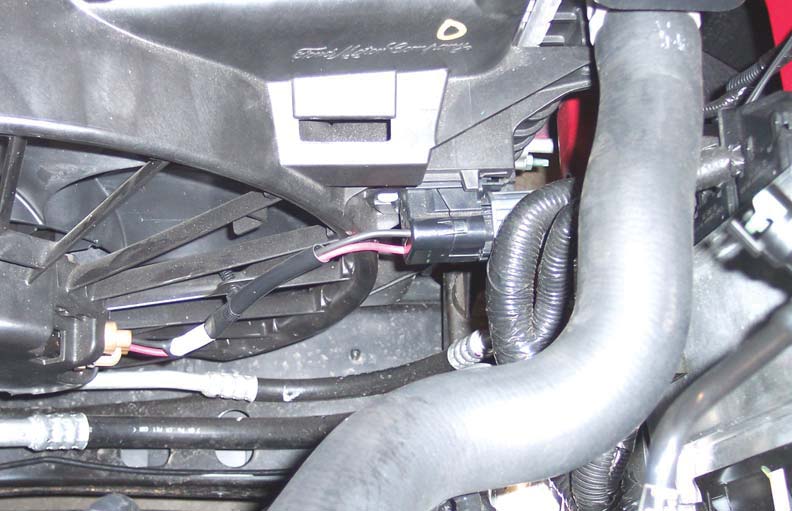
5. Disconnect the electrical connector from the radiator cooling fan.
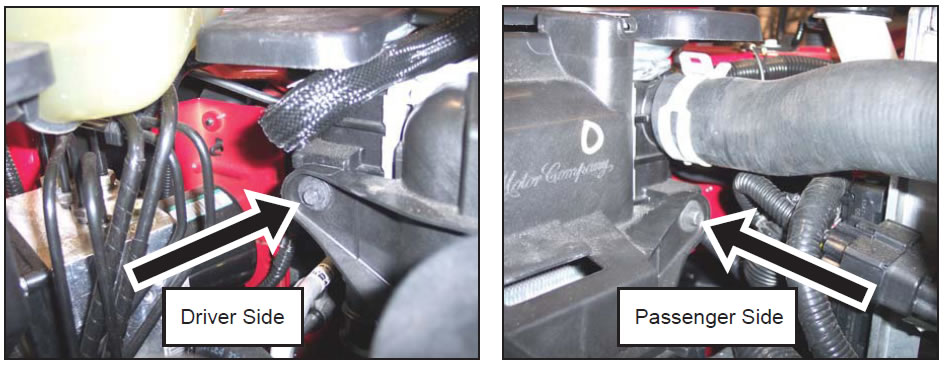
6. Remove the two bolts which retain the fan shroud to the cooling module, and carefully pull the complete shroud and fan assembly free from the vehicle.
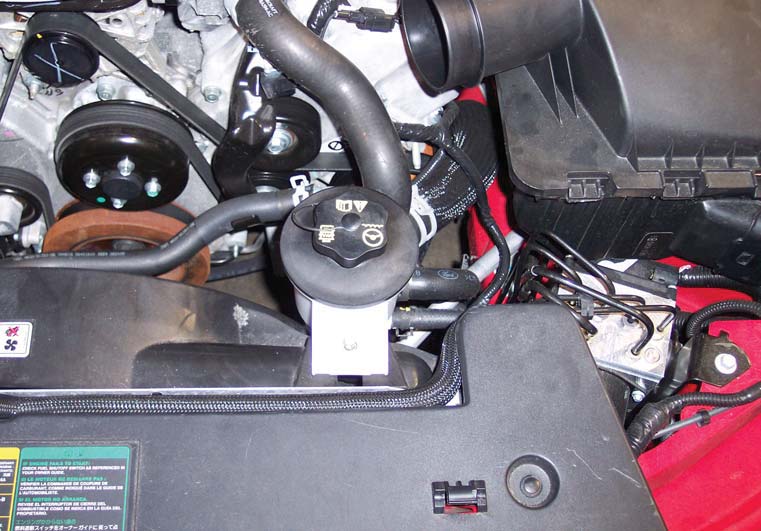
7. 2010 models – Remove the Air Cleaner Assembly and Inlet Air Tube to gain access to the Drivers side fan shroud bolt.
8. With the FEAD belt still in place, loosen the four water pump pulley bolts. DO NOT REMOVE THE WATER PUMP PULLEY BOLTS COMPLETELY.
9. Reduce the tension on the FEAD belt using a ½” breaker bar or ratchet and remove the belt from the water pump pulley.
10. Remove the crankshaft pulley bolt and washer.
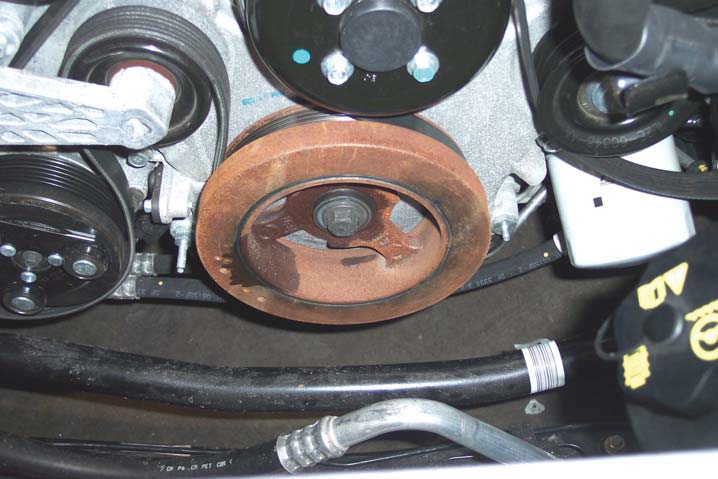
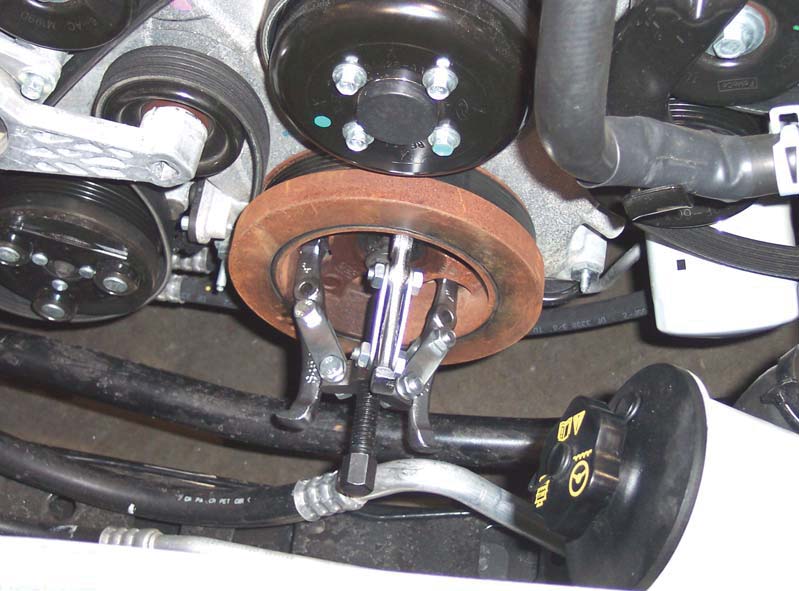
11. Using the properly sized 3-jaw puller, remove the crankshaft pulley.
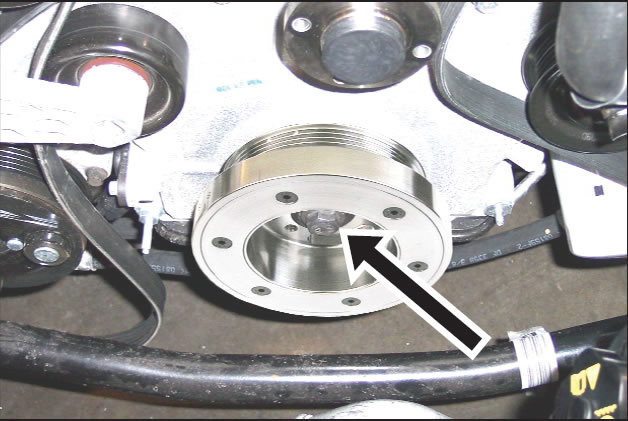
12. Remove the four water pump pulley bolts and pulley.
SECTION B - INSTALLATION
- Apply silicone gasket and sealant to the Woodruff key slot in the new crankshaft pulley (R07020028).
NOTE: If not secured within 4 minutes, the sealant must be removed and the sealing area cleaned. Clean the sealing area using brake clean. Failure to do so can cause future oil leakage.

2. Using the special installation tool, install the new crankshaft damper pulley.
3. Torque the new crankshaft pulley bolt (R07020031) with washer to 90 Nm (66 lb-ft). Doing so will fully seat the pulley onto the crankshaft. Loosen the crankshaft bolt one complete revolution (360 degrees). Re-torque to 50 Nm (37 lb-ft), then tighten an additional 90 degrees.
NOTE: It may be necessary to prevent the crankshaft from turning to properly torque the bolt.
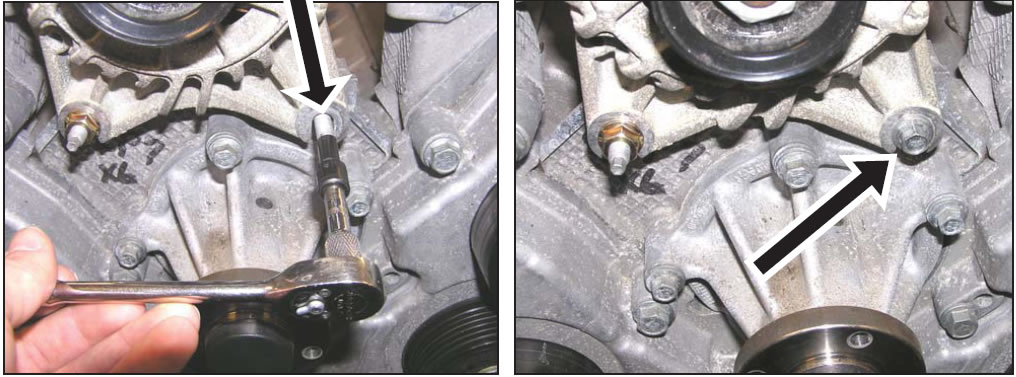
4. Remove the nut from the bottom right stud retaining the alternator.
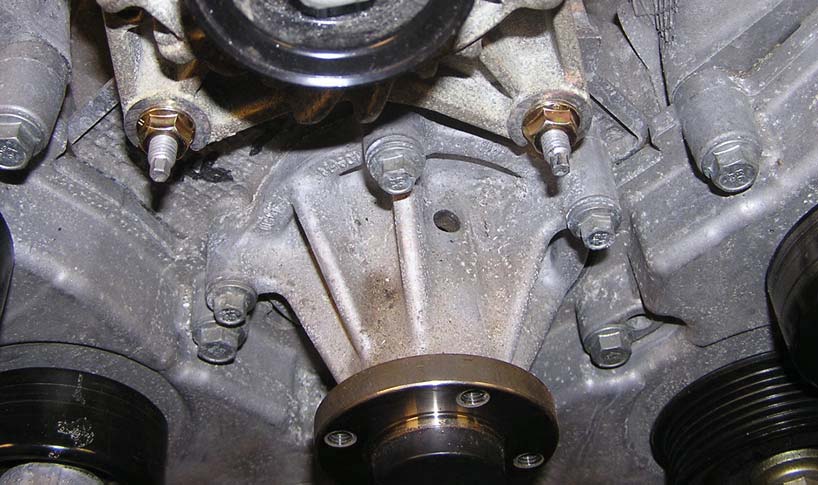
5. Using a 7/32” socket, remove the stud from the front of the engine and replace with the provided alternator bolt (N811334-S309). Torque to 25 Nm (18.5 lb-ft).
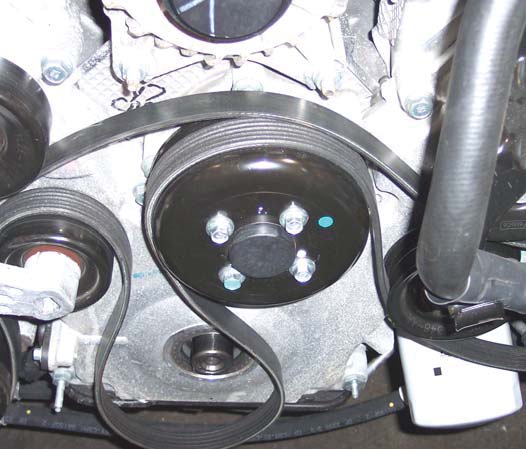
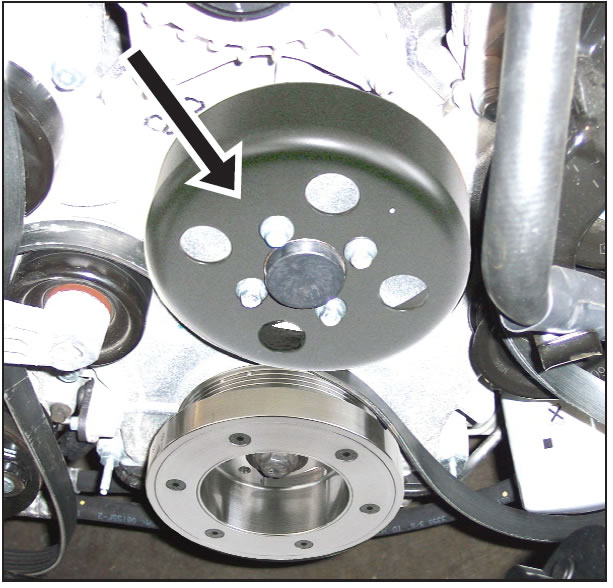
6. Install the new water pump pulley (R07020029) reusing the four factory bolts. Torque to 25 Nm (18.5 lb-ft).
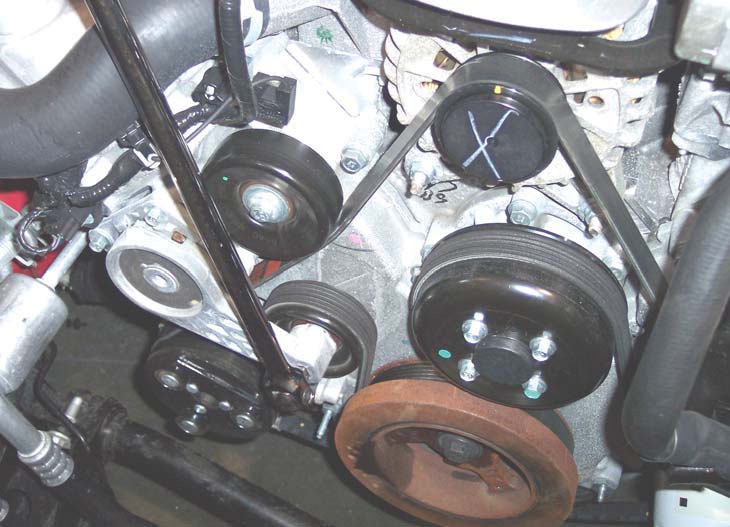
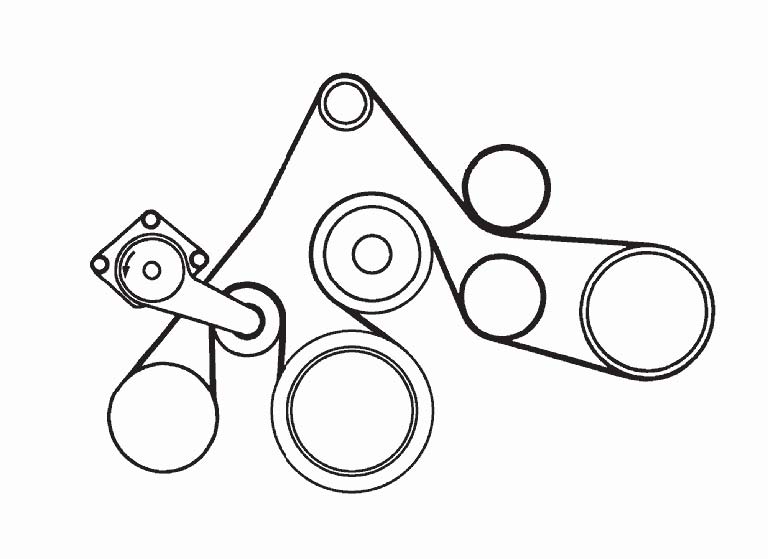
7. Reinstall the FEAD belt (reference the diagram below for proper belt routing).
8. Reinstall the fan shroud using the two factory bolts and torque to 10 Nm (7.5 lb-ft).
9. Reconnect the electrical connector to the radiator cooling fan.
10. 05-09 Models, Reinstall the power steering reservoir and coolant reservoir using the factory bolts and torque to 10 Nm (7.5 lb-ft).
11. 2010 Models, Reinstall the air inlet tube and air cleaner assembly. Ensure that the two rubber grommets under the air cleaner housing are in place and torque the bolt to 8 Nm ( 71 lb-in).
12. Reinstall the clean air tube and torque the worm clamps to 27 lb-in.
13. Reconnect the PCV breather tube to the clean air tube.
Congratulations!!! You have completed the installation of the ROUSH Performance Products, Ford Mustang GT Underdrive Pulley Kit. It is recommended that you save all parts removed from your vehicle during the installation of this kit.
