 FREE 1 to 3-Day Delivery on Orders $149+ Details
Mustang Seat Track Extension Kit ('79-'04) - Installation Instructions
Installation
1. Slide the seat completely forward
2. Remove the plastic covers that are covering the bolts, they should easily pop out of place. (I only had one)
3. Remove the plastic covers that are covering the bolts, they should easily pop out of place. (I only had one)
4. After bolts are removed, slide the seat into the back position.
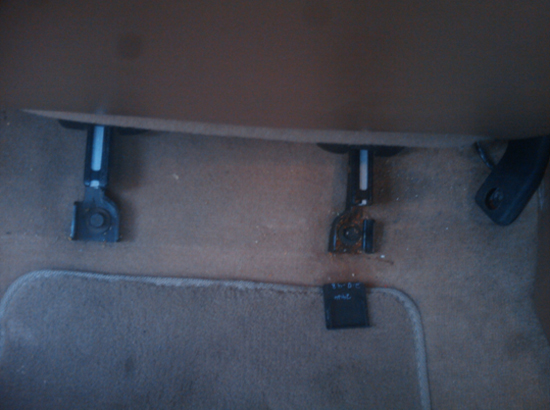
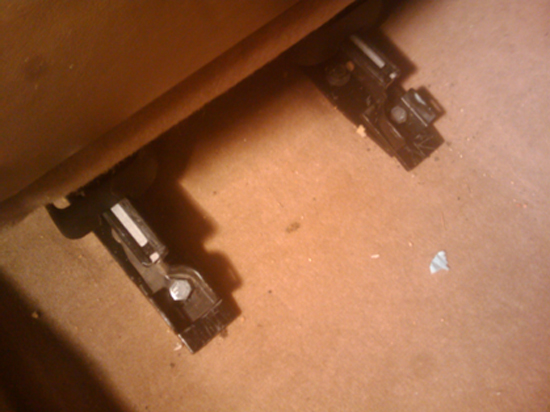
5. Remove the two front nuts using a 15mm socket. (Using a deep well socket works best. Or you can use some vice grips to get the nut started)(Save the nuts)
6. Once all four bolts are removed, tilt the seat back off the studs and rest it against the rear seat.
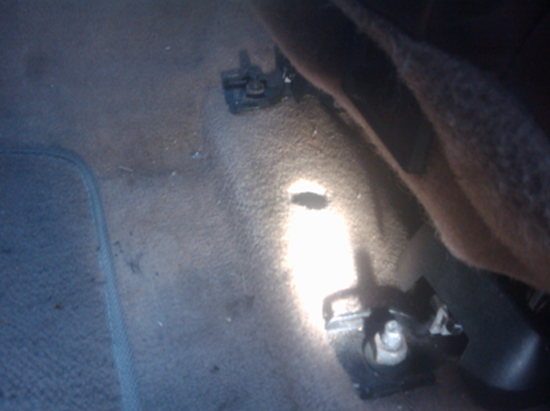
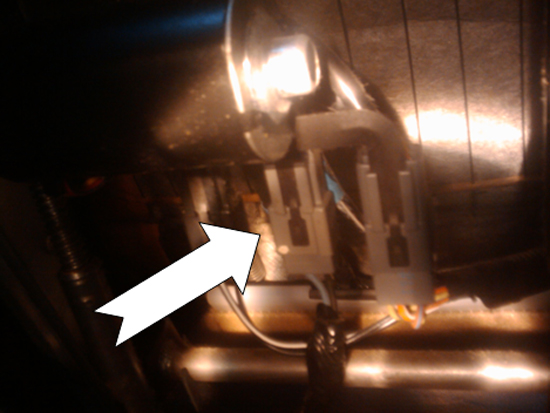
7. Look for the electrical harness that connects the seat to the car and unhook the harness. (To make this easier, first remove the harness from the black holder)
8. After the seat is completely disconnected from the car, carefully remove the seat. Lean the seat all the way forward to make removal easier. (This is a great time to clean under the seat)
9. Install the new extension brackets using the old hardware. The studs on the bracket should be towards the front of the car and facing up. (My brackets did not line up exactly so I had to modify them. To do this I used a dremel tool with a grander bit and grinded the brackets until they fit. Be careful not to grind too much off or the seat might be loose!)
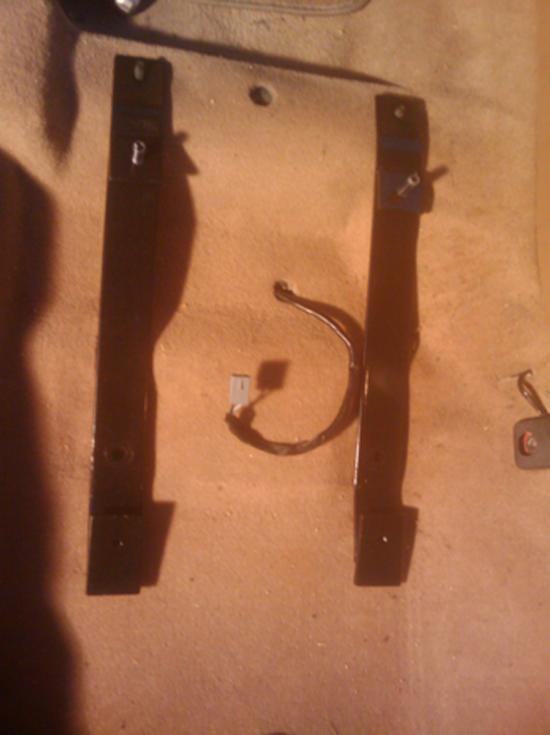
10. Remove the plastic thread protector from the studs.
11. Put the seat onto the brackets and re-attach the electrical harness.
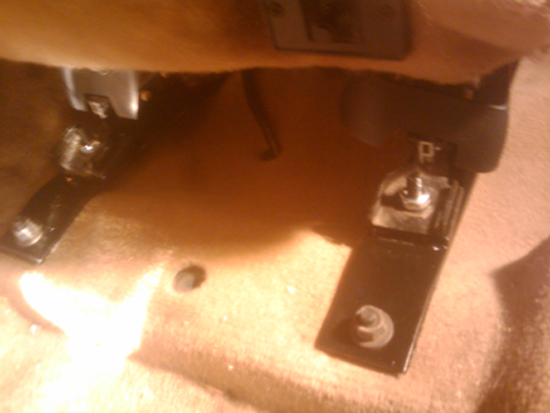
12. Screw the 17mm nuts that are included with the brackets onto the studs loosely.
13. Move the seat into the forward position.
14. Verify that the holes in the bracket are lined up with the seat, then install the new 17mm bolts and snug them up. Do not over tighten or you WILL strip them. (If the holes do not line up you will have to remove the seat and grind out the seat bracket until the holes line up. Use a pen and mark how much to grind off, or you will have to remove the seat multiple times before it fits…not fun)
15. Replace the plastic bolt covers by inserting one side into the groove on the seat, then by pressing firmly downwards it will snap into place.
16. Move the seat into the back position and snug up the front nuts using your 17mm socket. Tighten these very snuggly…don’t want your seat to move once you’re done.
17. Verify the seat moves freely and has no complications. When installed your seat will be approximately 4 inches back, and it does raise up a little bit too. But it’s really nice especially if you are tall like me.
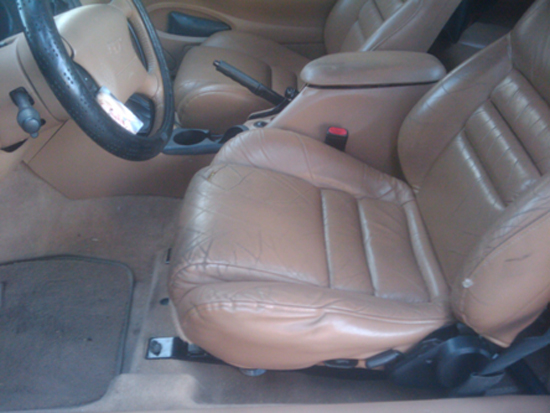
18. Use your seat as normal, note that there is a lot less room behind your seat for people to use…hope they have short legs!
19. If you have a rear seat floor mat, you may want to trim it for a better fit. With the new brackets, the floor mat is squished up and looks fairly unattractive. To trim, first mark where you want to cut, then using a pair of scissors cut out the portion of the mat. Put your floor mat back in the car and enjoy!
Installation instructions provided by AmericanMuscle customer Chris Towler 5.5.10
