FREE 1 to 3-Day Delivery on Orders $149+ Details
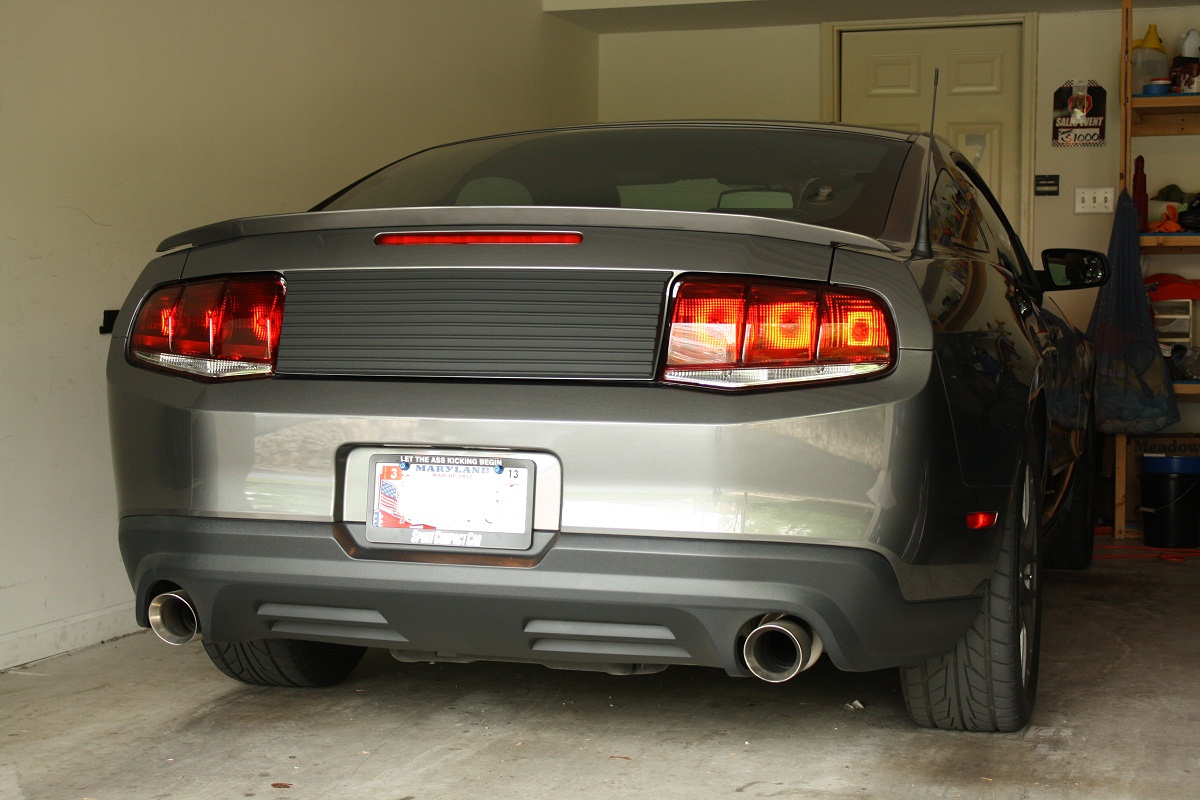
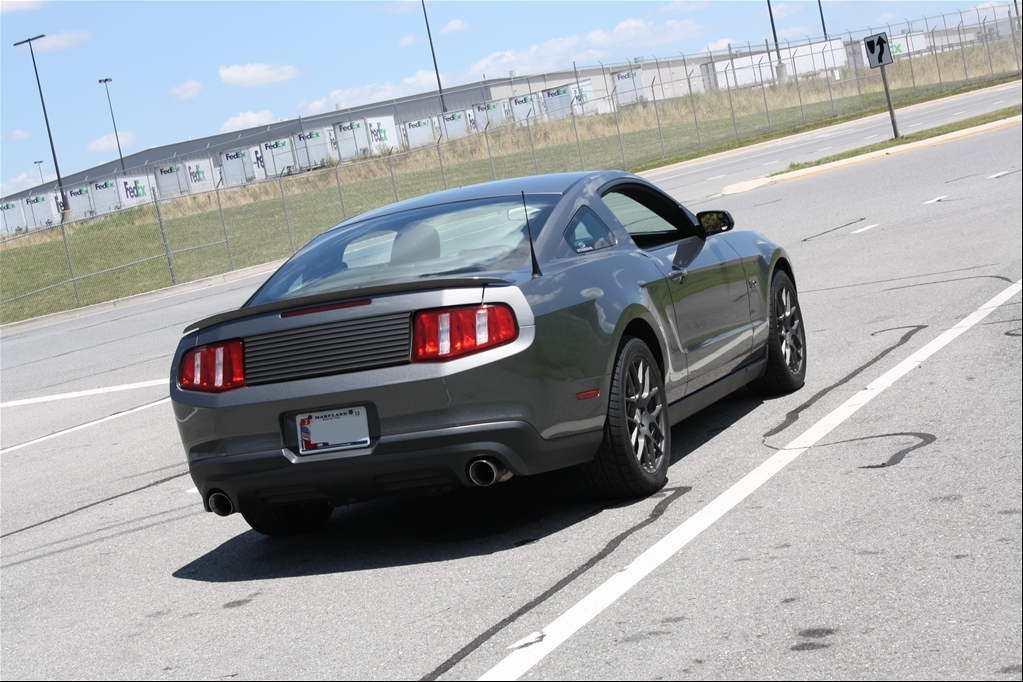
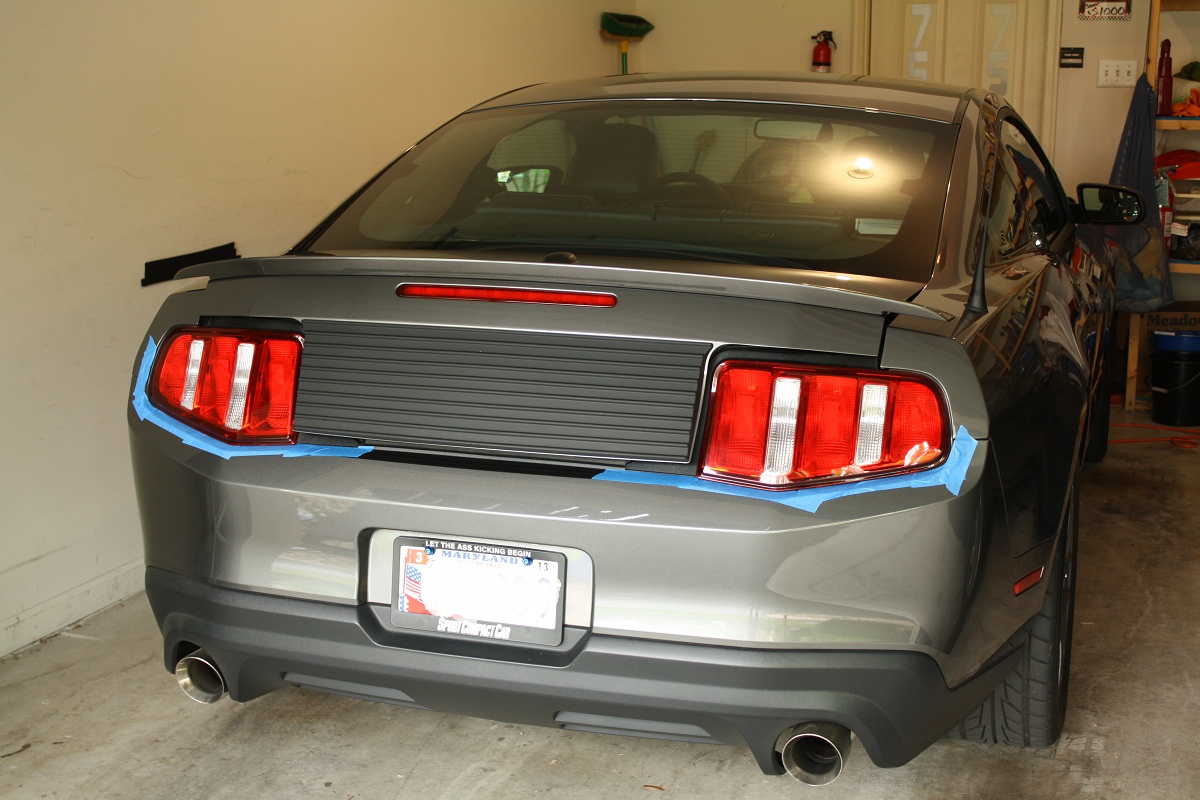
How to Install Raxiom Aero Tail Lights on Your 2010-2012 Mustang
Installation Time
1 hours
Tools Required
- Painter’s masking tape
- Interior trim removal tool and/or flat-head screwdriver
- 11-mm socket and/or box wrench

Shop Parts in this Guide
Installation
Installation Instructions:
1. Using the blue painter’s tape, mask off the paint around the stock taillights. This is to protect the bumper during removal. Try to place the tape underneath the stock taillights for the best protection.
2. Open the trunk and remove the plastic trim piece at the rear of the trunk. It is held on with four (4) plastic push pins. The image below shows the two on the driver’s side.
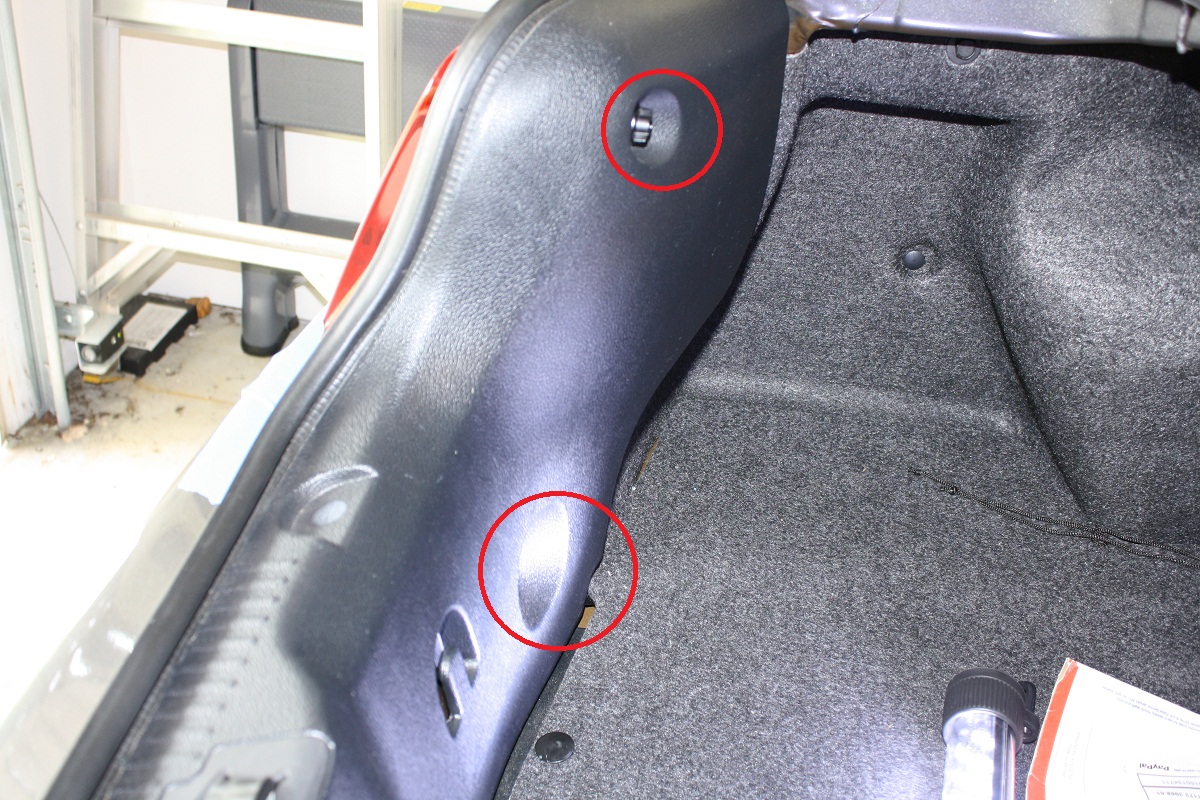
3. The top pushpins can be easily removed with a flathead screwdriver or a trim removal tool. They do NOT twist off; they pull off. The bottom two pushpins also pull off, but are much more difficult to remove and may be damaged during removal. After removing the pushpins, pull up on the interior panel to remove it. It is held to the metal below via four (4) additional fasteners that are integrated into the panel. Set the panel out of the way further in the trunk, or disconnect the light bulb and remove it completely.
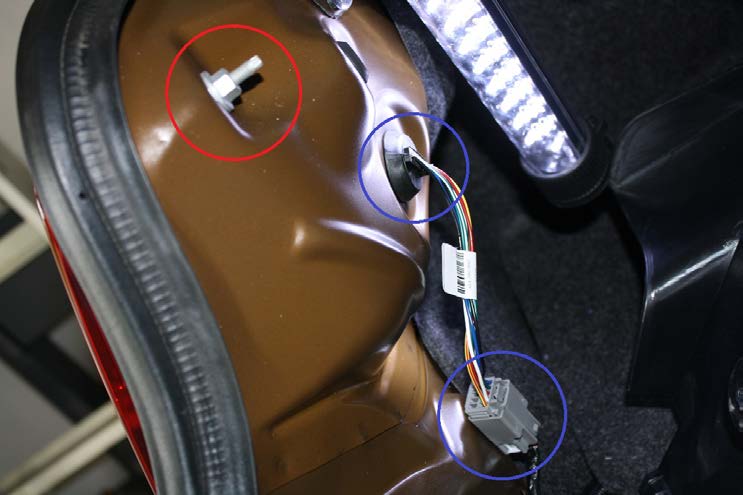
4. Remove the stock taillight assembly. First, disconnect the wiring harness plug and gently push the harness’s rubber grommet through the opening. (Blue circles in picture below). Using an 11-mm wrench, remove the three (3) nuts holding the taillight on. (Red circle in picture below.) Two of the nuts are behind the fabric trunk liner.
5. After removing the nuts, gently begin to pull the taillight away from the vehicle. The painter’s tape will help prevent scratching the paint, as the taillight often “lets go all at once.” You may need to apply pressure to the bolts from the inside using the screwdriver to help push the taillight out.
6. Set the old tail light and new taillight side-by-side on a soft surface, such as a clean microfiber towel. Using the trim removal tool or screwdriver, pry the wiring harness out of the clip on the stock taillight. The clip will most likely be damaged in this process, but it is NOT needed on the new taillights.
7. Next, remove the bulbs by gently twisting the sockets counter-clockwise. Remove the reverse lights (blue circles) first, followed by the brake light LEDs (red circles). DO NOT touch the bulbs with your fingers.

8. Install the harness and bulbs into the new taillights. Note that on the new taillights, the reverse bulbs are at the bottom of the assembly:
9. Install the bulbs by twisting them clockwise. Route the wiring harness away from the bolts and other connectors of the taillight assembly.
10. Reinstall the taillight assembly. Feed the wiring harness plug through the hole in the body, then line up the three bolts and gently insert the entire taillight assembly. Finger-tighten the 11-mm nuts. The new taillight will most likely NOT be sitting flush with the body. Using a wrench, begin to tighten the nuts, going in a triangle pattern similar to tightening lug nuts on wheels. As the nuts are tightened, the taillight will be “drawn” into the body and sit flush.
11. Gently pull the wiring harness’s grommet through the metal hole. (Try to pull on the rubber itself and not the wires.) Reconnect the wiring harness plug and check for proper operation of the new taillight. Remove the painter’s tape.
12. Repeat Steps 3-5 for the other taillight.
13. Reinstall the trunk liner. Installation is reverse of removal.