 FREE 1 to 3-Day Delivery on Orders $149+ Details
How to Install a SR Performance Braided Stainless Steel Hydraulic Clutch Line on a 2005-2014 Mustang
Installation Time
2 hours
Tools Required
- Flathead Screwdriver (or pocketknife)
- Car Jack/Jack Stands
- DOT 3 or 4 brake fluid
- Long Needle-nose Pliers (optional)

Shop Parts in this Guide
Preventative Check:
Before beginning this installation, check the clutch master cylinder where it connects to your clutch pedal. This part is plastic and is prone to cracking and eventually breaking off the master cylinder pushrod.
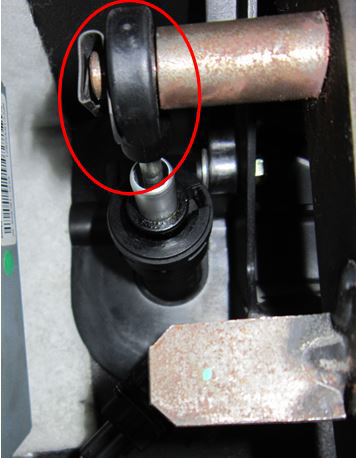
This will make your car immobile with no way to disengage the clutch. If yours is cracked, consider buying a new master cylinder to install along with the clutch line to avoid having to bleed the system multiple times.
Removal of Stock Line:
Locate the Master Cylinder connection for the stock line. This is located in the Driver’s Side/Firewall corner of the engine bay, next to the brake booster.
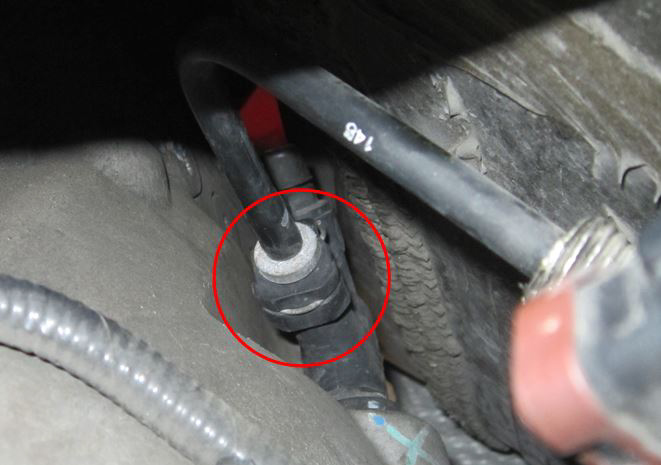
Remove the metal clip securing the line to the firewall connection by prying the “looped” end out with a small flathead screwdriver. Be careful not to lose the clip, as it may pop out of the fitting.
Using a rag to catch any brake fluid that drips, remove the hose from the fitting.
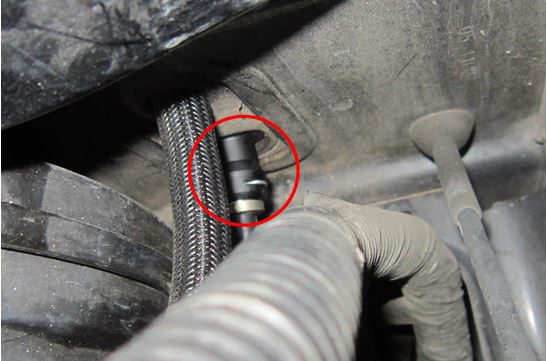
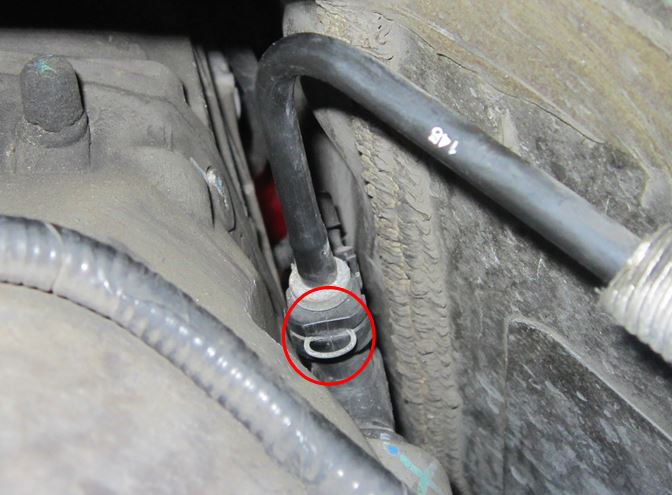
Locate the transmission connection for the clutch line. This will be on the driver’s side of the bellhousing, where the firewall slants back and narrows down to meet the transmission tunnel. You may be able to access this from below the vehicle, especially if you have removed the factory catalytic converters. I chose to access this from the top side, by reaching at an angle beginning at the driver’s side cylinder head and down into the transmission tunnel.
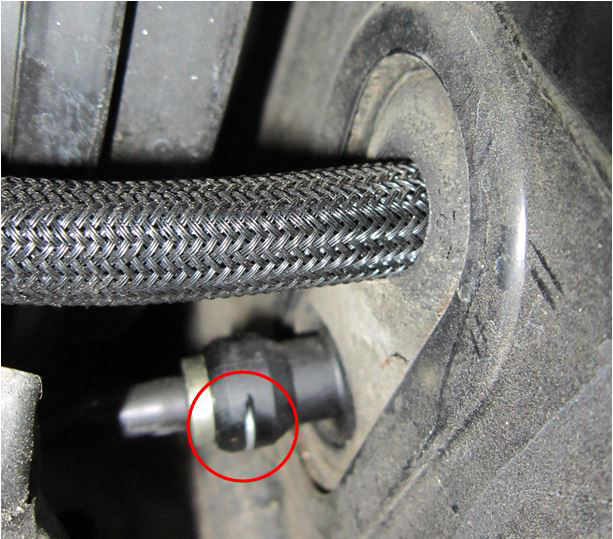
Remove the clip here in the same fashion as you did at the top. A small pocketknife worked well to pry the clip loose in this limited space. Then pull the hose out of the fitting. The hose will now be free to remove from engine bay.
Install the new Braided Stainless Steel Line:
Insert the new Braided Stainless hose into the upper fitting, and secure it by fully re-inserting the metal clip.

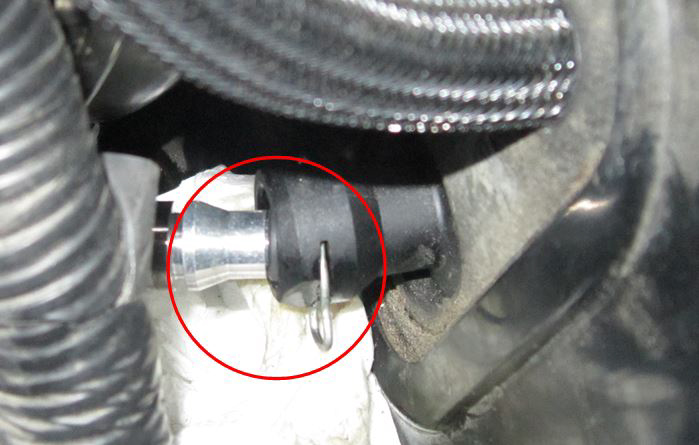
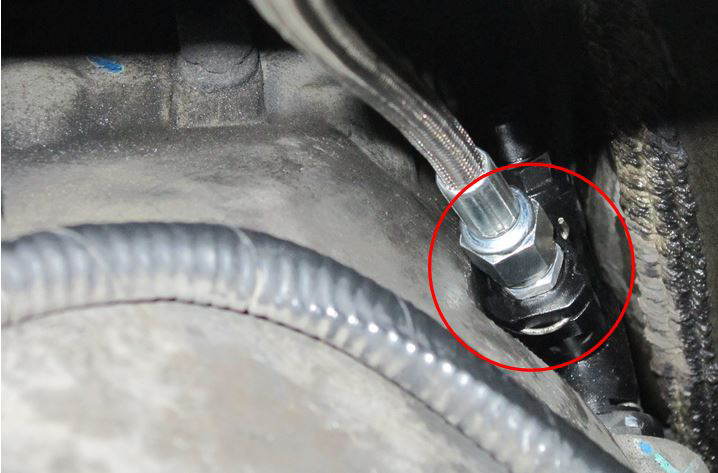
Insert the other end of the hose into the transmission fitting. Secure it by fully re-inserting the metal clip. Long needle-nose pliers may be helpful for one or both of these steps.
To bleed the air out of the new line, you can use the Ford Service Manual method (using a vacuum pump) or gravity bleed. To do this, jack up the front driver’s side of the car as high as possible and secure vehicle with a jack stand. Using slow pumps (5-10 seconds per stroke), work the air out of the clutch system. A few rounds of 10 strokes, waiting 10-15 minutes between rounds, seems to work well for most owners. When the clutch feels firm as normal, do one more round of slow pumping. It should now be well bled, and any remaining bubbles will work themselves out as you use the clutch.
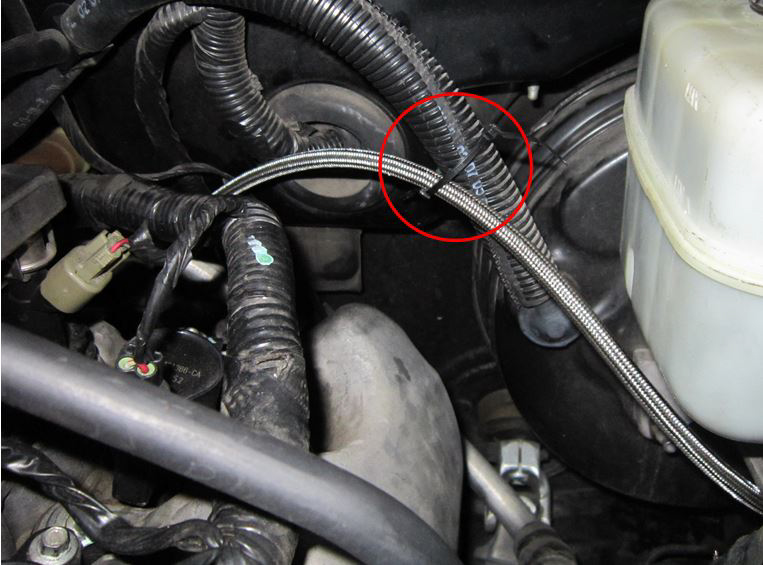
Finally, you will want to keep the hose off of the engine block or headers to avoid extreme heat or chafing of the braided line. Use a zip-tie to secure the new hose to one of the wiring harnesses or another attachment point on the firewall.
Installation Instructions Written By AmericanMuscle Customer Benjamin Price 10/20/2013
