 FREE 1 to 3-Day Delivery on Orders $149+ Details
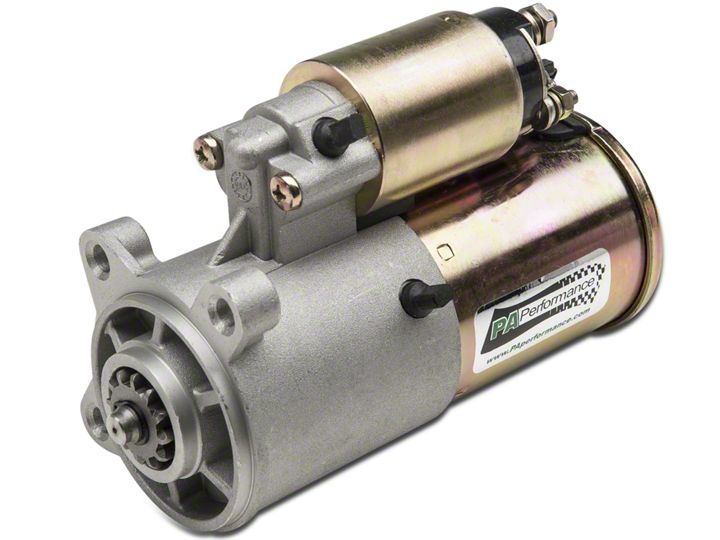
How to Install PA Performance Starter (05-10 GT, GT500) on your Ford Mustang
Installation Time
1 hours
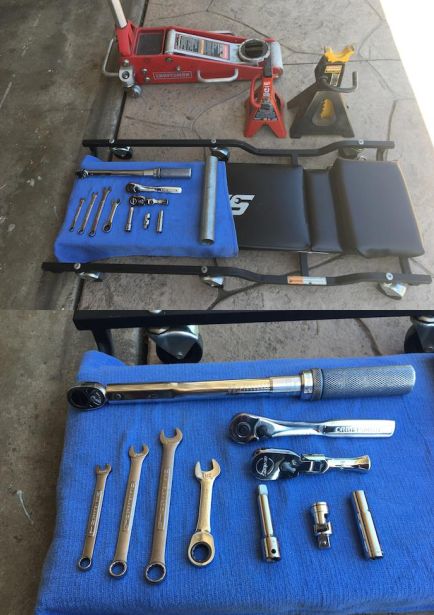
Tools Required
- Jack
- Jack pad (if you have one)
- Jack stands
- Creeper (if you have one)
- Wheel Chocks / Bricks
- 8mm Wrench/Socket
- 10mm Wrench/Socket
- 13mm Wrench/Socket
- Socket Wrench
- Socket Extension
- Socket Flex Extension
- Breaker Bar / Improvised Cheater Bar Pipe
- WD-40 or Equivalent
- Torque Wrench
Shop Parts in this Guide
Installation Instructions:
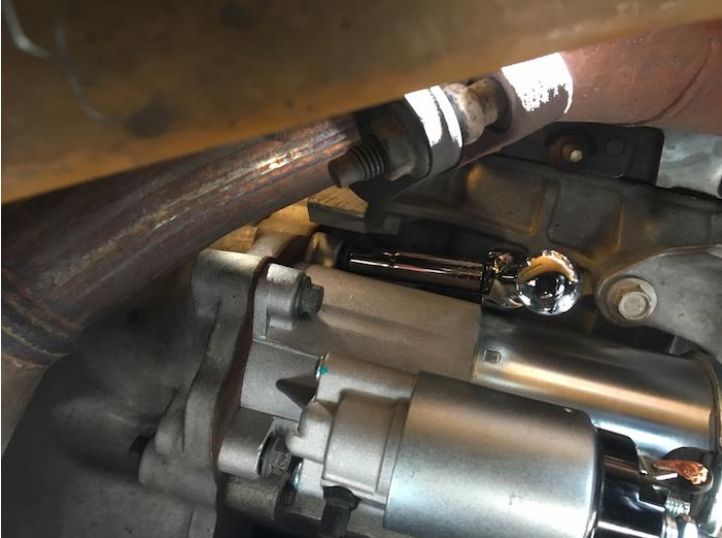
1. Work while the engine is cold. The starter is located near the exhaust headers.
2. Set parking brake and chock off rear wheels.
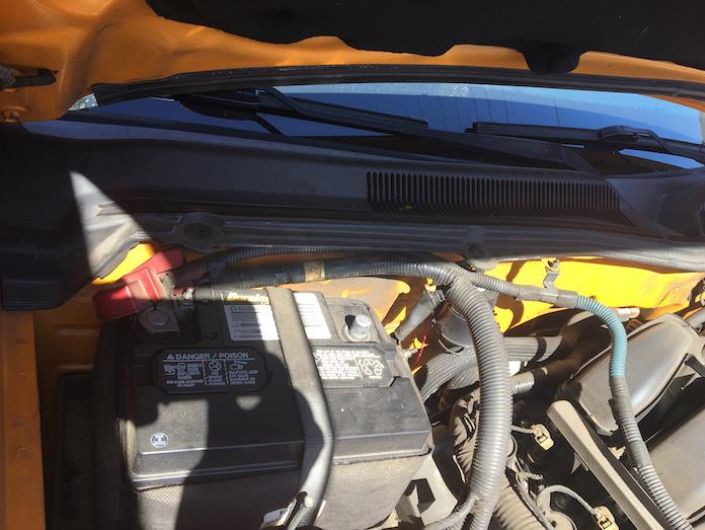
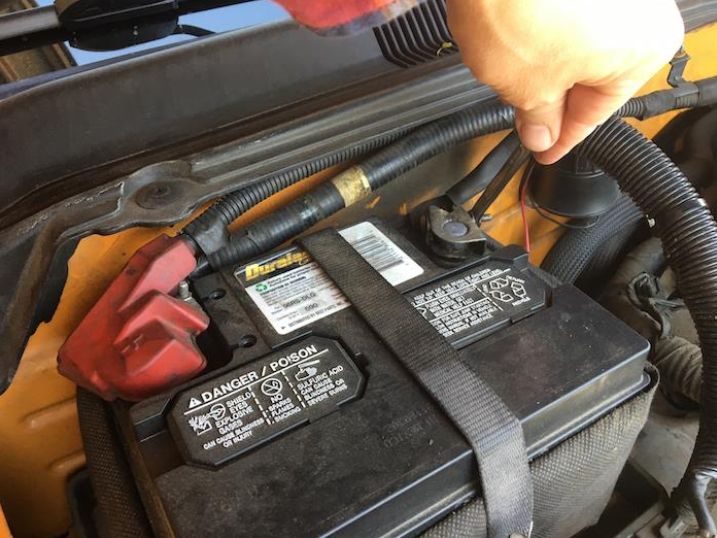
3. Disconnect the negative terminal on the battery with a 8mm wrench/socket.
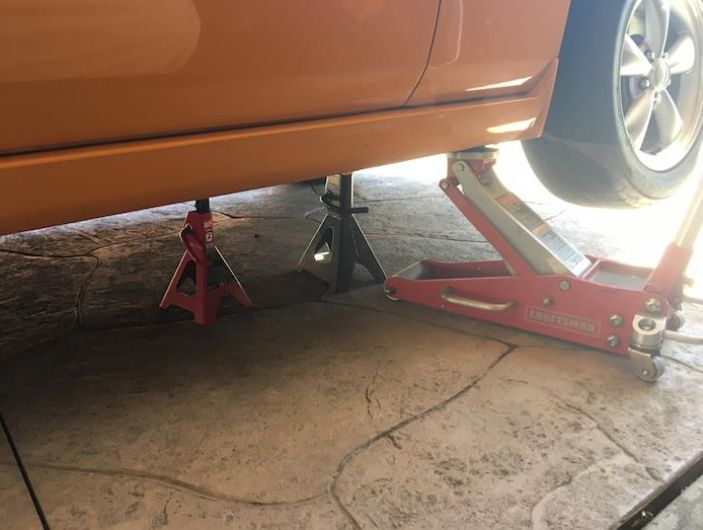
4. Jack up car, place jack stand(s) underneath frame rails. Check wheel chocks.
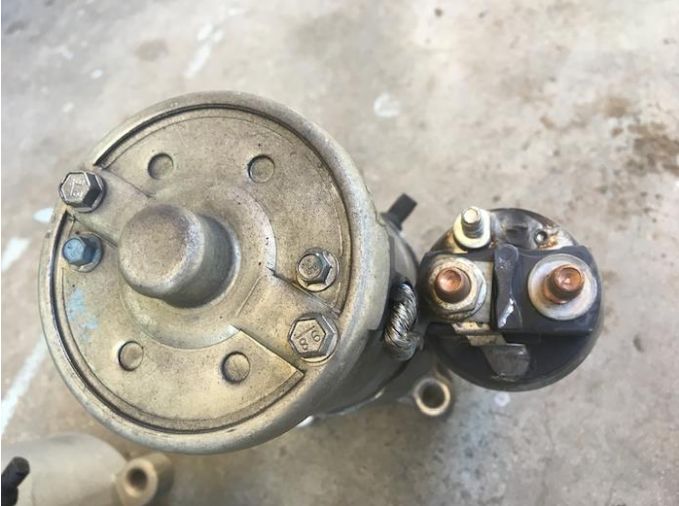
5. Remove the OEM Starter Solenoid Red Terminal Cap. Set it aside, it will be
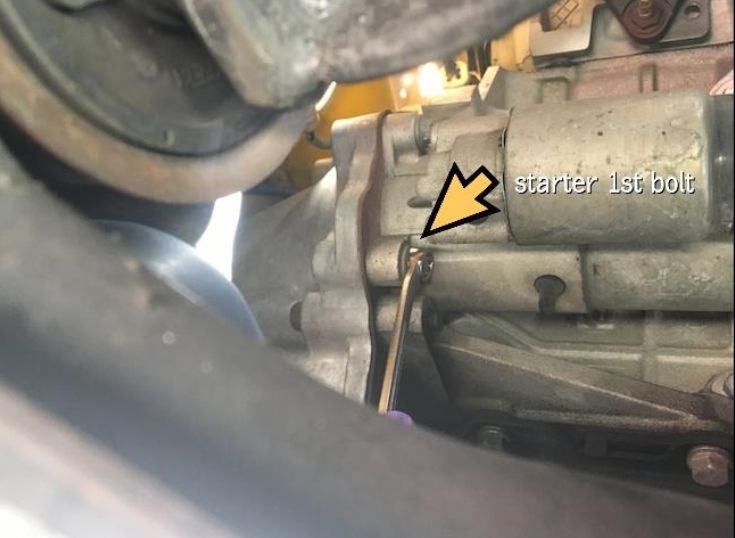
reused. The starter has (2) bolts for the solenoid and (3) bolts for the starter.
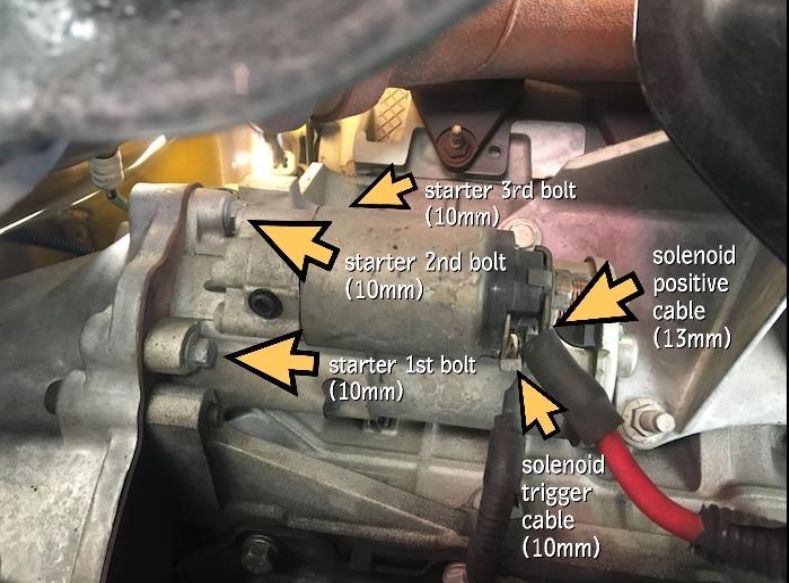
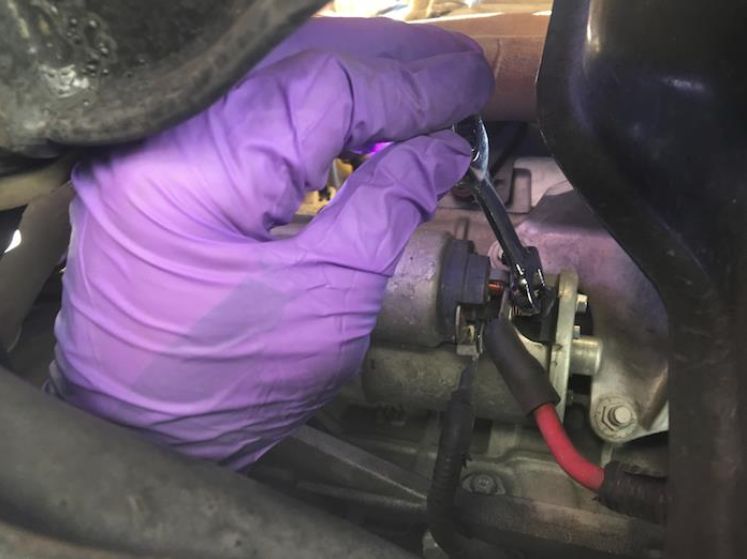
6. Remove the Red Solenoid Positive Cable (B ) with a 13mm wrench/socket and
move aside. (I had a Stubby Ratcheting Wrench that came in handy).
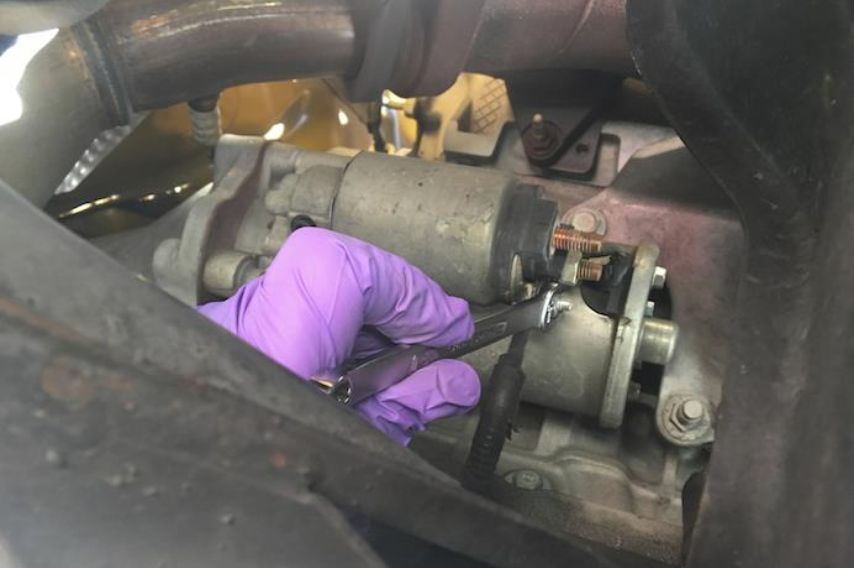
7. Remove the Black Solenoid Starter Trigger Cable (S-) with a 10mm
wrench/socket and move aside.
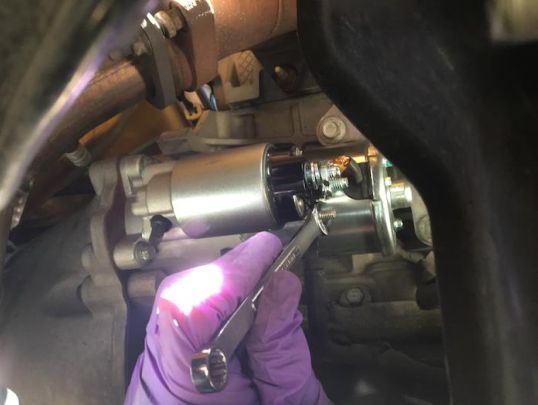
8. Loosen the 3 starter bolts with a 10mm wrench and/or socket. If you need to add WD-40 or similar, do this first and let penetrate for 5-10 minutes before starting. The bolts may need a breaker bar or pipe extension to crack them open. You may need to use a combination of flex extensions / flex head ratchets to do the job, in different drive diameters (3/8”, 1/4”) and consider other variables like aftermarket headers, other add-ons, etc.
9. To break loose the starter bolts, I used:
• 10mm wrench with Cheater Pipe on the 1st lower bolt (closest to the ground)
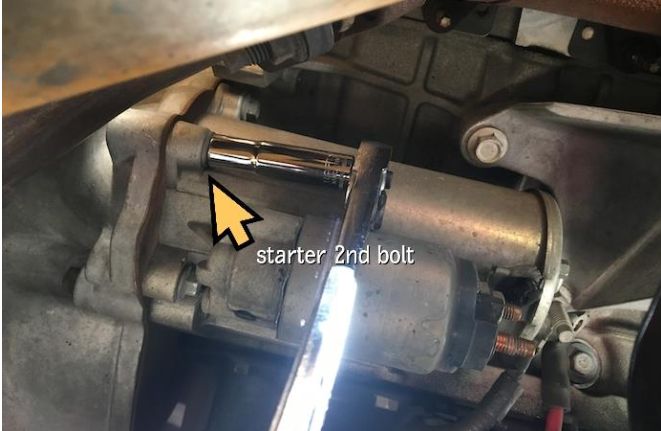
• 10mm deep socket (3/8” drive) with Cheater Pipe on the 2nd middle bolt
• 10mm deep socket (3/8” drive) for the 3rd top bolt
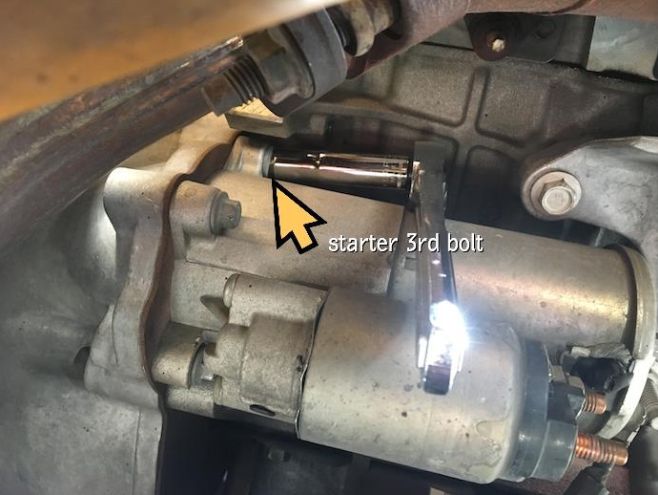
Note: On several Mustang forums people comment about the top 3rd bolt
being difficult to remove, and given the small space where it is, I agree, up to
a point. I prepared for a difficult removal, yet I had no trouble whatsoever
with the loosening and removal of the 3rd bolt, it opened up freely and I was
able to spin the bolt out by hand using the socket itself. Plan ahead; borrow
tools if necessary, better to have more you didn’t use vs. being under the car
wishing you had a flex head ratchet.
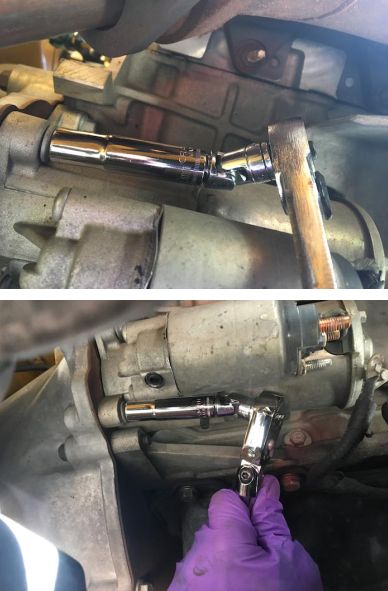
I used flex adapters and a flex head stubby ratchet for the removal of all 3
starter bolts, starting with the 3rd top bolt, then the 1st bottom bolt, and last
with the 2nd middle bolt to hold the starter in place to ease in removal.
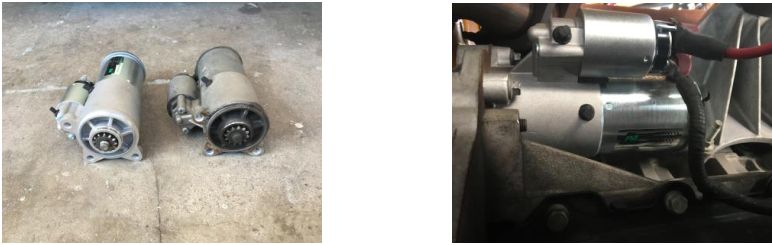
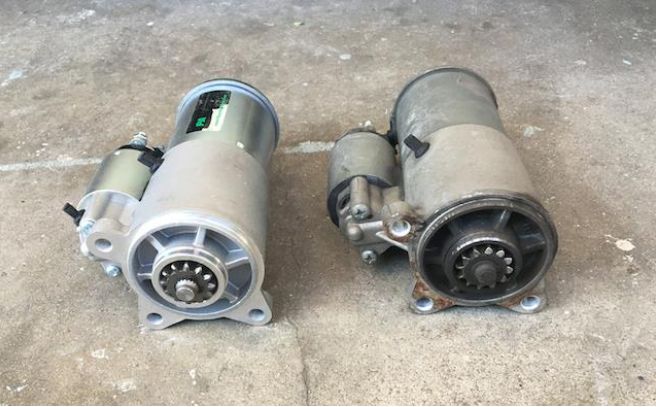
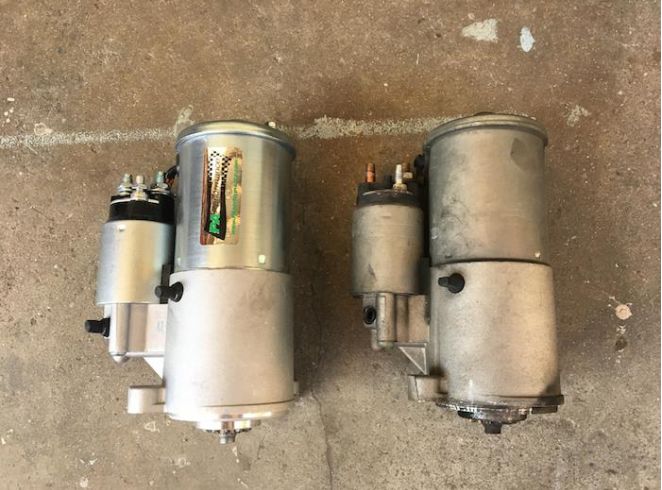
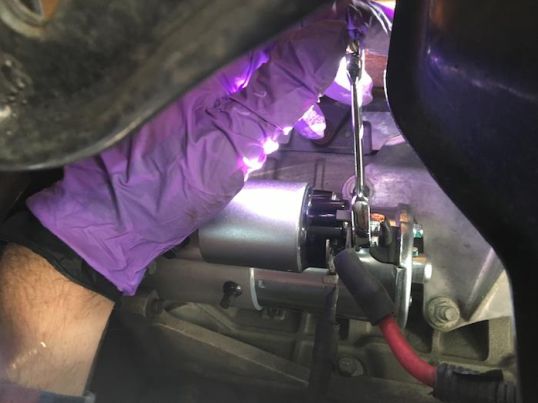
10. Once bolts are all out, set aside and remove the OEM starter.
Side by side, the dimensions and tooling are near identical. The PA Performance
Starter has nice connections from the solenoid, and is really well made quality part.
11. If your starter bolts need a quick cleaning, now is the time to do it. Use some
WD-40 or similar and a wire brush to clean them up.
12. Place the new PA Performance Starter in place, have a bolt handy to run in by
hand and start all the bolts to keep the starter in place.
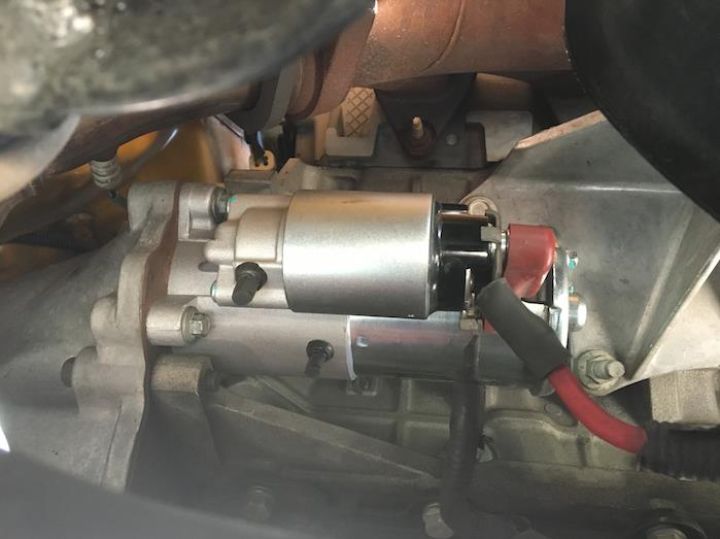
13. Tighten the three starter bolts with a 10mm wrench/socket. Torque bolts to 18 ft-lb.
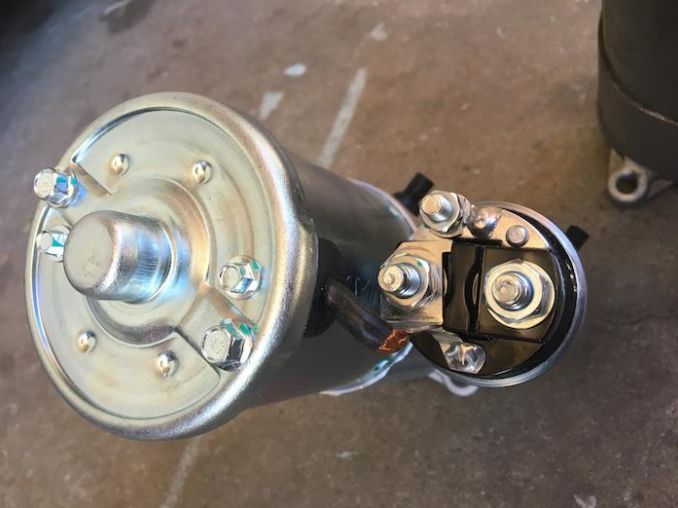
14. Install the Black Solenoid Starter Trigger Cable (S-) with a 10mm wrench or
socket. Do not over-tighten.
15. Install the Red Solenoid Positive Cable (B ) with a 13mm wrench or socket.
Do not over-tighten.
16. Install the OEM Starter Solenoid Red Terminal Cap over the Solenoid bolts.
17. Lower the car off the jack stands and remove the wheel chocks.
18. Reconnect the battery using a 8mm wrench/socket.
Start the car and enjoy!
Installation Instructions Created by AmericanMuscle Customer: Chris D. on 7/24/17
